DJI Mavic Air 2 Fly More Combo - Drone Quadcopter UAV with 4K Video|48MP Camera|34min Flight Time|8K Hyperlapse 1/2" CMOS Sensor|ActiveTrack 3.0|3-Axis Gimba|Ocusync 2.0


- guaranteeQuality checked
- World Wide ShippingExpedite / Standard services
- Warranty1-year warranty
- ConsultancyLifetime 24/7/356
DJI Mavic Air 2 - giving you a new photos and video recording experience
The DJI Mavic Air 2 pushes power and portability to new heights, with advanced capabilities packed into a small package.
Aerial masterpieces are within reach thanks to intelligent shooting functions and superb image quality. You can raise your game while fully enjoying the creative process with safer, smarter flight.
Feature
|
Ultra-Clear Details 1/2-Inch Image Sensor 4K/60fps Video 48MP Photo |
Enhanced HDR Photo Video Panorama |
|
Fly Smarter and Safer APAS 3.0 Obstacle Avoidance |
Fly Farther, See Clearer OcuSync 2.0 10km 1080p/30fps Video Transmission |
|
Fly Longer 34-Min Max Flight Time 240-Min Max RC Battery Life |
Cinematic Content 8K Hyperlapse QuickShots |

High Image Quality

HDR Video

All in the Details
The 48MP camera has a high megapixel count, which means that even when zooming in on an image, you can see vivid details.

Optimized Capture
|
|
 |
|
Strong Lighting Conditions HyperLight improves the sharpness of images taken in low-light circumstances by reducing noise. |
Weak Lighting Conditions HyperLight improves the sharpness of images taken in low-light circumstances by reducing noise. |

HDR Panorama

Intelligent Features

FocusTrack
|
 |
|
|
|
Spotlight 2.0 With this handy mode, you may fly around freely while the camera remains fixed on the subject. Simply choose your target and take off. |
ActiveTrack 3.0 With the latest version of DJI's ActiveTrack technology, following subjects while avoiding obstacles has never been easier. This technique keeps your subject in the center of the screen, even if they go behind a tree, with superior pathfinding and a faster and more accurate prediction of lost subjects. |
POI 3.0 POI 3.0 enhances the capabilities of POI 2.0, particularly in terms of flat surface recognition. This updated functionality avoids the problem that POI 2.0 had with losing the target during tracking. POI 3.0 now has the ability to track people, cars, and boats in real time. |


8K Hyperlapse
- Course Lock
- Free
- Waypoint
- Circle

QuickShots
- Dronie
- Circle
- Helix
- Rocket
- Boomerang
- Asteroid
Flight and Safety
OcuSync 2.0
*When unobstructed, interference-free, and FCC-compliant. The maximum flying range specification is a proxy for the strength and robustness of the radio link.

2.4/5.8GHz Dual Frequency
*Some countries do not accept 5.8 GHz transmission due to local laws.
Battery and Flight
*Flight time was recorded at a 9° angle and a speed of 5.1 m/s in a windless environment.

Obstacle Avoidance
|
Forward: Vision sensor accurate up to 22 meters |
|
Backward: Vision sensor accurate up to 23.6 meters |
|
Downward: Vision sensor, infrared sensor. The auxiliary light assist with visual positioning, safe landing, and visibility in the air. It can be turned on and off manually. |
DJI Fly App

Remote Controller
*In an interference-free environment, battery life was measured using an Android phone.

ND Filters
*The Fly More Combo comes with ND16/64/256 filters. Separately, the ND4/8/32 filter set can be ordered.

Specification
- Weight
- 570 g
- Size
-
Folded:
180×97×74 mm (Length×Width×Height)
Unfolded:
183×253×77 mm (Length×Width×Height)
- Diagonal Distance
- 302 mm
- Transmitter Power (EIRP)
-
2.400-2.4835 GHz:
FCC: ≤26 dBm
CE: ≤20 dBm
SRRC: ≤20 dBm
MIC: ≤20 dBm
5.725-5.850 GHz:
FCC: ≤26 dBm
CE: ≤14 dBm
SRRC: ≤26 dBm
- Max Ascent Speed
-
4 m/s (S Mode)
4 m/s (N Mode)
- Max Service Ceiling Above Sea Level
- 5000 m
- Max Flight Time (without wind)
- 34 minutes
- Max Hover Time (without wind)
- 33 minutes
- Max Flight Distance
- 18.5 km
- Max Descent Speed
-
3 m/s (S Mode)
3 m/s (N Mode)
5 m/s (S Mode and N Mode during a sharp descent)
3 m/s (all modes at elevations over 4500 m)
- Max Horizontal Flight Speed
-
19 m/s (S Mode)
12 m/s (N Mode)
5 m/s (T Mode) - Hovering Accuracy Range
-
Vertical:
±0.1 m (with vision positioning)
±0.5 m (with GPS positioning)
Horizontal:
±0.1 m (with vision positioning)
±1.5 m (with GPS positioning)
- Max Wind Resistance
- 8.5-10.5 m/s (Level 5)
- Max Tilt Angle
-
35° (S Mode)
20° (N Mode)
35° (N Mode under strong wind)
- Operating Frequency
-
2.400-2.4835 GHz
5.725-5.850 GHz
- Max Angular Velocity
-
250°/s (S Mode)
250°/s (N Mode)
- Operating Temperature Range
- -10° to 40°C (14° to 104°F)
- Propellers
- Quick release, low noise, folding
- Satellite Systems
- GPS+GLONASS
- Compass
- Single Compass
- IMU
- Single IMU
- Internal Storage
- 8 GB
- Capacity
- 3500 mAh
- Voltage
- 11.55 V
- Charging Voltage Limit
- 13.2 V
- Weight
- 198 g
- Charging Temperature
- 5° to 40°C (41° to 104°F)
- Battery Type
- LiPo 3S
- Energy
- 40.42 Wh
- Max Charging Power
- 38 W
- Sensor
-
1/2" CMOS
Effective Pixels: 12 MP and 48 MP - ISO
-
Video:
100-6400
Photo (12 MP):
100-3200 (Auto)
100-6400 (Manual)
Photo (48 MP):
100-1600 (Auto)
100-3200 (Manual)
- Lens
-
FOV: 84°
Equivalent Focal Length: 24 mm
Aperture: f/2.8
Focus Range: 1 m to ∞
- Video Formats
- MP4/MOV (H.264/MPEG-4 AVC, H.265/HEVC)
- Max Bitrate
- 120 Mbps
- Max Photo Resolution
- 48 MP 8000×6000 pixel
- Photo Formats
- JPEG/DNG (RAW)
- Photo Modes
-
Single: 12 MP and 48 MP
Burst: 12 MP, 3/5/7 frames
Automatic Exposure Bracketing (AEB): 12MP, 3/5 Frames at 0.7EV Bias
Timed: 12 MP 2/3/5/7/10/15/20/30/60 seconds
SmartPhoto: Scene Recognition, HyperLight, and HDR
HDR Panorama:
Vertical (3×1): 3328×8000 pixels (Width×Height)
Wide-angle (3×3): 8000×6144 pixels (Width×Height)
180° Panorama (3×7): 8192×3500 pixels (Width×Height)
Sphere (3×8+1): 8192×4096 pixels (Width×Height)
- Video Resolution and Frame Rates
-
4K Ultra HD: 3840×2160 24/25/30/48/50/60 fps
2.7K: 2688×1512 24/25/30/48/50/60 fps
FHD: 1920×1080 24/25/30/48/50/60/120/240 fps
4K Ultra HD HDR: 3840×2160 24/25/30 fps
2.7K HDR: 2688×1512 24/25/30 fps
FHD HDR: 1920×1080 24/25/30 fps
- Color Profiles
- D-Cinelike, Normal
- Supported SD Cards
- Supports a microSD with capacity of up to 256 GB
- Supported File Systems
- FAT32 and exFAT
- Zoom
- Available
Other Customers also buy:
-
-
{"id":6592445022283,"title":"DJI Mavic Air 2 Fly More Combo - Drone Quadcopter UAV with 4K Video|48MP Camera|34min Flight Time|8K Hyperlapse 1\/2\" CMOS Sensor|ActiveTrack 3.0|3-Axis Gimba|Ocusync 2.0","handle":"dji-mavic-air-2-fly-more-combo-drone-quadcopter-uav-with-4k-video-48mp-camera-34min-flight-time-8k-hyperlapse-1-2-cmos-sensor-activetrack-3-0-3-axis-gimba-ocusync-2-0","description":"\u003ch1 style=\"text-align: center;\"\u003e\u003cstrong\u003eDJI Mavic Air 2 - giving you a new photos and video recording experience\u003c\/strong\u003e\u003c\/h1\u003e\u003cdiv class=\"desc\"\u003e\n\u003ch2 style=\"text-align: center;\"\u003eThe DJI Mavic Air 2 pushes power and portability to new heights, with advanced capabilities packed into a small package. \u003c\/h2\u003e\n\u003cstyle\u003e\u003c!--\n.embed-container { position: relative; padding-bottom: 56.25%; height: 0; overflow: hidden; max-width: 100%; } .embed-container iframe, .embed-container object, .embed-container embed { position: absolute; top: 0; left: 0; width: 100%; height: 100%; }\n--\u003e\u003c\/style\u003e\n\u003cdiv style=\"text-align: center;\" class=\"embed-container\"\u003e\u003ciframe src=\"https:\/\/www.youtube.com\/embed\/StDjsvNFru0\" allowfullscreen=\"\" frameborder=\"0\"\u003e\u003c\/iframe\u003e\u003c\/div\u003e\n\u003cdiv style=\"text-align: center;\"\u003e \u003c\/div\u003e\n\u003ch3 style=\"text-align: center;\"\u003e\u003cspan style=\"font-weight: 400;\"\u003eAerial masterpieces are within reach thanks to intelligent shooting functions and superb image quality. You can raise your game while fully enjoying the creative process with safer, smarter flight.\u003c\/span\u003e\u003c\/h3\u003e\n\u003ch2 style=\"text-align: center;\"\u003e\u003cstrong\u003eFeature\u003c\/strong\u003e\u003c\/h2\u003e\n\u003cdiv style=\"text-align: center;\"\u003e\u003c\/div\u003e\n\u003cdiv style=\"text-align: center;\"\u003e\n\u003ctable\u003e\n\u003ctbody\u003e\n\u003ctr\u003e\n\u003ctd style=\"text-align: center;\"\u003e\n\u003cp\u003e\u003cstrong\u003eUltra-Clear Details \u003c\/strong\u003e\u003c\/p\u003e\n\u003cp\u003e\u003cspan style=\"font-weight: 400;\"\u003e1\/2-Inch Image Sensor \u003c\/span\u003e\u003c\/p\u003e\n\u003cp\u003e\u003cspan style=\"font-weight: 400;\"\u003e4K\/60fps Video \u003c\/span\u003e\u003c\/p\u003e\n\u003cp\u003e\u003cspan style=\"font-weight: 400;\"\u003e48MP Photo\u003c\/span\u003e\u003c\/p\u003e\n\u003c\/td\u003e\n\u003ctd style=\"text-align: center;\"\u003e\n\u003cp\u003e\u003cstrong\u003eEnhanced HDR \u003c\/strong\u003e\u003c\/p\u003e\n\u003cp\u003e\u003cspan style=\"font-weight: 400;\"\u003ePhoto \u003c\/span\u003e\u003c\/p\u003e\n\u003cp\u003e\u003cspan style=\"font-weight: 400;\"\u003eVideo \u003c\/span\u003e\u003c\/p\u003e\n\u003cp\u003e\u003cspan style=\"font-weight: 400;\"\u003ePanorama\u003c\/span\u003e\u003c\/p\u003e\n\u003c\/td\u003e\n\u003c\/tr\u003e\n\u003ctr\u003e\n\u003ctd style=\"text-align: center;\"\u003e\n\u003cp\u003e\u003cstrong\u003eFly Smarter and Safer \u003c\/strong\u003e\u003c\/p\u003e\n\u003cp\u003e\u003cspan style=\"font-weight: 400;\"\u003eAPAS 3.0 Obstacle Avoidance\u003c\/span\u003e\u003c\/p\u003e\n\u003c\/td\u003e\n\u003ctd style=\"text-align: center;\"\u003e\n\u003cp\u003e\u003cstrong\u003eFly Farther, See Clearer \u003c\/strong\u003e\u003c\/p\u003e\n\u003cp\u003e\u003cspan style=\"font-weight: 400;\"\u003eOcuSync 2.0 10km 1080p\/30fps Video Transmission\u003c\/span\u003e\u003c\/p\u003e\n\u003c\/td\u003e\n\u003c\/tr\u003e\n\u003ctr\u003e\n\u003ctd style=\"text-align: center;\"\u003e\n\u003cp\u003e\u003cstrong\u003eFly Longer \u003c\/strong\u003e\u003c\/p\u003e\n\u003cp\u003e\u003cspan\u003e34-Min Max Flight Time \u003c\/span\u003e\u003c\/p\u003e\n\u003cp\u003e\u003cspan\u003e240-Min Max RC Battery Life\u003c\/span\u003e\u003c\/p\u003e\n\u003c\/td\u003e\n\u003ctd style=\"text-align: center;\"\u003e\n\u003cp\u003e\u003cstrong\u003eCinematic Content \u003c\/strong\u003e\u003c\/p\u003e\n\u003cp\u003e\u003cspan\u003e8K Hyperlapse \u003c\/span\u003e\u003c\/p\u003e\n\u003cp\u003e\u003cspan\u003eQuickShots\u003c\/span\u003e\u003c\/p\u003e\n\u003c\/td\u003e\n\u003c\/tr\u003e\n\u003c\/tbody\u003e\n\u003c\/table\u003e\n\u003c\/div\u003e\n\u003cdiv style=\"text-align: center;\"\u003e\u003cb\u003e\u003cimg alt=\"dji-mavic-air-2-fly-more-combo-drone-content-feature-all\" src=\"https:\/\/cdn.shopify.com\/s\/files\/1\/2532\/7020\/files\/dji-mavic-air-2-fly-more-combo-drone-content-feature-all.jpg?v=1626148044\"\u003e\u003c\/b\u003e\u003c\/div\u003e\n\u003ch3 style=\"text-align: center;\"\u003e\u003cspan style=\"color: #ff8000;\"\u003e\u003cb\u003e\u003c\/b\u003e\u003c\/span\u003e\u003c\/h3\u003e\n\u003ch3 style=\"text-align: center;\"\u003e\u003cspan style=\"color: #ff8000;\"\u003e\u003cb\u003eHigh Image Quality\u003c\/b\u003e\u003c\/span\u003e\u003c\/h3\u003e\n\u003cdiv style=\"text-align: center;\"\u003e\u003cb\u003eEpic is Simple, with 4K\/60fps Video \u003c\/b\u003e\u003c\/div\u003e\n\u003cdiv style=\"text-align: center;\"\u003e\u003cspan style=\"font-weight: 400;\"\u003eFootage Master creative aerial views with 4K\/60fps video that is effortlessly fluid. For post-processing, the D-Cinelike flat color profile maintains more information. The HEVC (H.265) video codec records more visual information, uses less storage, and keeps your footage's dynamic range and quality, delivering next-level content.\u003cbr data-mce-fragment=\"1\"\u003e\u003c\/span\u003e\u003c\/div\u003e\n\u003cdiv style=\"text-align: center;\"\u003e\u003cspan style=\"font-weight: 400;\"\u003e\u003cimg alt=\"dji-mavic-air-2-fly-more-combo-drone-content-feature-1-image-quality\" src=\"https:\/\/cdn.shopify.com\/s\/files\/1\/2532\/7020\/files\/dji-mavic-air-2-fly-more-combo-drone-content-feature-1-image-quality.jpg?v=1626148092\"\u003e\u003c\/span\u003e\u003c\/div\u003e\n\u003ch3 style=\"text-align: center;\"\u003e\u003cspan style=\"color: #ff8000;\"\u003e\u003cb\u003e\u003c\/b\u003e\u003c\/span\u003e\u003c\/h3\u003e\n\u003ch3 style=\"text-align: center;\"\u003e\u003cspan style=\"color: #ff8000;\"\u003e\u003cb\u003eHDR Video\u003c\/b\u003e\u003c\/span\u003e\u003c\/h3\u003e\n\u003cdiv style=\"text-align: center;\"\u003e\u003cb\u003eBy default, everything is dynamic.\u003cbr data-mce-fragment=\"1\"\u003e\u003c\/b\u003e\u003c\/div\u003e\n\u003cdiv style=\"text-align: center;\"\u003e\u003cspan style=\"font-weight: 400;\"\u003eA high-performance Quad Bayer image sensor is the key to outstanding HDR video. A single frame captures light and dark details by separating exposure levels in different places. The photos are stacked to create a picture with a higher dynamic range that is vibrant, balanced, and appealing.\u003c\/span\u003e\u003c\/div\u003e\n\u003cdiv style=\"text-align: center;\"\u003e\u003cspan style=\"font-weight: 400;\"\u003e\u003cimg alt=\"dji-mavic-air-2-fly-more-combo-drone-content-feature-2-hdr-video\" src=\"https:\/\/cdn.shopify.com\/s\/files\/1\/2532\/7020\/files\/dji-mavic-air-2-fly-more-combo-drone-content-feature-2-hdr-video.jpg?v=1626148113\"\u003e\u003c\/span\u003e\u003c\/div\u003e\n\u003ch3 style=\"text-align: center;\"\u003e\u003cspan style=\"color: #ff8000;\"\u003e\u003cb\u003e\u003c\/b\u003e\u003c\/span\u003e\u003c\/h3\u003e\n\u003ch3 style=\"text-align: center;\"\u003e\u003cspan style=\"color: #ff8000;\"\u003e\u003cb\u003eAll in the Details\u003c\/b\u003e\u003c\/span\u003e\u003c\/h3\u003e\n\u003cdiv style=\"text-align: center;\"\u003e\u003cb\u003e48MP Photos\u003c\/b\u003e\u003c\/div\u003e\n\u003cdiv style=\"text-align: center;\"\u003e\u003cspan style=\"font-weight: 400;\"\u003eMavic Air 2 has a 1\/2-inch CMOS sensor that captures 48MP photographs. Prepare to take your airborne content to new heights.\u003cbr data-mce-fragment=\"1\"\u003eThe 48MP camera has a high megapixel count, which means that even when zooming in on an image, you can see vivid details.\u003c\/span\u003e\u003c\/div\u003e\n\u003cdiv style=\"text-align: center;\"\u003e\u003cspan style=\"font-weight: 400;\"\u003e\u003cimg alt=\"dji-mavic-air-2-fly-more-combo-drone-content-feature-3-48mp\" src=\"https:\/\/cdn.shopify.com\/s\/files\/1\/2532\/7020\/files\/dji-mavic-air-2-fly-more-combo-drone-content-feature-3-48mp.jpg?v=1626148140\"\u003e\u003c\/span\u003e\u003c\/div\u003e\n\u003ch3 style=\"text-align: center;\"\u003e\u003cspan style=\"color: #ff8000;\"\u003e\u003cb\u003e\u003c\/b\u003e\u003c\/span\u003e\u003c\/h3\u003e\n\u003ch3 style=\"text-align: center;\"\u003e\u003cspan style=\"color: #ff8000;\"\u003e\u003cb\u003eOptimized Capture\u003c\/b\u003e\u003c\/span\u003e\u003c\/h3\u003e\n\u003cdiv style=\"text-align: center;\"\u003e\u003cb\u003eSmartPhoto\u003c\/b\u003e\u003c\/div\u003e\n\u003cdiv style=\"text-align: center;\"\u003e\u003cspan style=\"font-weight: 400;\"\u003eSmartPhoto on the Mavic Air 2 combines scene recognition, HyperLight, and HDR into a single setting for optimal results. Scene recognition optimizes camera parameters for different scenes and offers intelligent recognition of five different categories: sunsets, sky, grass, snow, and trees. The resolution of photos taken in SmartPhoto mode is 12 MP.\u003c\/span\u003e\u003c\/div\u003e\n\u003cdiv style=\"text-align: center;\"\u003e\n\u003ctable width=\"100%\"\u003e\n\u003ctbody\u003e\n\u003ctr\u003e\n\u003ctd\u003e\n\u003cp\u003e\u003cimg alt=\"dji-mavic-air-2-fly-more-combo-drone-content-feature-4-1-Strong-Lighting-Conditions\" src=\"https:\/\/cdn.shopify.com\/s\/files\/1\/2532\/7020\/files\/dji-mavic-air-2-fly-more-combo-drone-content-feature-4-1-Strong-Lighting-Conditions.jpg?v=1626148348\"\u003e\u003c\/p\u003e\n\u003c\/td\u003e\n\u003ctd\u003e\u003cimg alt=\"dji-mavic-air-2-fly-more-combo-drone-content-feature-4-2-Weak-Lighting-Conditions\" src=\"https:\/\/cdn.shopify.com\/s\/files\/1\/2532\/7020\/files\/dji-mavic-air-2-fly-more-combo-drone-content-feature-4-2-Weak-Lighting-Conditions.jpg?v=1626148384\"\u003e\u003c\/td\u003e\n\u003c\/tr\u003e\n\u003ctr\u003e\n\u003ctd\u003e\n\u003cp data-mce-fragment=\"1\"\u003e\u003cstrong\u003eStrong Lighting\u003c\/strong\u003e\u003c\/p\u003e\n\u003cp data-mce-fragment=\"1\"\u003eConditions HyperLight improves the sharpness of images taken in low-light circumstances by reducing noise.\u003c\/p\u003e\n\u003c\/td\u003e\n\u003ctd\u003e\n\u003cp\u003e\u003cstrong\u003eWeak Lighting Conditions\u003c\/strong\u003e\u003c\/p\u003e\n\u003cp data-mce-fragment=\"1\"\u003e\u003cspan data-mce-fragment=\"1\"\u003eHyperLight improves the sharpness of images taken in low-light circumstances by reducing noise.\u003c\/span\u003e\u003c\/p\u003e\n\u003c\/td\u003e\n\u003c\/tr\u003e\n\u003c\/tbody\u003e\n\u003c\/table\u003e\n\u003c\/div\u003e\n\u003cdiv style=\"text-align: center;\"\u003e \u003c\/div\u003e\n\u003cdiv style=\"text-align: center;\"\u003e \u003c\/div\u003e\n\u003ch3 style=\"text-align: center;\"\u003e\u003cspan style=\"color: #ff8000;\"\u003e\u003cb\u003eHDR Panorama\u003c\/b\u003e\u003c\/span\u003e\u003c\/h3\u003e\n\u003cdiv style=\"text-align: center;\"\u003e\u003cb\u003eLook at the Big Picture\u003c\/b\u003e\u003c\/div\u003e\n\u003cdiv style=\"text-align: center;\"\u003e\u003cspan style=\"font-weight: 400;\"\u003eThe Mavic Air 2 has DJI's most sophisticated panorama mode, with a larger dynamic range and vibrant, amazingly realistic colors.\u003c\/span\u003e\u003c\/div\u003e\n\u003cdiv style=\"text-align: center;\"\u003e\u003cspan style=\"font-weight: 400;\"\u003e\u003cimg alt=\"dji-mavic-air-2-fly-more-combo-drone-content-feature-5-HDR-Panorama\" src=\"https:\/\/cdn.shopify.com\/s\/files\/1\/2532\/7020\/files\/dji-mavic-air-2-fly-more-combo-drone-content-feature-5-HDR-Panorama.jpg?v=1626148445\"\u003e\u003c\/span\u003e\u003c\/div\u003e\n\u003ch3 style=\"text-align: center;\"\u003e\u003cspan style=\"color: #ff8000;\"\u003e\u003cb\u003e\u003c\/b\u003e\u003c\/span\u003e\u003c\/h3\u003e\n\u003ch3 style=\"text-align: center;\"\u003e\u003cspan style=\"color: #ff8000;\"\u003e\u003cb\u003eIntelligent Features\u003c\/b\u003e\u003c\/span\u003e\u003c\/h3\u003e\n\u003cdiv style=\"text-align: center;\"\u003e\u003cb\u003eObtaining Cinematic Shots\u003c\/b\u003e\u003c\/div\u003e\n\u003cdiv style=\"text-align: center;\"\u003e\u003cspan style=\"font-weight: 400;\"\u003eFor breathtaking results, the Mavic Air 2 combines a powerful camera with intelligent shooting modes. Aerial photography has never been easier to create.\u003c\/span\u003e\u003c\/div\u003e\n\u003cdiv style=\"text-align: center;\"\u003e\u003cspan style=\"font-weight: 400;\"\u003e\u003cimg alt=\"dji-mavic-air-2-fly-more-combo-drone-content-feature-6-Intelligent-Features\" src=\"https:\/\/cdn.shopify.com\/s\/files\/1\/2532\/7020\/files\/dji-mavic-air-2-fly-more-combo-drone-content-feature-6-Intelligent-Features.jpg?v=1626148481\"\u003e\u003c\/span\u003e\u003c\/div\u003e\n\u003ch3 style=\"text-align: center;\"\u003e\u003cspan style=\"color: #ff8000;\"\u003e\u003cb\u003e\u003c\/b\u003e\u003c\/span\u003e\u003c\/h3\u003e\n\u003ch3 style=\"text-align: center;\"\u003e\u003cspan style=\"color: #ff8000;\"\u003e\u003cb\u003eFocusTrack\u003c\/b\u003e\u003c\/span\u003e\u003c\/h3\u003e\n\u003cdiv style=\"text-align: center;\"\u003e\u003cb\u003eMaster the Skies\u003c\/b\u003e\u003c\/div\u003e\n\u003cdiv style=\"text-align: center;\"\u003e\u003cspan style=\"font-weight: 400;\"\u003eWith FocusTrack, capturing professional-quality footage is a breeze. Active Track 3.0, Spotlight 2.0, and Point of Interest 3.0 are among the easy-to-use intelligent tracking modes that let you express yourself.\u003c\/span\u003e\u003c\/div\u003e\n\u003cdiv style=\"text-align: center;\"\u003e \u003c\/div\u003e\n\u003cdiv style=\"text-align: center;\"\u003e\n\u003ctable width=\"100%\" data-mce-fragment=\"1\"\u003e\n\u003ctbody data-mce-fragment=\"1\"\u003e\n\u003ctr data-mce-fragment=\"1\"\u003e\n\u003ctd data-mce-fragment=\"1\"\u003e\n\u003cp\u003e \u003c\/p\u003e\n\u003cdiv style=\"text-align: left;\"\u003e\u003cimg style=\"float: none;\" alt=\"dji-mavic-air-2-fly-more-combo-drone-content-feature-7-1-Spotlight 2.0\" src=\"https:\/\/cdn.shopify.com\/s\/files\/1\/2532\/7020\/files\/dji-mavic-air-2-fly-more-combo-drone-content-feature-7-1-Spotlight_2.0.jpg?v=1626148537\"\u003e\u003c\/div\u003e\n\u003c\/td\u003e\n\u003ctd data-mce-fragment=\"1\"\u003e\n\u003cp\u003e\u003cimg src=\"https:\/\/cdn.shopify.com\/s\/files\/1\/2532\/7020\/files\/dji-mavic-air-2-fly-more-combo-drone-content-feature-7-2-ActiveTrack_3.0.jpg?v=1626148709\" alt=\"dji-mavic-air-2-fly-more-combo-drone-content-feature-7-2-ActiveTrack 3.0\" data-mce-fragment=\"1\" data-mce-src=\"https:\/\/cdn.shopify.com\/s\/files\/1\/2532\/7020\/files\/dji-mavic-air-2-fly-more-combo-drone-content-feature-7-2-ActiveTrack_3.0.jpg?v=1626148709\"\u003e\u003cbr\u003e\u003c\/p\u003e\n\u003c\/td\u003e\n\u003ctd data-mce-fragment=\"1\"\u003e\n\u003cp\u003e\u003cimg src=\"https:\/\/cdn.shopify.com\/s\/files\/1\/2532\/7020\/files\/dji-mavic-air-2-fly-more-combo-drone-content-feature-7-3-POI_3.0.jpg?v=1626148918\" alt=\"dji-mavic-air-2-fly-more-combo-drone-content-feature-7-3-POI 3.0\" data-mce-fragment=\"1\" data-mce-src=\"https:\/\/cdn.shopify.com\/s\/files\/1\/2532\/7020\/files\/dji-mavic-air-2-fly-more-combo-drone-content-feature-7-3-POI_3.0.jpg?v=1626148918\"\u003e\u003cbr\u003e\u003c\/p\u003e\n\u003c\/td\u003e\n\u003c\/tr\u003e\n\u003ctr data-mce-fragment=\"1\"\u003e\n\u003ctd data-mce-fragment=\"1\"\u003e\n\u003cp\u003e\u003cstrong\u003eSpotlight 2.0\u003c\/strong\u003e\u003c\/p\u003e\n\u003cp\u003eWith this handy mode, you may fly around freely while the camera remains fixed on the subject. Simply choose your target and take off.\u003c\/p\u003e\n\u003c\/td\u003e\n\u003ctd data-mce-fragment=\"1\"\u003e\n\u003cp\u003e\u003cstrong\u003eActiveTrack 3.0\u003c\/strong\u003e\u003c\/p\u003e\n\u003cp\u003eWith the latest version of DJI's ActiveTrack technology, following subjects while avoiding obstacles has never been easier. This technique keeps your subject in the center of the screen, even if they go behind a tree, with superior pathfinding and a faster and more accurate prediction of lost subjects.\u003c\/p\u003e\n\u003c\/td\u003e\n\u003ctd data-mce-fragment=\"1\"\u003e\n\u003cp\u003e\u003cstrong\u003ePOI 3.0\u003c\/strong\u003e\u003c\/p\u003e\n\u003cp\u003ePOI 3.0 enhances the capabilities of POI 2.0, particularly in terms of flat surface recognition. This updated functionality avoids the problem that POI 2.0 had with losing the target during tracking. POI 3.0 now has the ability to track people, cars, and boats in real time.\u003c\/p\u003e\n\u003c\/td\u003e\n\u003c\/tr\u003e\n\u003c\/tbody\u003e\n\u003c\/table\u003e\n\u003c\/div\u003e\n\u003ch3 style=\"text-align: center;\"\u003e\u003cb\u003e\u003cspan style=\"color: #ff8000;\"\u003e8K Hyperlapse\u003c\/span\u003e\u003c\/b\u003e\u003c\/h3\u003e\n\u003cdiv style=\"text-align: center;\"\u003e\u003cb\u003eTime and Movement\u003c\/b\u003e\u003c\/div\u003e\n\u003cdiv style=\"text-align: center;\"\u003e\u003cspan style=\"font-weight: 400;\"\u003eHyperlapse in 8K is supported by the Mavic Air 2, allowing you to warp time and space for particularly spectacular film. Best of all, you can get this photo without using any complicated post-production techniques. Choose from Free, Circle, Course Lock, and Waypoint modes, then point and shoot using the DJI Fly app. *8K resolution is only available in Free and Waypoint modes.\u003c\/span\u003e\u003c\/div\u003e\n\u003cdiv style=\"text-align: center;\"\u003e\n\u003cul\u003e\n\u003cli style=\"font-weight: 400;\"\u003e\u003cspan style=\"font-weight: 400;\"\u003eCourse Lock\u003c\/span\u003e\u003c\/li\u003e\n\u003cli style=\"font-weight: 400;\"\u003e\u003cspan style=\"font-weight: 400;\"\u003eFree\u003c\/span\u003e\u003c\/li\u003e\n\u003cli style=\"font-weight: 400;\"\u003e\u003cspan style=\"font-weight: 400;\"\u003eWaypoint\u003c\/span\u003e\u003c\/li\u003e\n\u003cli style=\"font-weight: 400;\"\u003e\u003cspan style=\"font-weight: 400;\"\u003eCircle\u003c\/span\u003e\u003c\/li\u003e\n\u003c\/ul\u003e\n\u003c\/div\u003e\n\u003cdiv style=\"text-align: center;\"\u003e\n\u003cimg src=\"https:\/\/cdn.shopify.com\/s\/files\/1\/2532\/7020\/files\/dji-mavic-air-2-fly-more-combo-drone-content-feature-8-2-free.jpg?v=1626148985\" alt=\"dji-mavic-air-2-fly-more-combo-drone-content-feature-8-2-free\" data-mce-fragment=\"1\" data-mce-src=\"https:\/\/cdn.shopify.com\/s\/files\/1\/2532\/7020\/files\/dji-mavic-air-2-fly-more-combo-drone-content-feature-8-2-free.jpg?v=1626148985\"\u003e\u003cbr\u003e\n\u003c\/div\u003e\n\u003cdiv style=\"text-align: center;\"\u003e \u003c\/div\u003e\n\u003ch3 style=\"text-align: center;\"\u003e\u003cspan style=\"color: #ff8000;\"\u003e\u003cb\u003eQuickShots\u003c\/b\u003e\u003c\/span\u003e\u003c\/h3\u003e\n\u003cdiv style=\"text-align: center;\"\u003e\u003cb\u003eImagination Simplified\u003c\/b\u003e\u003c\/div\u003e\n\u003cdiv style=\"text-align: center;\"\u003e\u003cspan style=\"font-weight: 400;\"\u003eQuickShots allows you to capture cinematic video snippets automatically. Mavic Air 2 prepares and flies a difficult aerial route for a professional-quality photo with just a few touches. With super-intuitive Story templates, you can add music, effects, and filters to your creation before sharing it on social media.\u003c\/span\u003e\u003c\/div\u003e\n\u003cdiv style=\"text-align: center;\"\u003e\n\u003cul\u003e\n\u003cli style=\"font-weight: 400;\"\u003e\u003cspan style=\"font-weight: 400;\"\u003eDronie\u003c\/span\u003e\u003c\/li\u003e\n\u003cli style=\"font-weight: 400;\"\u003e\u003cspan style=\"font-weight: 400;\"\u003eCircle\u003c\/span\u003e\u003c\/li\u003e\n\u003cli style=\"font-weight: 400;\"\u003e\u003cspan style=\"font-weight: 400;\"\u003eHelix\u003c\/span\u003e\u003c\/li\u003e\n\u003cli style=\"font-weight: 400;\"\u003e\u003cspan style=\"font-weight: 400;\"\u003eRocket\u003c\/span\u003e\u003c\/li\u003e\n\u003cli style=\"font-weight: 400;\"\u003e\u003cspan style=\"font-weight: 400;\"\u003eBoomerang\u003c\/span\u003e\u003c\/li\u003e\n\u003cli style=\"font-weight: 400;\"\u003e\u003cspan style=\"font-weight: 400;\"\u003eAsteroid\u003c\/span\u003e\u003c\/li\u003e\n\u003c\/ul\u003e\n\u003c\/div\u003e\n\u003ch3 style=\"text-align: center;\"\u003e\u003cspan style=\"color: #ff8000;\"\u003e\u003cb\u003e\u003c\/b\u003e\u003c\/span\u003e\u003c\/h3\u003e\n\u003ch3 style=\"text-align: center;\"\u003e\u003cspan style=\"color: #ff8000;\"\u003e\u003cb\u003eFlight and Safety\u003c\/b\u003e\u003c\/span\u003e\u003c\/h3\u003e\n\u003cdiv style=\"text-align: center;\"\u003e\u003cb\u003eSafer Flight for Stunning Content\u003c\/b\u003e\u003c\/div\u003e\n\u003cdiv style=\"text-align: center;\"\u003e\u003cspan style=\"color: #ffffff;\"\u003e\u003cb\u003e.\u003c\/b\u003e\u003c\/span\u003e\u003c\/div\u003e\n\u003ch3 style=\"text-align: center;\"\u003e\u003cspan style=\"color: #ff8000;\"\u003e\u003cb\u003e\u003c\/b\u003e\u003c\/span\u003e\u003c\/h3\u003e\n\u003ch3 style=\"text-align: center;\"\u003e\u003cspan style=\"color: #ff8000;\"\u003e\u003cb\u003eOcuSync 2.0\u003c\/b\u003e\u003c\/span\u003e\u003c\/h3\u003e\n\u003cdiv style=\"text-align: center;\"\u003e\u003cb\u003eThe Sky’s the Limit\u003c\/b\u003e\u003c\/div\u003e\n\u003cdiv style=\"text-align: center;\"\u003e\u003cspan style=\"font-weight: 400;\"\u003eOcuSync 2.0 can give a 1080p FHD livestream directly from the drone's camera and has a video transmission distance of up to 10 kilometers. Enjoy greater freedom when it comes to exploring and more clarity when it comes to capturing the perfect photo. \u003cbr data-mce-fragment=\"1\"\u003e\u003cbr data-mce-fragment=\"1\"\u003e*When unobstructed, interference-free, and FCC-compliant. The maximum flying range specification is a proxy for the strength and robustness of the radio link.\u003c\/span\u003e\u003c\/div\u003e\n\u003cdiv style=\"text-align: center;\"\u003e\u003cspan style=\"font-weight: 400;\"\u003e\u003cimg alt=\"dji-mavic-air-2-fly-more-combo-drone-content-feature-9-OcuSync 2.0\" src=\"https:\/\/cdn.shopify.com\/s\/files\/1\/2532\/7020\/files\/dji-mavic-air-2-fly-more-combo-drone-content-feature-9-OcuSync_2.0.jpg?v=1626149011\"\u003e\u003c\/span\u003e\u003c\/div\u003e\n\u003cdiv style=\"text-align: center;\"\u003e \u003c\/div\u003e\n\u003ch3 style=\"text-align: center;\"\u003e\u003cspan style=\"color: #ff8000;\"\u003e\u003cb\u003e2.4\/5.8GHz Dual Frequency\u003c\/b\u003e\u003c\/span\u003e\u003c\/h3\u003e\n\u003cdiv style=\"text-align: center;\"\u003e\u003cb\u003eSmooth Flight, Reliable Signal\u003cbr data-mce-fragment=\"1\"\u003e\u003c\/b\u003e\u003c\/div\u003e\n\u003cdiv style=\"text-align: center;\"\u003e\u003cspan style=\"font-weight: 400;\"\u003eThe Mavic Air 2 has dual-frequency connectivity (2.4\/5.8GHz) and automatically shifts to the best channel with the least interference in real time. This increases flight safety by greatly improving the aircraft's anti-interference ability in adverse circumstances. \u003cbr data-mce-fragment=\"1\"\u003e\u003cbr data-mce-fragment=\"1\"\u003e*Some countries do not accept 5.8 GHz transmission due to local laws.\u003c\/span\u003e\u003c\/div\u003e\n\u003cdiv style=\"text-align: center;\"\u003e\u003cspan style=\"font-weight: 400; color: #ffffff;\"\u003e.\u003c\/span\u003e\u003c\/div\u003e\n\u003ch3 style=\"text-align: center;\"\u003e\u003cspan style=\"color: #ff8000;\"\u003e\u003cb\u003e\u003c\/b\u003e\u003c\/span\u003e\u003c\/h3\u003e\n\u003ch3 style=\"text-align: center;\"\u003e\u003cspan style=\"color: #ff8000;\"\u003e\u003cb\u003eBattery and Flight\u003c\/b\u003e\u003c\/span\u003e\u003c\/h3\u003e\n\u003cdiv style=\"text-align: center;\"\u003e\u003cb\u003eFly Longer\u003c\/b\u003e\u003c\/div\u003e\n\u003cdiv style=\"text-align: center;\"\u003e\u003cspan style=\"font-weight: 400;\"\u003eWith a battery life of up to 34 minutes and a maximum flight speed of 68 kph in Sport mode, you'll be able to stay in the air for as long as you want to obtain the ideal image. \u003cbr data-mce-fragment=\"1\"\u003e\u003cbr data-mce-fragment=\"1\"\u003e*Flight time was recorded at a 9° angle and a speed of 5.1 m\/s in a windless environment.\u003c\/span\u003e\u003c\/div\u003e\n\u003cdiv style=\"text-align: center;\"\u003e \u003c\/div\u003e\n\u003cdiv style=\"text-align: center;\"\u003e\u003cspan style=\"font-weight: 400;\"\u003e\u003cimg alt=\"dji-mavic-air-2-fly-more-combo-drone-content-feature-10-battery\" src=\"https:\/\/cdn.shopify.com\/s\/files\/1\/2532\/7020\/files\/dji-mavic-air-2-fly-more-combo-drone-content-feature-10-battery.jpg?v=1626149034\"\u003e\u003c\/span\u003e\u003c\/div\u003e\n\u003ch3 style=\"text-align: center;\"\u003e\u003cspan style=\"color: #ff8000;\"\u003e\u003cb\u003eObstacle Avoidance\u003c\/b\u003e\u003c\/span\u003e\u003c\/h3\u003e\n\u003cdiv style=\"text-align: center;\"\u003e\u003cb\u003eFly Safer\u003c\/b\u003e\u003c\/div\u003e\n\u003cdiv style=\"text-align: center;\"\u003e\u003cspan style=\"font-weight: 400;\"\u003eForward, backward, and downward are the three directions in which Mavic Air 2 observes its surroundings. An auxiliary light improves visibility, and obstacle avoidance adds an extra layer of security that's great for pushing the boundaries of what's possible.\u003c\/span\u003e\u003c\/div\u003e\n\u003cdiv style=\"text-align: center;\"\u003e\n\u003ctable\u003e\n\u003ctbody\u003e\n\u003ctr\u003e\n\u003ctd\u003e\n\u003cp\u003e\u003cb\u003eForward\u003c\/b\u003e\u003cspan style=\"font-weight: 400;\"\u003e: Vision sensor accurate up to 22 meters\u003c\/span\u003e\u003c\/p\u003e\n\u003c\/td\u003e\n\u003c\/tr\u003e\n\u003ctr\u003e\n\u003ctd\u003e\n\u003cp\u003e\u003cb\u003eBackward\u003c\/b\u003e\u003cspan style=\"font-weight: 400;\"\u003e: Vision sensor accurate up to 23.6 meters\u003c\/span\u003e\u003c\/p\u003e\n\u003c\/td\u003e\n\u003c\/tr\u003e\n\u003ctr\u003e\n\u003ctd\u003e\n\u003cp\u003e\u003cb\u003eDownward\u003c\/b\u003e\u003cspan style=\"font-weight: 400;\"\u003e: Vision sensor, infrared sensor. The auxiliary light assist with visual positioning, safe landing, and visibility in the air. It can be turned on and off manually.\u003c\/span\u003e\u003c\/p\u003e\n\u003c\/td\u003e\n\u003c\/tr\u003e\n\u003c\/tbody\u003e\n\u003c\/table\u003e\n\u003c\/div\u003e\n\u003cdiv style=\"text-align: center;\"\u003e\u003cspan style=\"color: #ffffff;\"\u003e\u003cb\u003e.\u003c\/b\u003e\u003c\/span\u003e\u003c\/div\u003e\n\u003cdiv style=\"text-align: center;\"\u003e\u003cb\u003e\u003c\/b\u003e\u003c\/div\u003e\n\u003cdiv style=\"text-align: center;\"\u003e\u003cb\u003eAPAS 3.0\u003c\/b\u003e\u003c\/div\u003e\n\u003cdiv style=\"text-align: center;\"\u003e\u003cspan style=\"font-weight: 400;\"\u003eIn difficult settings, Advanced Pilot Assistance Systems (APAS) 3.0 employs advanced mapping technology for smooth following and dependable obstacle avoidance. When compared to earlier generations, obstacle avoidance performance and autonomous flight planning have improved substantially, boosting safety and enabling more options.\u003c\/span\u003e\u003c\/div\u003e\n\u003cdiv style=\"text-align: center;\"\u003e\u003cspan style=\"font-weight: 400;\"\u003e*While recording in 4K at 60, 50, and 48 fps, 2.7K at 60, 50, and 48 fps, and 1080p at 120 and 240 fps, APAS 3.0 and FocusTrack are not available.\u003cbr data-mce-fragment=\"1\"\u003e\u003c\/span\u003e\u003c\/div\u003e\n\u003cstyle\u003e\u003c!--\n.embed-container { position: relative; padding-bottom: 56.25%; height: 0; overflow: hidden; max-width: 100%; } .embed-container iframe, .embed-container object, .embed-container embed { position: absolute; top: 0; left: 0; width: 100%; height: 100%; }\n--\u003e\u003c\/style\u003e\n\u003cdiv style=\"text-align: center;\" class=\"embed-container\"\u003e\u003ciframe src=\"https:\/\/www.youtube.com\/embed\/IwoyGb-NWDs\" frameborder=\"0\" allowfullscreen=\"\"\u003e\u003c\/iframe\u003e\u003c\/div\u003e\n\u003cdiv style=\"text-align: center;\"\u003e \u003c\/div\u003e\n\u003ch3 style=\"text-align: center;\"\u003e\u003cspan style=\"color: #ff8000;\"\u003e\u003cb\u003eDJI Fly App\u003c\/b\u003e\u003c\/span\u003e\u003c\/h3\u003e\n\u003cdiv style=\"text-align: center;\"\u003e\u003cb\u003eEffortless Editing\u003c\/b\u003e\u003c\/div\u003e\n\u003cdiv style=\"text-align: center;\"\u003e\u003cspan style=\"font-weight: 400;\"\u003eThe DJI Fly app makes creating perfect films easier than ever before. It incorporates the DJI Mimo app's editing suite, giving users access to manual settings, advanced functionalities, and intuitive templates to quickly produce professional compositions.\u003c\/span\u003e\u003c\/div\u003e\n\u003cdiv style=\"text-align: center;\"\u003e\u003cspan style=\"font-weight: 400;\"\u003e\u003cimg alt=\"dji-mavic-air-2-fly-more-combo-drone-content-feature-11-DJI-Fly-App\" src=\"https:\/\/cdn.shopify.com\/s\/files\/1\/2532\/7020\/files\/dji-mavic-air-2-fly-more-combo-drone-content-feature-11-DJI-Fly-App.jpg?v=1626149062\"\u003e\u003c\/span\u003e\u003c\/div\u003e\n\u003ch3 style=\"text-align: center;\"\u003e\u003cspan style=\"color: #ff8000;\"\u003e\u003cb\u003e\u003c\/b\u003e\u003c\/span\u003e\u003c\/h3\u003e\n\u003ch3 style=\"text-align: center;\"\u003e\u003cspan style=\"color: #ff8000;\"\u003e\u003cb\u003eRemote Controller \u003c\/b\u003e\u003c\/span\u003e\u003c\/h3\u003e\n\u003cdiv style=\"text-align: center;\"\u003e\u003cb\u003eDesigned for Pilots\u003c\/b\u003e\u003c\/div\u003e\n\u003cdiv style=\"text-align: center;\"\u003e\u003cspan style=\"font-weight: 400;\"\u003eThe newly designed remote controller has an ergonomic shape for a more comfortable grip and an excellent 240-minute battery life. The redesigned clamp makes it simple to attach devices, and the integrated antennas improve the user experience dramatically.\u003cbr data-mce-fragment=\"1\"\u003e*In an interference-free environment, battery life was measured using an Android phone.\u003c\/span\u003e\u003c\/div\u003e\n\u003cdiv style=\"text-align: center;\"\u003e\u003cspan style=\"font-weight: 400;\"\u003e\u003cimg alt=\"dji-mavic-air-2-fly-more-combo-drone-content-feature-12-remote\" src=\"https:\/\/cdn.shopify.com\/s\/files\/1\/2532\/7020\/files\/dji-mavic-air-2-fly-more-combo-drone-content-feature-12-remote.jpg?v=1626149088\"\u003e\u003c\/span\u003e\u003c\/div\u003e\n\u003cdiv style=\"text-align: center;\"\u003e \u003c\/div\u003e\n\u003ch3 style=\"text-align: center;\"\u003e\u003cspan style=\"color: #ff8000;\"\u003e\u003cb\u003eND Filters\u003c\/b\u003e\u003c\/span\u003e\u003c\/h3\u003e\n\u003cdiv style=\"text-align: center;\"\u003e\u003cb\u003eOptimal Options\u003c\/b\u003e\u003c\/div\u003e\n\u003cdiv style=\"text-align: center;\"\u003eThe Mavic Air 2 comes with two ND filter sets that help with exposure control and give you additional creative options. The ND 16\/64\/256 set is useful for altering shutter speed and in low-light situations, while the ND 4\/8\/32 set allows for colorful photographs even at low ISO.\u003cbr\u003e\u003cbr\u003e*The Fly More Combo comes with ND16\/64\/256 filters. Separately, the ND4\/8\/32 filter set can be ordered.\u003c\/div\u003e\n\u003cdiv style=\"text-align: center;\"\u003e\u003cspan style=\"font-weight: 400;\"\u003e\u003cimg alt=\"dji-mavic-air-2-fly-more-combo-drone-content-feature-13-ND-Filter\" src=\"https:\/\/cdn.shopify.com\/s\/files\/1\/2532\/7020\/files\/dji-mavic-air-2-fly-more-combo-drone-content-feature-13-ND-Filter.jpg?v=1626149110\"\u003e\u003c\/span\u003e\u003c\/div\u003e\n\u003cdiv style=\"text-align: center;\"\u003e \u003c\/div\u003e\n\u003ch2 style=\"text-align: left;\"\u003e\u003cstrong\u003eSpecification\u003c\/strong\u003e\u003c\/h2\u003e\n\u003cp\u003e \u003c\/p\u003e\n\u003cp\u003e \u003c\/p\u003e\n\u003cp\u003e \u003c\/p\u003e\n\u003cdiv style=\"text-align: left;\"\u003e\u003cb\u003eAircraft\u003c\/b\u003e\u003c\/div\u003e\n\u003cdiv style=\"text-align: left;\"\u003e\n\u003cul\u003e\n\u003cli style=\"font-weight: 400;\"\u003e\u003cb\u003eWeight\u003c\/b\u003e\u003c\/li\u003e\n\u003cli style=\"font-weight: 400;\"\u003e570 g\u003c\/li\u003e\n\u003c\/ul\u003e\n\u003cul\u003e\n\u003cli style=\"font-weight: 400;\"\u003e\u003cb\u003eSize\u003c\/b\u003e\u003c\/li\u003e\n\u003cli style=\"font-weight: 400;\"\u003e\n\u003cspan style=\"font-weight: 400;\"\u003eFolded:\u003c\/span\u003e\u003cspan style=\"font-weight: 400;\"\u003e\u003cbr\u003e\u003c\/span\u003e\u003cspan style=\"font-weight: 400;\"\u003e180×97×74 mm (Length×Width×Height)\u003c\/span\u003e\u003cspan style=\"font-weight: 400;\"\u003e\u003cbr\u003e\u003c\/span\u003e\u003cspan style=\"font-weight: 400;\"\u003eUnfolded:\u003c\/span\u003e\u003cspan style=\"font-weight: 400;\"\u003e\u003cbr\u003e\u003c\/span\u003e\u003cspan style=\"font-weight: 400;\"\u003e183×253×77 mm (Length×Width×Height)\u003c\/span\u003e\n\u003c\/li\u003e\n\u003c\/ul\u003e\n\u003cul\u003e\n\u003cli style=\"font-weight: 400;\"\u003e\u003cb\u003eDiagonal Distance\u003c\/b\u003e\u003c\/li\u003e\n\u003cli style=\"font-weight: 400;\"\u003e\u003cspan style=\"font-weight: 400;\"\u003e302 mm\u003c\/span\u003e\u003c\/li\u003e\n\u003cli\u003e\u003cb\u003eTransmitter Power (EIRP)\u003c\/b\u003e\u003c\/li\u003e\n\u003cli\u003e\n\u003cspan\u003e2.400-2.4835 GHz:\u003c\/span\u003e\u003cspan\u003e\u003cbr\u003e\u003c\/span\u003e\u003cspan\u003eFCC: ≤26 dBm\u003c\/span\u003e\u003cspan\u003e\u003cbr\u003e\u003c\/span\u003e\u003cspan\u003eCE: ≤20 dBm\u003c\/span\u003e\u003cspan\u003e\u003cbr\u003e\u003c\/span\u003e\u003cspan\u003eSRRC: ≤20 dBm\u003c\/span\u003e\u003cspan\u003e\u003cbr\u003e\u003c\/span\u003e\u003cspan\u003eMIC: ≤20 dBm\u003c\/span\u003e\u003cspan\u003e\u003cbr\u003e\u003c\/span\u003e\u003cspan\u003e\u003cbr\u003e\u003c\/span\u003e\u003cspan\u003e5.725-5.850 GHz:\u003c\/span\u003e\u003cspan\u003e\u003cbr\u003e\u003c\/span\u003e\u003cspan\u003eFCC: ≤26 dBm\u003c\/span\u003e\u003cspan\u003e\u003cbr\u003e\u003c\/span\u003e\u003cspan\u003eCE: ≤14 dBm\u003c\/span\u003e\u003cspan\u003e\u003cbr\u003e\u003c\/span\u003e\u003cspan\u003eSRRC: ≤26 dBm\u003c\/span\u003e\n\u003c\/li\u003e\n\u003c\/ul\u003e\n\u003cul\u003e\n\u003cli style=\"font-weight: 400;\"\u003e\u003cb\u003eMax Ascent Speed\u003c\/b\u003e\u003c\/li\u003e\n\u003cli style=\"font-weight: 400;\"\u003e\n\u003cspan style=\"font-weight: 400;\"\u003e4 m\/s (S Mode)\u003c\/span\u003e\u003cspan style=\"font-weight: 400;\"\u003e\u003cbr\u003e\u003c\/span\u003e\u003cspan style=\"font-weight: 400;\"\u003e4 m\/s (N Mode)\u003c\/span\u003e\n\u003c\/li\u003e\n\u003c\/ul\u003e\n\u003cul\u003e\n\u003cli style=\"font-weight: 400;\"\u003e\u003cb\u003eMax Service Ceiling Above Sea Level\u003c\/b\u003e\u003c\/li\u003e\n\u003cli style=\"font-weight: 400;\"\u003e\u003cspan style=\"font-weight: 400;\"\u003e5000 m\u003c\/span\u003e\u003c\/li\u003e\n\u003c\/ul\u003e\n\u003cul\u003e\n\u003cli style=\"font-weight: 400;\"\u003e\u003cb\u003eMax Flight Time (without wind)\u003c\/b\u003e\u003c\/li\u003e\n\u003cli style=\"font-weight: 400;\"\u003e\u003cspan style=\"font-weight: 400;\"\u003e34 minutes\u003c\/span\u003e\u003c\/li\u003e\n\u003c\/ul\u003e\n\u003cul\u003e\n\u003cli style=\"font-weight: 400;\"\u003e\u003cb\u003eMax Hover Time (without wind)\u003c\/b\u003e\u003c\/li\u003e\n\u003cli style=\"font-weight: 400;\"\u003e\u003cspan style=\"font-weight: 400;\"\u003e33 minutes\u003c\/span\u003e\u003c\/li\u003e\n\u003c\/ul\u003e\n\u003cul\u003e\n\u003cli style=\"font-weight: 400;\"\u003e\u003cb\u003eMax Flight Distance\u003c\/b\u003e\u003c\/li\u003e\n\u003cli style=\"font-weight: 400;\"\u003e\u003cspan style=\"font-weight: 400;\"\u003e18.5 km\u003c\/span\u003e\u003c\/li\u003e\n\u003cli\u003e\u003cb\u003eMax Descent Speed\u003c\/b\u003e\u003c\/li\u003e\n\u003cli\u003e\n\u003cspan\u003e3 m\/s (S Mode)\u003c\/span\u003e\u003cspan\u003e\u003cbr\u003e\u003c\/span\u003e\u003cspan\u003e3 m\/s (N Mode)\u003c\/span\u003e\u003cspan\u003e\u003cbr\u003e\u003c\/span\u003e\u003cspan\u003e5 m\/s (S Mode and N Mode during a sharp descent)\u003c\/span\u003e\u003cspan\u003e\u003cbr\u003e\u003c\/span\u003e\u003cspan\u003e3 m\/s (all modes at elevations over 4500 m)\u003c\/span\u003e\n\u003c\/li\u003e\n\u003c\/ul\u003e\n\u003cul\u003e\n\u003cli style=\"font-weight: 400;\"\u003e\u003cb\u003eMax Horizontal Flight Speed\u003c\/b\u003e\u003c\/li\u003e\n\u003cli style=\"font-weight: 400;\"\u003e\n\u003cspan style=\"font-weight: 400;\"\u003e19 m\/s (S Mode)\u003c\/span\u003e\u003cspan style=\"font-weight: 400;\"\u003e\u003cbr\u003e\u003c\/span\u003e\u003cspan style=\"font-weight: 400;\"\u003e12 m\/s (N Mode)\u003c\/span\u003e\u003cspan style=\"font-weight: 400;\"\u003e\u003cbr\u003e\u003c\/span\u003e\u003cspan style=\"font-weight: 400;\"\u003e5 m\/s (T Mode)\u003c\/span\u003e\n\u003c\/li\u003e\n\u003cli\u003e\u003cb\u003eHovering Accuracy Range\u003c\/b\u003e\u003c\/li\u003e\n\u003cli\u003e\n\u003cspan\u003eVertical:\u003c\/span\u003e\u003cspan\u003e\u003cbr\u003e\u003c\/span\u003e\u003cspan\u003e±0.1 m (with vision positioning)\u003c\/span\u003e\u003cspan\u003e\u003cbr\u003e\u003c\/span\u003e\u003cspan\u003e±0.5 m (with GPS positioning)\u003c\/span\u003e\u003cspan\u003e\u003cbr\u003e\u003c\/span\u003e\u003cspan\u003e\u003cbr\u003e\u003c\/span\u003e\u003cspan\u003eHorizontal:\u003c\/span\u003e\u003cspan\u003e\u003cbr\u003e\u003c\/span\u003e\u003cspan\u003e±0.1 m (with vision positioning)\u003c\/span\u003e\u003cspan\u003e\u003cbr\u003e\u003c\/span\u003e\u003cspan\u003e±1.5 m (with GPS positioning)\u003c\/span\u003e\n\u003c\/li\u003e\n\u003c\/ul\u003e\n\u003cul\u003e\n\u003cli style=\"font-weight: 400;\"\u003e\u003cb\u003eMax Wind Resistance\u003c\/b\u003e\u003c\/li\u003e\n\u003cli style=\"font-weight: 400;\"\u003e\u003cspan style=\"font-weight: 400;\"\u003e8.5-10.5 m\/s (Level 5)\u003c\/span\u003e\u003c\/li\u003e\n\u003c\/ul\u003e\n\u003cul\u003e\n\u003cli style=\"font-weight: 400;\"\u003e\u003cb\u003eMax Tilt Angle\u003c\/b\u003e\u003c\/li\u003e\n\u003cli style=\"font-weight: 400;\"\u003e\n\u003cspan style=\"font-weight: 400;\"\u003e35° (S Mode)\u003c\/span\u003e\u003cspan style=\"font-weight: 400;\"\u003e\u003cbr\u003e\u003c\/span\u003e\u003cspan style=\"font-weight: 400;\"\u003e20° (N Mode)\u003c\/span\u003e\u003cspan style=\"font-weight: 400;\"\u003e\u003cbr\u003e\u003c\/span\u003e\u003cspan style=\"font-weight: 400;\"\u003e35° (N Mode under strong wind)\u003c\/span\u003e\n\u003c\/li\u003e\n\u003c\/ul\u003e\n\u003cul\u003e\n\u003cli style=\"font-weight: 400;\"\u003e\u003cb\u003eOperating Frequency\u003c\/b\u003e\u003c\/li\u003e\n\u003cli style=\"font-weight: 400;\"\u003e\n\u003cspan style=\"font-weight: 400;\"\u003e2.400-2.4835 GHz\u003c\/span\u003e\u003cspan style=\"font-weight: 400;\"\u003e\u003cbr\u003e\u003c\/span\u003e\u003cspan style=\"font-weight: 400;\"\u003e5.725-5.850 GHz\u003c\/span\u003e\n\u003c\/li\u003e\n\u003c\/ul\u003e\n\u003cul data-mce-fragment=\"1\"\u003e\n\u003cli data-mce-fragment=\"1\"\u003e\u003cb data-mce-fragment=\"1\"\u003eMax Angular Velocity\u003c\/b\u003e\u003c\/li\u003e\n\u003cli data-mce-fragment=\"1\"\u003e\n\u003cspan data-mce-fragment=\"1\"\u003e250°\/s (S Mode)\u003c\/span\u003e\u003cspan data-mce-fragment=\"1\"\u003e\u003cbr data-mce-fragment=\"1\"\u003e\u003c\/span\u003e\u003cspan data-mce-fragment=\"1\"\u003e250°\/s (N Mode)\u003c\/span\u003e\n\u003c\/li\u003e\n\u003c\/ul\u003e\n\u003cul data-mce-fragment=\"1\"\u003e\n\u003cli data-mce-fragment=\"1\"\u003e\u003cb data-mce-fragment=\"1\"\u003eOperating Temperature Range\u003c\/b\u003e\u003c\/li\u003e\n\u003cli data-mce-fragment=\"1\"\u003e\u003cspan data-mce-fragment=\"1\"\u003e-10° to 40°C (14° to 104°F)\u003c\/span\u003e\u003c\/li\u003e\n\u003c\/ul\u003e\n\u003cul\u003e\u003c\/ul\u003e\n\u003cul\u003e\n\u003cli style=\"font-weight: 400;\"\u003e\u003cb\u003ePropellers\u003c\/b\u003e\u003c\/li\u003e\n\u003cli style=\"font-weight: 400;\"\u003e\u003cspan style=\"font-weight: 400;\"\u003eQuick release, low noise, folding\u003c\/span\u003e\u003c\/li\u003e\n\u003c\/ul\u003e\n\u003cul\u003e\n\u003cli style=\"font-weight: 400;\"\u003e\u003cb\u003eSatellite Systems\u003c\/b\u003e\u003c\/li\u003e\n\u003cli style=\"font-weight: 400;\"\u003e\u003cspan style=\"font-weight: 400;\"\u003eGPS+GLONASS\u003c\/span\u003e\u003c\/li\u003e\n\u003c\/ul\u003e\n\u003cul\u003e\n\u003cli style=\"font-weight: 400;\"\u003e\u003cb\u003eCompass\u003c\/b\u003e\u003c\/li\u003e\n\u003cli style=\"font-weight: 400;\"\u003e\u003cspan style=\"font-weight: 400;\"\u003eSingle Compass\u003c\/span\u003e\u003c\/li\u003e\n\u003c\/ul\u003e\n\u003cul\u003e\n\u003cli style=\"font-weight: 400;\"\u003e\u003cb\u003eIMU\u003c\/b\u003e\u003c\/li\u003e\n\u003cli style=\"font-weight: 400;\"\u003e\u003cspan style=\"font-weight: 400;\"\u003eSingle IMU\u003c\/span\u003e\u003c\/li\u003e\n\u003c\/ul\u003e\n\u003cul\u003e\n\u003cli style=\"font-weight: 400;\"\u003e\u003cb\u003eInternal Storage\u003c\/b\u003e\u003c\/li\u003e\n\u003cli style=\"font-weight: 400;\"\u003e\u003cspan style=\"font-weight: 400;\"\u003e8 GB\u003c\/span\u003e\u003c\/li\u003e\n\u003c\/ul\u003e\n\u003c\/div\u003e\n\u003cdiv style=\"text-align: left;\"\u003e\u003cb\u003eBattery\u003c\/b\u003e\u003c\/div\u003e\n\u003cdiv style=\"text-align: left;\"\u003e\n\u003cul\u003e\n\u003cli style=\"font-weight: 400;\"\u003e\u003cb\u003eCapacity\u003c\/b\u003e\u003c\/li\u003e\n\u003cli style=\"font-weight: 400;\"\u003e\u003cspan style=\"font-weight: 400;\"\u003e3500 mAh\u003c\/span\u003e\u003c\/li\u003e\n\u003c\/ul\u003e\n\u003cul\u003e\n\u003cli style=\"font-weight: 400;\"\u003e\u003cb\u003eVoltage\u003c\/b\u003e\u003c\/li\u003e\n\u003cli style=\"font-weight: 400;\"\u003e\u003cspan style=\"font-weight: 400;\"\u003e11.55 V\u003c\/span\u003e\u003c\/li\u003e\n\u003c\/ul\u003e\n\u003cul\u003e\n\u003cli style=\"font-weight: 400;\"\u003e\u003cb\u003eCharging Voltage Limit\u003c\/b\u003e\u003c\/li\u003e\n\u003cli style=\"font-weight: 400;\"\u003e\u003cspan style=\"font-weight: 400;\"\u003e13.2 V\u003c\/span\u003e\u003c\/li\u003e\n\u003c\/ul\u003e\n\u003cul\u003e\u003c\/ul\u003e\n\u003cul\u003e\n\u003cli style=\"font-weight: 400;\"\u003e\u003cb\u003eWeight\u003c\/b\u003e\u003c\/li\u003e\n\u003cli style=\"font-weight: 400;\"\u003e\u003cspan style=\"font-weight: 400;\"\u003e198 g\u003c\/span\u003e\u003c\/li\u003e\n\u003c\/ul\u003e\n\u003cul\u003e\n\u003cli style=\"font-weight: 400;\"\u003e\u003cb\u003eCharging Temperature\u003c\/b\u003e\u003c\/li\u003e\n\u003cli style=\"font-weight: 400;\"\u003e\u003cspan style=\"font-weight: 400;\"\u003e5° to 40°C (41° to 104°F)\u003c\/span\u003e\u003c\/li\u003e\n\u003c\/ul\u003e\n\u003cul data-mce-fragment=\"1\"\u003e\n\u003cli data-mce-fragment=\"1\"\u003e\u003cb data-mce-fragment=\"1\"\u003eBattery Type\u003c\/b\u003e\u003c\/li\u003e\n\u003cli data-mce-fragment=\"1\"\u003e\u003cspan data-mce-fragment=\"1\"\u003eLiPo 3S\u003c\/span\u003e\u003c\/li\u003e\n\u003c\/ul\u003e\n\u003cul data-mce-fragment=\"1\"\u003e\n\u003cli data-mce-fragment=\"1\"\u003e\u003cb data-mce-fragment=\"1\"\u003eEnergy\u003c\/b\u003e\u003c\/li\u003e\n\u003cli data-mce-fragment=\"1\"\u003e\u003cspan data-mce-fragment=\"1\"\u003e40.42 Wh\u003c\/span\u003e\u003c\/li\u003e\n\u003c\/ul\u003e\n\u003cul\u003e\u003c\/ul\u003e\n\u003cul\u003e\n\u003cli style=\"font-weight: 400;\"\u003e\u003cb\u003eMax Charging Power\u003c\/b\u003e\u003c\/li\u003e\n\u003cli style=\"font-weight: 400;\"\u003e\u003cspan style=\"font-weight: 400;\"\u003e38 W\u003c\/span\u003e\u003c\/li\u003e\n\u003c\/ul\u003e\n\u003c\/div\u003e\n\u003cdiv style=\"text-align: left;\"\u003e\u003cb\u003eCamera\u003c\/b\u003e\u003c\/div\u003e\n\u003cdiv\u003e\n\u003cul style=\"text-align: left;\"\u003e\n\u003cli style=\"font-weight: 400;\"\u003e\u003cb\u003eSensor\u003c\/b\u003e\u003c\/li\u003e\n\u003cli style=\"font-weight: 400;\"\u003e\n\u003cspan style=\"font-weight: 400;\"\u003e1\/2\" CMOS\u003c\/span\u003e\u003cspan style=\"font-weight: 400;\"\u003e\u003cbr\u003e\u003c\/span\u003e\u003cspan style=\"font-weight: 400;\"\u003eEffective Pixels: 12 MP and 48 MP\u003c\/span\u003e\n\u003c\/li\u003e\n\u003cli\u003e\u003cb\u003eISO\u003c\/b\u003e\u003c\/li\u003e\n\u003cli\u003e\n\u003cspan\u003eVideo:\u003c\/span\u003e\u003cspan\u003e\u003cbr\u003e\u003c\/span\u003e\u003cspan\u003e100-6400\u003c\/span\u003e\u003cspan\u003e\u003cbr\u003e\u003c\/span\u003e\u003cspan\u003e\u003cbr\u003e\u003c\/span\u003e\u003cspan\u003ePhoto (12 MP):\u003c\/span\u003e\u003cspan\u003e\u003cbr\u003e\u003c\/span\u003e\u003cspan\u003e100-3200 (Auto)\u003c\/span\u003e\u003cspan\u003e\u003cbr\u003e\u003c\/span\u003e\u003cspan\u003e100-6400 (Manual)\u003c\/span\u003e\u003cspan\u003e\u003cbr\u003e\u003c\/span\u003e\u003cspan\u003ePhoto (48 MP):\u003c\/span\u003e\u003cspan\u003e\u003cbr\u003e\u003c\/span\u003e\u003cspan\u003e100-1600 (Auto)\u003c\/span\u003e\u003cspan\u003e\u003cbr\u003e\u003c\/span\u003e\u003cspan\u003e100-3200 (Manual)\u003c\/span\u003e\n\u003c\/li\u003e\n\u003c\/ul\u003e\n\u003cul style=\"text-align: left;\"\u003e\n\u003cli style=\"font-weight: 400;\"\u003e\u003cb\u003eLens\u003c\/b\u003e\u003c\/li\u003e\n\u003cli style=\"font-weight: 400;\"\u003e\n\u003cspan style=\"font-weight: 400;\"\u003eFOV: 84°\u003c\/span\u003e\u003cspan style=\"font-weight: 400;\"\u003e\u003cbr\u003e\u003c\/span\u003e\u003cspan style=\"font-weight: 400;\"\u003eEquivalent Focal Length: 24 mm\u003c\/span\u003e\u003cspan style=\"font-weight: 400;\"\u003e\u003cbr\u003e\u003c\/span\u003e\u003cspan style=\"font-weight: 400;\"\u003eAperture: f\/2.8\u003c\/span\u003e\u003cspan style=\"font-weight: 400;\"\u003e\u003cbr\u003e\u003c\/span\u003e\u003cspan style=\"font-weight: 400;\"\u003eFocus Range: 1 m to ∞\u003c\/span\u003e\n\u003c\/li\u003e\n\u003c\/ul\u003e\n\u003cul data-mce-fragment=\"1\"\u003e\n\u003cli data-mce-fragment=\"1\"\u003e\u003cb data-mce-fragment=\"1\"\u003eVideo Formats\u003c\/b\u003e\u003c\/li\u003e\n\u003cli data-mce-fragment=\"1\"\u003e\u003cspan data-mce-fragment=\"1\"\u003eMP4\/MOV (H.264\/MPEG-4 AVC, H.265\/HEVC)\u003c\/span\u003e\u003c\/li\u003e\n\u003c\/ul\u003e\n\u003cul data-mce-fragment=\"1\"\u003e\n\u003cli data-mce-fragment=\"1\"\u003e\u003cb data-mce-fragment=\"1\"\u003eMax Bitrate\u003c\/b\u003e\u003c\/li\u003e\n\u003cli data-mce-fragment=\"1\"\u003e\u003cspan data-mce-fragment=\"1\"\u003e120 Mbps\u003c\/span\u003e\u003c\/li\u003e\n\u003c\/ul\u003e\n\u003cul style=\"text-align: left;\"\u003e\u003c\/ul\u003e\n\u003cul style=\"text-align: left;\"\u003e\n\u003cli style=\"font-weight: 400;\"\u003e\u003cb\u003eMax Photo Resolution\u003c\/b\u003e\u003c\/li\u003e\n\u003cli style=\"font-weight: 400;\"\u003e\u003cspan style=\"font-weight: 400;\"\u003e48 MP 8000×6000 pixel\u003c\/span\u003e\u003c\/li\u003e\n\u003c\/ul\u003e\n\u003cul style=\"text-align: left;\"\u003e\n\u003cli style=\"font-weight: 400;\"\u003e\u003cb\u003ePhoto Formats\u003c\/b\u003e\u003c\/li\u003e\n\u003cli style=\"font-weight: 400;\"\u003e\u003cspan style=\"font-weight: 400;\"\u003eJPEG\/DNG (RAW)\u003c\/span\u003e\u003c\/li\u003e\n\u003cli\u003e\u003cb\u003ePhoto Modes\u003c\/b\u003e\u003c\/li\u003e\n\u003cli\u003e\n\u003cspan\u003eSingle: 12 MP and 48 MP\u003c\/span\u003e\u003cspan\u003e\u003cbr\u003e\u003c\/span\u003e\u003cspan\u003eBurst: 12 MP, 3\/5\/7 frames\u003c\/span\u003e\u003cspan\u003e\u003cbr\u003e\u003c\/span\u003e\u003cspan\u003eAutomatic Exposure Bracketing (AEB): 12MP, 3\/5 Frames at 0.7EV Bias\u003c\/span\u003e\u003cspan\u003e\u003cbr\u003e\u003c\/span\u003e\u003cspan\u003eTimed: 12 MP 2\/3\/5\/7\/10\/15\/20\/30\/60 seconds\u003c\/span\u003e\u003cspan\u003e\u003cbr\u003e\u003c\/span\u003e\u003cspan\u003eSmartPhoto: Scene Recognition, HyperLight, and HDR\u003c\/span\u003e\u003cspan\u003e\u003cbr\u003e\u003c\/span\u003e\u003cspan\u003eHDR Panorama:\u003c\/span\u003e\u003cspan\u003e\u003cbr\u003e\u003c\/span\u003e\u003cspan\u003eVertical (3×1): 3328×8000 pixels (Width×Height)\u003c\/span\u003e\u003cspan\u003e\u003cbr\u003e\u003c\/span\u003e\u003cspan\u003eWide-angle (3×3): 8000×6144 pixels (Width×Height)\u003c\/span\u003e\u003cspan\u003e\u003cbr\u003e\u003c\/span\u003e\u003cspan\u003e180° Panorama (3×7): 8192×3500 pixels (Width×Height)\u003c\/span\u003e\u003cspan\u003e\u003cbr\u003e\u003c\/span\u003e\u003cspan\u003eSphere (3×8+1): 8192×4096 pixels (Width×Height)\u003c\/span\u003e\n\u003c\/li\u003e\n\u003c\/ul\u003e\n\u003cul style=\"text-align: left;\"\u003e\n\u003cli style=\"font-weight: 400;\"\u003e\u003cb\u003eVideo Resolution and Frame Rates\u003c\/b\u003e\u003c\/li\u003e\n\u003cli style=\"font-weight: 400;\"\u003e\n\u003cspan style=\"font-weight: 400;\"\u003e4K Ultra HD: 3840×2160 24\/25\/30\/48\/50\/60 fps\u003c\/span\u003e\u003cspan style=\"font-weight: 400;\"\u003e\u003cbr\u003e\u003c\/span\u003e\u003cspan style=\"font-weight: 400;\"\u003e2.7K: 2688×1512 24\/25\/30\/48\/50\/60 fps\u003c\/span\u003e\u003cspan style=\"font-weight: 400;\"\u003e\u003cbr\u003e\u003c\/span\u003e\u003cspan style=\"font-weight: 400;\"\u003eFHD: 1920×1080 24\/25\/30\/48\/50\/60\/120\/240 fps\u003c\/span\u003e\u003cspan style=\"font-weight: 400;\"\u003e\u003cbr\u003e\u003c\/span\u003e\u003cspan style=\"font-weight: 400;\"\u003e4K Ultra HD HDR: 3840×2160 24\/25\/30 fps\u003c\/span\u003e\u003cspan style=\"font-weight: 400;\"\u003e\u003cbr\u003e\u003c\/span\u003e\u003cspan style=\"font-weight: 400;\"\u003e2.7K HDR: 2688×1512 24\/25\/30 fps\u003c\/span\u003e\u003cspan style=\"font-weight: 400;\"\u003e\u003cbr\u003e\u003c\/span\u003e\u003cspan style=\"font-weight: 400;\"\u003eFHD HDR: 1920×1080 24\/25\/30 fps\u003c\/span\u003e\n\u003c\/li\u003e\n\u003c\/ul\u003e\n\u003cul style=\"text-align: left;\"\u003e\n\u003cli style=\"font-weight: 400;\"\u003e\u003cb\u003eColor Profiles\u003c\/b\u003e\u003c\/li\u003e\n\u003cli style=\"font-weight: 400;\"\u003e\u003cspan style=\"font-weight: 400;\"\u003eD-Cinelike, Normal\u003c\/span\u003e\u003c\/li\u003e\n\u003c\/ul\u003e\n\u003cul style=\"text-align: left;\"\u003e\n\u003cli style=\"font-weight: 400;\"\u003e\u003cb\u003eSupported SD Cards\u003c\/b\u003e\u003c\/li\u003e\n\u003cli style=\"font-weight: 400;\"\u003e\u003cspan style=\"font-weight: 400;\"\u003eSupports a microSD with capacity of up to 256 GB\u003c\/span\u003e\u003c\/li\u003e\n\u003c\/ul\u003e\n\u003cul style=\"text-align: left;\"\u003e\n\u003cli style=\"font-weight: 400;\"\u003e\u003cb\u003eSupported File Systems\u003c\/b\u003e\u003c\/li\u003e\n\u003cli style=\"font-weight: 400;\"\u003e\u003cspan style=\"font-weight: 400;\"\u003eFAT32 and exFAT\u003c\/span\u003e\u003c\/li\u003e\n\u003c\/ul\u003e\n\u003cul style=\"text-align: center;\"\u003e\n\u003cli style=\"font-weight: 400; text-align: left;\"\u003e\u003cb\u003eZoom\u003c\/b\u003e\u003c\/li\u003e\n\u003cli style=\"font-weight: 400; text-align: left;\"\u003e\u003cspan style=\"font-weight: 400;\"\u003eAvailable\u003c\/span\u003e\u003c\/li\u003e\n\u003c\/ul\u003e\n\u003c\/div\u003e\n\u003c\/div\u003e","published_at":"2022-10-20T06:18:16-04:00","created_at":"2021-07-23T04:25:10-04:00","vendor":"DJI","type":"Drone","tags":["best drone","DJI Drones","DJI Mavic Air 2","DJI Mavic Air 2 Fly More Combo","drone","drone camera","drone dji","drone with camera","FocusTrack","HDR","mini drone","無人機","無人機套裝","航拍機","遙控航拍機","飛行無人機","高清航拍機"],"price":108800,"price_min":108800,"price_max":108800,"available":false,"price_varies":false,"compare_at_price":null,"compare_at_price_min":0,"compare_at_price_max":0,"compare_at_price_varies":false,"variants":[{"id":39446096314443,"title":"Default Title","option1":"Default Title","option2":null,"option3":null,"sku":"DJI-Air2-COMBO","requires_shipping":true,"taxable":true,"featured_image":null,"available":false,"name":"DJI Mavic Air 2 Fly More Combo - Drone Quadcopter UAV with 4K Video|48MP Camera|34min Flight Time|8K Hyperlapse 1\/2\" CMOS Sensor|ActiveTrack 3.0|3-Axis Gimba|Ocusync 2.0","public_title":null,"options":["Default Title"],"price":108800,"weight":2000,"compare_at_price":null,"inventory_management":"shopify","barcode":"","requires_selling_plan":false,"selling_plan_allocations":[]}],"images":["\/\/www.stream-sourcing.com\/cdn\/shop\/products\/dji-mavic-air-2-fly-more-combo-drone-front.jpg?v=1627028713","\/\/www.stream-sourcing.com\/cdn\/shop\/products\/dji-mavic-air-2-fly-more-combo-drone-package.jpg?v=1627028713","\/\/www.stream-sourcing.com\/cdn\/shop\/products\/dji-mavic-air-2-fly-more-combo-drone-bottom.jpg?v=1627028713","\/\/www.stream-sourcing.com\/cdn\/shop\/products\/dji-mavic-air-2-fly-more-combo-drone-open-side.jpg?v=1627028713","\/\/www.stream-sourcing.com\/cdn\/shop\/products\/dji-mavic-air-2-fly-more-combo-drone-all-package.jpg?v=1627028713","\/\/www.stream-sourcing.com\/cdn\/shop\/products\/dji-mavic-air-2-fly-more-combo-drone-closed-side.jpg?v=1627028714","\/\/www.stream-sourcing.com\/cdn\/shop\/products\/dji-mavic-air-2-fly-more-combo-drone-control.jpg?v=1627028714","\/\/www.stream-sourcing.com\/cdn\/shop\/products\/dji-mavic-air-2-fly-more-combo-drone-front-top.jpg?v=1627028714","\/\/www.stream-sourcing.com\/cdn\/shop\/products\/dji-mavic-air-2-fly-more-combo-drone-named-side.jpg?v=1627028714","\/\/www.stream-sourcing.com\/cdn\/shop\/products\/dji-mavic-air-2-fly-more-combo-drone-top-view.jpg?v=1627028714","\/\/www.stream-sourcing.com\/cdn\/shop\/products\/dji-mavic-air-2-fly-more-combo-drone-with-mobile.jpg?v=1627028714","\/\/www.stream-sourcing.com\/cdn\/shop\/products\/dji-mavic-air-2-fly-more-combo-drone-with-mobile-hand.jpg?v=1627028715"],"featured_image":"\/\/www.stream-sourcing.com\/cdn\/shop\/products\/dji-mavic-air-2-fly-more-combo-drone-front.jpg?v=1627028713","options":["Title"],"media":[{"alt":"dji-mavic-air-2-fly-more-combo-drone-front","id":20538303774795,"position":1,"preview_image":{"aspect_ratio":1.762,"height":681,"width":1200,"src":"\/\/www.stream-sourcing.com\/cdn\/shop\/products\/dji-mavic-air-2-fly-more-combo-drone-front.jpg?v=1627028713"},"aspect_ratio":1.762,"height":681,"media_type":"image","src":"\/\/www.stream-sourcing.com\/cdn\/shop\/products\/dji-mavic-air-2-fly-more-combo-drone-front.jpg?v=1627028713","width":1200},{"alt":"dji-mavic-air-2-fly-more-combo-drone-package","id":20538303807563,"position":2,"preview_image":{"aspect_ratio":1.506,"height":797,"width":1200,"src":"\/\/www.stream-sourcing.com\/cdn\/shop\/products\/dji-mavic-air-2-fly-more-combo-drone-package.jpg?v=1627028713"},"aspect_ratio":1.506,"height":797,"media_type":"image","src":"\/\/www.stream-sourcing.com\/cdn\/shop\/products\/dji-mavic-air-2-fly-more-combo-drone-package.jpg?v=1627028713","width":1200},{"alt":"dji-mavic-air-2-fly-more-combo-drone-bottom","id":20538303840331,"position":3,"preview_image":{"aspect_ratio":1.644,"height":730,"width":1200,"src":"\/\/www.stream-sourcing.com\/cdn\/shop\/products\/dji-mavic-air-2-fly-more-combo-drone-bottom.jpg?v=1627028713"},"aspect_ratio":1.644,"height":730,"media_type":"image","src":"\/\/www.stream-sourcing.com\/cdn\/shop\/products\/dji-mavic-air-2-fly-more-combo-drone-bottom.jpg?v=1627028713","width":1200},{"alt":"dji-mavic-air-2-fly-more-combo-drone-open-side","id":20538303873099,"position":4,"preview_image":{"aspect_ratio":1.384,"height":867,"width":1200,"src":"\/\/www.stream-sourcing.com\/cdn\/shop\/products\/dji-mavic-air-2-fly-more-combo-drone-open-side.jpg?v=1627028713"},"aspect_ratio":1.384,"height":867,"media_type":"image","src":"\/\/www.stream-sourcing.com\/cdn\/shop\/products\/dji-mavic-air-2-fly-more-combo-drone-open-side.jpg?v=1627028713","width":1200},{"alt":"dji-mavic-air-2-fly-more-combo-drone-all-package","id":20538303905867,"position":5,"preview_image":{"aspect_ratio":1.453,"height":826,"width":1200,"src":"\/\/www.stream-sourcing.com\/cdn\/shop\/products\/dji-mavic-air-2-fly-more-combo-drone-all-package.jpg?v=1627028713"},"aspect_ratio":1.453,"height":826,"media_type":"image","src":"\/\/www.stream-sourcing.com\/cdn\/shop\/products\/dji-mavic-air-2-fly-more-combo-drone-all-package.jpg?v=1627028713","width":1200},{"alt":"dji mavic air 2 fly more combo drone closed side","id":20538303938635,"position":6,"preview_image":{"aspect_ratio":1.257,"height":955,"width":1200,"src":"\/\/www.stream-sourcing.com\/cdn\/shop\/products\/dji-mavic-air-2-fly-more-combo-drone-closed-side.jpg?v=1627028714"},"aspect_ratio":1.257,"height":955,"media_type":"image","src":"\/\/www.stream-sourcing.com\/cdn\/shop\/products\/dji-mavic-air-2-fly-more-combo-drone-closed-side.jpg?v=1627028714","width":1200},{"alt":"dji-mavic-air-2-fly-more-combo-drone-control","id":20538303971403,"position":7,"preview_image":{"aspect_ratio":1.317,"height":911,"width":1200,"src":"\/\/www.stream-sourcing.com\/cdn\/shop\/products\/dji-mavic-air-2-fly-more-combo-drone-control.jpg?v=1627028714"},"aspect_ratio":1.317,"height":911,"media_type":"image","src":"\/\/www.stream-sourcing.com\/cdn\/shop\/products\/dji-mavic-air-2-fly-more-combo-drone-control.jpg?v=1627028714","width":1200},{"alt":"dji-mavic-air-2-fly-more-combo-drone-front-top","id":20538304004171,"position":8,"preview_image":{"aspect_ratio":1.463,"height":820,"width":1200,"src":"\/\/www.stream-sourcing.com\/cdn\/shop\/products\/dji-mavic-air-2-fly-more-combo-drone-front-top.jpg?v=1627028714"},"aspect_ratio":1.463,"height":820,"media_type":"image","src":"\/\/www.stream-sourcing.com\/cdn\/shop\/products\/dji-mavic-air-2-fly-more-combo-drone-front-top.jpg?v=1627028714","width":1200},{"alt":null,"id":20538304036939,"position":9,"preview_image":{"aspect_ratio":1.359,"height":883,"width":1200,"src":"\/\/www.stream-sourcing.com\/cdn\/shop\/products\/dji-mavic-air-2-fly-more-combo-drone-named-side.jpg?v=1627028714"},"aspect_ratio":1.359,"height":883,"media_type":"image","src":"\/\/www.stream-sourcing.com\/cdn\/shop\/products\/dji-mavic-air-2-fly-more-combo-drone-named-side.jpg?v=1627028714","width":1200},{"alt":null,"id":20538304069707,"position":10,"preview_image":{"aspect_ratio":1.257,"height":955,"width":1200,"src":"\/\/www.stream-sourcing.com\/cdn\/shop\/products\/dji-mavic-air-2-fly-more-combo-drone-top-view.jpg?v=1627028714"},"aspect_ratio":1.257,"height":955,"media_type":"image","src":"\/\/www.stream-sourcing.com\/cdn\/shop\/products\/dji-mavic-air-2-fly-more-combo-drone-top-view.jpg?v=1627028714","width":1200},{"alt":null,"id":20538304102475,"position":11,"preview_image":{"aspect_ratio":1.2,"height":1000,"width":1200,"src":"\/\/www.stream-sourcing.com\/cdn\/shop\/products\/dji-mavic-air-2-fly-more-combo-drone-with-mobile.jpg?v=1627028714"},"aspect_ratio":1.2,"height":1000,"media_type":"image","src":"\/\/www.stream-sourcing.com\/cdn\/shop\/products\/dji-mavic-air-2-fly-more-combo-drone-with-mobile.jpg?v=1627028714","width":1200},{"alt":null,"id":20538304135243,"position":12,"preview_image":{"aspect_ratio":1.292,"height":929,"width":1200,"src":"\/\/www.stream-sourcing.com\/cdn\/shop\/products\/dji-mavic-air-2-fly-more-combo-drone-with-mobile-hand.jpg?v=1627028715"},"aspect_ratio":1.292,"height":929,"media_type":"image","src":"\/\/www.stream-sourcing.com\/cdn\/shop\/products\/dji-mavic-air-2-fly-more-combo-drone-with-mobile-hand.jpg?v=1627028715","width":1200}],"requires_selling_plan":false,"selling_plan_groups":[],"content":"\u003ch1 style=\"text-align: center;\"\u003e\u003cstrong\u003eDJI Mavic Air 2 - giving you a new photos and video recording experience\u003c\/strong\u003e\u003c\/h1\u003e\u003cdiv class=\"desc\"\u003e\n\u003ch2 style=\"text-align: center;\"\u003eThe DJI Mavic Air 2 pushes power and portability to new heights, with advanced capabilities packed into a small package. \u003c\/h2\u003e\n\u003cstyle\u003e\u003c!--\n.embed-container { position: relative; padding-bottom: 56.25%; height: 0; overflow: hidden; max-width: 100%; } .embed-container iframe, .embed-container object, .embed-container embed { position: absolute; top: 0; left: 0; width: 100%; height: 100%; }\n--\u003e\u003c\/style\u003e\n\u003cdiv style=\"text-align: center;\" class=\"embed-container\"\u003e\u003ciframe src=\"https:\/\/www.youtube.com\/embed\/StDjsvNFru0\" allowfullscreen=\"\" frameborder=\"0\"\u003e\u003c\/iframe\u003e\u003c\/div\u003e\n\u003cdiv style=\"text-align: center;\"\u003e \u003c\/div\u003e\n\u003ch3 style=\"text-align: center;\"\u003e\u003cspan style=\"font-weight: 400;\"\u003eAerial masterpieces are within reach thanks to intelligent shooting functions and superb image quality. You can raise your game while fully enjoying the creative process with safer, smarter flight.\u003c\/span\u003e\u003c\/h3\u003e\n\u003ch2 style=\"text-align: center;\"\u003e\u003cstrong\u003eFeature\u003c\/strong\u003e\u003c\/h2\u003e\n\u003cdiv style=\"text-align: center;\"\u003e\u003c\/div\u003e\n\u003cdiv style=\"text-align: center;\"\u003e\n\u003ctable\u003e\n\u003ctbody\u003e\n\u003ctr\u003e\n\u003ctd style=\"text-align: center;\"\u003e\n\u003cp\u003e\u003cstrong\u003eUltra-Clear Details \u003c\/strong\u003e\u003c\/p\u003e\n\u003cp\u003e\u003cspan style=\"font-weight: 400;\"\u003e1\/2-Inch Image Sensor \u003c\/span\u003e\u003c\/p\u003e\n\u003cp\u003e\u003cspan style=\"font-weight: 400;\"\u003e4K\/60fps Video \u003c\/span\u003e\u003c\/p\u003e\n\u003cp\u003e\u003cspan style=\"font-weight: 400;\"\u003e48MP Photo\u003c\/span\u003e\u003c\/p\u003e\n\u003c\/td\u003e\n\u003ctd style=\"text-align: center;\"\u003e\n\u003cp\u003e\u003cstrong\u003eEnhanced HDR \u003c\/strong\u003e\u003c\/p\u003e\n\u003cp\u003e\u003cspan style=\"font-weight: 400;\"\u003ePhoto \u003c\/span\u003e\u003c\/p\u003e\n\u003cp\u003e\u003cspan style=\"font-weight: 400;\"\u003eVideo \u003c\/span\u003e\u003c\/p\u003e\n\u003cp\u003e\u003cspan style=\"font-weight: 400;\"\u003ePanorama\u003c\/span\u003e\u003c\/p\u003e\n\u003c\/td\u003e\n\u003c\/tr\u003e\n\u003ctr\u003e\n\u003ctd style=\"text-align: center;\"\u003e\n\u003cp\u003e\u003cstrong\u003eFly Smarter and Safer \u003c\/strong\u003e\u003c\/p\u003e\n\u003cp\u003e\u003cspan style=\"font-weight: 400;\"\u003eAPAS 3.0 Obstacle Avoidance\u003c\/span\u003e\u003c\/p\u003e\n\u003c\/td\u003e\n\u003ctd style=\"text-align: center;\"\u003e\n\u003cp\u003e\u003cstrong\u003eFly Farther, See Clearer \u003c\/strong\u003e\u003c\/p\u003e\n\u003cp\u003e\u003cspan style=\"font-weight: 400;\"\u003eOcuSync 2.0 10km 1080p\/30fps Video Transmission\u003c\/span\u003e\u003c\/p\u003e\n\u003c\/td\u003e\n\u003c\/tr\u003e\n\u003ctr\u003e\n\u003ctd style=\"text-align: center;\"\u003e\n\u003cp\u003e\u003cstrong\u003eFly Longer \u003c\/strong\u003e\u003c\/p\u003e\n\u003cp\u003e\u003cspan\u003e34-Min Max Flight Time \u003c\/span\u003e\u003c\/p\u003e\n\u003cp\u003e\u003cspan\u003e240-Min Max RC Battery Life\u003c\/span\u003e\u003c\/p\u003e\n\u003c\/td\u003e\n\u003ctd style=\"text-align: center;\"\u003e\n\u003cp\u003e\u003cstrong\u003eCinematic Content \u003c\/strong\u003e\u003c\/p\u003e\n\u003cp\u003e\u003cspan\u003e8K Hyperlapse \u003c\/span\u003e\u003c\/p\u003e\n\u003cp\u003e\u003cspan\u003eQuickShots\u003c\/span\u003e\u003c\/p\u003e\n\u003c\/td\u003e\n\u003c\/tr\u003e\n\u003c\/tbody\u003e\n\u003c\/table\u003e\n\u003c\/div\u003e\n\u003cdiv style=\"text-align: center;\"\u003e\u003cb\u003e\u003cimg alt=\"dji-mavic-air-2-fly-more-combo-drone-content-feature-all\" src=\"https:\/\/cdn.shopify.com\/s\/files\/1\/2532\/7020\/files\/dji-mavic-air-2-fly-more-combo-drone-content-feature-all.jpg?v=1626148044\"\u003e\u003c\/b\u003e\u003c\/div\u003e\n\u003ch3 style=\"text-align: center;\"\u003e\u003cspan style=\"color: #ff8000;\"\u003e\u003cb\u003e\u003c\/b\u003e\u003c\/span\u003e\u003c\/h3\u003e\n\u003ch3 style=\"text-align: center;\"\u003e\u003cspan style=\"color: #ff8000;\"\u003e\u003cb\u003eHigh Image Quality\u003c\/b\u003e\u003c\/span\u003e\u003c\/h3\u003e\n\u003cdiv style=\"text-align: center;\"\u003e\u003cb\u003eEpic is Simple, with 4K\/60fps Video \u003c\/b\u003e\u003c\/div\u003e\n\u003cdiv style=\"text-align: center;\"\u003e\u003cspan style=\"font-weight: 400;\"\u003eFootage Master creative aerial views with 4K\/60fps video that is effortlessly fluid. For post-processing, the D-Cinelike flat color profile maintains more information. The HEVC (H.265) video codec records more visual information, uses less storage, and keeps your footage's dynamic range and quality, delivering next-level content.\u003cbr data-mce-fragment=\"1\"\u003e\u003c\/span\u003e\u003c\/div\u003e\n\u003cdiv style=\"text-align: center;\"\u003e\u003cspan style=\"font-weight: 400;\"\u003e\u003cimg alt=\"dji-mavic-air-2-fly-more-combo-drone-content-feature-1-image-quality\" src=\"https:\/\/cdn.shopify.com\/s\/files\/1\/2532\/7020\/files\/dji-mavic-air-2-fly-more-combo-drone-content-feature-1-image-quality.jpg?v=1626148092\"\u003e\u003c\/span\u003e\u003c\/div\u003e\n\u003ch3 style=\"text-align: center;\"\u003e\u003cspan style=\"color: #ff8000;\"\u003e\u003cb\u003e\u003c\/b\u003e\u003c\/span\u003e\u003c\/h3\u003e\n\u003ch3 style=\"text-align: center;\"\u003e\u003cspan style=\"color: #ff8000;\"\u003e\u003cb\u003eHDR Video\u003c\/b\u003e\u003c\/span\u003e\u003c\/h3\u003e\n\u003cdiv style=\"text-align: center;\"\u003e\u003cb\u003eBy default, everything is dynamic.\u003cbr data-mce-fragment=\"1\"\u003e\u003c\/b\u003e\u003c\/div\u003e\n\u003cdiv style=\"text-align: center;\"\u003e\u003cspan style=\"font-weight: 400;\"\u003eA high-performance Quad Bayer image sensor is the key to outstanding HDR video. A single frame captures light and dark details by separating exposure levels in different places. The photos are stacked to create a picture with a higher dynamic range that is vibrant, balanced, and appealing.\u003c\/span\u003e\u003c\/div\u003e\n\u003cdiv style=\"text-align: center;\"\u003e\u003cspan style=\"font-weight: 400;\"\u003e\u003cimg alt=\"dji-mavic-air-2-fly-more-combo-drone-content-feature-2-hdr-video\" src=\"https:\/\/cdn.shopify.com\/s\/files\/1\/2532\/7020\/files\/dji-mavic-air-2-fly-more-combo-drone-content-feature-2-hdr-video.jpg?v=1626148113\"\u003e\u003c\/span\u003e\u003c\/div\u003e\n\u003ch3 style=\"text-align: center;\"\u003e\u003cspan style=\"color: #ff8000;\"\u003e\u003cb\u003e\u003c\/b\u003e\u003c\/span\u003e\u003c\/h3\u003e\n\u003ch3 style=\"text-align: center;\"\u003e\u003cspan style=\"color: #ff8000;\"\u003e\u003cb\u003eAll in the Details\u003c\/b\u003e\u003c\/span\u003e\u003c\/h3\u003e\n\u003cdiv style=\"text-align: center;\"\u003e\u003cb\u003e48MP Photos\u003c\/b\u003e\u003c\/div\u003e\n\u003cdiv style=\"text-align: center;\"\u003e\u003cspan style=\"font-weight: 400;\"\u003eMavic Air 2 has a 1\/2-inch CMOS sensor that captures 48MP photographs. Prepare to take your airborne content to new heights.\u003cbr data-mce-fragment=\"1\"\u003eThe 48MP camera has a high megapixel count, which means that even when zooming in on an image, you can see vivid details.\u003c\/span\u003e\u003c\/div\u003e\n\u003cdiv style=\"text-align: center;\"\u003e\u003cspan style=\"font-weight: 400;\"\u003e\u003cimg alt=\"dji-mavic-air-2-fly-more-combo-drone-content-feature-3-48mp\" src=\"https:\/\/cdn.shopify.com\/s\/files\/1\/2532\/7020\/files\/dji-mavic-air-2-fly-more-combo-drone-content-feature-3-48mp.jpg?v=1626148140\"\u003e\u003c\/span\u003e\u003c\/div\u003e\n\u003ch3 style=\"text-align: center;\"\u003e\u003cspan style=\"color: #ff8000;\"\u003e\u003cb\u003e\u003c\/b\u003e\u003c\/span\u003e\u003c\/h3\u003e\n\u003ch3 style=\"text-align: center;\"\u003e\u003cspan style=\"color: #ff8000;\"\u003e\u003cb\u003eOptimized Capture\u003c\/b\u003e\u003c\/span\u003e\u003c\/h3\u003e\n\u003cdiv style=\"text-align: center;\"\u003e\u003cb\u003eSmartPhoto\u003c\/b\u003e\u003c\/div\u003e\n\u003cdiv style=\"text-align: center;\"\u003e\u003cspan style=\"font-weight: 400;\"\u003eSmartPhoto on the Mavic Air 2 combines scene recognition, HyperLight, and HDR into a single setting for optimal results. Scene recognition optimizes camera parameters for different scenes and offers intelligent recognition of five different categories: sunsets, sky, grass, snow, and trees. The resolution of photos taken in SmartPhoto mode is 12 MP.\u003c\/span\u003e\u003c\/div\u003e\n\u003cdiv style=\"text-align: center;\"\u003e\n\u003ctable width=\"100%\"\u003e\n\u003ctbody\u003e\n\u003ctr\u003e\n\u003ctd\u003e\n\u003cp\u003e\u003cimg alt=\"dji-mavic-air-2-fly-more-combo-drone-content-feature-4-1-Strong-Lighting-Conditions\" src=\"https:\/\/cdn.shopify.com\/s\/files\/1\/2532\/7020\/files\/dji-mavic-air-2-fly-more-combo-drone-content-feature-4-1-Strong-Lighting-Conditions.jpg?v=1626148348\"\u003e\u003c\/p\u003e\n\u003c\/td\u003e\n\u003ctd\u003e\u003cimg alt=\"dji-mavic-air-2-fly-more-combo-drone-content-feature-4-2-Weak-Lighting-Conditions\" src=\"https:\/\/cdn.shopify.com\/s\/files\/1\/2532\/7020\/files\/dji-mavic-air-2-fly-more-combo-drone-content-feature-4-2-Weak-Lighting-Conditions.jpg?v=1626148384\"\u003e\u003c\/td\u003e\n\u003c\/tr\u003e\n\u003ctr\u003e\n\u003ctd\u003e\n\u003cp data-mce-fragment=\"1\"\u003e\u003cstrong\u003eStrong Lighting\u003c\/strong\u003e\u003c\/p\u003e\n\u003cp data-mce-fragment=\"1\"\u003eConditions HyperLight improves the sharpness of images taken in low-light circumstances by reducing noise.\u003c\/p\u003e\n\u003c\/td\u003e\n\u003ctd\u003e\n\u003cp\u003e\u003cstrong\u003eWeak Lighting Conditions\u003c\/strong\u003e\u003c\/p\u003e\n\u003cp data-mce-fragment=\"1\"\u003e\u003cspan data-mce-fragment=\"1\"\u003eHyperLight improves the sharpness of images taken in low-light circumstances by reducing noise.\u003c\/span\u003e\u003c\/p\u003e\n\u003c\/td\u003e\n\u003c\/tr\u003e\n\u003c\/tbody\u003e\n\u003c\/table\u003e\n\u003c\/div\u003e\n\u003cdiv style=\"text-align: center;\"\u003e \u003c\/div\u003e\n\u003cdiv style=\"text-align: center;\"\u003e \u003c\/div\u003e\n\u003ch3 style=\"text-align: center;\"\u003e\u003cspan style=\"color: #ff8000;\"\u003e\u003cb\u003eHDR Panorama\u003c\/b\u003e\u003c\/span\u003e\u003c\/h3\u003e\n\u003cdiv style=\"text-align: center;\"\u003e\u003cb\u003eLook at the Big Picture\u003c\/b\u003e\u003c\/div\u003e\n\u003cdiv style=\"text-align: center;\"\u003e\u003cspan style=\"font-weight: 400;\"\u003eThe Mavic Air 2 has DJI's most sophisticated panorama mode, with a larger dynamic range and vibrant, amazingly realistic colors.\u003c\/span\u003e\u003c\/div\u003e\n\u003cdiv style=\"text-align: center;\"\u003e\u003cspan style=\"font-weight: 400;\"\u003e\u003cimg alt=\"dji-mavic-air-2-fly-more-combo-drone-content-feature-5-HDR-Panorama\" src=\"https:\/\/cdn.shopify.com\/s\/files\/1\/2532\/7020\/files\/dji-mavic-air-2-fly-more-combo-drone-content-feature-5-HDR-Panorama.jpg?v=1626148445\"\u003e\u003c\/span\u003e\u003c\/div\u003e\n\u003ch3 style=\"text-align: center;\"\u003e\u003cspan style=\"color: #ff8000;\"\u003e\u003cb\u003e\u003c\/b\u003e\u003c\/span\u003e\u003c\/h3\u003e\n\u003ch3 style=\"text-align: center;\"\u003e\u003cspan style=\"color: #ff8000;\"\u003e\u003cb\u003eIntelligent Features\u003c\/b\u003e\u003c\/span\u003e\u003c\/h3\u003e\n\u003cdiv style=\"text-align: center;\"\u003e\u003cb\u003eObtaining Cinematic Shots\u003c\/b\u003e\u003c\/div\u003e\n\u003cdiv style=\"text-align: center;\"\u003e\u003cspan style=\"font-weight: 400;\"\u003eFor breathtaking results, the Mavic Air 2 combines a powerful camera with intelligent shooting modes. Aerial photography has never been easier to create.\u003c\/span\u003e\u003c\/div\u003e\n\u003cdiv style=\"text-align: center;\"\u003e\u003cspan style=\"font-weight: 400;\"\u003e\u003cimg alt=\"dji-mavic-air-2-fly-more-combo-drone-content-feature-6-Intelligent-Features\" src=\"https:\/\/cdn.shopify.com\/s\/files\/1\/2532\/7020\/files\/dji-mavic-air-2-fly-more-combo-drone-content-feature-6-Intelligent-Features.jpg?v=1626148481\"\u003e\u003c\/span\u003e\u003c\/div\u003e\n\u003ch3 style=\"text-align: center;\"\u003e\u003cspan style=\"color: #ff8000;\"\u003e\u003cb\u003e\u003c\/b\u003e\u003c\/span\u003e\u003c\/h3\u003e\n\u003ch3 style=\"text-align: center;\"\u003e\u003cspan style=\"color: #ff8000;\"\u003e\u003cb\u003eFocusTrack\u003c\/b\u003e\u003c\/span\u003e\u003c\/h3\u003e\n\u003cdiv style=\"text-align: center;\"\u003e\u003cb\u003eMaster the Skies\u003c\/b\u003e\u003c\/div\u003e\n\u003cdiv style=\"text-align: center;\"\u003e\u003cspan style=\"font-weight: 400;\"\u003eWith FocusTrack, capturing professional-quality footage is a breeze. Active Track 3.0, Spotlight 2.0, and Point of Interest 3.0 are among the easy-to-use intelligent tracking modes that let you express yourself.\u003c\/span\u003e\u003c\/div\u003e\n\u003cdiv style=\"text-align: center;\"\u003e \u003c\/div\u003e\n\u003cdiv style=\"text-align: center;\"\u003e\n\u003ctable width=\"100%\" data-mce-fragment=\"1\"\u003e\n\u003ctbody data-mce-fragment=\"1\"\u003e\n\u003ctr data-mce-fragment=\"1\"\u003e\n\u003ctd data-mce-fragment=\"1\"\u003e\n\u003cp\u003e \u003c\/p\u003e\n\u003cdiv style=\"text-align: left;\"\u003e\u003cimg style=\"float: none;\" alt=\"dji-mavic-air-2-fly-more-combo-drone-content-feature-7-1-Spotlight 2.0\" src=\"https:\/\/cdn.shopify.com\/s\/files\/1\/2532\/7020\/files\/dji-mavic-air-2-fly-more-combo-drone-content-feature-7-1-Spotlight_2.0.jpg?v=1626148537\"\u003e\u003c\/div\u003e\n\u003c\/td\u003e\n\u003ctd data-mce-fragment=\"1\"\u003e\n\u003cp\u003e\u003cimg src=\"https:\/\/cdn.shopify.com\/s\/files\/1\/2532\/7020\/files\/dji-mavic-air-2-fly-more-combo-drone-content-feature-7-2-ActiveTrack_3.0.jpg?v=1626148709\" alt=\"dji-mavic-air-2-fly-more-combo-drone-content-feature-7-2-ActiveTrack 3.0\" data-mce-fragment=\"1\" data-mce-src=\"https:\/\/cdn.shopify.com\/s\/files\/1\/2532\/7020\/files\/dji-mavic-air-2-fly-more-combo-drone-content-feature-7-2-ActiveTrack_3.0.jpg?v=1626148709\"\u003e\u003cbr\u003e\u003c\/p\u003e\n\u003c\/td\u003e\n\u003ctd data-mce-fragment=\"1\"\u003e\n\u003cp\u003e\u003cimg src=\"https:\/\/cdn.shopify.com\/s\/files\/1\/2532\/7020\/files\/dji-mavic-air-2-fly-more-combo-drone-content-feature-7-3-POI_3.0.jpg?v=1626148918\" alt=\"dji-mavic-air-2-fly-more-combo-drone-content-feature-7-3-POI 3.0\" data-mce-fragment=\"1\" data-mce-src=\"https:\/\/cdn.shopify.com\/s\/files\/1\/2532\/7020\/files\/dji-mavic-air-2-fly-more-combo-drone-content-feature-7-3-POI_3.0.jpg?v=1626148918\"\u003e\u003cbr\u003e\u003c\/p\u003e\n\u003c\/td\u003e\n\u003c\/tr\u003e\n\u003ctr data-mce-fragment=\"1\"\u003e\n\u003ctd data-mce-fragment=\"1\"\u003e\n\u003cp\u003e\u003cstrong\u003eSpotlight 2.0\u003c\/strong\u003e\u003c\/p\u003e\n\u003cp\u003eWith this handy mode, you may fly around freely while the camera remains fixed on the subject. Simply choose your target and take off.\u003c\/p\u003e\n\u003c\/td\u003e\n\u003ctd data-mce-fragment=\"1\"\u003e\n\u003cp\u003e\u003cstrong\u003eActiveTrack 3.0\u003c\/strong\u003e\u003c\/p\u003e\n\u003cp\u003eWith the latest version of DJI's ActiveTrack technology, following subjects while avoiding obstacles has never been easier. This technique keeps your subject in the center of the screen, even if they go behind a tree, with superior pathfinding and a faster and more accurate prediction of lost subjects.\u003c\/p\u003e\n\u003c\/td\u003e\n\u003ctd data-mce-fragment=\"1\"\u003e\n\u003cp\u003e\u003cstrong\u003ePOI 3.0\u003c\/strong\u003e\u003c\/p\u003e\n\u003cp\u003ePOI 3.0 enhances the capabilities of POI 2.0, particularly in terms of flat surface recognition. This updated functionality avoids the problem that POI 2.0 had with losing the target during tracking. POI 3.0 now has the ability to track people, cars, and boats in real time.\u003c\/p\u003e\n\u003c\/td\u003e\n\u003c\/tr\u003e\n\u003c\/tbody\u003e\n\u003c\/table\u003e\n\u003c\/div\u003e\n\u003ch3 style=\"text-align: center;\"\u003e\u003cb\u003e\u003cspan style=\"color: #ff8000;\"\u003e8K Hyperlapse\u003c\/span\u003e\u003c\/b\u003e\u003c\/h3\u003e\n\u003cdiv style=\"text-align: center;\"\u003e\u003cb\u003eTime and Movement\u003c\/b\u003e\u003c\/div\u003e\n\u003cdiv style=\"text-align: center;\"\u003e\u003cspan style=\"font-weight: 400;\"\u003eHyperlapse in 8K is supported by the Mavic Air 2, allowing you to warp time and space for particularly spectacular film. Best of all, you can get this photo without using any complicated post-production techniques. Choose from Free, Circle, Course Lock, and Waypoint modes, then point and shoot using the DJI Fly app. *8K resolution is only available in Free and Waypoint modes.\u003c\/span\u003e\u003c\/div\u003e\n\u003cdiv style=\"text-align: center;\"\u003e\n\u003cul\u003e\n\u003cli style=\"font-weight: 400;\"\u003e\u003cspan style=\"font-weight: 400;\"\u003eCourse Lock\u003c\/span\u003e\u003c\/li\u003e\n\u003cli style=\"font-weight: 400;\"\u003e\u003cspan style=\"font-weight: 400;\"\u003eFree\u003c\/span\u003e\u003c\/li\u003e\n\u003cli style=\"font-weight: 400;\"\u003e\u003cspan style=\"font-weight: 400;\"\u003eWaypoint\u003c\/span\u003e\u003c\/li\u003e\n\u003cli style=\"font-weight: 400;\"\u003e\u003cspan style=\"font-weight: 400;\"\u003eCircle\u003c\/span\u003e\u003c\/li\u003e\n\u003c\/ul\u003e\n\u003c\/div\u003e\n\u003cdiv style=\"text-align: center;\"\u003e\n\u003cimg src=\"https:\/\/cdn.shopify.com\/s\/files\/1\/2532\/7020\/files\/dji-mavic-air-2-fly-more-combo-drone-content-feature-8-2-free.jpg?v=1626148985\" alt=\"dji-mavic-air-2-fly-more-combo-drone-content-feature-8-2-free\" data-mce-fragment=\"1\" data-mce-src=\"https:\/\/cdn.shopify.com\/s\/files\/1\/2532\/7020\/files\/dji-mavic-air-2-fly-more-combo-drone-content-feature-8-2-free.jpg?v=1626148985\"\u003e\u003cbr\u003e\n\u003c\/div\u003e\n\u003cdiv style=\"text-align: center;\"\u003e \u003c\/div\u003e\n\u003ch3 style=\"text-align: center;\"\u003e\u003cspan style=\"color: #ff8000;\"\u003e\u003cb\u003eQuickShots\u003c\/b\u003e\u003c\/span\u003e\u003c\/h3\u003e\n\u003cdiv style=\"text-align: center;\"\u003e\u003cb\u003eImagination Simplified\u003c\/b\u003e\u003c\/div\u003e\n\u003cdiv style=\"text-align: center;\"\u003e\u003cspan style=\"font-weight: 400;\"\u003eQuickShots allows you to capture cinematic video snippets automatically. Mavic Air 2 prepares and flies a difficult aerial route for a professional-quality photo with just a few touches. With super-intuitive Story templates, you can add music, effects, and filters to your creation before sharing it on social media.\u003c\/span\u003e\u003c\/div\u003e\n\u003cdiv style=\"text-align: center;\"\u003e\n\u003cul\u003e\n\u003cli style=\"font-weight: 400;\"\u003e\u003cspan style=\"font-weight: 400;\"\u003eDronie\u003c\/span\u003e\u003c\/li\u003e\n\u003cli style=\"font-weight: 400;\"\u003e\u003cspan style=\"font-weight: 400;\"\u003eCircle\u003c\/span\u003e\u003c\/li\u003e\n\u003cli style=\"font-weight: 400;\"\u003e\u003cspan style=\"font-weight: 400;\"\u003eHelix\u003c\/span\u003e\u003c\/li\u003e\n\u003cli style=\"font-weight: 400;\"\u003e\u003cspan style=\"font-weight: 400;\"\u003eRocket\u003c\/span\u003e\u003c\/li\u003e\n\u003cli style=\"font-weight: 400;\"\u003e\u003cspan style=\"font-weight: 400;\"\u003eBoomerang\u003c\/span\u003e\u003c\/li\u003e\n\u003cli style=\"font-weight: 400;\"\u003e\u003cspan style=\"font-weight: 400;\"\u003eAsteroid\u003c\/span\u003e\u003c\/li\u003e\n\u003c\/ul\u003e\n\u003c\/div\u003e\n\u003ch3 style=\"text-align: center;\"\u003e\u003cspan style=\"color: #ff8000;\"\u003e\u003cb\u003e\u003c\/b\u003e\u003c\/span\u003e\u003c\/h3\u003e\n\u003ch3 style=\"text-align: center;\"\u003e\u003cspan style=\"color: #ff8000;\"\u003e\u003cb\u003eFlight and Safety\u003c\/b\u003e\u003c\/span\u003e\u003c\/h3\u003e\n\u003cdiv style=\"text-align: center;\"\u003e\u003cb\u003eSafer Flight for Stunning Content\u003c\/b\u003e\u003c\/div\u003e\n\u003cdiv style=\"text-align: center;\"\u003e\u003cspan style=\"color: #ffffff;\"\u003e\u003cb\u003e.\u003c\/b\u003e\u003c\/span\u003e\u003c\/div\u003e\n\u003ch3 style=\"text-align: center;\"\u003e\u003cspan style=\"color: #ff8000;\"\u003e\u003cb\u003e\u003c\/b\u003e\u003c\/span\u003e\u003c\/h3\u003e\n\u003ch3 style=\"text-align: center;\"\u003e\u003cspan style=\"color: #ff8000;\"\u003e\u003cb\u003eOcuSync 2.0\u003c\/b\u003e\u003c\/span\u003e\u003c\/h3\u003e\n\u003cdiv style=\"text-align: center;\"\u003e\u003cb\u003eThe Sky’s the Limit\u003c\/b\u003e\u003c\/div\u003e\n\u003cdiv style=\"text-align: center;\"\u003e\u003cspan style=\"font-weight: 400;\"\u003eOcuSync 2.0 can give a 1080p FHD livestream directly from the drone's camera and has a video transmission distance of up to 10 kilometers. Enjoy greater freedom when it comes to exploring and more clarity when it comes to capturing the perfect photo. \u003cbr data-mce-fragment=\"1\"\u003e\u003cbr data-mce-fragment=\"1\"\u003e*When unobstructed, interference-free, and FCC-compliant. The maximum flying range specification is a proxy for the strength and robustness of the radio link.\u003c\/span\u003e\u003c\/div\u003e\n\u003cdiv style=\"text-align: center;\"\u003e\u003cspan style=\"font-weight: 400;\"\u003e\u003cimg alt=\"dji-mavic-air-2-fly-more-combo-drone-content-feature-9-OcuSync 2.0\" src=\"https:\/\/cdn.shopify.com\/s\/files\/1\/2532\/7020\/files\/dji-mavic-air-2-fly-more-combo-drone-content-feature-9-OcuSync_2.0.jpg?v=1626149011\"\u003e\u003c\/span\u003e\u003c\/div\u003e\n\u003cdiv style=\"text-align: center;\"\u003e \u003c\/div\u003e\n\u003ch3 style=\"text-align: center;\"\u003e\u003cspan style=\"color: #ff8000;\"\u003e\u003cb\u003e2.4\/5.8GHz Dual Frequency\u003c\/b\u003e\u003c\/span\u003e\u003c\/h3\u003e\n\u003cdiv style=\"text-align: center;\"\u003e\u003cb\u003eSmooth Flight, Reliable Signal\u003cbr data-mce-fragment=\"1\"\u003e\u003c\/b\u003e\u003c\/div\u003e\n\u003cdiv style=\"text-align: center;\"\u003e\u003cspan style=\"font-weight: 400;\"\u003eThe Mavic Air 2 has dual-frequency connectivity (2.4\/5.8GHz) and automatically shifts to the best channel with the least interference in real time. This increases flight safety by greatly improving the aircraft's anti-interference ability in adverse circumstances. \u003cbr data-mce-fragment=\"1\"\u003e\u003cbr data-mce-fragment=\"1\"\u003e*Some countries do not accept 5.8 GHz transmission due to local laws.\u003c\/span\u003e\u003c\/div\u003e\n\u003cdiv style=\"text-align: center;\"\u003e\u003cspan style=\"font-weight: 400; color: #ffffff;\"\u003e.\u003c\/span\u003e\u003c\/div\u003e\n\u003ch3 style=\"text-align: center;\"\u003e\u003cspan style=\"color: #ff8000;\"\u003e\u003cb\u003e\u003c\/b\u003e\u003c\/span\u003e\u003c\/h3\u003e\n\u003ch3 style=\"text-align: center;\"\u003e\u003cspan style=\"color: #ff8000;\"\u003e\u003cb\u003eBattery and Flight\u003c\/b\u003e\u003c\/span\u003e\u003c\/h3\u003e\n\u003cdiv style=\"text-align: center;\"\u003e\u003cb\u003eFly Longer\u003c\/b\u003e\u003c\/div\u003e\n\u003cdiv style=\"text-align: center;\"\u003e\u003cspan style=\"font-weight: 400;\"\u003eWith a battery life of up to 34 minutes and a maximum flight speed of 68 kph in Sport mode, you'll be able to stay in the air for as long as you want to obtain the ideal image. \u003cbr data-mce-fragment=\"1\"\u003e\u003cbr data-mce-fragment=\"1\"\u003e*Flight time was recorded at a 9° angle and a speed of 5.1 m\/s in a windless environment.\u003c\/span\u003e\u003c\/div\u003e\n\u003cdiv style=\"text-align: center;\"\u003e \u003c\/div\u003e\n\u003cdiv style=\"text-align: center;\"\u003e\u003cspan style=\"font-weight: 400;\"\u003e\u003cimg alt=\"dji-mavic-air-2-fly-more-combo-drone-content-feature-10-battery\" src=\"https:\/\/cdn.shopify.com\/s\/files\/1\/2532\/7020\/files\/dji-mavic-air-2-fly-more-combo-drone-content-feature-10-battery.jpg?v=1626149034\"\u003e\u003c\/span\u003e\u003c\/div\u003e\n\u003ch3 style=\"text-align: center;\"\u003e\u003cspan style=\"color: #ff8000;\"\u003e\u003cb\u003eObstacle Avoidance\u003c\/b\u003e\u003c\/span\u003e\u003c\/h3\u003e\n\u003cdiv style=\"text-align: center;\"\u003e\u003cb\u003eFly Safer\u003c\/b\u003e\u003c\/div\u003e\n\u003cdiv style=\"text-align: center;\"\u003e\u003cspan style=\"font-weight: 400;\"\u003eForward, backward, and downward are the three directions in which Mavic Air 2 observes its surroundings. An auxiliary light improves visibility, and obstacle avoidance adds an extra layer of security that's great for pushing the boundaries of what's possible.\u003c\/span\u003e\u003c\/div\u003e\n\u003cdiv style=\"text-align: center;\"\u003e\n\u003ctable\u003e\n\u003ctbody\u003e\n\u003ctr\u003e\n\u003ctd\u003e\n\u003cp\u003e\u003cb\u003eForward\u003c\/b\u003e\u003cspan style=\"font-weight: 400;\"\u003e: Vision sensor accurate up to 22 meters\u003c\/span\u003e\u003c\/p\u003e\n\u003c\/td\u003e\n\u003c\/tr\u003e\n\u003ctr\u003e\n\u003ctd\u003e\n\u003cp\u003e\u003cb\u003eBackward\u003c\/b\u003e\u003cspan style=\"font-weight: 400;\"\u003e: Vision sensor accurate up to 23.6 meters\u003c\/span\u003e\u003c\/p\u003e\n\u003c\/td\u003e\n\u003c\/tr\u003e\n\u003ctr\u003e\n\u003ctd\u003e\n\u003cp\u003e\u003cb\u003eDownward\u003c\/b\u003e\u003cspan style=\"font-weight: 400;\"\u003e: Vision sensor, infrared sensor. The auxiliary light assist with visual positioning, safe landing, and visibility in the air. It can be turned on and off manually.\u003c\/span\u003e\u003c\/p\u003e\n\u003c\/td\u003e\n\u003c\/tr\u003e\n\u003c\/tbody\u003e\n\u003c\/table\u003e\n\u003c\/div\u003e\n\u003cdiv style=\"text-align: center;\"\u003e\u003cspan style=\"color: #ffffff;\"\u003e\u003cb\u003e.\u003c\/b\u003e\u003c\/span\u003e\u003c\/div\u003e\n\u003cdiv style=\"text-align: center;\"\u003e\u003cb\u003e\u003c\/b\u003e\u003c\/div\u003e\n\u003cdiv style=\"text-align: center;\"\u003e\u003cb\u003eAPAS 3.0\u003c\/b\u003e\u003c\/div\u003e\n\u003cdiv style=\"text-align: center;\"\u003e\u003cspan style=\"font-weight: 400;\"\u003eIn difficult settings, Advanced Pilot Assistance Systems (APAS) 3.0 employs advanced mapping technology for smooth following and dependable obstacle avoidance. When compared to earlier generations, obstacle avoidance performance and autonomous flight planning have improved substantially, boosting safety and enabling more options.\u003c\/span\u003e\u003c\/div\u003e\n\u003cdiv style=\"text-align: center;\"\u003e\u003cspan style=\"font-weight: 400;\"\u003e*While recording in 4K at 60, 50, and 48 fps, 2.7K at 60, 50, and 48 fps, and 1080p at 120 and 240 fps, APAS 3.0 and FocusTrack are not available.\u003cbr data-mce-fragment=\"1\"\u003e\u003c\/span\u003e\u003c\/div\u003e\n\u003cstyle\u003e\u003c!--\n.embed-container { position: relative; padding-bottom: 56.25%; height: 0; overflow: hidden; max-width: 100%; } .embed-container iframe, .embed-container object, .embed-container embed { position: absolute; top: 0; left: 0; width: 100%; height: 100%; }\n--\u003e\u003c\/style\u003e\n\u003cdiv style=\"text-align: center;\" class=\"embed-container\"\u003e\u003ciframe src=\"https:\/\/www.youtube.com\/embed\/IwoyGb-NWDs\" frameborder=\"0\" allowfullscreen=\"\"\u003e\u003c\/iframe\u003e\u003c\/div\u003e\n\u003cdiv style=\"text-align: center;\"\u003e \u003c\/div\u003e\n\u003ch3 style=\"text-align: center;\"\u003e\u003cspan style=\"color: #ff8000;\"\u003e\u003cb\u003eDJI Fly App\u003c\/b\u003e\u003c\/span\u003e\u003c\/h3\u003e\n\u003cdiv style=\"text-align: center;\"\u003e\u003cb\u003eEffortless Editing\u003c\/b\u003e\u003c\/div\u003e\n\u003cdiv style=\"text-align: center;\"\u003e\u003cspan style=\"font-weight: 400;\"\u003eThe DJI Fly app makes creating perfect films easier than ever before. It incorporates the DJI Mimo app's editing suite, giving users access to manual settings, advanced functionalities, and intuitive templates to quickly produce professional compositions.\u003c\/span\u003e\u003c\/div\u003e\n\u003cdiv style=\"text-align: center;\"\u003e\u003cspan style=\"font-weight: 400;\"\u003e\u003cimg alt=\"dji-mavic-air-2-fly-more-combo-drone-content-feature-11-DJI-Fly-App\" src=\"https:\/\/cdn.shopify.com\/s\/files\/1\/2532\/7020\/files\/dji-mavic-air-2-fly-more-combo-drone-content-feature-11-DJI-Fly-App.jpg?v=1626149062\"\u003e\u003c\/span\u003e\u003c\/div\u003e\n\u003ch3 style=\"text-align: center;\"\u003e\u003cspan style=\"color: #ff8000;\"\u003e\u003cb\u003e\u003c\/b\u003e\u003c\/span\u003e\u003c\/h3\u003e\n\u003ch3 style=\"text-align: center;\"\u003e\u003cspan style=\"color: #ff8000;\"\u003e\u003cb\u003eRemote Controller \u003c\/b\u003e\u003c\/span\u003e\u003c\/h3\u003e\n\u003cdiv style=\"text-align: center;\"\u003e\u003cb\u003eDesigned for Pilots\u003c\/b\u003e\u003c\/div\u003e\n\u003cdiv style=\"text-align: center;\"\u003e\u003cspan style=\"font-weight: 400;\"\u003eThe newly designed remote controller has an ergonomic shape for a more comfortable grip and an excellent 240-minute battery life. The redesigned clamp makes it simple to attach devices, and the integrated antennas improve the user experience dramatically.\u003cbr data-mce-fragment=\"1\"\u003e*In an interference-free environment, battery life was measured using an Android phone.\u003c\/span\u003e\u003c\/div\u003e\n\u003cdiv style=\"text-align: center;\"\u003e\u003cspan style=\"font-weight: 400;\"\u003e\u003cimg alt=\"dji-mavic-air-2-fly-more-combo-drone-content-feature-12-remote\" src=\"https:\/\/cdn.shopify.com\/s\/files\/1\/2532\/7020\/files\/dji-mavic-air-2-fly-more-combo-drone-content-feature-12-remote.jpg?v=1626149088\"\u003e\u003c\/span\u003e\u003c\/div\u003e\n\u003cdiv style=\"text-align: center;\"\u003e \u003c\/div\u003e\n\u003ch3 style=\"text-align: center;\"\u003e\u003cspan style=\"color: #ff8000;\"\u003e\u003cb\u003eND Filters\u003c\/b\u003e\u003c\/span\u003e\u003c\/h3\u003e\n\u003cdiv style=\"text-align: center;\"\u003e\u003cb\u003eOptimal Options\u003c\/b\u003e\u003c\/div\u003e\n\u003cdiv style=\"text-align: center;\"\u003eThe Mavic Air 2 comes with two ND filter sets that help with exposure control and give you additional creative options. The ND 16\/64\/256 set is useful for altering shutter speed and in low-light situations, while the ND 4\/8\/32 set allows for colorful photographs even at low ISO.\u003cbr\u003e\u003cbr\u003e*The Fly More Combo comes with ND16\/64\/256 filters. Separately, the ND4\/8\/32 filter set can be ordered.\u003c\/div\u003e\n\u003cdiv style=\"text-align: center;\"\u003e\u003cspan style=\"font-weight: 400;\"\u003e\u003cimg alt=\"dji-mavic-air-2-fly-more-combo-drone-content-feature-13-ND-Filter\" src=\"https:\/\/cdn.shopify.com\/s\/files\/1\/2532\/7020\/files\/dji-mavic-air-2-fly-more-combo-drone-content-feature-13-ND-Filter.jpg?v=1626149110\"\u003e\u003c\/span\u003e\u003c\/div\u003e\n\u003cdiv style=\"text-align: center;\"\u003e \u003c\/div\u003e\n\u003ch2 style=\"text-align: left;\"\u003e\u003cstrong\u003eSpecification\u003c\/strong\u003e\u003c\/h2\u003e\n\u003cp\u003e \u003c\/p\u003e\n\u003cp\u003e \u003c\/p\u003e\n\u003cp\u003e \u003c\/p\u003e\n\u003cdiv style=\"text-align: left;\"\u003e\u003cb\u003eAircraft\u003c\/b\u003e\u003c\/div\u003e\n\u003cdiv style=\"text-align: left;\"\u003e\n\u003cul\u003e\n\u003cli style=\"font-weight: 400;\"\u003e\u003cb\u003eWeight\u003c\/b\u003e\u003c\/li\u003e\n\u003cli style=\"font-weight: 400;\"\u003e570 g\u003c\/li\u003e\n\u003c\/ul\u003e\n\u003cul\u003e\n\u003cli style=\"font-weight: 400;\"\u003e\u003cb\u003eSize\u003c\/b\u003e\u003c\/li\u003e\n\u003cli style=\"font-weight: 400;\"\u003e\n\u003cspan style=\"font-weight: 400;\"\u003eFolded:\u003c\/span\u003e\u003cspan style=\"font-weight: 400;\"\u003e\u003cbr\u003e\u003c\/span\u003e\u003cspan style=\"font-weight: 400;\"\u003e180×97×74 mm (Length×Width×Height)\u003c\/span\u003e\u003cspan style=\"font-weight: 400;\"\u003e\u003cbr\u003e\u003c\/span\u003e\u003cspan style=\"font-weight: 400;\"\u003eUnfolded:\u003c\/span\u003e\u003cspan style=\"font-weight: 400;\"\u003e\u003cbr\u003e\u003c\/span\u003e\u003cspan style=\"font-weight: 400;\"\u003e183×253×77 mm (Length×Width×Height)\u003c\/span\u003e\n\u003c\/li\u003e\n\u003c\/ul\u003e\n\u003cul\u003e\n\u003cli style=\"font-weight: 400;\"\u003e\u003cb\u003eDiagonal Distance\u003c\/b\u003e\u003c\/li\u003e\n\u003cli style=\"font-weight: 400;\"\u003e\u003cspan style=\"font-weight: 400;\"\u003e302 mm\u003c\/span\u003e\u003c\/li\u003e\n\u003cli\u003e\u003cb\u003eTransmitter Power (EIRP)\u003c\/b\u003e\u003c\/li\u003e\n\u003cli\u003e\n\u003cspan\u003e2.400-2.4835 GHz:\u003c\/span\u003e\u003cspan\u003e\u003cbr\u003e\u003c\/span\u003e\u003cspan\u003eFCC: ≤26 dBm\u003c\/span\u003e\u003cspan\u003e\u003cbr\u003e\u003c\/span\u003e\u003cspan\u003eCE: ≤20 dBm\u003c\/span\u003e\u003cspan\u003e\u003cbr\u003e\u003c\/span\u003e\u003cspan\u003eSRRC: ≤20 dBm\u003c\/span\u003e\u003cspan\u003e\u003cbr\u003e\u003c\/span\u003e\u003cspan\u003eMIC: ≤20 dBm\u003c\/span\u003e\u003cspan\u003e\u003cbr\u003e\u003c\/span\u003e\u003cspan\u003e\u003cbr\u003e\u003c\/span\u003e\u003cspan\u003e5.725-5.850 GHz:\u003c\/span\u003e\u003cspan\u003e\u003cbr\u003e\u003c\/span\u003e\u003cspan\u003eFCC: ≤26 dBm\u003c\/span\u003e\u003cspan\u003e\u003cbr\u003e\u003c\/span\u003e\u003cspan\u003eCE: ≤14 dBm\u003c\/span\u003e\u003cspan\u003e\u003cbr\u003e\u003c\/span\u003e\u003cspan\u003eSRRC: ≤26 dBm\u003c\/span\u003e\n\u003c\/li\u003e\n\u003c\/ul\u003e\n\u003cul\u003e\n\u003cli style=\"font-weight: 400;\"\u003e\u003cb\u003eMax Ascent Speed\u003c\/b\u003e\u003c\/li\u003e\n\u003cli style=\"font-weight: 400;\"\u003e\n\u003cspan style=\"font-weight: 400;\"\u003e4 m\/s (S Mode)\u003c\/span\u003e\u003cspan style=\"font-weight: 400;\"\u003e\u003cbr\u003e\u003c\/span\u003e\u003cspan style=\"font-weight: 400;\"\u003e4 m\/s (N Mode)\u003c\/span\u003e\n\u003c\/li\u003e\n\u003c\/ul\u003e\n\u003cul\u003e\n\u003cli style=\"font-weight: 400;\"\u003e\u003cb\u003eMax Service Ceiling Above Sea Level\u003c\/b\u003e\u003c\/li\u003e\n\u003cli style=\"font-weight: 400;\"\u003e\u003cspan style=\"font-weight: 400;\"\u003e5000 m\u003c\/span\u003e\u003c\/li\u003e\n\u003c\/ul\u003e\n\u003cul\u003e\n\u003cli style=\"font-weight: 400;\"\u003e\u003cb\u003eMax Flight Time (without wind)\u003c\/b\u003e\u003c\/li\u003e\n\u003cli style=\"font-weight: 400;\"\u003e\u003cspan style=\"font-weight: 400;\"\u003e34 minutes\u003c\/span\u003e\u003c\/li\u003e\n\u003c\/ul\u003e\n\u003cul\u003e\n\u003cli style=\"font-weight: 400;\"\u003e\u003cb\u003eMax Hover Time (without wind)\u003c\/b\u003e\u003c\/li\u003e\n\u003cli style=\"font-weight: 400;\"\u003e\u003cspan style=\"font-weight: 400;\"\u003e33 minutes\u003c\/span\u003e\u003c\/li\u003e\n\u003c\/ul\u003e\n\u003cul\u003e\n\u003cli style=\"font-weight: 400;\"\u003e\u003cb\u003eMax Flight Distance\u003c\/b\u003e\u003c\/li\u003e\n\u003cli style=\"font-weight: 400;\"\u003e\u003cspan style=\"font-weight: 400;\"\u003e18.5 km\u003c\/span\u003e\u003c\/li\u003e\n\u003cli\u003e\u003cb\u003eMax Descent Speed\u003c\/b\u003e\u003c\/li\u003e\n\u003cli\u003e\n\u003cspan\u003e3 m\/s (S Mode)\u003c\/span\u003e\u003cspan\u003e\u003cbr\u003e\u003c\/span\u003e\u003cspan\u003e3 m\/s (N Mode)\u003c\/span\u003e\u003cspan\u003e\u003cbr\u003e\u003c\/span\u003e\u003cspan\u003e5 m\/s (S Mode and N Mode during a sharp descent)\u003c\/span\u003e\u003cspan\u003e\u003cbr\u003e\u003c\/span\u003e\u003cspan\u003e3 m\/s (all modes at elevations over 4500 m)\u003c\/span\u003e\n\u003c\/li\u003e\n\u003c\/ul\u003e\n\u003cul\u003e\n\u003cli style=\"font-weight: 400;\"\u003e\u003cb\u003eMax Horizontal Flight Speed\u003c\/b\u003e\u003c\/li\u003e\n\u003cli style=\"font-weight: 400;\"\u003e\n\u003cspan style=\"font-weight: 400;\"\u003e19 m\/s (S Mode)\u003c\/span\u003e\u003cspan style=\"font-weight: 400;\"\u003e\u003cbr\u003e\u003c\/span\u003e\u003cspan style=\"font-weight: 400;\"\u003e12 m\/s (N Mode)\u003c\/span\u003e\u003cspan style=\"font-weight: 400;\"\u003e\u003cbr\u003e\u003c\/span\u003e\u003cspan style=\"font-weight: 400;\"\u003e5 m\/s (T Mode)\u003c\/span\u003e\n\u003c\/li\u003e\n\u003cli\u003e\u003cb\u003eHovering Accuracy Range\u003c\/b\u003e\u003c\/li\u003e\n\u003cli\u003e\n\u003cspan\u003eVertical:\u003c\/span\u003e\u003cspan\u003e\u003cbr\u003e\u003c\/span\u003e\u003cspan\u003e±0.1 m (with vision positioning)\u003c\/span\u003e\u003cspan\u003e\u003cbr\u003e\u003c\/span\u003e\u003cspan\u003e±0.5 m (with GPS positioning)\u003c\/span\u003e\u003cspan\u003e\u003cbr\u003e\u003c\/span\u003e\u003cspan\u003e\u003cbr\u003e\u003c\/span\u003e\u003cspan\u003eHorizontal:\u003c\/span\u003e\u003cspan\u003e\u003cbr\u003e\u003c\/span\u003e\u003cspan\u003e±0.1 m (with vision positioning)\u003c\/span\u003e\u003cspan\u003e\u003cbr\u003e\u003c\/span\u003e\u003cspan\u003e±1.5 m (with GPS positioning)\u003c\/span\u003e\n\u003c\/li\u003e\n\u003c\/ul\u003e\n\u003cul\u003e\n\u003cli style=\"font-weight: 400;\"\u003e\u003cb\u003eMax Wind Resistance\u003c\/b\u003e\u003c\/li\u003e\n\u003cli style=\"font-weight: 400;\"\u003e\u003cspan style=\"font-weight: 400;\"\u003e8.5-10.5 m\/s (Level 5)\u003c\/span\u003e\u003c\/li\u003e\n\u003c\/ul\u003e\n\u003cul\u003e\n\u003cli style=\"font-weight: 400;\"\u003e\u003cb\u003eMax Tilt Angle\u003c\/b\u003e\u003c\/li\u003e\n\u003cli style=\"font-weight: 400;\"\u003e\n\u003cspan style=\"font-weight: 400;\"\u003e35° (S Mode)\u003c\/span\u003e\u003cspan style=\"font-weight: 400;\"\u003e\u003cbr\u003e\u003c\/span\u003e\u003cspan style=\"font-weight: 400;\"\u003e20° (N Mode)\u003c\/span\u003e\u003cspan style=\"font-weight: 400;\"\u003e\u003cbr\u003e\u003c\/span\u003e\u003cspan style=\"font-weight: 400;\"\u003e35° (N Mode under strong wind)\u003c\/span\u003e\n\u003c\/li\u003e\n\u003c\/ul\u003e\n\u003cul\u003e\n\u003cli style=\"font-weight: 400;\"\u003e\u003cb\u003eOperating Frequency\u003c\/b\u003e\u003c\/li\u003e\n\u003cli style=\"font-weight: 400;\"\u003e\n\u003cspan style=\"font-weight: 400;\"\u003e2.400-2.4835 GHz\u003c\/span\u003e\u003cspan style=\"font-weight: 400;\"\u003e\u003cbr\u003e\u003c\/span\u003e\u003cspan style=\"font-weight: 400;\"\u003e5.725-5.850 GHz\u003c\/span\u003e\n\u003c\/li\u003e\n\u003c\/ul\u003e\n\u003cul data-mce-fragment=\"1\"\u003e\n\u003cli data-mce-fragment=\"1\"\u003e\u003cb data-mce-fragment=\"1\"\u003eMax Angular Velocity\u003c\/b\u003e\u003c\/li\u003e\n\u003cli data-mce-fragment=\"1\"\u003e\n\u003cspan data-mce-fragment=\"1\"\u003e250°\/s (S Mode)\u003c\/span\u003e\u003cspan data-mce-fragment=\"1\"\u003e\u003cbr data-mce-fragment=\"1\"\u003e\u003c\/span\u003e\u003cspan data-mce-fragment=\"1\"\u003e250°\/s (N Mode)\u003c\/span\u003e\n\u003c\/li\u003e\n\u003c\/ul\u003e\n\u003cul data-mce-fragment=\"1\"\u003e\n\u003cli data-mce-fragment=\"1\"\u003e\u003cb data-mce-fragment=\"1\"\u003eOperating Temperature Range\u003c\/b\u003e\u003c\/li\u003e\n\u003cli data-mce-fragment=\"1\"\u003e\u003cspan data-mce-fragment=\"1\"\u003e-10° to 40°C (14° to 104°F)\u003c\/span\u003e\u003c\/li\u003e\n\u003c\/ul\u003e\n\u003cul\u003e\u003c\/ul\u003e\n\u003cul\u003e\n\u003cli style=\"font-weight: 400;\"\u003e\u003cb\u003ePropellers\u003c\/b\u003e\u003c\/li\u003e\n\u003cli style=\"font-weight: 400;\"\u003e\u003cspan style=\"font-weight: 400;\"\u003eQuick release, low noise, folding\u003c\/span\u003e\u003c\/li\u003e\n\u003c\/ul\u003e\n\u003cul\u003e\n\u003cli style=\"font-weight: 400;\"\u003e\u003cb\u003eSatellite Systems\u003c\/b\u003e\u003c\/li\u003e\n\u003cli style=\"font-weight: 400;\"\u003e\u003cspan style=\"font-weight: 400;\"\u003eGPS+GLONASS\u003c\/span\u003e\u003c\/li\u003e\n\u003c\/ul\u003e\n\u003cul\u003e\n\u003cli style=\"font-weight: 400;\"\u003e\u003cb\u003eCompass\u003c\/b\u003e\u003c\/li\u003e\n\u003cli style=\"font-weight: 400;\"\u003e\u003cspan style=\"font-weight: 400;\"\u003eSingle Compass\u003c\/span\u003e\u003c\/li\u003e\n\u003c\/ul\u003e\n\u003cul\u003e\n\u003cli style=\"font-weight: 400;\"\u003e\u003cb\u003eIMU\u003c\/b\u003e\u003c\/li\u003e\n\u003cli style=\"font-weight: 400;\"\u003e\u003cspan style=\"font-weight: 400;\"\u003eSingle IMU\u003c\/span\u003e\u003c\/li\u003e\n\u003c\/ul\u003e\n\u003cul\u003e\n\u003cli style=\"font-weight: 400;\"\u003e\u003cb\u003eInternal Storage\u003c\/b\u003e\u003c\/li\u003e\n\u003cli style=\"font-weight: 400;\"\u003e\u003cspan style=\"font-weight: 400;\"\u003e8 GB\u003c\/span\u003e\u003c\/li\u003e\n\u003c\/ul\u003e\n\u003c\/div\u003e\n\u003cdiv style=\"text-align: left;\"\u003e\u003cb\u003eBattery\u003c\/b\u003e\u003c\/div\u003e\n\u003cdiv style=\"text-align: left;\"\u003e\n\u003cul\u003e\n\u003cli style=\"font-weight: 400;\"\u003e\u003cb\u003eCapacity\u003c\/b\u003e\u003c\/li\u003e\n\u003cli style=\"font-weight: 400;\"\u003e\u003cspan style=\"font-weight: 400;\"\u003e3500 mAh\u003c\/span\u003e\u003c\/li\u003e\n\u003c\/ul\u003e\n\u003cul\u003e\n\u003cli style=\"font-weight: 400;\"\u003e\u003cb\u003eVoltage\u003c\/b\u003e\u003c\/li\u003e\n\u003cli style=\"font-weight: 400;\"\u003e\u003cspan style=\"font-weight: 400;\"\u003e11.55 V\u003c\/span\u003e\u003c\/li\u003e\n\u003c\/ul\u003e\n\u003cul\u003e\n\u003cli style=\"font-weight: 400;\"\u003e\u003cb\u003eCharging Voltage Limit\u003c\/b\u003e\u003c\/li\u003e\n\u003cli style=\"font-weight: 400;\"\u003e\u003cspan style=\"font-weight: 400;\"\u003e13.2 V\u003c\/span\u003e\u003c\/li\u003e\n\u003c\/ul\u003e\n\u003cul\u003e\u003c\/ul\u003e\n\u003cul\u003e\n\u003cli style=\"font-weight: 400;\"\u003e\u003cb\u003eWeight\u003c\/b\u003e\u003c\/li\u003e\n\u003cli style=\"font-weight: 400;\"\u003e\u003cspan style=\"font-weight: 400;\"\u003e198 g\u003c\/span\u003e\u003c\/li\u003e\n\u003c\/ul\u003e\n\u003cul\u003e\n\u003cli style=\"font-weight: 400;\"\u003e\u003cb\u003eCharging Temperature\u003c\/b\u003e\u003c\/li\u003e\n\u003cli style=\"font-weight: 400;\"\u003e\u003cspan style=\"font-weight: 400;\"\u003e5° to 40°C (41° to 104°F)\u003c\/span\u003e\u003c\/li\u003e\n\u003c\/ul\u003e\n\u003cul data-mce-fragment=\"1\"\u003e\n\u003cli data-mce-fragment=\"1\"\u003e\u003cb data-mce-fragment=\"1\"\u003eBattery Type\u003c\/b\u003e\u003c\/li\u003e\n\u003cli data-mce-fragment=\"1\"\u003e\u003cspan data-mce-fragment=\"1\"\u003eLiPo 3S\u003c\/span\u003e\u003c\/li\u003e\n\u003c\/ul\u003e\n\u003cul data-mce-fragment=\"1\"\u003e\n\u003cli data-mce-fragment=\"1\"\u003e\u003cb data-mce-fragment=\"1\"\u003eEnergy\u003c\/b\u003e\u003c\/li\u003e\n\u003cli data-mce-fragment=\"1\"\u003e\u003cspan data-mce-fragment=\"1\"\u003e40.42 Wh\u003c\/span\u003e\u003c\/li\u003e\n\u003c\/ul\u003e\n\u003cul\u003e\u003c\/ul\u003e\n\u003cul\u003e\n\u003cli style=\"font-weight: 400;\"\u003e\u003cb\u003eMax Charging Power\u003c\/b\u003e\u003c\/li\u003e\n\u003cli style=\"font-weight: 400;\"\u003e\u003cspan style=\"font-weight: 400;\"\u003e38 W\u003c\/span\u003e\u003c\/li\u003e\n\u003c\/ul\u003e\n\u003c\/div\u003e\n\u003cdiv style=\"text-align: left;\"\u003e\u003cb\u003eCamera\u003c\/b\u003e\u003c\/div\u003e\n\u003cdiv\u003e\n\u003cul style=\"text-align: left;\"\u003e\n\u003cli style=\"font-weight: 400;\"\u003e\u003cb\u003eSensor\u003c\/b\u003e\u003c\/li\u003e\n\u003cli style=\"font-weight: 400;\"\u003e\n\u003cspan style=\"font-weight: 400;\"\u003e1\/2\" CMOS\u003c\/span\u003e\u003cspan style=\"font-weight: 400;\"\u003e\u003cbr\u003e\u003c\/span\u003e\u003cspan style=\"font-weight: 400;\"\u003eEffective Pixels: 12 MP and 48 MP\u003c\/span\u003e\n\u003c\/li\u003e\n\u003cli\u003e\u003cb\u003eISO\u003c\/b\u003e\u003c\/li\u003e\n\u003cli\u003e\n\u003cspan\u003eVideo:\u003c\/span\u003e\u003cspan\u003e\u003cbr\u003e\u003c\/span\u003e\u003cspan\u003e100-6400\u003c\/span\u003e\u003cspan\u003e\u003cbr\u003e\u003c\/span\u003e\u003cspan\u003e\u003cbr\u003e\u003c\/span\u003e\u003cspan\u003ePhoto (12 MP):\u003c\/span\u003e\u003cspan\u003e\u003cbr\u003e\u003c\/span\u003e\u003cspan\u003e100-3200 (Auto)\u003c\/span\u003e\u003cspan\u003e\u003cbr\u003e\u003c\/span\u003e\u003cspan\u003e100-6400 (Manual)\u003c\/span\u003e\u003cspan\u003e\u003cbr\u003e\u003c\/span\u003e\u003cspan\u003ePhoto (48 MP):\u003c\/span\u003e\u003cspan\u003e\u003cbr\u003e\u003c\/span\u003e\u003cspan\u003e100-1600 (Auto)\u003c\/span\u003e\u003cspan\u003e\u003cbr\u003e\u003c\/span\u003e\u003cspan\u003e100-3200 (Manual)\u003c\/span\u003e\n\u003c\/li\u003e\n\u003c\/ul\u003e\n\u003cul style=\"text-align: left;\"\u003e\n\u003cli style=\"font-weight: 400;\"\u003e\u003cb\u003eLens\u003c\/b\u003e\u003c\/li\u003e\n\u003cli style=\"font-weight: 400;\"\u003e\n\u003cspan style=\"font-weight: 400;\"\u003eFOV: 84°\u003c\/span\u003e\u003cspan style=\"font-weight: 400;\"\u003e\u003cbr\u003e\u003c\/span\u003e\u003cspan style=\"font-weight: 400;\"\u003eEquivalent Focal Length: 24 mm\u003c\/span\u003e\u003cspan style=\"font-weight: 400;\"\u003e\u003cbr\u003e\u003c\/span\u003e\u003cspan style=\"font-weight: 400;\"\u003eAperture: f\/2.8\u003c\/span\u003e\u003cspan style=\"font-weight: 400;\"\u003e\u003cbr\u003e\u003c\/span\u003e\u003cspan style=\"font-weight: 400;\"\u003eFocus Range: 1 m to ∞\u003c\/span\u003e\n\u003c\/li\u003e\n\u003c\/ul\u003e\n\u003cul data-mce-fragment=\"1\"\u003e\n\u003cli data-mce-fragment=\"1\"\u003e\u003cb data-mce-fragment=\"1\"\u003eVideo Formats\u003c\/b\u003e\u003c\/li\u003e\n\u003cli data-mce-fragment=\"1\"\u003e\u003cspan data-mce-fragment=\"1\"\u003eMP4\/MOV (H.264\/MPEG-4 AVC, H.265\/HEVC)\u003c\/span\u003e\u003c\/li\u003e\n\u003c\/ul\u003e\n\u003cul data-mce-fragment=\"1\"\u003e\n\u003cli data-mce-fragment=\"1\"\u003e\u003cb data-mce-fragment=\"1\"\u003eMax Bitrate\u003c\/b\u003e\u003c\/li\u003e\n\u003cli data-mce-fragment=\"1\"\u003e\u003cspan data-mce-fragment=\"1\"\u003e120 Mbps\u003c\/span\u003e\u003c\/li\u003e\n\u003c\/ul\u003e\n\u003cul style=\"text-align: left;\"\u003e\u003c\/ul\u003e\n\u003cul style=\"text-align: left;\"\u003e\n\u003cli style=\"font-weight: 400;\"\u003e\u003cb\u003eMax Photo Resolution\u003c\/b\u003e\u003c\/li\u003e\n\u003cli style=\"font-weight: 400;\"\u003e\u003cspan style=\"font-weight: 400;\"\u003e48 MP 8000×6000 pixel\u003c\/span\u003e\u003c\/li\u003e\n\u003c\/ul\u003e\n\u003cul style=\"text-align: left;\"\u003e\n\u003cli style=\"font-weight: 400;\"\u003e\u003cb\u003ePhoto Formats\u003c\/b\u003e\u003c\/li\u003e\n\u003cli style=\"font-weight: 400;\"\u003e\u003cspan style=\"font-weight: 400;\"\u003eJPEG\/DNG (RAW)\u003c\/span\u003e\u003c\/li\u003e\n\u003cli\u003e\u003cb\u003ePhoto Modes\u003c\/b\u003e\u003c\/li\u003e\n\u003cli\u003e\n\u003cspan\u003eSingle: 12 MP and 48 MP\u003c\/span\u003e\u003cspan\u003e\u003cbr\u003e\u003c\/span\u003e\u003cspan\u003eBurst: 12 MP, 3\/5\/7 frames\u003c\/span\u003e\u003cspan\u003e\u003cbr\u003e\u003c\/span\u003e\u003cspan\u003eAutomatic Exposure Bracketing (AEB): 12MP, 3\/5 Frames at 0.7EV Bias\u003c\/span\u003e\u003cspan\u003e\u003cbr\u003e\u003c\/span\u003e\u003cspan\u003eTimed: 12 MP 2\/3\/5\/7\/10\/15\/20\/30\/60 seconds\u003c\/span\u003e\u003cspan\u003e\u003cbr\u003e\u003c\/span\u003e\u003cspan\u003eSmartPhoto: Scene Recognition, HyperLight, and HDR\u003c\/span\u003e\u003cspan\u003e\u003cbr\u003e\u003c\/span\u003e\u003cspan\u003eHDR Panorama:\u003c\/span\u003e\u003cspan\u003e\u003cbr\u003e\u003c\/span\u003e\u003cspan\u003eVertical (3×1): 3328×8000 pixels (Width×Height)\u003c\/span\u003e\u003cspan\u003e\u003cbr\u003e\u003c\/span\u003e\u003cspan\u003eWide-angle (3×3): 8000×6144 pixels (Width×Height)\u003c\/span\u003e\u003cspan\u003e\u003cbr\u003e\u003c\/span\u003e\u003cspan\u003e180° Panorama (3×7): 8192×3500 pixels (Width×Height)\u003c\/span\u003e\u003cspan\u003e\u003cbr\u003e\u003c\/span\u003e\u003cspan\u003eSphere (3×8+1): 8192×4096 pixels (Width×Height)\u003c\/span\u003e\n\u003c\/li\u003e\n\u003c\/ul\u003e\n\u003cul style=\"text-align: left;\"\u003e\n\u003cli style=\"font-weight: 400;\"\u003e\u003cb\u003eVideo Resolution and Frame Rates\u003c\/b\u003e\u003c\/li\u003e\n\u003cli style=\"font-weight: 400;\"\u003e\n\u003cspan style=\"font-weight: 400;\"\u003e4K Ultra HD: 3840×2160 24\/25\/30\/48\/50\/60 fps\u003c\/span\u003e\u003cspan style=\"font-weight: 400;\"\u003e\u003cbr\u003e\u003c\/span\u003e\u003cspan style=\"font-weight: 400;\"\u003e2.7K: 2688×1512 24\/25\/30\/48\/50\/60 fps\u003c\/span\u003e\u003cspan style=\"font-weight: 400;\"\u003e\u003cbr\u003e\u003c\/span\u003e\u003cspan style=\"font-weight: 400;\"\u003eFHD: 1920×1080 24\/25\/30\/48\/50\/60\/120\/240 fps\u003c\/span\u003e\u003cspan style=\"font-weight: 400;\"\u003e\u003cbr\u003e\u003c\/span\u003e\u003cspan style=\"font-weight: 400;\"\u003e4K Ultra HD HDR: 3840×2160 24\/25\/30 fps\u003c\/span\u003e\u003cspan style=\"font-weight: 400;\"\u003e\u003cbr\u003e\u003c\/span\u003e\u003cspan style=\"font-weight: 400;\"\u003e2.7K HDR: 2688×1512 24\/25\/30 fps\u003c\/span\u003e\u003cspan style=\"font-weight: 400;\"\u003e\u003cbr\u003e\u003c\/span\u003e\u003cspan style=\"font-weight: 400;\"\u003eFHD HDR: 1920×1080 24\/25\/30 fps\u003c\/span\u003e\n\u003c\/li\u003e\n\u003c\/ul\u003e\n\u003cul style=\"text-align: left;\"\u003e\n\u003cli style=\"font-weight: 400;\"\u003e\u003cb\u003eColor Profiles\u003c\/b\u003e\u003c\/li\u003e\n\u003cli style=\"font-weight: 400;\"\u003e\u003cspan style=\"font-weight: 400;\"\u003eD-Cinelike, Normal\u003c\/span\u003e\u003c\/li\u003e\n\u003c\/ul\u003e\n\u003cul style=\"text-align: left;\"\u003e\n\u003cli style=\"font-weight: 400;\"\u003e\u003cb\u003eSupported SD Cards\u003c\/b\u003e\u003c\/li\u003e\n\u003cli style=\"font-weight: 400;\"\u003e\u003cspan style=\"font-weight: 400;\"\u003eSupports a microSD with capacity of up to 256 GB\u003c\/span\u003e\u003c\/li\u003e\n\u003c\/ul\u003e\n\u003cul style=\"text-align: left;\"\u003e\n\u003cli style=\"font-weight: 400;\"\u003e\u003cb\u003eSupported File Systems\u003c\/b\u003e\u003c\/li\u003e\n\u003cli style=\"font-weight: 400;\"\u003e\u003cspan style=\"font-weight: 400;\"\u003eFAT32 and exFAT\u003c\/span\u003e\u003c\/li\u003e\n\u003c\/ul\u003e\n\u003cul style=\"text-align: center;\"\u003e\n\u003cli style=\"font-weight: 400; text-align: left;\"\u003e\u003cb\u003eZoom\u003c\/b\u003e\u003c\/li\u003e\n\u003cli style=\"font-weight: 400; text-align: left;\"\u003e\u003cspan style=\"font-weight: 400;\"\u003eAvailable\u003c\/span\u003e\u003c\/li\u003e\n\u003c\/ul\u003e\n\u003c\/div\u003e\n\u003c\/div\u003e"}
Translation missing: en.products.product.regular_price$49.00$44.00 On SaleTranslation missing: en.products.product.regular_price $1,088.00 Sold OutInsta360 POV Mouth Mount
( GO 2 / ONE X2 / ONE R )Flexible POV bracket
 Free your hands and get the perfect first-person pictureThermoforming, fits the mouth shape, perfect fit.The special design allows you to talk and breathe like normal when in use.Use with safety sling, no fear of lossSpecifications:Dimensions:89.9x87.1x47mm (3.5x3.4x1.9in)Weight:22g (0.8oz)Material: Plastic
Package:
 Important notes
- Don't like the fit? Repeat steps 1-3.
- Do not use spare parts from other accessories together with the POV Mouth Mount.
- Maximum weight supported by the mount is 250 grams.
-
{"id":6592445022283,"title":"DJI Mavic Air 2 Fly More Combo - Drone Quadcopter UAV with 4K Video|48MP Camera|34min Flight Time|8K Hyperlapse 1\/2\" CMOS Sensor|ActiveTrack 3.0|3-Axis Gimba|Ocusync 2.0","handle":"dji-mavic-air-2-fly-more-combo-drone-quadcopter-uav-with-4k-video-48mp-camera-34min-flight-time-8k-hyperlapse-1-2-cmos-sensor-activetrack-3-0-3-axis-gimba-ocusync-2-0","description":"\u003ch1 style=\"text-align: center;\"\u003e\u003cstrong\u003eDJI Mavic Air 2 - giving you a new photos and video recording experience\u003c\/strong\u003e\u003c\/h1\u003e\u003cdiv class=\"desc\"\u003e\n\u003ch2 style=\"text-align: center;\"\u003eThe DJI Mavic Air 2 pushes power and portability to new heights, with advanced capabilities packed into a small package. \u003c\/h2\u003e\n\u003cstyle\u003e\u003c!--\n.embed-container { position: relative; padding-bottom: 56.25%; height: 0; overflow: hidden; max-width: 100%; } .embed-container iframe, .embed-container object, .embed-container embed { position: absolute; top: 0; left: 0; width: 100%; height: 100%; }\n--\u003e\u003c\/style\u003e\n\u003cdiv style=\"text-align: center;\" class=\"embed-container\"\u003e\u003ciframe src=\"https:\/\/www.youtube.com\/embed\/StDjsvNFru0\" allowfullscreen=\"\" frameborder=\"0\"\u003e\u003c\/iframe\u003e\u003c\/div\u003e\n\u003cdiv style=\"text-align: center;\"\u003e \u003c\/div\u003e\n\u003ch3 style=\"text-align: center;\"\u003e\u003cspan style=\"font-weight: 400;\"\u003eAerial masterpieces are within reach thanks to intelligent shooting functions and superb image quality. You can raise your game while fully enjoying the creative process with safer, smarter flight.\u003c\/span\u003e\u003c\/h3\u003e\n\u003ch2 style=\"text-align: center;\"\u003e\u003cstrong\u003eFeature\u003c\/strong\u003e\u003c\/h2\u003e\n\u003cdiv style=\"text-align: center;\"\u003e\u003c\/div\u003e\n\u003cdiv style=\"text-align: center;\"\u003e\n\u003ctable\u003e\n\u003ctbody\u003e\n\u003ctr\u003e\n\u003ctd style=\"text-align: center;\"\u003e\n\u003cp\u003e\u003cstrong\u003eUltra-Clear Details \u003c\/strong\u003e\u003c\/p\u003e\n\u003cp\u003e\u003cspan style=\"font-weight: 400;\"\u003e1\/2-Inch Image Sensor \u003c\/span\u003e\u003c\/p\u003e\n\u003cp\u003e\u003cspan style=\"font-weight: 400;\"\u003e4K\/60fps Video \u003c\/span\u003e\u003c\/p\u003e\n\u003cp\u003e\u003cspan style=\"font-weight: 400;\"\u003e48MP Photo\u003c\/span\u003e\u003c\/p\u003e\n\u003c\/td\u003e\n\u003ctd style=\"text-align: center;\"\u003e\n\u003cp\u003e\u003cstrong\u003eEnhanced HDR \u003c\/strong\u003e\u003c\/p\u003e\n\u003cp\u003e\u003cspan style=\"font-weight: 400;\"\u003ePhoto \u003c\/span\u003e\u003c\/p\u003e\n\u003cp\u003e\u003cspan style=\"font-weight: 400;\"\u003eVideo \u003c\/span\u003e\u003c\/p\u003e\n\u003cp\u003e\u003cspan style=\"font-weight: 400;\"\u003ePanorama\u003c\/span\u003e\u003c\/p\u003e\n\u003c\/td\u003e\n\u003c\/tr\u003e\n\u003ctr\u003e\n\u003ctd style=\"text-align: center;\"\u003e\n\u003cp\u003e\u003cstrong\u003eFly Smarter and Safer \u003c\/strong\u003e\u003c\/p\u003e\n\u003cp\u003e\u003cspan style=\"font-weight: 400;\"\u003eAPAS 3.0 Obstacle Avoidance\u003c\/span\u003e\u003c\/p\u003e\n\u003c\/td\u003e\n\u003ctd style=\"text-align: center;\"\u003e\n\u003cp\u003e\u003cstrong\u003eFly Farther, See Clearer \u003c\/strong\u003e\u003c\/p\u003e\n\u003cp\u003e\u003cspan style=\"font-weight: 400;\"\u003eOcuSync 2.0 10km 1080p\/30fps Video Transmission\u003c\/span\u003e\u003c\/p\u003e\n\u003c\/td\u003e\n\u003c\/tr\u003e\n\u003ctr\u003e\n\u003ctd style=\"text-align: center;\"\u003e\n\u003cp\u003e\u003cstrong\u003eFly Longer \u003c\/strong\u003e\u003c\/p\u003e\n\u003cp\u003e\u003cspan\u003e34-Min Max Flight Time \u003c\/span\u003e\u003c\/p\u003e\n\u003cp\u003e\u003cspan\u003e240-Min Max RC Battery Life\u003c\/span\u003e\u003c\/p\u003e\n\u003c\/td\u003e\n\u003ctd style=\"text-align: center;\"\u003e\n\u003cp\u003e\u003cstrong\u003eCinematic Content \u003c\/strong\u003e\u003c\/p\u003e\n\u003cp\u003e\u003cspan\u003e8K Hyperlapse \u003c\/span\u003e\u003c\/p\u003e\n\u003cp\u003e\u003cspan\u003eQuickShots\u003c\/span\u003e\u003c\/p\u003e\n\u003c\/td\u003e\n\u003c\/tr\u003e\n\u003c\/tbody\u003e\n\u003c\/table\u003e\n\u003c\/div\u003e\n\u003cdiv style=\"text-align: center;\"\u003e\u003cb\u003e\u003cimg alt=\"dji-mavic-air-2-fly-more-combo-drone-content-feature-all\" src=\"https:\/\/cdn.shopify.com\/s\/files\/1\/2532\/7020\/files\/dji-mavic-air-2-fly-more-combo-drone-content-feature-all.jpg?v=1626148044\"\u003e\u003c\/b\u003e\u003c\/div\u003e\n\u003ch3 style=\"text-align: center;\"\u003e\u003cspan style=\"color: #ff8000;\"\u003e\u003cb\u003e\u003c\/b\u003e\u003c\/span\u003e\u003c\/h3\u003e\n\u003ch3 style=\"text-align: center;\"\u003e\u003cspan style=\"color: #ff8000;\"\u003e\u003cb\u003eHigh Image Quality\u003c\/b\u003e\u003c\/span\u003e\u003c\/h3\u003e\n\u003cdiv style=\"text-align: center;\"\u003e\u003cb\u003eEpic is Simple, with 4K\/60fps Video \u003c\/b\u003e\u003c\/div\u003e\n\u003cdiv style=\"text-align: center;\"\u003e\u003cspan style=\"font-weight: 400;\"\u003eFootage Master creative aerial views with 4K\/60fps video that is effortlessly fluid. For post-processing, the D-Cinelike flat color profile maintains more information. The HEVC (H.265) video codec records more visual information, uses less storage, and keeps your footage's dynamic range and quality, delivering next-level content.\u003cbr data-mce-fragment=\"1\"\u003e\u003c\/span\u003e\u003c\/div\u003e\n\u003cdiv style=\"text-align: center;\"\u003e\u003cspan style=\"font-weight: 400;\"\u003e\u003cimg alt=\"dji-mavic-air-2-fly-more-combo-drone-content-feature-1-image-quality\" src=\"https:\/\/cdn.shopify.com\/s\/files\/1\/2532\/7020\/files\/dji-mavic-air-2-fly-more-combo-drone-content-feature-1-image-quality.jpg?v=1626148092\"\u003e\u003c\/span\u003e\u003c\/div\u003e\n\u003ch3 style=\"text-align: center;\"\u003e\u003cspan style=\"color: #ff8000;\"\u003e\u003cb\u003e\u003c\/b\u003e\u003c\/span\u003e\u003c\/h3\u003e\n\u003ch3 style=\"text-align: center;\"\u003e\u003cspan style=\"color: #ff8000;\"\u003e\u003cb\u003eHDR Video\u003c\/b\u003e\u003c\/span\u003e\u003c\/h3\u003e\n\u003cdiv style=\"text-align: center;\"\u003e\u003cb\u003eBy default, everything is dynamic.\u003cbr data-mce-fragment=\"1\"\u003e\u003c\/b\u003e\u003c\/div\u003e\n\u003cdiv style=\"text-align: center;\"\u003e\u003cspan style=\"font-weight: 400;\"\u003eA high-performance Quad Bayer image sensor is the key to outstanding HDR video. A single frame captures light and dark details by separating exposure levels in different places. The photos are stacked to create a picture with a higher dynamic range that is vibrant, balanced, and appealing.\u003c\/span\u003e\u003c\/div\u003e\n\u003cdiv style=\"text-align: center;\"\u003e\u003cspan style=\"font-weight: 400;\"\u003e\u003cimg alt=\"dji-mavic-air-2-fly-more-combo-drone-content-feature-2-hdr-video\" src=\"https:\/\/cdn.shopify.com\/s\/files\/1\/2532\/7020\/files\/dji-mavic-air-2-fly-more-combo-drone-content-feature-2-hdr-video.jpg?v=1626148113\"\u003e\u003c\/span\u003e\u003c\/div\u003e\n\u003ch3 style=\"text-align: center;\"\u003e\u003cspan style=\"color: #ff8000;\"\u003e\u003cb\u003e\u003c\/b\u003e\u003c\/span\u003e\u003c\/h3\u003e\n\u003ch3 style=\"text-align: center;\"\u003e\u003cspan style=\"color: #ff8000;\"\u003e\u003cb\u003eAll in the Details\u003c\/b\u003e\u003c\/span\u003e\u003c\/h3\u003e\n\u003cdiv style=\"text-align: center;\"\u003e\u003cb\u003e48MP Photos\u003c\/b\u003e\u003c\/div\u003e\n\u003cdiv style=\"text-align: center;\"\u003e\u003cspan style=\"font-weight: 400;\"\u003eMavic Air 2 has a 1\/2-inch CMOS sensor that captures 48MP photographs. Prepare to take your airborne content to new heights.\u003cbr data-mce-fragment=\"1\"\u003eThe 48MP camera has a high megapixel count, which means that even when zooming in on an image, you can see vivid details.\u003c\/span\u003e\u003c\/div\u003e\n\u003cdiv style=\"text-align: center;\"\u003e\u003cspan style=\"font-weight: 400;\"\u003e\u003cimg alt=\"dji-mavic-air-2-fly-more-combo-drone-content-feature-3-48mp\" src=\"https:\/\/cdn.shopify.com\/s\/files\/1\/2532\/7020\/files\/dji-mavic-air-2-fly-more-combo-drone-content-feature-3-48mp.jpg?v=1626148140\"\u003e\u003c\/span\u003e\u003c\/div\u003e\n\u003ch3 style=\"text-align: center;\"\u003e\u003cspan style=\"color: #ff8000;\"\u003e\u003cb\u003e\u003c\/b\u003e\u003c\/span\u003e\u003c\/h3\u003e\n\u003ch3 style=\"text-align: center;\"\u003e\u003cspan style=\"color: #ff8000;\"\u003e\u003cb\u003eOptimized Capture\u003c\/b\u003e\u003c\/span\u003e\u003c\/h3\u003e\n\u003cdiv style=\"text-align: center;\"\u003e\u003cb\u003eSmartPhoto\u003c\/b\u003e\u003c\/div\u003e\n\u003cdiv style=\"text-align: center;\"\u003e\u003cspan style=\"font-weight: 400;\"\u003eSmartPhoto on the Mavic Air 2 combines scene recognition, HyperLight, and HDR into a single setting for optimal results. Scene recognition optimizes camera parameters for different scenes and offers intelligent recognition of five different categories: sunsets, sky, grass, snow, and trees. The resolution of photos taken in SmartPhoto mode is 12 MP.\u003c\/span\u003e\u003c\/div\u003e\n\u003cdiv style=\"text-align: center;\"\u003e\n\u003ctable width=\"100%\"\u003e\n\u003ctbody\u003e\n\u003ctr\u003e\n\u003ctd\u003e\n\u003cp\u003e\u003cimg alt=\"dji-mavic-air-2-fly-more-combo-drone-content-feature-4-1-Strong-Lighting-Conditions\" src=\"https:\/\/cdn.shopify.com\/s\/files\/1\/2532\/7020\/files\/dji-mavic-air-2-fly-more-combo-drone-content-feature-4-1-Strong-Lighting-Conditions.jpg?v=1626148348\"\u003e\u003c\/p\u003e\n\u003c\/td\u003e\n\u003ctd\u003e\u003cimg alt=\"dji-mavic-air-2-fly-more-combo-drone-content-feature-4-2-Weak-Lighting-Conditions\" src=\"https:\/\/cdn.shopify.com\/s\/files\/1\/2532\/7020\/files\/dji-mavic-air-2-fly-more-combo-drone-content-feature-4-2-Weak-Lighting-Conditions.jpg?v=1626148384\"\u003e\u003c\/td\u003e\n\u003c\/tr\u003e\n\u003ctr\u003e\n\u003ctd\u003e\n\u003cp data-mce-fragment=\"1\"\u003e\u003cstrong\u003eStrong Lighting\u003c\/strong\u003e\u003c\/p\u003e\n\u003cp data-mce-fragment=\"1\"\u003eConditions HyperLight improves the sharpness of images taken in low-light circumstances by reducing noise.\u003c\/p\u003e\n\u003c\/td\u003e\n\u003ctd\u003e\n\u003cp\u003e\u003cstrong\u003eWeak Lighting Conditions\u003c\/strong\u003e\u003c\/p\u003e\n\u003cp data-mce-fragment=\"1\"\u003e\u003cspan data-mce-fragment=\"1\"\u003eHyperLight improves the sharpness of images taken in low-light circumstances by reducing noise.\u003c\/span\u003e\u003c\/p\u003e\n\u003c\/td\u003e\n\u003c\/tr\u003e\n\u003c\/tbody\u003e\n\u003c\/table\u003e\n\u003c\/div\u003e\n\u003cdiv style=\"text-align: center;\"\u003e \u003c\/div\u003e\n\u003cdiv style=\"text-align: center;\"\u003e \u003c\/div\u003e\n\u003ch3 style=\"text-align: center;\"\u003e\u003cspan style=\"color: #ff8000;\"\u003e\u003cb\u003eHDR Panorama\u003c\/b\u003e\u003c\/span\u003e\u003c\/h3\u003e\n\u003cdiv style=\"text-align: center;\"\u003e\u003cb\u003eLook at the Big Picture\u003c\/b\u003e\u003c\/div\u003e\n\u003cdiv style=\"text-align: center;\"\u003e\u003cspan style=\"font-weight: 400;\"\u003eThe Mavic Air 2 has DJI's most sophisticated panorama mode, with a larger dynamic range and vibrant, amazingly realistic colors.\u003c\/span\u003e\u003c\/div\u003e\n\u003cdiv style=\"text-align: center;\"\u003e\u003cspan style=\"font-weight: 400;\"\u003e\u003cimg alt=\"dji-mavic-air-2-fly-more-combo-drone-content-feature-5-HDR-Panorama\" src=\"https:\/\/cdn.shopify.com\/s\/files\/1\/2532\/7020\/files\/dji-mavic-air-2-fly-more-combo-drone-content-feature-5-HDR-Panorama.jpg?v=1626148445\"\u003e\u003c\/span\u003e\u003c\/div\u003e\n\u003ch3 style=\"text-align: center;\"\u003e\u003cspan style=\"color: #ff8000;\"\u003e\u003cb\u003e\u003c\/b\u003e\u003c\/span\u003e\u003c\/h3\u003e\n\u003ch3 style=\"text-align: center;\"\u003e\u003cspan style=\"color: #ff8000;\"\u003e\u003cb\u003eIntelligent Features\u003c\/b\u003e\u003c\/span\u003e\u003c\/h3\u003e\n\u003cdiv style=\"text-align: center;\"\u003e\u003cb\u003eObtaining Cinematic Shots\u003c\/b\u003e\u003c\/div\u003e\n\u003cdiv style=\"text-align: center;\"\u003e\u003cspan style=\"font-weight: 400;\"\u003eFor breathtaking results, the Mavic Air 2 combines a powerful camera with intelligent shooting modes. Aerial photography has never been easier to create.\u003c\/span\u003e\u003c\/div\u003e\n\u003cdiv style=\"text-align: center;\"\u003e\u003cspan style=\"font-weight: 400;\"\u003e\u003cimg alt=\"dji-mavic-air-2-fly-more-combo-drone-content-feature-6-Intelligent-Features\" src=\"https:\/\/cdn.shopify.com\/s\/files\/1\/2532\/7020\/files\/dji-mavic-air-2-fly-more-combo-drone-content-feature-6-Intelligent-Features.jpg?v=1626148481\"\u003e\u003c\/span\u003e\u003c\/div\u003e\n\u003ch3 style=\"text-align: center;\"\u003e\u003cspan style=\"color: #ff8000;\"\u003e\u003cb\u003e\u003c\/b\u003e\u003c\/span\u003e\u003c\/h3\u003e\n\u003ch3 style=\"text-align: center;\"\u003e\u003cspan style=\"color: #ff8000;\"\u003e\u003cb\u003eFocusTrack\u003c\/b\u003e\u003c\/span\u003e\u003c\/h3\u003e\n\u003cdiv style=\"text-align: center;\"\u003e\u003cb\u003eMaster the Skies\u003c\/b\u003e\u003c\/div\u003e\n\u003cdiv style=\"text-align: center;\"\u003e\u003cspan style=\"font-weight: 400;\"\u003eWith FocusTrack, capturing professional-quality footage is a breeze. Active Track 3.0, Spotlight 2.0, and Point of Interest 3.0 are among the easy-to-use intelligent tracking modes that let you express yourself.\u003c\/span\u003e\u003c\/div\u003e\n\u003cdiv style=\"text-align: center;\"\u003e \u003c\/div\u003e\n\u003cdiv style=\"text-align: center;\"\u003e\n\u003ctable width=\"100%\" data-mce-fragment=\"1\"\u003e\n\u003ctbody data-mce-fragment=\"1\"\u003e\n\u003ctr data-mce-fragment=\"1\"\u003e\n\u003ctd data-mce-fragment=\"1\"\u003e\n\u003cp\u003e \u003c\/p\u003e\n\u003cdiv style=\"text-align: left;\"\u003e\u003cimg style=\"float: none;\" alt=\"dji-mavic-air-2-fly-more-combo-drone-content-feature-7-1-Spotlight 2.0\" src=\"https:\/\/cdn.shopify.com\/s\/files\/1\/2532\/7020\/files\/dji-mavic-air-2-fly-more-combo-drone-content-feature-7-1-Spotlight_2.0.jpg?v=1626148537\"\u003e\u003c\/div\u003e\n\u003c\/td\u003e\n\u003ctd data-mce-fragment=\"1\"\u003e\n\u003cp\u003e\u003cimg src=\"https:\/\/cdn.shopify.com\/s\/files\/1\/2532\/7020\/files\/dji-mavic-air-2-fly-more-combo-drone-content-feature-7-2-ActiveTrack_3.0.jpg?v=1626148709\" alt=\"dji-mavic-air-2-fly-more-combo-drone-content-feature-7-2-ActiveTrack 3.0\" data-mce-fragment=\"1\" data-mce-src=\"https:\/\/cdn.shopify.com\/s\/files\/1\/2532\/7020\/files\/dji-mavic-air-2-fly-more-combo-drone-content-feature-7-2-ActiveTrack_3.0.jpg?v=1626148709\"\u003e\u003cbr\u003e\u003c\/p\u003e\n\u003c\/td\u003e\n\u003ctd data-mce-fragment=\"1\"\u003e\n\u003cp\u003e\u003cimg src=\"https:\/\/cdn.shopify.com\/s\/files\/1\/2532\/7020\/files\/dji-mavic-air-2-fly-more-combo-drone-content-feature-7-3-POI_3.0.jpg?v=1626148918\" alt=\"dji-mavic-air-2-fly-more-combo-drone-content-feature-7-3-POI 3.0\" data-mce-fragment=\"1\" data-mce-src=\"https:\/\/cdn.shopify.com\/s\/files\/1\/2532\/7020\/files\/dji-mavic-air-2-fly-more-combo-drone-content-feature-7-3-POI_3.0.jpg?v=1626148918\"\u003e\u003cbr\u003e\u003c\/p\u003e\n\u003c\/td\u003e\n\u003c\/tr\u003e\n\u003ctr data-mce-fragment=\"1\"\u003e\n\u003ctd data-mce-fragment=\"1\"\u003e\n\u003cp\u003e\u003cstrong\u003eSpotlight 2.0\u003c\/strong\u003e\u003c\/p\u003e\n\u003cp\u003eWith this handy mode, you may fly around freely while the camera remains fixed on the subject. Simply choose your target and take off.\u003c\/p\u003e\n\u003c\/td\u003e\n\u003ctd data-mce-fragment=\"1\"\u003e\n\u003cp\u003e\u003cstrong\u003eActiveTrack 3.0\u003c\/strong\u003e\u003c\/p\u003e\n\u003cp\u003eWith the latest version of DJI's ActiveTrack technology, following subjects while avoiding obstacles has never been easier. This technique keeps your subject in the center of the screen, even if they go behind a tree, with superior pathfinding and a faster and more accurate prediction of lost subjects.\u003c\/p\u003e\n\u003c\/td\u003e\n\u003ctd data-mce-fragment=\"1\"\u003e\n\u003cp\u003e\u003cstrong\u003ePOI 3.0\u003c\/strong\u003e\u003c\/p\u003e\n\u003cp\u003ePOI 3.0 enhances the capabilities of POI 2.0, particularly in terms of flat surface recognition. This updated functionality avoids the problem that POI 2.0 had with losing the target during tracking. POI 3.0 now has the ability to track people, cars, and boats in real time.\u003c\/p\u003e\n\u003c\/td\u003e\n\u003c\/tr\u003e\n\u003c\/tbody\u003e\n\u003c\/table\u003e\n\u003c\/div\u003e\n\u003ch3 style=\"text-align: center;\"\u003e\u003cb\u003e\u003cspan style=\"color: #ff8000;\"\u003e8K Hyperlapse\u003c\/span\u003e\u003c\/b\u003e\u003c\/h3\u003e\n\u003cdiv style=\"text-align: center;\"\u003e\u003cb\u003eTime and Movement\u003c\/b\u003e\u003c\/div\u003e\n\u003cdiv style=\"text-align: center;\"\u003e\u003cspan style=\"font-weight: 400;\"\u003eHyperlapse in 8K is supported by the Mavic Air 2, allowing you to warp time and space for particularly spectacular film. Best of all, you can get this photo without using any complicated post-production techniques. Choose from Free, Circle, Course Lock, and Waypoint modes, then point and shoot using the DJI Fly app. *8K resolution is only available in Free and Waypoint modes.\u003c\/span\u003e\u003c\/div\u003e\n\u003cdiv style=\"text-align: center;\"\u003e\n\u003cul\u003e\n\u003cli style=\"font-weight: 400;\"\u003e\u003cspan style=\"font-weight: 400;\"\u003eCourse Lock\u003c\/span\u003e\u003c\/li\u003e\n\u003cli style=\"font-weight: 400;\"\u003e\u003cspan style=\"font-weight: 400;\"\u003eFree\u003c\/span\u003e\u003c\/li\u003e\n\u003cli style=\"font-weight: 400;\"\u003e\u003cspan style=\"font-weight: 400;\"\u003eWaypoint\u003c\/span\u003e\u003c\/li\u003e\n\u003cli style=\"font-weight: 400;\"\u003e\u003cspan style=\"font-weight: 400;\"\u003eCircle\u003c\/span\u003e\u003c\/li\u003e\n\u003c\/ul\u003e\n\u003c\/div\u003e\n\u003cdiv style=\"text-align: center;\"\u003e\n\u003cimg src=\"https:\/\/cdn.shopify.com\/s\/files\/1\/2532\/7020\/files\/dji-mavic-air-2-fly-more-combo-drone-content-feature-8-2-free.jpg?v=1626148985\" alt=\"dji-mavic-air-2-fly-more-combo-drone-content-feature-8-2-free\" data-mce-fragment=\"1\" data-mce-src=\"https:\/\/cdn.shopify.com\/s\/files\/1\/2532\/7020\/files\/dji-mavic-air-2-fly-more-combo-drone-content-feature-8-2-free.jpg?v=1626148985\"\u003e\u003cbr\u003e\n\u003c\/div\u003e\n\u003cdiv style=\"text-align: center;\"\u003e \u003c\/div\u003e\n\u003ch3 style=\"text-align: center;\"\u003e\u003cspan style=\"color: #ff8000;\"\u003e\u003cb\u003eQuickShots\u003c\/b\u003e\u003c\/span\u003e\u003c\/h3\u003e\n\u003cdiv style=\"text-align: center;\"\u003e\u003cb\u003eImagination Simplified\u003c\/b\u003e\u003c\/div\u003e\n\u003cdiv style=\"text-align: center;\"\u003e\u003cspan style=\"font-weight: 400;\"\u003eQuickShots allows you to capture cinematic video snippets automatically. Mavic Air 2 prepares and flies a difficult aerial route for a professional-quality photo with just a few touches. With super-intuitive Story templates, you can add music, effects, and filters to your creation before sharing it on social media.\u003c\/span\u003e\u003c\/div\u003e\n\u003cdiv style=\"text-align: center;\"\u003e\n\u003cul\u003e\n\u003cli style=\"font-weight: 400;\"\u003e\u003cspan style=\"font-weight: 400;\"\u003eDronie\u003c\/span\u003e\u003c\/li\u003e\n\u003cli style=\"font-weight: 400;\"\u003e\u003cspan style=\"font-weight: 400;\"\u003eCircle\u003c\/span\u003e\u003c\/li\u003e\n\u003cli style=\"font-weight: 400;\"\u003e\u003cspan style=\"font-weight: 400;\"\u003eHelix\u003c\/span\u003e\u003c\/li\u003e\n\u003cli style=\"font-weight: 400;\"\u003e\u003cspan style=\"font-weight: 400;\"\u003eRocket\u003c\/span\u003e\u003c\/li\u003e\n\u003cli style=\"font-weight: 400;\"\u003e\u003cspan style=\"font-weight: 400;\"\u003eBoomerang\u003c\/span\u003e\u003c\/li\u003e\n\u003cli style=\"font-weight: 400;\"\u003e\u003cspan style=\"font-weight: 400;\"\u003eAsteroid\u003c\/span\u003e\u003c\/li\u003e\n\u003c\/ul\u003e\n\u003c\/div\u003e\n\u003ch3 style=\"text-align: center;\"\u003e\u003cspan style=\"color: #ff8000;\"\u003e\u003cb\u003e\u003c\/b\u003e\u003c\/span\u003e\u003c\/h3\u003e\n\u003ch3 style=\"text-align: center;\"\u003e\u003cspan style=\"color: #ff8000;\"\u003e\u003cb\u003eFlight and Safety\u003c\/b\u003e\u003c\/span\u003e\u003c\/h3\u003e\n\u003cdiv style=\"text-align: center;\"\u003e\u003cb\u003eSafer Flight for Stunning Content\u003c\/b\u003e\u003c\/div\u003e\n\u003cdiv style=\"text-align: center;\"\u003e\u003cspan style=\"color: #ffffff;\"\u003e\u003cb\u003e.\u003c\/b\u003e\u003c\/span\u003e\u003c\/div\u003e\n\u003ch3 style=\"text-align: center;\"\u003e\u003cspan style=\"color: #ff8000;\"\u003e\u003cb\u003e\u003c\/b\u003e\u003c\/span\u003e\u003c\/h3\u003e\n\u003ch3 style=\"text-align: center;\"\u003e\u003cspan style=\"color: #ff8000;\"\u003e\u003cb\u003eOcuSync 2.0\u003c\/b\u003e\u003c\/span\u003e\u003c\/h3\u003e\n\u003cdiv style=\"text-align: center;\"\u003e\u003cb\u003eThe Sky’s the Limit\u003c\/b\u003e\u003c\/div\u003e\n\u003cdiv style=\"text-align: center;\"\u003e\u003cspan style=\"font-weight: 400;\"\u003eOcuSync 2.0 can give a 1080p FHD livestream directly from the drone's camera and has a video transmission distance of up to 10 kilometers. Enjoy greater freedom when it comes to exploring and more clarity when it comes to capturing the perfect photo. \u003cbr data-mce-fragment=\"1\"\u003e\u003cbr data-mce-fragment=\"1\"\u003e*When unobstructed, interference-free, and FCC-compliant. The maximum flying range specification is a proxy for the strength and robustness of the radio link.\u003c\/span\u003e\u003c\/div\u003e\n\u003cdiv style=\"text-align: center;\"\u003e\u003cspan style=\"font-weight: 400;\"\u003e\u003cimg alt=\"dji-mavic-air-2-fly-more-combo-drone-content-feature-9-OcuSync 2.0\" src=\"https:\/\/cdn.shopify.com\/s\/files\/1\/2532\/7020\/files\/dji-mavic-air-2-fly-more-combo-drone-content-feature-9-OcuSync_2.0.jpg?v=1626149011\"\u003e\u003c\/span\u003e\u003c\/div\u003e\n\u003cdiv style=\"text-align: center;\"\u003e \u003c\/div\u003e\n\u003ch3 style=\"text-align: center;\"\u003e\u003cspan style=\"color: #ff8000;\"\u003e\u003cb\u003e2.4\/5.8GHz Dual Frequency\u003c\/b\u003e\u003c\/span\u003e\u003c\/h3\u003e\n\u003cdiv style=\"text-align: center;\"\u003e\u003cb\u003eSmooth Flight, Reliable Signal\u003cbr data-mce-fragment=\"1\"\u003e\u003c\/b\u003e\u003c\/div\u003e\n\u003cdiv style=\"text-align: center;\"\u003e\u003cspan style=\"font-weight: 400;\"\u003eThe Mavic Air 2 has dual-frequency connectivity (2.4\/5.8GHz) and automatically shifts to the best channel with the least interference in real time. This increases flight safety by greatly improving the aircraft's anti-interference ability in adverse circumstances. \u003cbr data-mce-fragment=\"1\"\u003e\u003cbr data-mce-fragment=\"1\"\u003e*Some countries do not accept 5.8 GHz transmission due to local laws.\u003c\/span\u003e\u003c\/div\u003e\n\u003cdiv style=\"text-align: center;\"\u003e\u003cspan style=\"font-weight: 400; color: #ffffff;\"\u003e.\u003c\/span\u003e\u003c\/div\u003e\n\u003ch3 style=\"text-align: center;\"\u003e\u003cspan style=\"color: #ff8000;\"\u003e\u003cb\u003e\u003c\/b\u003e\u003c\/span\u003e\u003c\/h3\u003e\n\u003ch3 style=\"text-align: center;\"\u003e\u003cspan style=\"color: #ff8000;\"\u003e\u003cb\u003eBattery and Flight\u003c\/b\u003e\u003c\/span\u003e\u003c\/h3\u003e\n\u003cdiv style=\"text-align: center;\"\u003e\u003cb\u003eFly Longer\u003c\/b\u003e\u003c\/div\u003e\n\u003cdiv style=\"text-align: center;\"\u003e\u003cspan style=\"font-weight: 400;\"\u003eWith a battery life of up to 34 minutes and a maximum flight speed of 68 kph in Sport mode, you'll be able to stay in the air for as long as you want to obtain the ideal image. \u003cbr data-mce-fragment=\"1\"\u003e\u003cbr data-mce-fragment=\"1\"\u003e*Flight time was recorded at a 9° angle and a speed of 5.1 m\/s in a windless environment.\u003c\/span\u003e\u003c\/div\u003e\n\u003cdiv style=\"text-align: center;\"\u003e \u003c\/div\u003e\n\u003cdiv style=\"text-align: center;\"\u003e\u003cspan style=\"font-weight: 400;\"\u003e\u003cimg alt=\"dji-mavic-air-2-fly-more-combo-drone-content-feature-10-battery\" src=\"https:\/\/cdn.shopify.com\/s\/files\/1\/2532\/7020\/files\/dji-mavic-air-2-fly-more-combo-drone-content-feature-10-battery.jpg?v=1626149034\"\u003e\u003c\/span\u003e\u003c\/div\u003e\n\u003ch3 style=\"text-align: center;\"\u003e\u003cspan style=\"color: #ff8000;\"\u003e\u003cb\u003eObstacle Avoidance\u003c\/b\u003e\u003c\/span\u003e\u003c\/h3\u003e\n\u003cdiv style=\"text-align: center;\"\u003e\u003cb\u003eFly Safer\u003c\/b\u003e\u003c\/div\u003e\n\u003cdiv style=\"text-align: center;\"\u003e\u003cspan style=\"font-weight: 400;\"\u003eForward, backward, and downward are the three directions in which Mavic Air 2 observes its surroundings. An auxiliary light improves visibility, and obstacle avoidance adds an extra layer of security that's great for pushing the boundaries of what's possible.\u003c\/span\u003e\u003c\/div\u003e\n\u003cdiv style=\"text-align: center;\"\u003e\n\u003ctable\u003e\n\u003ctbody\u003e\n\u003ctr\u003e\n\u003ctd\u003e\n\u003cp\u003e\u003cb\u003eForward\u003c\/b\u003e\u003cspan style=\"font-weight: 400;\"\u003e: Vision sensor accurate up to 22 meters\u003c\/span\u003e\u003c\/p\u003e\n\u003c\/td\u003e\n\u003c\/tr\u003e\n\u003ctr\u003e\n\u003ctd\u003e\n\u003cp\u003e\u003cb\u003eBackward\u003c\/b\u003e\u003cspan style=\"font-weight: 400;\"\u003e: Vision sensor accurate up to 23.6 meters\u003c\/span\u003e\u003c\/p\u003e\n\u003c\/td\u003e\n\u003c\/tr\u003e\n\u003ctr\u003e\n\u003ctd\u003e\n\u003cp\u003e\u003cb\u003eDownward\u003c\/b\u003e\u003cspan style=\"font-weight: 400;\"\u003e: Vision sensor, infrared sensor. The auxiliary light assist with visual positioning, safe landing, and visibility in the air. It can be turned on and off manually.\u003c\/span\u003e\u003c\/p\u003e\n\u003c\/td\u003e\n\u003c\/tr\u003e\n\u003c\/tbody\u003e\n\u003c\/table\u003e\n\u003c\/div\u003e\n\u003cdiv style=\"text-align: center;\"\u003e\u003cspan style=\"color: #ffffff;\"\u003e\u003cb\u003e.\u003c\/b\u003e\u003c\/span\u003e\u003c\/div\u003e\n\u003cdiv style=\"text-align: center;\"\u003e\u003cb\u003e\u003c\/b\u003e\u003c\/div\u003e\n\u003cdiv style=\"text-align: center;\"\u003e\u003cb\u003eAPAS 3.0\u003c\/b\u003e\u003c\/div\u003e\n\u003cdiv style=\"text-align: center;\"\u003e\u003cspan style=\"font-weight: 400;\"\u003eIn difficult settings, Advanced Pilot Assistance Systems (APAS) 3.0 employs advanced mapping technology for smooth following and dependable obstacle avoidance. When compared to earlier generations, obstacle avoidance performance and autonomous flight planning have improved substantially, boosting safety and enabling more options.\u003c\/span\u003e\u003c\/div\u003e\n\u003cdiv style=\"text-align: center;\"\u003e\u003cspan style=\"font-weight: 400;\"\u003e*While recording in 4K at 60, 50, and 48 fps, 2.7K at 60, 50, and 48 fps, and 1080p at 120 and 240 fps, APAS 3.0 and FocusTrack are not available.\u003cbr data-mce-fragment=\"1\"\u003e\u003c\/span\u003e\u003c\/div\u003e\n\u003cstyle\u003e\u003c!--\n.embed-container { position: relative; padding-bottom: 56.25%; height: 0; overflow: hidden; max-width: 100%; } .embed-container iframe, .embed-container object, .embed-container embed { position: absolute; top: 0; left: 0; width: 100%; height: 100%; }\n--\u003e\u003c\/style\u003e\n\u003cdiv style=\"text-align: center;\" class=\"embed-container\"\u003e\u003ciframe src=\"https:\/\/www.youtube.com\/embed\/IwoyGb-NWDs\" frameborder=\"0\" allowfullscreen=\"\"\u003e\u003c\/iframe\u003e\u003c\/div\u003e\n\u003cdiv style=\"text-align: center;\"\u003e \u003c\/div\u003e\n\u003ch3 style=\"text-align: center;\"\u003e\u003cspan style=\"color: #ff8000;\"\u003e\u003cb\u003eDJI Fly App\u003c\/b\u003e\u003c\/span\u003e\u003c\/h3\u003e\n\u003cdiv style=\"text-align: center;\"\u003e\u003cb\u003eEffortless Editing\u003c\/b\u003e\u003c\/div\u003e\n\u003cdiv style=\"text-align: center;\"\u003e\u003cspan style=\"font-weight: 400;\"\u003eThe DJI Fly app makes creating perfect films easier than ever before. It incorporates the DJI Mimo app's editing suite, giving users access to manual settings, advanced functionalities, and intuitive templates to quickly produce professional compositions.\u003c\/span\u003e\u003c\/div\u003e\n\u003cdiv style=\"text-align: center;\"\u003e\u003cspan style=\"font-weight: 400;\"\u003e\u003cimg alt=\"dji-mavic-air-2-fly-more-combo-drone-content-feature-11-DJI-Fly-App\" src=\"https:\/\/cdn.shopify.com\/s\/files\/1\/2532\/7020\/files\/dji-mavic-air-2-fly-more-combo-drone-content-feature-11-DJI-Fly-App.jpg?v=1626149062\"\u003e\u003c\/span\u003e\u003c\/div\u003e\n\u003ch3 style=\"text-align: center;\"\u003e\u003cspan style=\"color: #ff8000;\"\u003e\u003cb\u003e\u003c\/b\u003e\u003c\/span\u003e\u003c\/h3\u003e\n\u003ch3 style=\"text-align: center;\"\u003e\u003cspan style=\"color: #ff8000;\"\u003e\u003cb\u003eRemote Controller \u003c\/b\u003e\u003c\/span\u003e\u003c\/h3\u003e\n\u003cdiv style=\"text-align: center;\"\u003e\u003cb\u003eDesigned for Pilots\u003c\/b\u003e\u003c\/div\u003e\n\u003cdiv style=\"text-align: center;\"\u003e\u003cspan style=\"font-weight: 400;\"\u003eThe newly designed remote controller has an ergonomic shape for a more comfortable grip and an excellent 240-minute battery life. The redesigned clamp makes it simple to attach devices, and the integrated antennas improve the user experience dramatically.\u003cbr data-mce-fragment=\"1\"\u003e*In an interference-free environment, battery life was measured using an Android phone.\u003c\/span\u003e\u003c\/div\u003e\n\u003cdiv style=\"text-align: center;\"\u003e\u003cspan style=\"font-weight: 400;\"\u003e\u003cimg alt=\"dji-mavic-air-2-fly-more-combo-drone-content-feature-12-remote\" src=\"https:\/\/cdn.shopify.com\/s\/files\/1\/2532\/7020\/files\/dji-mavic-air-2-fly-more-combo-drone-content-feature-12-remote.jpg?v=1626149088\"\u003e\u003c\/span\u003e\u003c\/div\u003e\n\u003cdiv style=\"text-align: center;\"\u003e \u003c\/div\u003e\n\u003ch3 style=\"text-align: center;\"\u003e\u003cspan style=\"color: #ff8000;\"\u003e\u003cb\u003eND Filters\u003c\/b\u003e\u003c\/span\u003e\u003c\/h3\u003e\n\u003cdiv style=\"text-align: center;\"\u003e\u003cb\u003eOptimal Options\u003c\/b\u003e\u003c\/div\u003e\n\u003cdiv style=\"text-align: center;\"\u003eThe Mavic Air 2 comes with two ND filter sets that help with exposure control and give you additional creative options. The ND 16\/64\/256 set is useful for altering shutter speed and in low-light situations, while the ND 4\/8\/32 set allows for colorful photographs even at low ISO.\u003cbr\u003e\u003cbr\u003e*The Fly More Combo comes with ND16\/64\/256 filters. Separately, the ND4\/8\/32 filter set can be ordered.\u003c\/div\u003e\n\u003cdiv style=\"text-align: center;\"\u003e\u003cspan style=\"font-weight: 400;\"\u003e\u003cimg alt=\"dji-mavic-air-2-fly-more-combo-drone-content-feature-13-ND-Filter\" src=\"https:\/\/cdn.shopify.com\/s\/files\/1\/2532\/7020\/files\/dji-mavic-air-2-fly-more-combo-drone-content-feature-13-ND-Filter.jpg?v=1626149110\"\u003e\u003c\/span\u003e\u003c\/div\u003e\n\u003cdiv style=\"text-align: center;\"\u003e \u003c\/div\u003e\n\u003ch2 style=\"text-align: left;\"\u003e\u003cstrong\u003eSpecification\u003c\/strong\u003e\u003c\/h2\u003e\n\u003cp\u003e \u003c\/p\u003e\n\u003cp\u003e \u003c\/p\u003e\n\u003cp\u003e \u003c\/p\u003e\n\u003cdiv style=\"text-align: left;\"\u003e\u003cb\u003eAircraft\u003c\/b\u003e\u003c\/div\u003e\n\u003cdiv style=\"text-align: left;\"\u003e\n\u003cul\u003e\n\u003cli style=\"font-weight: 400;\"\u003e\u003cb\u003eWeight\u003c\/b\u003e\u003c\/li\u003e\n\u003cli style=\"font-weight: 400;\"\u003e570 g\u003c\/li\u003e\n\u003c\/ul\u003e\n\u003cul\u003e\n\u003cli style=\"font-weight: 400;\"\u003e\u003cb\u003eSize\u003c\/b\u003e\u003c\/li\u003e\n\u003cli style=\"font-weight: 400;\"\u003e\n\u003cspan style=\"font-weight: 400;\"\u003eFolded:\u003c\/span\u003e\u003cspan style=\"font-weight: 400;\"\u003e\u003cbr\u003e\u003c\/span\u003e\u003cspan style=\"font-weight: 400;\"\u003e180×97×74 mm (Length×Width×Height)\u003c\/span\u003e\u003cspan style=\"font-weight: 400;\"\u003e\u003cbr\u003e\u003c\/span\u003e\u003cspan style=\"font-weight: 400;\"\u003eUnfolded:\u003c\/span\u003e\u003cspan style=\"font-weight: 400;\"\u003e\u003cbr\u003e\u003c\/span\u003e\u003cspan style=\"font-weight: 400;\"\u003e183×253×77 mm (Length×Width×Height)\u003c\/span\u003e\n\u003c\/li\u003e\n\u003c\/ul\u003e\n\u003cul\u003e\n\u003cli style=\"font-weight: 400;\"\u003e\u003cb\u003eDiagonal Distance\u003c\/b\u003e\u003c\/li\u003e\n\u003cli style=\"font-weight: 400;\"\u003e\u003cspan style=\"font-weight: 400;\"\u003e302 mm\u003c\/span\u003e\u003c\/li\u003e\n\u003cli\u003e\u003cb\u003eTransmitter Power (EIRP)\u003c\/b\u003e\u003c\/li\u003e\n\u003cli\u003e\n\u003cspan\u003e2.400-2.4835 GHz:\u003c\/span\u003e\u003cspan\u003e\u003cbr\u003e\u003c\/span\u003e\u003cspan\u003eFCC: ≤26 dBm\u003c\/span\u003e\u003cspan\u003e\u003cbr\u003e\u003c\/span\u003e\u003cspan\u003eCE: ≤20 dBm\u003c\/span\u003e\u003cspan\u003e\u003cbr\u003e\u003c\/span\u003e\u003cspan\u003eSRRC: ≤20 dBm\u003c\/span\u003e\u003cspan\u003e\u003cbr\u003e\u003c\/span\u003e\u003cspan\u003eMIC: ≤20 dBm\u003c\/span\u003e\u003cspan\u003e\u003cbr\u003e\u003c\/span\u003e\u003cspan\u003e\u003cbr\u003e\u003c\/span\u003e\u003cspan\u003e5.725-5.850 GHz:\u003c\/span\u003e\u003cspan\u003e\u003cbr\u003e\u003c\/span\u003e\u003cspan\u003eFCC: ≤26 dBm\u003c\/span\u003e\u003cspan\u003e\u003cbr\u003e\u003c\/span\u003e\u003cspan\u003eCE: ≤14 dBm\u003c\/span\u003e\u003cspan\u003e\u003cbr\u003e\u003c\/span\u003e\u003cspan\u003eSRRC: ≤26 dBm\u003c\/span\u003e\n\u003c\/li\u003e\n\u003c\/ul\u003e\n\u003cul\u003e\n\u003cli style=\"font-weight: 400;\"\u003e\u003cb\u003eMax Ascent Speed\u003c\/b\u003e\u003c\/li\u003e\n\u003cli style=\"font-weight: 400;\"\u003e\n\u003cspan style=\"font-weight: 400;\"\u003e4 m\/s (S Mode)\u003c\/span\u003e\u003cspan style=\"font-weight: 400;\"\u003e\u003cbr\u003e\u003c\/span\u003e\u003cspan style=\"font-weight: 400;\"\u003e4 m\/s (N Mode)\u003c\/span\u003e\n\u003c\/li\u003e\n\u003c\/ul\u003e\n\u003cul\u003e\n\u003cli style=\"font-weight: 400;\"\u003e\u003cb\u003eMax Service Ceiling Above Sea Level\u003c\/b\u003e\u003c\/li\u003e\n\u003cli style=\"font-weight: 400;\"\u003e\u003cspan style=\"font-weight: 400;\"\u003e5000 m\u003c\/span\u003e\u003c\/li\u003e\n\u003c\/ul\u003e\n\u003cul\u003e\n\u003cli style=\"font-weight: 400;\"\u003e\u003cb\u003eMax Flight Time (without wind)\u003c\/b\u003e\u003c\/li\u003e\n\u003cli style=\"font-weight: 400;\"\u003e\u003cspan style=\"font-weight: 400;\"\u003e34 minutes\u003c\/span\u003e\u003c\/li\u003e\n\u003c\/ul\u003e\n\u003cul\u003e\n\u003cli style=\"font-weight: 400;\"\u003e\u003cb\u003eMax Hover Time (without wind)\u003c\/b\u003e\u003c\/li\u003e\n\u003cli style=\"font-weight: 400;\"\u003e\u003cspan style=\"font-weight: 400;\"\u003e33 minutes\u003c\/span\u003e\u003c\/li\u003e\n\u003c\/ul\u003e\n\u003cul\u003e\n\u003cli style=\"font-weight: 400;\"\u003e\u003cb\u003eMax Flight Distance\u003c\/b\u003e\u003c\/li\u003e\n\u003cli style=\"font-weight: 400;\"\u003e\u003cspan style=\"font-weight: 400;\"\u003e18.5 km\u003c\/span\u003e\u003c\/li\u003e\n\u003cli\u003e\u003cb\u003eMax Descent Speed\u003c\/b\u003e\u003c\/li\u003e\n\u003cli\u003e\n\u003cspan\u003e3 m\/s (S Mode)\u003c\/span\u003e\u003cspan\u003e\u003cbr\u003e\u003c\/span\u003e\u003cspan\u003e3 m\/s (N Mode)\u003c\/span\u003e\u003cspan\u003e\u003cbr\u003e\u003c\/span\u003e\u003cspan\u003e5 m\/s (S Mode and N Mode during a sharp descent)\u003c\/span\u003e\u003cspan\u003e\u003cbr\u003e\u003c\/span\u003e\u003cspan\u003e3 m\/s (all modes at elevations over 4500 m)\u003c\/span\u003e\n\u003c\/li\u003e\n\u003c\/ul\u003e\n\u003cul\u003e\n\u003cli style=\"font-weight: 400;\"\u003e\u003cb\u003eMax Horizontal Flight Speed\u003c\/b\u003e\u003c\/li\u003e\n\u003cli style=\"font-weight: 400;\"\u003e\n\u003cspan style=\"font-weight: 400;\"\u003e19 m\/s (S Mode)\u003c\/span\u003e\u003cspan style=\"font-weight: 400;\"\u003e\u003cbr\u003e\u003c\/span\u003e\u003cspan style=\"font-weight: 400;\"\u003e12 m\/s (N Mode)\u003c\/span\u003e\u003cspan style=\"font-weight: 400;\"\u003e\u003cbr\u003e\u003c\/span\u003e\u003cspan style=\"font-weight: 400;\"\u003e5 m\/s (T Mode)\u003c\/span\u003e\n\u003c\/li\u003e\n\u003cli\u003e\u003cb\u003eHovering Accuracy Range\u003c\/b\u003e\u003c\/li\u003e\n\u003cli\u003e\n\u003cspan\u003eVertical:\u003c\/span\u003e\u003cspan\u003e\u003cbr\u003e\u003c\/span\u003e\u003cspan\u003e±0.1 m (with vision positioning)\u003c\/span\u003e\u003cspan\u003e\u003cbr\u003e\u003c\/span\u003e\u003cspan\u003e±0.5 m (with GPS positioning)\u003c\/span\u003e\u003cspan\u003e\u003cbr\u003e\u003c\/span\u003e\u003cspan\u003e\u003cbr\u003e\u003c\/span\u003e\u003cspan\u003eHorizontal:\u003c\/span\u003e\u003cspan\u003e\u003cbr\u003e\u003c\/span\u003e\u003cspan\u003e±0.1 m (with vision positioning)\u003c\/span\u003e\u003cspan\u003e\u003cbr\u003e\u003c\/span\u003e\u003cspan\u003e±1.5 m (with GPS positioning)\u003c\/span\u003e\n\u003c\/li\u003e\n\u003c\/ul\u003e\n\u003cul\u003e\n\u003cli style=\"font-weight: 400;\"\u003e\u003cb\u003eMax Wind Resistance\u003c\/b\u003e\u003c\/li\u003e\n\u003cli style=\"font-weight: 400;\"\u003e\u003cspan style=\"font-weight: 400;\"\u003e8.5-10.5 m\/s (Level 5)\u003c\/span\u003e\u003c\/li\u003e\n\u003c\/ul\u003e\n\u003cul\u003e\n\u003cli style=\"font-weight: 400;\"\u003e\u003cb\u003eMax Tilt Angle\u003c\/b\u003e\u003c\/li\u003e\n\u003cli style=\"font-weight: 400;\"\u003e\n\u003cspan style=\"font-weight: 400;\"\u003e35° (S Mode)\u003c\/span\u003e\u003cspan style=\"font-weight: 400;\"\u003e\u003cbr\u003e\u003c\/span\u003e\u003cspan style=\"font-weight: 400;\"\u003e20° (N Mode)\u003c\/span\u003e\u003cspan style=\"font-weight: 400;\"\u003e\u003cbr\u003e\u003c\/span\u003e\u003cspan style=\"font-weight: 400;\"\u003e35° (N Mode under strong wind)\u003c\/span\u003e\n\u003c\/li\u003e\n\u003c\/ul\u003e\n\u003cul\u003e\n\u003cli style=\"font-weight: 400;\"\u003e\u003cb\u003eOperating Frequency\u003c\/b\u003e\u003c\/li\u003e\n\u003cli style=\"font-weight: 400;\"\u003e\n\u003cspan style=\"font-weight: 400;\"\u003e2.400-2.4835 GHz\u003c\/span\u003e\u003cspan style=\"font-weight: 400;\"\u003e\u003cbr\u003e\u003c\/span\u003e\u003cspan style=\"font-weight: 400;\"\u003e5.725-5.850 GHz\u003c\/span\u003e\n\u003c\/li\u003e\n\u003c\/ul\u003e\n\u003cul data-mce-fragment=\"1\"\u003e\n\u003cli data-mce-fragment=\"1\"\u003e\u003cb data-mce-fragment=\"1\"\u003eMax Angular Velocity\u003c\/b\u003e\u003c\/li\u003e\n\u003cli data-mce-fragment=\"1\"\u003e\n\u003cspan data-mce-fragment=\"1\"\u003e250°\/s (S Mode)\u003c\/span\u003e\u003cspan data-mce-fragment=\"1\"\u003e\u003cbr data-mce-fragment=\"1\"\u003e\u003c\/span\u003e\u003cspan data-mce-fragment=\"1\"\u003e250°\/s (N Mode)\u003c\/span\u003e\n\u003c\/li\u003e\n\u003c\/ul\u003e\n\u003cul data-mce-fragment=\"1\"\u003e\n\u003cli data-mce-fragment=\"1\"\u003e\u003cb data-mce-fragment=\"1\"\u003eOperating Temperature Range\u003c\/b\u003e\u003c\/li\u003e\n\u003cli data-mce-fragment=\"1\"\u003e\u003cspan data-mce-fragment=\"1\"\u003e-10° to 40°C (14° to 104°F)\u003c\/span\u003e\u003c\/li\u003e\n\u003c\/ul\u003e\n\u003cul\u003e\u003c\/ul\u003e\n\u003cul\u003e\n\u003cli style=\"font-weight: 400;\"\u003e\u003cb\u003ePropellers\u003c\/b\u003e\u003c\/li\u003e\n\u003cli style=\"font-weight: 400;\"\u003e\u003cspan style=\"font-weight: 400;\"\u003eQuick release, low noise, folding\u003c\/span\u003e\u003c\/li\u003e\n\u003c\/ul\u003e\n\u003cul\u003e\n\u003cli style=\"font-weight: 400;\"\u003e\u003cb\u003eSatellite Systems\u003c\/b\u003e\u003c\/li\u003e\n\u003cli style=\"font-weight: 400;\"\u003e\u003cspan style=\"font-weight: 400;\"\u003eGPS+GLONASS\u003c\/span\u003e\u003c\/li\u003e\n\u003c\/ul\u003e\n\u003cul\u003e\n\u003cli style=\"font-weight: 400;\"\u003e\u003cb\u003eCompass\u003c\/b\u003e\u003c\/li\u003e\n\u003cli style=\"font-weight: 400;\"\u003e\u003cspan style=\"font-weight: 400;\"\u003eSingle Compass\u003c\/span\u003e\u003c\/li\u003e\n\u003c\/ul\u003e\n\u003cul\u003e\n\u003cli style=\"font-weight: 400;\"\u003e\u003cb\u003eIMU\u003c\/b\u003e\u003c\/li\u003e\n\u003cli style=\"font-weight: 400;\"\u003e\u003cspan style=\"font-weight: 400;\"\u003eSingle IMU\u003c\/span\u003e\u003c\/li\u003e\n\u003c\/ul\u003e\n\u003cul\u003e\n\u003cli style=\"font-weight: 400;\"\u003e\u003cb\u003eInternal Storage\u003c\/b\u003e\u003c\/li\u003e\n\u003cli style=\"font-weight: 400;\"\u003e\u003cspan style=\"font-weight: 400;\"\u003e8 GB\u003c\/span\u003e\u003c\/li\u003e\n\u003c\/ul\u003e\n\u003c\/div\u003e\n\u003cdiv style=\"text-align: left;\"\u003e\u003cb\u003eBattery\u003c\/b\u003e\u003c\/div\u003e\n\u003cdiv style=\"text-align: left;\"\u003e\n\u003cul\u003e\n\u003cli style=\"font-weight: 400;\"\u003e\u003cb\u003eCapacity\u003c\/b\u003e\u003c\/li\u003e\n\u003cli style=\"font-weight: 400;\"\u003e\u003cspan style=\"font-weight: 400;\"\u003e3500 mAh\u003c\/span\u003e\u003c\/li\u003e\n\u003c\/ul\u003e\n\u003cul\u003e\n\u003cli style=\"font-weight: 400;\"\u003e\u003cb\u003eVoltage\u003c\/b\u003e\u003c\/li\u003e\n\u003cli style=\"font-weight: 400;\"\u003e\u003cspan style=\"font-weight: 400;\"\u003e11.55 V\u003c\/span\u003e\u003c\/li\u003e\n\u003c\/ul\u003e\n\u003cul\u003e\n\u003cli style=\"font-weight: 400;\"\u003e\u003cb\u003eCharging Voltage Limit\u003c\/b\u003e\u003c\/li\u003e\n\u003cli style=\"font-weight: 400;\"\u003e\u003cspan style=\"font-weight: 400;\"\u003e13.2 V\u003c\/span\u003e\u003c\/li\u003e\n\u003c\/ul\u003e\n\u003cul\u003e\u003c\/ul\u003e\n\u003cul\u003e\n\u003cli style=\"font-weight: 400;\"\u003e\u003cb\u003eWeight\u003c\/b\u003e\u003c\/li\u003e\n\u003cli style=\"font-weight: 400;\"\u003e\u003cspan style=\"font-weight: 400;\"\u003e198 g\u003c\/span\u003e\u003c\/li\u003e\n\u003c\/ul\u003e\n\u003cul\u003e\n\u003cli style=\"font-weight: 400;\"\u003e\u003cb\u003eCharging Temperature\u003c\/b\u003e\u003c\/li\u003e\n\u003cli style=\"font-weight: 400;\"\u003e\u003cspan style=\"font-weight: 400;\"\u003e5° to 40°C (41° to 104°F)\u003c\/span\u003e\u003c\/li\u003e\n\u003c\/ul\u003e\n\u003cul data-mce-fragment=\"1\"\u003e\n\u003cli data-mce-fragment=\"1\"\u003e\u003cb data-mce-fragment=\"1\"\u003eBattery Type\u003c\/b\u003e\u003c\/li\u003e\n\u003cli data-mce-fragment=\"1\"\u003e\u003cspan data-mce-fragment=\"1\"\u003eLiPo 3S\u003c\/span\u003e\u003c\/li\u003e\n\u003c\/ul\u003e\n\u003cul data-mce-fragment=\"1\"\u003e\n\u003cli data-mce-fragment=\"1\"\u003e\u003cb data-mce-fragment=\"1\"\u003eEnergy\u003c\/b\u003e\u003c\/li\u003e\n\u003cli data-mce-fragment=\"1\"\u003e\u003cspan data-mce-fragment=\"1\"\u003e40.42 Wh\u003c\/span\u003e\u003c\/li\u003e\n\u003c\/ul\u003e\n\u003cul\u003e\u003c\/ul\u003e\n\u003cul\u003e\n\u003cli style=\"font-weight: 400;\"\u003e\u003cb\u003eMax Charging Power\u003c\/b\u003e\u003c\/li\u003e\n\u003cli style=\"font-weight: 400;\"\u003e\u003cspan style=\"font-weight: 400;\"\u003e38 W\u003c\/span\u003e\u003c\/li\u003e\n\u003c\/ul\u003e\n\u003c\/div\u003e\n\u003cdiv style=\"text-align: left;\"\u003e\u003cb\u003eCamera\u003c\/b\u003e\u003c\/div\u003e\n\u003cdiv\u003e\n\u003cul style=\"text-align: left;\"\u003e\n\u003cli style=\"font-weight: 400;\"\u003e\u003cb\u003eSensor\u003c\/b\u003e\u003c\/li\u003e\n\u003cli style=\"font-weight: 400;\"\u003e\n\u003cspan style=\"font-weight: 400;\"\u003e1\/2\" CMOS\u003c\/span\u003e\u003cspan style=\"font-weight: 400;\"\u003e\u003cbr\u003e\u003c\/span\u003e\u003cspan style=\"font-weight: 400;\"\u003eEffective Pixels: 12 MP and 48 MP\u003c\/span\u003e\n\u003c\/li\u003e\n\u003cli\u003e\u003cb\u003eISO\u003c\/b\u003e\u003c\/li\u003e\n\u003cli\u003e\n\u003cspan\u003eVideo:\u003c\/span\u003e\u003cspan\u003e\u003cbr\u003e\u003c\/span\u003e\u003cspan\u003e100-6400\u003c\/span\u003e\u003cspan\u003e\u003cbr\u003e\u003c\/span\u003e\u003cspan\u003e\u003cbr\u003e\u003c\/span\u003e\u003cspan\u003ePhoto (12 MP):\u003c\/span\u003e\u003cspan\u003e\u003cbr\u003e\u003c\/span\u003e\u003cspan\u003e100-3200 (Auto)\u003c\/span\u003e\u003cspan\u003e\u003cbr\u003e\u003c\/span\u003e\u003cspan\u003e100-6400 (Manual)\u003c\/span\u003e\u003cspan\u003e\u003cbr\u003e\u003c\/span\u003e\u003cspan\u003ePhoto (48 MP):\u003c\/span\u003e\u003cspan\u003e\u003cbr\u003e\u003c\/span\u003e\u003cspan\u003e100-1600 (Auto)\u003c\/span\u003e\u003cspan\u003e\u003cbr\u003e\u003c\/span\u003e\u003cspan\u003e100-3200 (Manual)\u003c\/span\u003e\n\u003c\/li\u003e\n\u003c\/ul\u003e\n\u003cul style=\"text-align: left;\"\u003e\n\u003cli style=\"font-weight: 400;\"\u003e\u003cb\u003eLens\u003c\/b\u003e\u003c\/li\u003e\n\u003cli style=\"font-weight: 400;\"\u003e\n\u003cspan style=\"font-weight: 400;\"\u003eFOV: 84°\u003c\/span\u003e\u003cspan style=\"font-weight: 400;\"\u003e\u003cbr\u003e\u003c\/span\u003e\u003cspan style=\"font-weight: 400;\"\u003eEquivalent Focal Length: 24 mm\u003c\/span\u003e\u003cspan style=\"font-weight: 400;\"\u003e\u003cbr\u003e\u003c\/span\u003e\u003cspan style=\"font-weight: 400;\"\u003eAperture: f\/2.8\u003c\/span\u003e\u003cspan style=\"font-weight: 400;\"\u003e\u003cbr\u003e\u003c\/span\u003e\u003cspan style=\"font-weight: 400;\"\u003eFocus Range: 1 m to ∞\u003c\/span\u003e\n\u003c\/li\u003e\n\u003c\/ul\u003e\n\u003cul data-mce-fragment=\"1\"\u003e\n\u003cli data-mce-fragment=\"1\"\u003e\u003cb data-mce-fragment=\"1\"\u003eVideo Formats\u003c\/b\u003e\u003c\/li\u003e\n\u003cli data-mce-fragment=\"1\"\u003e\u003cspan data-mce-fragment=\"1\"\u003eMP4\/MOV (H.264\/MPEG-4 AVC, H.265\/HEVC)\u003c\/span\u003e\u003c\/li\u003e\n\u003c\/ul\u003e\n\u003cul data-mce-fragment=\"1\"\u003e\n\u003cli data-mce-fragment=\"1\"\u003e\u003cb data-mce-fragment=\"1\"\u003eMax Bitrate\u003c\/b\u003e\u003c\/li\u003e\n\u003cli data-mce-fragment=\"1\"\u003e\u003cspan data-mce-fragment=\"1\"\u003e120 Mbps\u003c\/span\u003e\u003c\/li\u003e\n\u003c\/ul\u003e\n\u003cul style=\"text-align: left;\"\u003e\u003c\/ul\u003e\n\u003cul style=\"text-align: left;\"\u003e\n\u003cli style=\"font-weight: 400;\"\u003e\u003cb\u003eMax Photo Resolution\u003c\/b\u003e\u003c\/li\u003e\n\u003cli style=\"font-weight: 400;\"\u003e\u003cspan style=\"font-weight: 400;\"\u003e48 MP 8000×6000 pixel\u003c\/span\u003e\u003c\/li\u003e\n\u003c\/ul\u003e\n\u003cul style=\"text-align: left;\"\u003e\n\u003cli style=\"font-weight: 400;\"\u003e\u003cb\u003ePhoto Formats\u003c\/b\u003e\u003c\/li\u003e\n\u003cli style=\"font-weight: 400;\"\u003e\u003cspan style=\"font-weight: 400;\"\u003eJPEG\/DNG (RAW)\u003c\/span\u003e\u003c\/li\u003e\n\u003cli\u003e\u003cb\u003ePhoto Modes\u003c\/b\u003e\u003c\/li\u003e\n\u003cli\u003e\n\u003cspan\u003eSingle: 12 MP and 48 MP\u003c\/span\u003e\u003cspan\u003e\u003cbr\u003e\u003c\/span\u003e\u003cspan\u003eBurst: 12 MP, 3\/5\/7 frames\u003c\/span\u003e\u003cspan\u003e\u003cbr\u003e\u003c\/span\u003e\u003cspan\u003eAutomatic Exposure Bracketing (AEB): 12MP, 3\/5 Frames at 0.7EV Bias\u003c\/span\u003e\u003cspan\u003e\u003cbr\u003e\u003c\/span\u003e\u003cspan\u003eTimed: 12 MP 2\/3\/5\/7\/10\/15\/20\/30\/60 seconds\u003c\/span\u003e\u003cspan\u003e\u003cbr\u003e\u003c\/span\u003e\u003cspan\u003eSmartPhoto: Scene Recognition, HyperLight, and HDR\u003c\/span\u003e\u003cspan\u003e\u003cbr\u003e\u003c\/span\u003e\u003cspan\u003eHDR Panorama:\u003c\/span\u003e\u003cspan\u003e\u003cbr\u003e\u003c\/span\u003e\u003cspan\u003eVertical (3×1): 3328×8000 pixels (Width×Height)\u003c\/span\u003e\u003cspan\u003e\u003cbr\u003e\u003c\/span\u003e\u003cspan\u003eWide-angle (3×3): 8000×6144 pixels (Width×Height)\u003c\/span\u003e\u003cspan\u003e\u003cbr\u003e\u003c\/span\u003e\u003cspan\u003e180° Panorama (3×7): 8192×3500 pixels (Width×Height)\u003c\/span\u003e\u003cspan\u003e\u003cbr\u003e\u003c\/span\u003e\u003cspan\u003eSphere (3×8+1): 8192×4096 pixels (Width×Height)\u003c\/span\u003e\n\u003c\/li\u003e\n\u003c\/ul\u003e\n\u003cul style=\"text-align: left;\"\u003e\n\u003cli style=\"font-weight: 400;\"\u003e\u003cb\u003eVideo Resolution and Frame Rates\u003c\/b\u003e\u003c\/li\u003e\n\u003cli style=\"font-weight: 400;\"\u003e\n\u003cspan style=\"font-weight: 400;\"\u003e4K Ultra HD: 3840×2160 24\/25\/30\/48\/50\/60 fps\u003c\/span\u003e\u003cspan style=\"font-weight: 400;\"\u003e\u003cbr\u003e\u003c\/span\u003e\u003cspan style=\"font-weight: 400;\"\u003e2.7K: 2688×1512 24\/25\/30\/48\/50\/60 fps\u003c\/span\u003e\u003cspan style=\"font-weight: 400;\"\u003e\u003cbr\u003e\u003c\/span\u003e\u003cspan style=\"font-weight: 400;\"\u003eFHD: 1920×1080 24\/25\/30\/48\/50\/60\/120\/240 fps\u003c\/span\u003e\u003cspan style=\"font-weight: 400;\"\u003e\u003cbr\u003e\u003c\/span\u003e\u003cspan style=\"font-weight: 400;\"\u003e4K Ultra HD HDR: 3840×2160 24\/25\/30 fps\u003c\/span\u003e\u003cspan style=\"font-weight: 400;\"\u003e\u003cbr\u003e\u003c\/span\u003e\u003cspan style=\"font-weight: 400;\"\u003e2.7K HDR: 2688×1512 24\/25\/30 fps\u003c\/span\u003e\u003cspan style=\"font-weight: 400;\"\u003e\u003cbr\u003e\u003c\/span\u003e\u003cspan style=\"font-weight: 400;\"\u003eFHD HDR: 1920×1080 24\/25\/30 fps\u003c\/span\u003e\n\u003c\/li\u003e\n\u003c\/ul\u003e\n\u003cul style=\"text-align: left;\"\u003e\n\u003cli style=\"font-weight: 400;\"\u003e\u003cb\u003eColor Profiles\u003c\/b\u003e\u003c\/li\u003e\n\u003cli style=\"font-weight: 400;\"\u003e\u003cspan style=\"font-weight: 400;\"\u003eD-Cinelike, Normal\u003c\/span\u003e\u003c\/li\u003e\n\u003c\/ul\u003e\n\u003cul style=\"text-align: left;\"\u003e\n\u003cli style=\"font-weight: 400;\"\u003e\u003cb\u003eSupported SD Cards\u003c\/b\u003e\u003c\/li\u003e\n\u003cli style=\"font-weight: 400;\"\u003e\u003cspan style=\"font-weight: 400;\"\u003eSupports a microSD with capacity of up to 256 GB\u003c\/span\u003e\u003c\/li\u003e\n\u003c\/ul\u003e\n\u003cul style=\"text-align: left;\"\u003e\n\u003cli style=\"font-weight: 400;\"\u003e\u003cb\u003eSupported File Systems\u003c\/b\u003e\u003c\/li\u003e\n\u003cli style=\"font-weight: 400;\"\u003e\u003cspan style=\"font-weight: 400;\"\u003eFAT32 and exFAT\u003c\/span\u003e\u003c\/li\u003e\n\u003c\/ul\u003e\n\u003cul style=\"text-align: center;\"\u003e\n\u003cli style=\"font-weight: 400; text-align: left;\"\u003e\u003cb\u003eZoom\u003c\/b\u003e\u003c\/li\u003e\n\u003cli style=\"font-weight: 400; text-align: left;\"\u003e\u003cspan style=\"font-weight: 400;\"\u003eAvailable\u003c\/span\u003e\u003c\/li\u003e\n\u003c\/ul\u003e\n\u003c\/div\u003e\n\u003c\/div\u003e","published_at":"2022-10-20T06:18:16-04:00","created_at":"2021-07-23T04:25:10-04:00","vendor":"DJI","type":"Drone","tags":["best drone","DJI Drones","DJI Mavic Air 2","DJI Mavic Air 2 Fly More Combo","drone","drone camera","drone dji","drone with camera","FocusTrack","HDR","mini drone","無人機","無人機套裝","航拍機","遙控航拍機","飛行無人機","高清航拍機"],"price":108800,"price_min":108800,"price_max":108800,"available":false,"price_varies":false,"compare_at_price":null,"compare_at_price_min":0,"compare_at_price_max":0,"compare_at_price_varies":false,"variants":[{"id":39446096314443,"title":"Default Title","option1":"Default Title","option2":null,"option3":null,"sku":"DJI-Air2-COMBO","requires_shipping":true,"taxable":true,"featured_image":null,"available":false,"name":"DJI Mavic Air 2 Fly More Combo - Drone Quadcopter UAV with 4K Video|48MP Camera|34min Flight Time|8K Hyperlapse 1\/2\" CMOS Sensor|ActiveTrack 3.0|3-Axis Gimba|Ocusync 2.0","public_title":null,"options":["Default Title"],"price":108800,"weight":2000,"compare_at_price":null,"inventory_management":"shopify","barcode":"","requires_selling_plan":false,"selling_plan_allocations":[]}],"images":["\/\/www.stream-sourcing.com\/cdn\/shop\/products\/dji-mavic-air-2-fly-more-combo-drone-front.jpg?v=1627028713","\/\/www.stream-sourcing.com\/cdn\/shop\/products\/dji-mavic-air-2-fly-more-combo-drone-package.jpg?v=1627028713","\/\/www.stream-sourcing.com\/cdn\/shop\/products\/dji-mavic-air-2-fly-more-combo-drone-bottom.jpg?v=1627028713","\/\/www.stream-sourcing.com\/cdn\/shop\/products\/dji-mavic-air-2-fly-more-combo-drone-open-side.jpg?v=1627028713","\/\/www.stream-sourcing.com\/cdn\/shop\/products\/dji-mavic-air-2-fly-more-combo-drone-all-package.jpg?v=1627028713","\/\/www.stream-sourcing.com\/cdn\/shop\/products\/dji-mavic-air-2-fly-more-combo-drone-closed-side.jpg?v=1627028714","\/\/www.stream-sourcing.com\/cdn\/shop\/products\/dji-mavic-air-2-fly-more-combo-drone-control.jpg?v=1627028714","\/\/www.stream-sourcing.com\/cdn\/shop\/products\/dji-mavic-air-2-fly-more-combo-drone-front-top.jpg?v=1627028714","\/\/www.stream-sourcing.com\/cdn\/shop\/products\/dji-mavic-air-2-fly-more-combo-drone-named-side.jpg?v=1627028714","\/\/www.stream-sourcing.com\/cdn\/shop\/products\/dji-mavic-air-2-fly-more-combo-drone-top-view.jpg?v=1627028714","\/\/www.stream-sourcing.com\/cdn\/shop\/products\/dji-mavic-air-2-fly-more-combo-drone-with-mobile.jpg?v=1627028714","\/\/www.stream-sourcing.com\/cdn\/shop\/products\/dji-mavic-air-2-fly-more-combo-drone-with-mobile-hand.jpg?v=1627028715"],"featured_image":"\/\/www.stream-sourcing.com\/cdn\/shop\/products\/dji-mavic-air-2-fly-more-combo-drone-front.jpg?v=1627028713","options":["Title"],"media":[{"alt":"dji-mavic-air-2-fly-more-combo-drone-front","id":20538303774795,"position":1,"preview_image":{"aspect_ratio":1.762,"height":681,"width":1200,"src":"\/\/www.stream-sourcing.com\/cdn\/shop\/products\/dji-mavic-air-2-fly-more-combo-drone-front.jpg?v=1627028713"},"aspect_ratio":1.762,"height":681,"media_type":"image","src":"\/\/www.stream-sourcing.com\/cdn\/shop\/products\/dji-mavic-air-2-fly-more-combo-drone-front.jpg?v=1627028713","width":1200},{"alt":"dji-mavic-air-2-fly-more-combo-drone-package","id":20538303807563,"position":2,"preview_image":{"aspect_ratio":1.506,"height":797,"width":1200,"src":"\/\/www.stream-sourcing.com\/cdn\/shop\/products\/dji-mavic-air-2-fly-more-combo-drone-package.jpg?v=1627028713"},"aspect_ratio":1.506,"height":797,"media_type":"image","src":"\/\/www.stream-sourcing.com\/cdn\/shop\/products\/dji-mavic-air-2-fly-more-combo-drone-package.jpg?v=1627028713","width":1200},{"alt":"dji-mavic-air-2-fly-more-combo-drone-bottom","id":20538303840331,"position":3,"preview_image":{"aspect_ratio":1.644,"height":730,"width":1200,"src":"\/\/www.stream-sourcing.com\/cdn\/shop\/products\/dji-mavic-air-2-fly-more-combo-drone-bottom.jpg?v=1627028713"},"aspect_ratio":1.644,"height":730,"media_type":"image","src":"\/\/www.stream-sourcing.com\/cdn\/shop\/products\/dji-mavic-air-2-fly-more-combo-drone-bottom.jpg?v=1627028713","width":1200},{"alt":"dji-mavic-air-2-fly-more-combo-drone-open-side","id":20538303873099,"position":4,"preview_image":{"aspect_ratio":1.384,"height":867,"width":1200,"src":"\/\/www.stream-sourcing.com\/cdn\/shop\/products\/dji-mavic-air-2-fly-more-combo-drone-open-side.jpg?v=1627028713"},"aspect_ratio":1.384,"height":867,"media_type":"image","src":"\/\/www.stream-sourcing.com\/cdn\/shop\/products\/dji-mavic-air-2-fly-more-combo-drone-open-side.jpg?v=1627028713","width":1200},{"alt":"dji-mavic-air-2-fly-more-combo-drone-all-package","id":20538303905867,"position":5,"preview_image":{"aspect_ratio":1.453,"height":826,"width":1200,"src":"\/\/www.stream-sourcing.com\/cdn\/shop\/products\/dji-mavic-air-2-fly-more-combo-drone-all-package.jpg?v=1627028713"},"aspect_ratio":1.453,"height":826,"media_type":"image","src":"\/\/www.stream-sourcing.com\/cdn\/shop\/products\/dji-mavic-air-2-fly-more-combo-drone-all-package.jpg?v=1627028713","width":1200},{"alt":"dji mavic air 2 fly more combo drone closed side","id":20538303938635,"position":6,"preview_image":{"aspect_ratio":1.257,"height":955,"width":1200,"src":"\/\/www.stream-sourcing.com\/cdn\/shop\/products\/dji-mavic-air-2-fly-more-combo-drone-closed-side.jpg?v=1627028714"},"aspect_ratio":1.257,"height":955,"media_type":"image","src":"\/\/www.stream-sourcing.com\/cdn\/shop\/products\/dji-mavic-air-2-fly-more-combo-drone-closed-side.jpg?v=1627028714","width":1200},{"alt":"dji-mavic-air-2-fly-more-combo-drone-control","id":20538303971403,"position":7,"preview_image":{"aspect_ratio":1.317,"height":911,"width":1200,"src":"\/\/www.stream-sourcing.com\/cdn\/shop\/products\/dji-mavic-air-2-fly-more-combo-drone-control.jpg?v=1627028714"},"aspect_ratio":1.317,"height":911,"media_type":"image","src":"\/\/www.stream-sourcing.com\/cdn\/shop\/products\/dji-mavic-air-2-fly-more-combo-drone-control.jpg?v=1627028714","width":1200},{"alt":"dji-mavic-air-2-fly-more-combo-drone-front-top","id":20538304004171,"position":8,"preview_image":{"aspect_ratio":1.463,"height":820,"width":1200,"src":"\/\/www.stream-sourcing.com\/cdn\/shop\/products\/dji-mavic-air-2-fly-more-combo-drone-front-top.jpg?v=1627028714"},"aspect_ratio":1.463,"height":820,"media_type":"image","src":"\/\/www.stream-sourcing.com\/cdn\/shop\/products\/dji-mavic-air-2-fly-more-combo-drone-front-top.jpg?v=1627028714","width":1200},{"alt":null,"id":20538304036939,"position":9,"preview_image":{"aspect_ratio":1.359,"height":883,"width":1200,"src":"\/\/www.stream-sourcing.com\/cdn\/shop\/products\/dji-mavic-air-2-fly-more-combo-drone-named-side.jpg?v=1627028714"},"aspect_ratio":1.359,"height":883,"media_type":"image","src":"\/\/www.stream-sourcing.com\/cdn\/shop\/products\/dji-mavic-air-2-fly-more-combo-drone-named-side.jpg?v=1627028714","width":1200},{"alt":null,"id":20538304069707,"position":10,"preview_image":{"aspect_ratio":1.257,"height":955,"width":1200,"src":"\/\/www.stream-sourcing.com\/cdn\/shop\/products\/dji-mavic-air-2-fly-more-combo-drone-top-view.jpg?v=1627028714"},"aspect_ratio":1.257,"height":955,"media_type":"image","src":"\/\/www.stream-sourcing.com\/cdn\/shop\/products\/dji-mavic-air-2-fly-more-combo-drone-top-view.jpg?v=1627028714","width":1200},{"alt":null,"id":20538304102475,"position":11,"preview_image":{"aspect_ratio":1.2,"height":1000,"width":1200,"src":"\/\/www.stream-sourcing.com\/cdn\/shop\/products\/dji-mavic-air-2-fly-more-combo-drone-with-mobile.jpg?v=1627028714"},"aspect_ratio":1.2,"height":1000,"media_type":"image","src":"\/\/www.stream-sourcing.com\/cdn\/shop\/products\/dji-mavic-air-2-fly-more-combo-drone-with-mobile.jpg?v=1627028714","width":1200},{"alt":null,"id":20538304135243,"position":12,"preview_image":{"aspect_ratio":1.292,"height":929,"width":1200,"src":"\/\/www.stream-sourcing.com\/cdn\/shop\/products\/dji-mavic-air-2-fly-more-combo-drone-with-mobile-hand.jpg?v=1627028715"},"aspect_ratio":1.292,"height":929,"media_type":"image","src":"\/\/www.stream-sourcing.com\/cdn\/shop\/products\/dji-mavic-air-2-fly-more-combo-drone-with-mobile-hand.jpg?v=1627028715","width":1200}],"requires_selling_plan":false,"selling_plan_groups":[],"content":"\u003ch1 style=\"text-align: center;\"\u003e\u003cstrong\u003eDJI Mavic Air 2 - giving you a new photos and video recording experience\u003c\/strong\u003e\u003c\/h1\u003e\u003cdiv class=\"desc\"\u003e\n\u003ch2 style=\"text-align: center;\"\u003eThe DJI Mavic Air 2 pushes power and portability to new heights, with advanced capabilities packed into a small package. \u003c\/h2\u003e\n\u003cstyle\u003e\u003c!--\n.embed-container { position: relative; padding-bottom: 56.25%; height: 0; overflow: hidden; max-width: 100%; } .embed-container iframe, .embed-container object, .embed-container embed { position: absolute; top: 0; left: 0; width: 100%; height: 100%; }\n--\u003e\u003c\/style\u003e\n\u003cdiv style=\"text-align: center;\" class=\"embed-container\"\u003e\u003ciframe src=\"https:\/\/www.youtube.com\/embed\/StDjsvNFru0\" allowfullscreen=\"\" frameborder=\"0\"\u003e\u003c\/iframe\u003e\u003c\/div\u003e\n\u003cdiv style=\"text-align: center;\"\u003e \u003c\/div\u003e\n\u003ch3 style=\"text-align: center;\"\u003e\u003cspan style=\"font-weight: 400;\"\u003eAerial masterpieces are within reach thanks to intelligent shooting functions and superb image quality. You can raise your game while fully enjoying the creative process with safer, smarter flight.\u003c\/span\u003e\u003c\/h3\u003e\n\u003ch2 style=\"text-align: center;\"\u003e\u003cstrong\u003eFeature\u003c\/strong\u003e\u003c\/h2\u003e\n\u003cdiv style=\"text-align: center;\"\u003e\u003c\/div\u003e\n\u003cdiv style=\"text-align: center;\"\u003e\n\u003ctable\u003e\n\u003ctbody\u003e\n\u003ctr\u003e\n\u003ctd style=\"text-align: center;\"\u003e\n\u003cp\u003e\u003cstrong\u003eUltra-Clear Details \u003c\/strong\u003e\u003c\/p\u003e\n\u003cp\u003e\u003cspan style=\"font-weight: 400;\"\u003e1\/2-Inch Image Sensor \u003c\/span\u003e\u003c\/p\u003e\n\u003cp\u003e\u003cspan style=\"font-weight: 400;\"\u003e4K\/60fps Video \u003c\/span\u003e\u003c\/p\u003e\n\u003cp\u003e\u003cspan style=\"font-weight: 400;\"\u003e48MP Photo\u003c\/span\u003e\u003c\/p\u003e\n\u003c\/td\u003e\n\u003ctd style=\"text-align: center;\"\u003e\n\u003cp\u003e\u003cstrong\u003eEnhanced HDR \u003c\/strong\u003e\u003c\/p\u003e\n\u003cp\u003e\u003cspan style=\"font-weight: 400;\"\u003ePhoto \u003c\/span\u003e\u003c\/p\u003e\n\u003cp\u003e\u003cspan style=\"font-weight: 400;\"\u003eVideo \u003c\/span\u003e\u003c\/p\u003e\n\u003cp\u003e\u003cspan style=\"font-weight: 400;\"\u003ePanorama\u003c\/span\u003e\u003c\/p\u003e\n\u003c\/td\u003e\n\u003c\/tr\u003e\n\u003ctr\u003e\n\u003ctd style=\"text-align: center;\"\u003e\n\u003cp\u003e\u003cstrong\u003eFly Smarter and Safer \u003c\/strong\u003e\u003c\/p\u003e\n\u003cp\u003e\u003cspan style=\"font-weight: 400;\"\u003eAPAS 3.0 Obstacle Avoidance\u003c\/span\u003e\u003c\/p\u003e\n\u003c\/td\u003e\n\u003ctd style=\"text-align: center;\"\u003e\n\u003cp\u003e\u003cstrong\u003eFly Farther, See Clearer \u003c\/strong\u003e\u003c\/p\u003e\n\u003cp\u003e\u003cspan style=\"font-weight: 400;\"\u003eOcuSync 2.0 10km 1080p\/30fps Video Transmission\u003c\/span\u003e\u003c\/p\u003e\n\u003c\/td\u003e\n\u003c\/tr\u003e\n\u003ctr\u003e\n\u003ctd style=\"text-align: center;\"\u003e\n\u003cp\u003e\u003cstrong\u003eFly Longer \u003c\/strong\u003e\u003c\/p\u003e\n\u003cp\u003e\u003cspan\u003e34-Min Max Flight Time \u003c\/span\u003e\u003c\/p\u003e\n\u003cp\u003e\u003cspan\u003e240-Min Max RC Battery Life\u003c\/span\u003e\u003c\/p\u003e\n\u003c\/td\u003e\n\u003ctd style=\"text-align: center;\"\u003e\n\u003cp\u003e\u003cstrong\u003eCinematic Content \u003c\/strong\u003e\u003c\/p\u003e\n\u003cp\u003e\u003cspan\u003e8K Hyperlapse \u003c\/span\u003e\u003c\/p\u003e\n\u003cp\u003e\u003cspan\u003eQuickShots\u003c\/span\u003e\u003c\/p\u003e\n\u003c\/td\u003e\n\u003c\/tr\u003e\n\u003c\/tbody\u003e\n\u003c\/table\u003e\n\u003c\/div\u003e\n\u003cdiv style=\"text-align: center;\"\u003e\u003cb\u003e\u003cimg alt=\"dji-mavic-air-2-fly-more-combo-drone-content-feature-all\" src=\"https:\/\/cdn.shopify.com\/s\/files\/1\/2532\/7020\/files\/dji-mavic-air-2-fly-more-combo-drone-content-feature-all.jpg?v=1626148044\"\u003e\u003c\/b\u003e\u003c\/div\u003e\n\u003ch3 style=\"text-align: center;\"\u003e\u003cspan style=\"color: #ff8000;\"\u003e\u003cb\u003e\u003c\/b\u003e\u003c\/span\u003e\u003c\/h3\u003e\n\u003ch3 style=\"text-align: center;\"\u003e\u003cspan style=\"color: #ff8000;\"\u003e\u003cb\u003eHigh Image Quality\u003c\/b\u003e\u003c\/span\u003e\u003c\/h3\u003e\n\u003cdiv style=\"text-align: center;\"\u003e\u003cb\u003eEpic is Simple, with 4K\/60fps Video \u003c\/b\u003e\u003c\/div\u003e\n\u003cdiv style=\"text-align: center;\"\u003e\u003cspan style=\"font-weight: 400;\"\u003eFootage Master creative aerial views with 4K\/60fps video that is effortlessly fluid. For post-processing, the D-Cinelike flat color profile maintains more information. The HEVC (H.265) video codec records more visual information, uses less storage, and keeps your footage's dynamic range and quality, delivering next-level content.\u003cbr data-mce-fragment=\"1\"\u003e\u003c\/span\u003e\u003c\/div\u003e\n\u003cdiv style=\"text-align: center;\"\u003e\u003cspan style=\"font-weight: 400;\"\u003e\u003cimg alt=\"dji-mavic-air-2-fly-more-combo-drone-content-feature-1-image-quality\" src=\"https:\/\/cdn.shopify.com\/s\/files\/1\/2532\/7020\/files\/dji-mavic-air-2-fly-more-combo-drone-content-feature-1-image-quality.jpg?v=1626148092\"\u003e\u003c\/span\u003e\u003c\/div\u003e\n\u003ch3 style=\"text-align: center;\"\u003e\u003cspan style=\"color: #ff8000;\"\u003e\u003cb\u003e\u003c\/b\u003e\u003c\/span\u003e\u003c\/h3\u003e\n\u003ch3 style=\"text-align: center;\"\u003e\u003cspan style=\"color: #ff8000;\"\u003e\u003cb\u003eHDR Video\u003c\/b\u003e\u003c\/span\u003e\u003c\/h3\u003e\n\u003cdiv style=\"text-align: center;\"\u003e\u003cb\u003eBy default, everything is dynamic.\u003cbr data-mce-fragment=\"1\"\u003e\u003c\/b\u003e\u003c\/div\u003e\n\u003cdiv style=\"text-align: center;\"\u003e\u003cspan style=\"font-weight: 400;\"\u003eA high-performance Quad Bayer image sensor is the key to outstanding HDR video. A single frame captures light and dark details by separating exposure levels in different places. The photos are stacked to create a picture with a higher dynamic range that is vibrant, balanced, and appealing.\u003c\/span\u003e\u003c\/div\u003e\n\u003cdiv style=\"text-align: center;\"\u003e\u003cspan style=\"font-weight: 400;\"\u003e\u003cimg alt=\"dji-mavic-air-2-fly-more-combo-drone-content-feature-2-hdr-video\" src=\"https:\/\/cdn.shopify.com\/s\/files\/1\/2532\/7020\/files\/dji-mavic-air-2-fly-more-combo-drone-content-feature-2-hdr-video.jpg?v=1626148113\"\u003e\u003c\/span\u003e\u003c\/div\u003e\n\u003ch3 style=\"text-align: center;\"\u003e\u003cspan style=\"color: #ff8000;\"\u003e\u003cb\u003e\u003c\/b\u003e\u003c\/span\u003e\u003c\/h3\u003e\n\u003ch3 style=\"text-align: center;\"\u003e\u003cspan style=\"color: #ff8000;\"\u003e\u003cb\u003eAll in the Details\u003c\/b\u003e\u003c\/span\u003e\u003c\/h3\u003e\n\u003cdiv style=\"text-align: center;\"\u003e\u003cb\u003e48MP Photos\u003c\/b\u003e\u003c\/div\u003e\n\u003cdiv style=\"text-align: center;\"\u003e\u003cspan style=\"font-weight: 400;\"\u003eMavic Air 2 has a 1\/2-inch CMOS sensor that captures 48MP photographs. Prepare to take your airborne content to new heights.\u003cbr data-mce-fragment=\"1\"\u003eThe 48MP camera has a high megapixel count, which means that even when zooming in on an image, you can see vivid details.\u003c\/span\u003e\u003c\/div\u003e\n\u003cdiv style=\"text-align: center;\"\u003e\u003cspan style=\"font-weight: 400;\"\u003e\u003cimg alt=\"dji-mavic-air-2-fly-more-combo-drone-content-feature-3-48mp\" src=\"https:\/\/cdn.shopify.com\/s\/files\/1\/2532\/7020\/files\/dji-mavic-air-2-fly-more-combo-drone-content-feature-3-48mp.jpg?v=1626148140\"\u003e\u003c\/span\u003e\u003c\/div\u003e\n\u003ch3 style=\"text-align: center;\"\u003e\u003cspan style=\"color: #ff8000;\"\u003e\u003cb\u003e\u003c\/b\u003e\u003c\/span\u003e\u003c\/h3\u003e\n\u003ch3 style=\"text-align: center;\"\u003e\u003cspan style=\"color: #ff8000;\"\u003e\u003cb\u003eOptimized Capture\u003c\/b\u003e\u003c\/span\u003e\u003c\/h3\u003e\n\u003cdiv style=\"text-align: center;\"\u003e\u003cb\u003eSmartPhoto\u003c\/b\u003e\u003c\/div\u003e\n\u003cdiv style=\"text-align: center;\"\u003e\u003cspan style=\"font-weight: 400;\"\u003eSmartPhoto on the Mavic Air 2 combines scene recognition, HyperLight, and HDR into a single setting for optimal results. Scene recognition optimizes camera parameters for different scenes and offers intelligent recognition of five different categories: sunsets, sky, grass, snow, and trees. The resolution of photos taken in SmartPhoto mode is 12 MP.\u003c\/span\u003e\u003c\/div\u003e\n\u003cdiv style=\"text-align: center;\"\u003e\n\u003ctable width=\"100%\"\u003e\n\u003ctbody\u003e\n\u003ctr\u003e\n\u003ctd\u003e\n\u003cp\u003e\u003cimg alt=\"dji-mavic-air-2-fly-more-combo-drone-content-feature-4-1-Strong-Lighting-Conditions\" src=\"https:\/\/cdn.shopify.com\/s\/files\/1\/2532\/7020\/files\/dji-mavic-air-2-fly-more-combo-drone-content-feature-4-1-Strong-Lighting-Conditions.jpg?v=1626148348\"\u003e\u003c\/p\u003e\n\u003c\/td\u003e\n\u003ctd\u003e\u003cimg alt=\"dji-mavic-air-2-fly-more-combo-drone-content-feature-4-2-Weak-Lighting-Conditions\" src=\"https:\/\/cdn.shopify.com\/s\/files\/1\/2532\/7020\/files\/dji-mavic-air-2-fly-more-combo-drone-content-feature-4-2-Weak-Lighting-Conditions.jpg?v=1626148384\"\u003e\u003c\/td\u003e\n\u003c\/tr\u003e\n\u003ctr\u003e\n\u003ctd\u003e\n\u003cp data-mce-fragment=\"1\"\u003e\u003cstrong\u003eStrong Lighting\u003c\/strong\u003e\u003c\/p\u003e\n\u003cp data-mce-fragment=\"1\"\u003eConditions HyperLight improves the sharpness of images taken in low-light circumstances by reducing noise.\u003c\/p\u003e\n\u003c\/td\u003e\n\u003ctd\u003e\n\u003cp\u003e\u003cstrong\u003eWeak Lighting Conditions\u003c\/strong\u003e\u003c\/p\u003e\n\u003cp data-mce-fragment=\"1\"\u003e\u003cspan data-mce-fragment=\"1\"\u003eHyperLight improves the sharpness of images taken in low-light circumstances by reducing noise.\u003c\/span\u003e\u003c\/p\u003e\n\u003c\/td\u003e\n\u003c\/tr\u003e\n\u003c\/tbody\u003e\n\u003c\/table\u003e\n\u003c\/div\u003e\n\u003cdiv style=\"text-align: center;\"\u003e \u003c\/div\u003e\n\u003cdiv style=\"text-align: center;\"\u003e \u003c\/div\u003e\n\u003ch3 style=\"text-align: center;\"\u003e\u003cspan style=\"color: #ff8000;\"\u003e\u003cb\u003eHDR Panorama\u003c\/b\u003e\u003c\/span\u003e\u003c\/h3\u003e\n\u003cdiv style=\"text-align: center;\"\u003e\u003cb\u003eLook at the Big Picture\u003c\/b\u003e\u003c\/div\u003e\n\u003cdiv style=\"text-align: center;\"\u003e\u003cspan style=\"font-weight: 400;\"\u003eThe Mavic Air 2 has DJI's most sophisticated panorama mode, with a larger dynamic range and vibrant, amazingly realistic colors.\u003c\/span\u003e\u003c\/div\u003e\n\u003cdiv style=\"text-align: center;\"\u003e\u003cspan style=\"font-weight: 400;\"\u003e\u003cimg alt=\"dji-mavic-air-2-fly-more-combo-drone-content-feature-5-HDR-Panorama\" src=\"https:\/\/cdn.shopify.com\/s\/files\/1\/2532\/7020\/files\/dji-mavic-air-2-fly-more-combo-drone-content-feature-5-HDR-Panorama.jpg?v=1626148445\"\u003e\u003c\/span\u003e\u003c\/div\u003e\n\u003ch3 style=\"text-align: center;\"\u003e\u003cspan style=\"color: #ff8000;\"\u003e\u003cb\u003e\u003c\/b\u003e\u003c\/span\u003e\u003c\/h3\u003e\n\u003ch3 style=\"text-align: center;\"\u003e\u003cspan style=\"color: #ff8000;\"\u003e\u003cb\u003eIntelligent Features\u003c\/b\u003e\u003c\/span\u003e\u003c\/h3\u003e\n\u003cdiv style=\"text-align: center;\"\u003e\u003cb\u003eObtaining Cinematic Shots\u003c\/b\u003e\u003c\/div\u003e\n\u003cdiv style=\"text-align: center;\"\u003e\u003cspan style=\"font-weight: 400;\"\u003eFor breathtaking results, the Mavic Air 2 combines a powerful camera with intelligent shooting modes. Aerial photography has never been easier to create.\u003c\/span\u003e\u003c\/div\u003e\n\u003cdiv style=\"text-align: center;\"\u003e\u003cspan style=\"font-weight: 400;\"\u003e\u003cimg alt=\"dji-mavic-air-2-fly-more-combo-drone-content-feature-6-Intelligent-Features\" src=\"https:\/\/cdn.shopify.com\/s\/files\/1\/2532\/7020\/files\/dji-mavic-air-2-fly-more-combo-drone-content-feature-6-Intelligent-Features.jpg?v=1626148481\"\u003e\u003c\/span\u003e\u003c\/div\u003e\n\u003ch3 style=\"text-align: center;\"\u003e\u003cspan style=\"color: #ff8000;\"\u003e\u003cb\u003e\u003c\/b\u003e\u003c\/span\u003e\u003c\/h3\u003e\n\u003ch3 style=\"text-align: center;\"\u003e\u003cspan style=\"color: #ff8000;\"\u003e\u003cb\u003eFocusTrack\u003c\/b\u003e\u003c\/span\u003e\u003c\/h3\u003e\n\u003cdiv style=\"text-align: center;\"\u003e\u003cb\u003eMaster the Skies\u003c\/b\u003e\u003c\/div\u003e\n\u003cdiv style=\"text-align: center;\"\u003e\u003cspan style=\"font-weight: 400;\"\u003eWith FocusTrack, capturing professional-quality footage is a breeze. Active Track 3.0, Spotlight 2.0, and Point of Interest 3.0 are among the easy-to-use intelligent tracking modes that let you express yourself.\u003c\/span\u003e\u003c\/div\u003e\n\u003cdiv style=\"text-align: center;\"\u003e \u003c\/div\u003e\n\u003cdiv style=\"text-align: center;\"\u003e\n\u003ctable width=\"100%\" data-mce-fragment=\"1\"\u003e\n\u003ctbody data-mce-fragment=\"1\"\u003e\n\u003ctr data-mce-fragment=\"1\"\u003e\n\u003ctd data-mce-fragment=\"1\"\u003e\n\u003cp\u003e \u003c\/p\u003e\n\u003cdiv style=\"text-align: left;\"\u003e\u003cimg style=\"float: none;\" alt=\"dji-mavic-air-2-fly-more-combo-drone-content-feature-7-1-Spotlight 2.0\" src=\"https:\/\/cdn.shopify.com\/s\/files\/1\/2532\/7020\/files\/dji-mavic-air-2-fly-more-combo-drone-content-feature-7-1-Spotlight_2.0.jpg?v=1626148537\"\u003e\u003c\/div\u003e\n\u003c\/td\u003e\n\u003ctd data-mce-fragment=\"1\"\u003e\n\u003cp\u003e\u003cimg src=\"https:\/\/cdn.shopify.com\/s\/files\/1\/2532\/7020\/files\/dji-mavic-air-2-fly-more-combo-drone-content-feature-7-2-ActiveTrack_3.0.jpg?v=1626148709\" alt=\"dji-mavic-air-2-fly-more-combo-drone-content-feature-7-2-ActiveTrack 3.0\" data-mce-fragment=\"1\" data-mce-src=\"https:\/\/cdn.shopify.com\/s\/files\/1\/2532\/7020\/files\/dji-mavic-air-2-fly-more-combo-drone-content-feature-7-2-ActiveTrack_3.0.jpg?v=1626148709\"\u003e\u003cbr\u003e\u003c\/p\u003e\n\u003c\/td\u003e\n\u003ctd data-mce-fragment=\"1\"\u003e\n\u003cp\u003e\u003cimg src=\"https:\/\/cdn.shopify.com\/s\/files\/1\/2532\/7020\/files\/dji-mavic-air-2-fly-more-combo-drone-content-feature-7-3-POI_3.0.jpg?v=1626148918\" alt=\"dji-mavic-air-2-fly-more-combo-drone-content-feature-7-3-POI 3.0\" data-mce-fragment=\"1\" data-mce-src=\"https:\/\/cdn.shopify.com\/s\/files\/1\/2532\/7020\/files\/dji-mavic-air-2-fly-more-combo-drone-content-feature-7-3-POI_3.0.jpg?v=1626148918\"\u003e\u003cbr\u003e\u003c\/p\u003e\n\u003c\/td\u003e\n\u003c\/tr\u003e\n\u003ctr data-mce-fragment=\"1\"\u003e\n\u003ctd data-mce-fragment=\"1\"\u003e\n\u003cp\u003e\u003cstrong\u003eSpotlight 2.0\u003c\/strong\u003e\u003c\/p\u003e\n\u003cp\u003eWith this handy mode, you may fly around freely while the camera remains fixed on the subject. Simply choose your target and take off.\u003c\/p\u003e\n\u003c\/td\u003e\n\u003ctd data-mce-fragment=\"1\"\u003e\n\u003cp\u003e\u003cstrong\u003eActiveTrack 3.0\u003c\/strong\u003e\u003c\/p\u003e\n\u003cp\u003eWith the latest version of DJI's ActiveTrack technology, following subjects while avoiding obstacles has never been easier. This technique keeps your subject in the center of the screen, even if they go behind a tree, with superior pathfinding and a faster and more accurate prediction of lost subjects.\u003c\/p\u003e\n\u003c\/td\u003e\n\u003ctd data-mce-fragment=\"1\"\u003e\n\u003cp\u003e\u003cstrong\u003ePOI 3.0\u003c\/strong\u003e\u003c\/p\u003e\n\u003cp\u003ePOI 3.0 enhances the capabilities of POI 2.0, particularly in terms of flat surface recognition. This updated functionality avoids the problem that POI 2.0 had with losing the target during tracking. POI 3.0 now has the ability to track people, cars, and boats in real time.\u003c\/p\u003e\n\u003c\/td\u003e\n\u003c\/tr\u003e\n\u003c\/tbody\u003e\n\u003c\/table\u003e\n\u003c\/div\u003e\n\u003ch3 style=\"text-align: center;\"\u003e\u003cb\u003e\u003cspan style=\"color: #ff8000;\"\u003e8K Hyperlapse\u003c\/span\u003e\u003c\/b\u003e\u003c\/h3\u003e\n\u003cdiv style=\"text-align: center;\"\u003e\u003cb\u003eTime and Movement\u003c\/b\u003e\u003c\/div\u003e\n\u003cdiv style=\"text-align: center;\"\u003e\u003cspan style=\"font-weight: 400;\"\u003eHyperlapse in 8K is supported by the Mavic Air 2, allowing you to warp time and space for particularly spectacular film. Best of all, you can get this photo without using any complicated post-production techniques. Choose from Free, Circle, Course Lock, and Waypoint modes, then point and shoot using the DJI Fly app. *8K resolution is only available in Free and Waypoint modes.\u003c\/span\u003e\u003c\/div\u003e\n\u003cdiv style=\"text-align: center;\"\u003e\n\u003cul\u003e\n\u003cli style=\"font-weight: 400;\"\u003e\u003cspan style=\"font-weight: 400;\"\u003eCourse Lock\u003c\/span\u003e\u003c\/li\u003e\n\u003cli style=\"font-weight: 400;\"\u003e\u003cspan style=\"font-weight: 400;\"\u003eFree\u003c\/span\u003e\u003c\/li\u003e\n\u003cli style=\"font-weight: 400;\"\u003e\u003cspan style=\"font-weight: 400;\"\u003eWaypoint\u003c\/span\u003e\u003c\/li\u003e\n\u003cli style=\"font-weight: 400;\"\u003e\u003cspan style=\"font-weight: 400;\"\u003eCircle\u003c\/span\u003e\u003c\/li\u003e\n\u003c\/ul\u003e\n\u003c\/div\u003e\n\u003cdiv style=\"text-align: center;\"\u003e\n\u003cimg src=\"https:\/\/cdn.shopify.com\/s\/files\/1\/2532\/7020\/files\/dji-mavic-air-2-fly-more-combo-drone-content-feature-8-2-free.jpg?v=1626148985\" alt=\"dji-mavic-air-2-fly-more-combo-drone-content-feature-8-2-free\" data-mce-fragment=\"1\" data-mce-src=\"https:\/\/cdn.shopify.com\/s\/files\/1\/2532\/7020\/files\/dji-mavic-air-2-fly-more-combo-drone-content-feature-8-2-free.jpg?v=1626148985\"\u003e\u003cbr\u003e\n\u003c\/div\u003e\n\u003cdiv style=\"text-align: center;\"\u003e \u003c\/div\u003e\n\u003ch3 style=\"text-align: center;\"\u003e\u003cspan style=\"color: #ff8000;\"\u003e\u003cb\u003eQuickShots\u003c\/b\u003e\u003c\/span\u003e\u003c\/h3\u003e\n\u003cdiv style=\"text-align: center;\"\u003e\u003cb\u003eImagination Simplified\u003c\/b\u003e\u003c\/div\u003e\n\u003cdiv style=\"text-align: center;\"\u003e\u003cspan style=\"font-weight: 400;\"\u003eQuickShots allows you to capture cinematic video snippets automatically. Mavic Air 2 prepares and flies a difficult aerial route for a professional-quality photo with just a few touches. With super-intuitive Story templates, you can add music, effects, and filters to your creation before sharing it on social media.\u003c\/span\u003e\u003c\/div\u003e\n\u003cdiv style=\"text-align: center;\"\u003e\n\u003cul\u003e\n\u003cli style=\"font-weight: 400;\"\u003e\u003cspan style=\"font-weight: 400;\"\u003eDronie\u003c\/span\u003e\u003c\/li\u003e\n\u003cli style=\"font-weight: 400;\"\u003e\u003cspan style=\"font-weight: 400;\"\u003eCircle\u003c\/span\u003e\u003c\/li\u003e\n\u003cli style=\"font-weight: 400;\"\u003e\u003cspan style=\"font-weight: 400;\"\u003eHelix\u003c\/span\u003e\u003c\/li\u003e\n\u003cli style=\"font-weight: 400;\"\u003e\u003cspan style=\"font-weight: 400;\"\u003eRocket\u003c\/span\u003e\u003c\/li\u003e\n\u003cli style=\"font-weight: 400;\"\u003e\u003cspan style=\"font-weight: 400;\"\u003eBoomerang\u003c\/span\u003e\u003c\/li\u003e\n\u003cli style=\"font-weight: 400;\"\u003e\u003cspan style=\"font-weight: 400;\"\u003eAsteroid\u003c\/span\u003e\u003c\/li\u003e\n\u003c\/ul\u003e\n\u003c\/div\u003e\n\u003ch3 style=\"text-align: center;\"\u003e\u003cspan style=\"color: #ff8000;\"\u003e\u003cb\u003e\u003c\/b\u003e\u003c\/span\u003e\u003c\/h3\u003e\n\u003ch3 style=\"text-align: center;\"\u003e\u003cspan style=\"color: #ff8000;\"\u003e\u003cb\u003eFlight and Safety\u003c\/b\u003e\u003c\/span\u003e\u003c\/h3\u003e\n\u003cdiv style=\"text-align: center;\"\u003e\u003cb\u003eSafer Flight for Stunning Content\u003c\/b\u003e\u003c\/div\u003e\n\u003cdiv style=\"text-align: center;\"\u003e\u003cspan style=\"color: #ffffff;\"\u003e\u003cb\u003e.\u003c\/b\u003e\u003c\/span\u003e\u003c\/div\u003e\n\u003ch3 style=\"text-align: center;\"\u003e\u003cspan style=\"color: #ff8000;\"\u003e\u003cb\u003e\u003c\/b\u003e\u003c\/span\u003e\u003c\/h3\u003e\n\u003ch3 style=\"text-align: center;\"\u003e\u003cspan style=\"color: #ff8000;\"\u003e\u003cb\u003eOcuSync 2.0\u003c\/b\u003e\u003c\/span\u003e\u003c\/h3\u003e\n\u003cdiv style=\"text-align: center;\"\u003e\u003cb\u003eThe Sky’s the Limit\u003c\/b\u003e\u003c\/div\u003e\n\u003cdiv style=\"text-align: center;\"\u003e\u003cspan style=\"font-weight: 400;\"\u003eOcuSync 2.0 can give a 1080p FHD livestream directly from the drone's camera and has a video transmission distance of up to 10 kilometers. Enjoy greater freedom when it comes to exploring and more clarity when it comes to capturing the perfect photo. \u003cbr data-mce-fragment=\"1\"\u003e\u003cbr data-mce-fragment=\"1\"\u003e*When unobstructed, interference-free, and FCC-compliant. The maximum flying range specification is a proxy for the strength and robustness of the radio link.\u003c\/span\u003e\u003c\/div\u003e\n\u003cdiv style=\"text-align: center;\"\u003e\u003cspan style=\"font-weight: 400;\"\u003e\u003cimg alt=\"dji-mavic-air-2-fly-more-combo-drone-content-feature-9-OcuSync 2.0\" src=\"https:\/\/cdn.shopify.com\/s\/files\/1\/2532\/7020\/files\/dji-mavic-air-2-fly-more-combo-drone-content-feature-9-OcuSync_2.0.jpg?v=1626149011\"\u003e\u003c\/span\u003e\u003c\/div\u003e\n\u003cdiv style=\"text-align: center;\"\u003e \u003c\/div\u003e\n\u003ch3 style=\"text-align: center;\"\u003e\u003cspan style=\"color: #ff8000;\"\u003e\u003cb\u003e2.4\/5.8GHz Dual Frequency\u003c\/b\u003e\u003c\/span\u003e\u003c\/h3\u003e\n\u003cdiv style=\"text-align: center;\"\u003e\u003cb\u003eSmooth Flight, Reliable Signal\u003cbr data-mce-fragment=\"1\"\u003e\u003c\/b\u003e\u003c\/div\u003e\n\u003cdiv style=\"text-align: center;\"\u003e\u003cspan style=\"font-weight: 400;\"\u003eThe Mavic Air 2 has dual-frequency connectivity (2.4\/5.8GHz) and automatically shifts to the best channel with the least interference in real time. This increases flight safety by greatly improving the aircraft's anti-interference ability in adverse circumstances. \u003cbr data-mce-fragment=\"1\"\u003e\u003cbr data-mce-fragment=\"1\"\u003e*Some countries do not accept 5.8 GHz transmission due to local laws.\u003c\/span\u003e\u003c\/div\u003e\n\u003cdiv style=\"text-align: center;\"\u003e\u003cspan style=\"font-weight: 400; color: #ffffff;\"\u003e.\u003c\/span\u003e\u003c\/div\u003e\n\u003ch3 style=\"text-align: center;\"\u003e\u003cspan style=\"color: #ff8000;\"\u003e\u003cb\u003e\u003c\/b\u003e\u003c\/span\u003e\u003c\/h3\u003e\n\u003ch3 style=\"text-align: center;\"\u003e\u003cspan style=\"color: #ff8000;\"\u003e\u003cb\u003eBattery and Flight\u003c\/b\u003e\u003c\/span\u003e\u003c\/h3\u003e\n\u003cdiv style=\"text-align: center;\"\u003e\u003cb\u003eFly Longer\u003c\/b\u003e\u003c\/div\u003e\n\u003cdiv style=\"text-align: center;\"\u003e\u003cspan style=\"font-weight: 400;\"\u003eWith a battery life of up to 34 minutes and a maximum flight speed of 68 kph in Sport mode, you'll be able to stay in the air for as long as you want to obtain the ideal image. \u003cbr data-mce-fragment=\"1\"\u003e\u003cbr data-mce-fragment=\"1\"\u003e*Flight time was recorded at a 9° angle and a speed of 5.1 m\/s in a windless environment.\u003c\/span\u003e\u003c\/div\u003e\n\u003cdiv style=\"text-align: center;\"\u003e \u003c\/div\u003e\n\u003cdiv style=\"text-align: center;\"\u003e\u003cspan style=\"font-weight: 400;\"\u003e\u003cimg alt=\"dji-mavic-air-2-fly-more-combo-drone-content-feature-10-battery\" src=\"https:\/\/cdn.shopify.com\/s\/files\/1\/2532\/7020\/files\/dji-mavic-air-2-fly-more-combo-drone-content-feature-10-battery.jpg?v=1626149034\"\u003e\u003c\/span\u003e\u003c\/div\u003e\n\u003ch3 style=\"text-align: center;\"\u003e\u003cspan style=\"color: #ff8000;\"\u003e\u003cb\u003eObstacle Avoidance\u003c\/b\u003e\u003c\/span\u003e\u003c\/h3\u003e\n\u003cdiv style=\"text-align: center;\"\u003e\u003cb\u003eFly Safer\u003c\/b\u003e\u003c\/div\u003e\n\u003cdiv style=\"text-align: center;\"\u003e\u003cspan style=\"font-weight: 400;\"\u003eForward, backward, and downward are the three directions in which Mavic Air 2 observes its surroundings. An auxiliary light improves visibility, and obstacle avoidance adds an extra layer of security that's great for pushing the boundaries of what's possible.\u003c\/span\u003e\u003c\/div\u003e\n\u003cdiv style=\"text-align: center;\"\u003e\n\u003ctable\u003e\n\u003ctbody\u003e\n\u003ctr\u003e\n\u003ctd\u003e\n\u003cp\u003e\u003cb\u003eForward\u003c\/b\u003e\u003cspan style=\"font-weight: 400;\"\u003e: Vision sensor accurate up to 22 meters\u003c\/span\u003e\u003c\/p\u003e\n\u003c\/td\u003e\n\u003c\/tr\u003e\n\u003ctr\u003e\n\u003ctd\u003e\n\u003cp\u003e\u003cb\u003eBackward\u003c\/b\u003e\u003cspan style=\"font-weight: 400;\"\u003e: Vision sensor accurate up to 23.6 meters\u003c\/span\u003e\u003c\/p\u003e\n\u003c\/td\u003e\n\u003c\/tr\u003e\n\u003ctr\u003e\n\u003ctd\u003e\n\u003cp\u003e\u003cb\u003eDownward\u003c\/b\u003e\u003cspan style=\"font-weight: 400;\"\u003e: Vision sensor, infrared sensor. The auxiliary light assist with visual positioning, safe landing, and visibility in the air. It can be turned on and off manually.\u003c\/span\u003e\u003c\/p\u003e\n\u003c\/td\u003e\n\u003c\/tr\u003e\n\u003c\/tbody\u003e\n\u003c\/table\u003e\n\u003c\/div\u003e\n\u003cdiv style=\"text-align: center;\"\u003e\u003cspan style=\"color: #ffffff;\"\u003e\u003cb\u003e.\u003c\/b\u003e\u003c\/span\u003e\u003c\/div\u003e\n\u003cdiv style=\"text-align: center;\"\u003e\u003cb\u003e\u003c\/b\u003e\u003c\/div\u003e\n\u003cdiv style=\"text-align: center;\"\u003e\u003cb\u003eAPAS 3.0\u003c\/b\u003e\u003c\/div\u003e\n\u003cdiv style=\"text-align: center;\"\u003e\u003cspan style=\"font-weight: 400;\"\u003eIn difficult settings, Advanced Pilot Assistance Systems (APAS) 3.0 employs advanced mapping technology for smooth following and dependable obstacle avoidance. When compared to earlier generations, obstacle avoidance performance and autonomous flight planning have improved substantially, boosting safety and enabling more options.\u003c\/span\u003e\u003c\/div\u003e\n\u003cdiv style=\"text-align: center;\"\u003e\u003cspan style=\"font-weight: 400;\"\u003e*While recording in 4K at 60, 50, and 48 fps, 2.7K at 60, 50, and 48 fps, and 1080p at 120 and 240 fps, APAS 3.0 and FocusTrack are not available.\u003cbr data-mce-fragment=\"1\"\u003e\u003c\/span\u003e\u003c\/div\u003e\n\u003cstyle\u003e\u003c!--\n.embed-container { position: relative; padding-bottom: 56.25%; height: 0; overflow: hidden; max-width: 100%; } .embed-container iframe, .embed-container object, .embed-container embed { position: absolute; top: 0; left: 0; width: 100%; height: 100%; }\n--\u003e\u003c\/style\u003e\n\u003cdiv style=\"text-align: center;\" class=\"embed-container\"\u003e\u003ciframe src=\"https:\/\/www.youtube.com\/embed\/IwoyGb-NWDs\" frameborder=\"0\" allowfullscreen=\"\"\u003e\u003c\/iframe\u003e\u003c\/div\u003e\n\u003cdiv style=\"text-align: center;\"\u003e \u003c\/div\u003e\n\u003ch3 style=\"text-align: center;\"\u003e\u003cspan style=\"color: #ff8000;\"\u003e\u003cb\u003eDJI Fly App\u003c\/b\u003e\u003c\/span\u003e\u003c\/h3\u003e\n\u003cdiv style=\"text-align: center;\"\u003e\u003cb\u003eEffortless Editing\u003c\/b\u003e\u003c\/div\u003e\n\u003cdiv style=\"text-align: center;\"\u003e\u003cspan style=\"font-weight: 400;\"\u003eThe DJI Fly app makes creating perfect films easier than ever before. It incorporates the DJI Mimo app's editing suite, giving users access to manual settings, advanced functionalities, and intuitive templates to quickly produce professional compositions.\u003c\/span\u003e\u003c\/div\u003e\n\u003cdiv style=\"text-align: center;\"\u003e\u003cspan style=\"font-weight: 400;\"\u003e\u003cimg alt=\"dji-mavic-air-2-fly-more-combo-drone-content-feature-11-DJI-Fly-App\" src=\"https:\/\/cdn.shopify.com\/s\/files\/1\/2532\/7020\/files\/dji-mavic-air-2-fly-more-combo-drone-content-feature-11-DJI-Fly-App.jpg?v=1626149062\"\u003e\u003c\/span\u003e\u003c\/div\u003e\n\u003ch3 style=\"text-align: center;\"\u003e\u003cspan style=\"color: #ff8000;\"\u003e\u003cb\u003e\u003c\/b\u003e\u003c\/span\u003e\u003c\/h3\u003e\n\u003ch3 style=\"text-align: center;\"\u003e\u003cspan style=\"color: #ff8000;\"\u003e\u003cb\u003eRemote Controller \u003c\/b\u003e\u003c\/span\u003e\u003c\/h3\u003e\n\u003cdiv style=\"text-align: center;\"\u003e\u003cb\u003eDesigned for Pilots\u003c\/b\u003e\u003c\/div\u003e\n\u003cdiv style=\"text-align: center;\"\u003e\u003cspan style=\"font-weight: 400;\"\u003eThe newly designed remote controller has an ergonomic shape for a more comfortable grip and an excellent 240-minute battery life. The redesigned clamp makes it simple to attach devices, and the integrated antennas improve the user experience dramatically.\u003cbr data-mce-fragment=\"1\"\u003e*In an interference-free environment, battery life was measured using an Android phone.\u003c\/span\u003e\u003c\/div\u003e\n\u003cdiv style=\"text-align: center;\"\u003e\u003cspan style=\"font-weight: 400;\"\u003e\u003cimg alt=\"dji-mavic-air-2-fly-more-combo-drone-content-feature-12-remote\" src=\"https:\/\/cdn.shopify.com\/s\/files\/1\/2532\/7020\/files\/dji-mavic-air-2-fly-more-combo-drone-content-feature-12-remote.jpg?v=1626149088\"\u003e\u003c\/span\u003e\u003c\/div\u003e\n\u003cdiv style=\"text-align: center;\"\u003e \u003c\/div\u003e\n\u003ch3 style=\"text-align: center;\"\u003e\u003cspan style=\"color: #ff8000;\"\u003e\u003cb\u003eND Filters\u003c\/b\u003e\u003c\/span\u003e\u003c\/h3\u003e\n\u003cdiv style=\"text-align: center;\"\u003e\u003cb\u003eOptimal Options\u003c\/b\u003e\u003c\/div\u003e\n\u003cdiv style=\"text-align: center;\"\u003eThe Mavic Air 2 comes with two ND filter sets that help with exposure control and give you additional creative options. The ND 16\/64\/256 set is useful for altering shutter speed and in low-light situations, while the ND 4\/8\/32 set allows for colorful photographs even at low ISO.\u003cbr\u003e\u003cbr\u003e*The Fly More Combo comes with ND16\/64\/256 filters. Separately, the ND4\/8\/32 filter set can be ordered.\u003c\/div\u003e\n\u003cdiv style=\"text-align: center;\"\u003e\u003cspan style=\"font-weight: 400;\"\u003e\u003cimg alt=\"dji-mavic-air-2-fly-more-combo-drone-content-feature-13-ND-Filter\" src=\"https:\/\/cdn.shopify.com\/s\/files\/1\/2532\/7020\/files\/dji-mavic-air-2-fly-more-combo-drone-content-feature-13-ND-Filter.jpg?v=1626149110\"\u003e\u003c\/span\u003e\u003c\/div\u003e\n\u003cdiv style=\"text-align: center;\"\u003e \u003c\/div\u003e\n\u003ch2 style=\"text-align: left;\"\u003e\u003cstrong\u003eSpecification\u003c\/strong\u003e\u003c\/h2\u003e\n\u003cp\u003e \u003c\/p\u003e\n\u003cp\u003e \u003c\/p\u003e\n\u003cp\u003e \u003c\/p\u003e\n\u003cdiv style=\"text-align: left;\"\u003e\u003cb\u003eAircraft\u003c\/b\u003e\u003c\/div\u003e\n\u003cdiv style=\"text-align: left;\"\u003e\n\u003cul\u003e\n\u003cli style=\"font-weight: 400;\"\u003e\u003cb\u003eWeight\u003c\/b\u003e\u003c\/li\u003e\n\u003cli style=\"font-weight: 400;\"\u003e570 g\u003c\/li\u003e\n\u003c\/ul\u003e\n\u003cul\u003e\n\u003cli style=\"font-weight: 400;\"\u003e\u003cb\u003eSize\u003c\/b\u003e\u003c\/li\u003e\n\u003cli style=\"font-weight: 400;\"\u003e\n\u003cspan style=\"font-weight: 400;\"\u003eFolded:\u003c\/span\u003e\u003cspan style=\"font-weight: 400;\"\u003e\u003cbr\u003e\u003c\/span\u003e\u003cspan style=\"font-weight: 400;\"\u003e180×97×74 mm (Length×Width×Height)\u003c\/span\u003e\u003cspan style=\"font-weight: 400;\"\u003e\u003cbr\u003e\u003c\/span\u003e\u003cspan style=\"font-weight: 400;\"\u003eUnfolded:\u003c\/span\u003e\u003cspan style=\"font-weight: 400;\"\u003e\u003cbr\u003e\u003c\/span\u003e\u003cspan style=\"font-weight: 400;\"\u003e183×253×77 mm (Length×Width×Height)\u003c\/span\u003e\n\u003c\/li\u003e\n\u003c\/ul\u003e\n\u003cul\u003e\n\u003cli style=\"font-weight: 400;\"\u003e\u003cb\u003eDiagonal Distance\u003c\/b\u003e\u003c\/li\u003e\n\u003cli style=\"font-weight: 400;\"\u003e\u003cspan style=\"font-weight: 400;\"\u003e302 mm\u003c\/span\u003e\u003c\/li\u003e\n\u003cli\u003e\u003cb\u003eTransmitter Power (EIRP)\u003c\/b\u003e\u003c\/li\u003e\n\u003cli\u003e\n\u003cspan\u003e2.400-2.4835 GHz:\u003c\/span\u003e\u003cspan\u003e\u003cbr\u003e\u003c\/span\u003e\u003cspan\u003eFCC: ≤26 dBm\u003c\/span\u003e\u003cspan\u003e\u003cbr\u003e\u003c\/span\u003e\u003cspan\u003eCE: ≤20 dBm\u003c\/span\u003e\u003cspan\u003e\u003cbr\u003e\u003c\/span\u003e\u003cspan\u003eSRRC: ≤20 dBm\u003c\/span\u003e\u003cspan\u003e\u003cbr\u003e\u003c\/span\u003e\u003cspan\u003eMIC: ≤20 dBm\u003c\/span\u003e\u003cspan\u003e\u003cbr\u003e\u003c\/span\u003e\u003cspan\u003e\u003cbr\u003e\u003c\/span\u003e\u003cspan\u003e5.725-5.850 GHz:\u003c\/span\u003e\u003cspan\u003e\u003cbr\u003e\u003c\/span\u003e\u003cspan\u003eFCC: ≤26 dBm\u003c\/span\u003e\u003cspan\u003e\u003cbr\u003e\u003c\/span\u003e\u003cspan\u003eCE: ≤14 dBm\u003c\/span\u003e\u003cspan\u003e\u003cbr\u003e\u003c\/span\u003e\u003cspan\u003eSRRC: ≤26 dBm\u003c\/span\u003e\n\u003c\/li\u003e\n\u003c\/ul\u003e\n\u003cul\u003e\n\u003cli style=\"font-weight: 400;\"\u003e\u003cb\u003eMax Ascent Speed\u003c\/b\u003e\u003c\/li\u003e\n\u003cli style=\"font-weight: 400;\"\u003e\n\u003cspan style=\"font-weight: 400;\"\u003e4 m\/s (S Mode)\u003c\/span\u003e\u003cspan style=\"font-weight: 400;\"\u003e\u003cbr\u003e\u003c\/span\u003e\u003cspan style=\"font-weight: 400;\"\u003e4 m\/s (N Mode)\u003c\/span\u003e\n\u003c\/li\u003e\n\u003c\/ul\u003e\n\u003cul\u003e\n\u003cli style=\"font-weight: 400;\"\u003e\u003cb\u003eMax Service Ceiling Above Sea Level\u003c\/b\u003e\u003c\/li\u003e\n\u003cli style=\"font-weight: 400;\"\u003e\u003cspan style=\"font-weight: 400;\"\u003e5000 m\u003c\/span\u003e\u003c\/li\u003e\n\u003c\/ul\u003e\n\u003cul\u003e\n\u003cli style=\"font-weight: 400;\"\u003e\u003cb\u003eMax Flight Time (without wind)\u003c\/b\u003e\u003c\/li\u003e\n\u003cli style=\"font-weight: 400;\"\u003e\u003cspan style=\"font-weight: 400;\"\u003e34 minutes\u003c\/span\u003e\u003c\/li\u003e\n\u003c\/ul\u003e\n\u003cul\u003e\n\u003cli style=\"font-weight: 400;\"\u003e\u003cb\u003eMax Hover Time (without wind)\u003c\/b\u003e\u003c\/li\u003e\n\u003cli style=\"font-weight: 400;\"\u003e\u003cspan style=\"font-weight: 400;\"\u003e33 minutes\u003c\/span\u003e\u003c\/li\u003e\n\u003c\/ul\u003e\n\u003cul\u003e\n\u003cli style=\"font-weight: 400;\"\u003e\u003cb\u003eMax Flight Distance\u003c\/b\u003e\u003c\/li\u003e\n\u003cli style=\"font-weight: 400;\"\u003e\u003cspan style=\"font-weight: 400;\"\u003e18.5 km\u003c\/span\u003e\u003c\/li\u003e\n\u003cli\u003e\u003cb\u003eMax Descent Speed\u003c\/b\u003e\u003c\/li\u003e\n\u003cli\u003e\n\u003cspan\u003e3 m\/s (S Mode)\u003c\/span\u003e\u003cspan\u003e\u003cbr\u003e\u003c\/span\u003e\u003cspan\u003e3 m\/s (N Mode)\u003c\/span\u003e\u003cspan\u003e\u003cbr\u003e\u003c\/span\u003e\u003cspan\u003e5 m\/s (S Mode and N Mode during a sharp descent)\u003c\/span\u003e\u003cspan\u003e\u003cbr\u003e\u003c\/span\u003e\u003cspan\u003e3 m\/s (all modes at elevations over 4500 m)\u003c\/span\u003e\n\u003c\/li\u003e\n\u003c\/ul\u003e\n\u003cul\u003e\n\u003cli style=\"font-weight: 400;\"\u003e\u003cb\u003eMax Horizontal Flight Speed\u003c\/b\u003e\u003c\/li\u003e\n\u003cli style=\"font-weight: 400;\"\u003e\n\u003cspan style=\"font-weight: 400;\"\u003e19 m\/s (S Mode)\u003c\/span\u003e\u003cspan style=\"font-weight: 400;\"\u003e\u003cbr\u003e\u003c\/span\u003e\u003cspan style=\"font-weight: 400;\"\u003e12 m\/s (N Mode)\u003c\/span\u003e\u003cspan style=\"font-weight: 400;\"\u003e\u003cbr\u003e\u003c\/span\u003e\u003cspan style=\"font-weight: 400;\"\u003e5 m\/s (T Mode)\u003c\/span\u003e\n\u003c\/li\u003e\n\u003cli\u003e\u003cb\u003eHovering Accuracy Range\u003c\/b\u003e\u003c\/li\u003e\n\u003cli\u003e\n\u003cspan\u003eVertical:\u003c\/span\u003e\u003cspan\u003e\u003cbr\u003e\u003c\/span\u003e\u003cspan\u003e±0.1 m (with vision positioning)\u003c\/span\u003e\u003cspan\u003e\u003cbr\u003e\u003c\/span\u003e\u003cspan\u003e±0.5 m (with GPS positioning)\u003c\/span\u003e\u003cspan\u003e\u003cbr\u003e\u003c\/span\u003e\u003cspan\u003e\u003cbr\u003e\u003c\/span\u003e\u003cspan\u003eHorizontal:\u003c\/span\u003e\u003cspan\u003e\u003cbr\u003e\u003c\/span\u003e\u003cspan\u003e±0.1 m (with vision positioning)\u003c\/span\u003e\u003cspan\u003e\u003cbr\u003e\u003c\/span\u003e\u003cspan\u003e±1.5 m (with GPS positioning)\u003c\/span\u003e\n\u003c\/li\u003e\n\u003c\/ul\u003e\n\u003cul\u003e\n\u003cli style=\"font-weight: 400;\"\u003e\u003cb\u003eMax Wind Resistance\u003c\/b\u003e\u003c\/li\u003e\n\u003cli style=\"font-weight: 400;\"\u003e\u003cspan style=\"font-weight: 400;\"\u003e8.5-10.5 m\/s (Level 5)\u003c\/span\u003e\u003c\/li\u003e\n\u003c\/ul\u003e\n\u003cul\u003e\n\u003cli style=\"font-weight: 400;\"\u003e\u003cb\u003eMax Tilt Angle\u003c\/b\u003e\u003c\/li\u003e\n\u003cli style=\"font-weight: 400;\"\u003e\n\u003cspan style=\"font-weight: 400;\"\u003e35° (S Mode)\u003c\/span\u003e\u003cspan style=\"font-weight: 400;\"\u003e\u003cbr\u003e\u003c\/span\u003e\u003cspan style=\"font-weight: 400;\"\u003e20° (N Mode)\u003c\/span\u003e\u003cspan style=\"font-weight: 400;\"\u003e\u003cbr\u003e\u003c\/span\u003e\u003cspan style=\"font-weight: 400;\"\u003e35° (N Mode under strong wind)\u003c\/span\u003e\n\u003c\/li\u003e\n\u003c\/ul\u003e\n\u003cul\u003e\n\u003cli style=\"font-weight: 400;\"\u003e\u003cb\u003eOperating Frequency\u003c\/b\u003e\u003c\/li\u003e\n\u003cli style=\"font-weight: 400;\"\u003e\n\u003cspan style=\"font-weight: 400;\"\u003e2.400-2.4835 GHz\u003c\/span\u003e\u003cspan style=\"font-weight: 400;\"\u003e\u003cbr\u003e\u003c\/span\u003e\u003cspan style=\"font-weight: 400;\"\u003e5.725-5.850 GHz\u003c\/span\u003e\n\u003c\/li\u003e\n\u003c\/ul\u003e\n\u003cul data-mce-fragment=\"1\"\u003e\n\u003cli data-mce-fragment=\"1\"\u003e\u003cb data-mce-fragment=\"1\"\u003eMax Angular Velocity\u003c\/b\u003e\u003c\/li\u003e\n\u003cli data-mce-fragment=\"1\"\u003e\n\u003cspan data-mce-fragment=\"1\"\u003e250°\/s (S Mode)\u003c\/span\u003e\u003cspan data-mce-fragment=\"1\"\u003e\u003cbr data-mce-fragment=\"1\"\u003e\u003c\/span\u003e\u003cspan data-mce-fragment=\"1\"\u003e250°\/s (N Mode)\u003c\/span\u003e\n\u003c\/li\u003e\n\u003c\/ul\u003e\n\u003cul data-mce-fragment=\"1\"\u003e\n\u003cli data-mce-fragment=\"1\"\u003e\u003cb data-mce-fragment=\"1\"\u003eOperating Temperature Range\u003c\/b\u003e\u003c\/li\u003e\n\u003cli data-mce-fragment=\"1\"\u003e\u003cspan data-mce-fragment=\"1\"\u003e-10° to 40°C (14° to 104°F)\u003c\/span\u003e\u003c\/li\u003e\n\u003c\/ul\u003e\n\u003cul\u003e\u003c\/ul\u003e\n\u003cul\u003e\n\u003cli style=\"font-weight: 400;\"\u003e\u003cb\u003ePropellers\u003c\/b\u003e\u003c\/li\u003e\n\u003cli style=\"font-weight: 400;\"\u003e\u003cspan style=\"font-weight: 400;\"\u003eQuick release, low noise, folding\u003c\/span\u003e\u003c\/li\u003e\n\u003c\/ul\u003e\n\u003cul\u003e\n\u003cli style=\"font-weight: 400;\"\u003e\u003cb\u003eSatellite Systems\u003c\/b\u003e\u003c\/li\u003e\n\u003cli style=\"font-weight: 400;\"\u003e\u003cspan style=\"font-weight: 400;\"\u003eGPS+GLONASS\u003c\/span\u003e\u003c\/li\u003e\n\u003c\/ul\u003e\n\u003cul\u003e\n\u003cli style=\"font-weight: 400;\"\u003e\u003cb\u003eCompass\u003c\/b\u003e\u003c\/li\u003e\n\u003cli style=\"font-weight: 400;\"\u003e\u003cspan style=\"font-weight: 400;\"\u003eSingle Compass\u003c\/span\u003e\u003c\/li\u003e\n\u003c\/ul\u003e\n\u003cul\u003e\n\u003cli style=\"font-weight: 400;\"\u003e\u003cb\u003eIMU\u003c\/b\u003e\u003c\/li\u003e\n\u003cli style=\"font-weight: 400;\"\u003e\u003cspan style=\"font-weight: 400;\"\u003eSingle IMU\u003c\/span\u003e\u003c\/li\u003e\n\u003c\/ul\u003e\n\u003cul\u003e\n\u003cli style=\"font-weight: 400;\"\u003e\u003cb\u003eInternal Storage\u003c\/b\u003e\u003c\/li\u003e\n\u003cli style=\"font-weight: 400;\"\u003e\u003cspan style=\"font-weight: 400;\"\u003e8 GB\u003c\/span\u003e\u003c\/li\u003e\n\u003c\/ul\u003e\n\u003c\/div\u003e\n\u003cdiv style=\"text-align: left;\"\u003e\u003cb\u003eBattery\u003c\/b\u003e\u003c\/div\u003e\n\u003cdiv style=\"text-align: left;\"\u003e\n\u003cul\u003e\n\u003cli style=\"font-weight: 400;\"\u003e\u003cb\u003eCapacity\u003c\/b\u003e\u003c\/li\u003e\n\u003cli style=\"font-weight: 400;\"\u003e\u003cspan style=\"font-weight: 400;\"\u003e3500 mAh\u003c\/span\u003e\u003c\/li\u003e\n\u003c\/ul\u003e\n\u003cul\u003e\n\u003cli style=\"font-weight: 400;\"\u003e\u003cb\u003eVoltage\u003c\/b\u003e\u003c\/li\u003e\n\u003cli style=\"font-weight: 400;\"\u003e\u003cspan style=\"font-weight: 400;\"\u003e11.55 V\u003c\/span\u003e\u003c\/li\u003e\n\u003c\/ul\u003e\n\u003cul\u003e\n\u003cli style=\"font-weight: 400;\"\u003e\u003cb\u003eCharging Voltage Limit\u003c\/b\u003e\u003c\/li\u003e\n\u003cli style=\"font-weight: 400;\"\u003e\u003cspan style=\"font-weight: 400;\"\u003e13.2 V\u003c\/span\u003e\u003c\/li\u003e\n\u003c\/ul\u003e\n\u003cul\u003e\u003c\/ul\u003e\n\u003cul\u003e\n\u003cli style=\"font-weight: 400;\"\u003e\u003cb\u003eWeight\u003c\/b\u003e\u003c\/li\u003e\n\u003cli style=\"font-weight: 400;\"\u003e\u003cspan style=\"font-weight: 400;\"\u003e198 g\u003c\/span\u003e\u003c\/li\u003e\n\u003c\/ul\u003e\n\u003cul\u003e\n\u003cli style=\"font-weight: 400;\"\u003e\u003cb\u003eCharging Temperature\u003c\/b\u003e\u003c\/li\u003e\n\u003cli style=\"font-weight: 400;\"\u003e\u003cspan style=\"font-weight: 400;\"\u003e5° to 40°C (41° to 104°F)\u003c\/span\u003e\u003c\/li\u003e\n\u003c\/ul\u003e\n\u003cul data-mce-fragment=\"1\"\u003e\n\u003cli data-mce-fragment=\"1\"\u003e\u003cb data-mce-fragment=\"1\"\u003eBattery Type\u003c\/b\u003e\u003c\/li\u003e\n\u003cli data-mce-fragment=\"1\"\u003e\u003cspan data-mce-fragment=\"1\"\u003eLiPo 3S\u003c\/span\u003e\u003c\/li\u003e\n\u003c\/ul\u003e\n\u003cul data-mce-fragment=\"1\"\u003e\n\u003cli data-mce-fragment=\"1\"\u003e\u003cb data-mce-fragment=\"1\"\u003eEnergy\u003c\/b\u003e\u003c\/li\u003e\n\u003cli data-mce-fragment=\"1\"\u003e\u003cspan data-mce-fragment=\"1\"\u003e40.42 Wh\u003c\/span\u003e\u003c\/li\u003e\n\u003c\/ul\u003e\n\u003cul\u003e\u003c\/ul\u003e\n\u003cul\u003e\n\u003cli style=\"font-weight: 400;\"\u003e\u003cb\u003eMax Charging Power\u003c\/b\u003e\u003c\/li\u003e\n\u003cli style=\"font-weight: 400;\"\u003e\u003cspan style=\"font-weight: 400;\"\u003e38 W\u003c\/span\u003e\u003c\/li\u003e\n\u003c\/ul\u003e\n\u003c\/div\u003e\n\u003cdiv style=\"text-align: left;\"\u003e\u003cb\u003eCamera\u003c\/b\u003e\u003c\/div\u003e\n\u003cdiv\u003e\n\u003cul style=\"text-align: left;\"\u003e\n\u003cli style=\"font-weight: 400;\"\u003e\u003cb\u003eSensor\u003c\/b\u003e\u003c\/li\u003e\n\u003cli style=\"font-weight: 400;\"\u003e\n\u003cspan style=\"font-weight: 400;\"\u003e1\/2\" CMOS\u003c\/span\u003e\u003cspan style=\"font-weight: 400;\"\u003e\u003cbr\u003e\u003c\/span\u003e\u003cspan style=\"font-weight: 400;\"\u003eEffective Pixels: 12 MP and 48 MP\u003c\/span\u003e\n\u003c\/li\u003e\n\u003cli\u003e\u003cb\u003eISO\u003c\/b\u003e\u003c\/li\u003e\n\u003cli\u003e\n\u003cspan\u003eVideo:\u003c\/span\u003e\u003cspan\u003e\u003cbr\u003e\u003c\/span\u003e\u003cspan\u003e100-6400\u003c\/span\u003e\u003cspan\u003e\u003cbr\u003e\u003c\/span\u003e\u003cspan\u003e\u003cbr\u003e\u003c\/span\u003e\u003cspan\u003ePhoto (12 MP):\u003c\/span\u003e\u003cspan\u003e\u003cbr\u003e\u003c\/span\u003e\u003cspan\u003e100-3200 (Auto)\u003c\/span\u003e\u003cspan\u003e\u003cbr\u003e\u003c\/span\u003e\u003cspan\u003e100-6400 (Manual)\u003c\/span\u003e\u003cspan\u003e\u003cbr\u003e\u003c\/span\u003e\u003cspan\u003ePhoto (48 MP):\u003c\/span\u003e\u003cspan\u003e\u003cbr\u003e\u003c\/span\u003e\u003cspan\u003e100-1600 (Auto)\u003c\/span\u003e\u003cspan\u003e\u003cbr\u003e\u003c\/span\u003e\u003cspan\u003e100-3200 (Manual)\u003c\/span\u003e\n\u003c\/li\u003e\n\u003c\/ul\u003e\n\u003cul style=\"text-align: left;\"\u003e\n\u003cli style=\"font-weight: 400;\"\u003e\u003cb\u003eLens\u003c\/b\u003e\u003c\/li\u003e\n\u003cli style=\"font-weight: 400;\"\u003e\n\u003cspan style=\"font-weight: 400;\"\u003eFOV: 84°\u003c\/span\u003e\u003cspan style=\"font-weight: 400;\"\u003e\u003cbr\u003e\u003c\/span\u003e\u003cspan style=\"font-weight: 400;\"\u003eEquivalent Focal Length: 24 mm\u003c\/span\u003e\u003cspan style=\"font-weight: 400;\"\u003e\u003cbr\u003e\u003c\/span\u003e\u003cspan style=\"font-weight: 400;\"\u003eAperture: f\/2.8\u003c\/span\u003e\u003cspan style=\"font-weight: 400;\"\u003e\u003cbr\u003e\u003c\/span\u003e\u003cspan style=\"font-weight: 400;\"\u003eFocus Range: 1 m to ∞\u003c\/span\u003e\n\u003c\/li\u003e\n\u003c\/ul\u003e\n\u003cul data-mce-fragment=\"1\"\u003e\n\u003cli data-mce-fragment=\"1\"\u003e\u003cb data-mce-fragment=\"1\"\u003eVideo Formats\u003c\/b\u003e\u003c\/li\u003e\n\u003cli data-mce-fragment=\"1\"\u003e\u003cspan data-mce-fragment=\"1\"\u003eMP4\/MOV (H.264\/MPEG-4 AVC, H.265\/HEVC)\u003c\/span\u003e\u003c\/li\u003e\n\u003c\/ul\u003e\n\u003cul data-mce-fragment=\"1\"\u003e\n\u003cli data-mce-fragment=\"1\"\u003e\u003cb data-mce-fragment=\"1\"\u003eMax Bitrate\u003c\/b\u003e\u003c\/li\u003e\n\u003cli data-mce-fragment=\"1\"\u003e\u003cspan data-mce-fragment=\"1\"\u003e120 Mbps\u003c\/span\u003e\u003c\/li\u003e\n\u003c\/ul\u003e\n\u003cul style=\"text-align: left;\"\u003e\u003c\/ul\u003e\n\u003cul style=\"text-align: left;\"\u003e\n\u003cli style=\"font-weight: 400;\"\u003e\u003cb\u003eMax Photo Resolution\u003c\/b\u003e\u003c\/li\u003e\n\u003cli style=\"font-weight: 400;\"\u003e\u003cspan style=\"font-weight: 400;\"\u003e48 MP 8000×6000 pixel\u003c\/span\u003e\u003c\/li\u003e\n\u003c\/ul\u003e\n\u003cul style=\"text-align: left;\"\u003e\n\u003cli style=\"font-weight: 400;\"\u003e\u003cb\u003ePhoto Formats\u003c\/b\u003e\u003c\/li\u003e\n\u003cli style=\"font-weight: 400;\"\u003e\u003cspan style=\"font-weight: 400;\"\u003eJPEG\/DNG (RAW)\u003c\/span\u003e\u003c\/li\u003e\n\u003cli\u003e\u003cb\u003ePhoto Modes\u003c\/b\u003e\u003c\/li\u003e\n\u003cli\u003e\n\u003cspan\u003eSingle: 12 MP and 48 MP\u003c\/span\u003e\u003cspan\u003e\u003cbr\u003e\u003c\/span\u003e\u003cspan\u003eBurst: 12 MP, 3\/5\/7 frames\u003c\/span\u003e\u003cspan\u003e\u003cbr\u003e\u003c\/span\u003e\u003cspan\u003eAutomatic Exposure Bracketing (AEB): 12MP, 3\/5 Frames at 0.7EV Bias\u003c\/span\u003e\u003cspan\u003e\u003cbr\u003e\u003c\/span\u003e\u003cspan\u003eTimed: 12 MP 2\/3\/5\/7\/10\/15\/20\/30\/60 seconds\u003c\/span\u003e\u003cspan\u003e\u003cbr\u003e\u003c\/span\u003e\u003cspan\u003eSmartPhoto: Scene Recognition, HyperLight, and HDR\u003c\/span\u003e\u003cspan\u003e\u003cbr\u003e\u003c\/span\u003e\u003cspan\u003eHDR Panorama:\u003c\/span\u003e\u003cspan\u003e\u003cbr\u003e\u003c\/span\u003e\u003cspan\u003eVertical (3×1): 3328×8000 pixels (Width×Height)\u003c\/span\u003e\u003cspan\u003e\u003cbr\u003e\u003c\/span\u003e\u003cspan\u003eWide-angle (3×3): 8000×6144 pixels (Width×Height)\u003c\/span\u003e\u003cspan\u003e\u003cbr\u003e\u003c\/span\u003e\u003cspan\u003e180° Panorama (3×7): 8192×3500 pixels (Width×Height)\u003c\/span\u003e\u003cspan\u003e\u003cbr\u003e\u003c\/span\u003e\u003cspan\u003eSphere (3×8+1): 8192×4096 pixels (Width×Height)\u003c\/span\u003e\n\u003c\/li\u003e\n\u003c\/ul\u003e\n\u003cul style=\"text-align: left;\"\u003e\n\u003cli style=\"font-weight: 400;\"\u003e\u003cb\u003eVideo Resolution and Frame Rates\u003c\/b\u003e\u003c\/li\u003e\n\u003cli style=\"font-weight: 400;\"\u003e\n\u003cspan style=\"font-weight: 400;\"\u003e4K Ultra HD: 3840×2160 24\/25\/30\/48\/50\/60 fps\u003c\/span\u003e\u003cspan style=\"font-weight: 400;\"\u003e\u003cbr\u003e\u003c\/span\u003e\u003cspan style=\"font-weight: 400;\"\u003e2.7K: 2688×1512 24\/25\/30\/48\/50\/60 fps\u003c\/span\u003e\u003cspan style=\"font-weight: 400;\"\u003e\u003cbr\u003e\u003c\/span\u003e\u003cspan style=\"font-weight: 400;\"\u003eFHD: 1920×1080 24\/25\/30\/48\/50\/60\/120\/240 fps\u003c\/span\u003e\u003cspan style=\"font-weight: 400;\"\u003e\u003cbr\u003e\u003c\/span\u003e\u003cspan style=\"font-weight: 400;\"\u003e4K Ultra HD HDR: 3840×2160 24\/25\/30 fps\u003c\/span\u003e\u003cspan style=\"font-weight: 400;\"\u003e\u003cbr\u003e\u003c\/span\u003e\u003cspan style=\"font-weight: 400;\"\u003e2.7K HDR: 2688×1512 24\/25\/30 fps\u003c\/span\u003e\u003cspan style=\"font-weight: 400;\"\u003e\u003cbr\u003e\u003c\/span\u003e\u003cspan style=\"font-weight: 400;\"\u003eFHD HDR: 1920×1080 24\/25\/30 fps\u003c\/span\u003e\n\u003c\/li\u003e\n\u003c\/ul\u003e\n\u003cul style=\"text-align: left;\"\u003e\n\u003cli style=\"font-weight: 400;\"\u003e\u003cb\u003eColor Profiles\u003c\/b\u003e\u003c\/li\u003e\n\u003cli style=\"font-weight: 400;\"\u003e\u003cspan style=\"font-weight: 400;\"\u003eD-Cinelike, Normal\u003c\/span\u003e\u003c\/li\u003e\n\u003c\/ul\u003e\n\u003cul style=\"text-align: left;\"\u003e\n\u003cli style=\"font-weight: 400;\"\u003e\u003cb\u003eSupported SD Cards\u003c\/b\u003e\u003c\/li\u003e\n\u003cli style=\"font-weight: 400;\"\u003e\u003cspan style=\"font-weight: 400;\"\u003eSupports a microSD with capacity of up to 256 GB\u003c\/span\u003e\u003c\/li\u003e\n\u003c\/ul\u003e\n\u003cul style=\"text-align: left;\"\u003e\n\u003cli style=\"font-weight: 400;\"\u003e\u003cb\u003eSupported File Systems\u003c\/b\u003e\u003c\/li\u003e\n\u003cli style=\"font-weight: 400;\"\u003e\u003cspan style=\"font-weight: 400;\"\u003eFAT32 and exFAT\u003c\/span\u003e\u003c\/li\u003e\n\u003c\/ul\u003e\n\u003cul style=\"text-align: center;\"\u003e\n\u003cli style=\"font-weight: 400; text-align: left;\"\u003e\u003cb\u003eZoom\u003c\/b\u003e\u003c\/li\u003e\n\u003cli style=\"font-weight: 400; text-align: left;\"\u003e\u003cspan style=\"font-weight: 400;\"\u003eAvailable\u003c\/span\u003e\u003c\/li\u003e\n\u003c\/ul\u003e\n\u003c\/div\u003e\n\u003c\/div\u003e"}
-
-
{"id":6592445022283,"title":"DJI Mavic Air 2 Fly More Combo - Drone Quadcopter UAV with 4K Video|48MP Camera|34min Flight Time|8K Hyperlapse 1\/2\" CMOS Sensor|ActiveTrack 3.0|3-Axis Gimba|Ocusync 2.0","handle":"dji-mavic-air-2-fly-more-combo-drone-quadcopter-uav-with-4k-video-48mp-camera-34min-flight-time-8k-hyperlapse-1-2-cmos-sensor-activetrack-3-0-3-axis-gimba-ocusync-2-0","description":"\u003ch1 style=\"text-align: center;\"\u003e\u003cstrong\u003eDJI Mavic Air 2 - giving you a new photos and video recording experience\u003c\/strong\u003e\u003c\/h1\u003e\u003cdiv class=\"desc\"\u003e\n\u003ch2 style=\"text-align: center;\"\u003eThe DJI Mavic Air 2 pushes power and portability to new heights, with advanced capabilities packed into a small package. \u003c\/h2\u003e\n\u003cstyle\u003e\u003c!--\n.embed-container { position: relative; padding-bottom: 56.25%; height: 0; overflow: hidden; max-width: 100%; } .embed-container iframe, .embed-container object, .embed-container embed { position: absolute; top: 0; left: 0; width: 100%; height: 100%; }\n--\u003e\u003c\/style\u003e\n\u003cdiv style=\"text-align: center;\" class=\"embed-container\"\u003e\u003ciframe src=\"https:\/\/www.youtube.com\/embed\/StDjsvNFru0\" allowfullscreen=\"\" frameborder=\"0\"\u003e\u003c\/iframe\u003e\u003c\/div\u003e\n\u003cdiv style=\"text-align: center;\"\u003e \u003c\/div\u003e\n\u003ch3 style=\"text-align: center;\"\u003e\u003cspan style=\"font-weight: 400;\"\u003eAerial masterpieces are within reach thanks to intelligent shooting functions and superb image quality. You can raise your game while fully enjoying the creative process with safer, smarter flight.\u003c\/span\u003e\u003c\/h3\u003e\n\u003ch2 style=\"text-align: center;\"\u003e\u003cstrong\u003eFeature\u003c\/strong\u003e\u003c\/h2\u003e\n\u003cdiv style=\"text-align: center;\"\u003e\u003c\/div\u003e\n\u003cdiv style=\"text-align: center;\"\u003e\n\u003ctable\u003e\n\u003ctbody\u003e\n\u003ctr\u003e\n\u003ctd style=\"text-align: center;\"\u003e\n\u003cp\u003e\u003cstrong\u003eUltra-Clear Details \u003c\/strong\u003e\u003c\/p\u003e\n\u003cp\u003e\u003cspan style=\"font-weight: 400;\"\u003e1\/2-Inch Image Sensor \u003c\/span\u003e\u003c\/p\u003e\n\u003cp\u003e\u003cspan style=\"font-weight: 400;\"\u003e4K\/60fps Video \u003c\/span\u003e\u003c\/p\u003e\n\u003cp\u003e\u003cspan style=\"font-weight: 400;\"\u003e48MP Photo\u003c\/span\u003e\u003c\/p\u003e\n\u003c\/td\u003e\n\u003ctd style=\"text-align: center;\"\u003e\n\u003cp\u003e\u003cstrong\u003eEnhanced HDR \u003c\/strong\u003e\u003c\/p\u003e\n\u003cp\u003e\u003cspan style=\"font-weight: 400;\"\u003ePhoto \u003c\/span\u003e\u003c\/p\u003e\n\u003cp\u003e\u003cspan style=\"font-weight: 400;\"\u003eVideo \u003c\/span\u003e\u003c\/p\u003e\n\u003cp\u003e\u003cspan style=\"font-weight: 400;\"\u003ePanorama\u003c\/span\u003e\u003c\/p\u003e\n\u003c\/td\u003e\n\u003c\/tr\u003e\n\u003ctr\u003e\n\u003ctd style=\"text-align: center;\"\u003e\n\u003cp\u003e\u003cstrong\u003eFly Smarter and Safer \u003c\/strong\u003e\u003c\/p\u003e\n\u003cp\u003e\u003cspan style=\"font-weight: 400;\"\u003eAPAS 3.0 Obstacle Avoidance\u003c\/span\u003e\u003c\/p\u003e\n\u003c\/td\u003e\n\u003ctd style=\"text-align: center;\"\u003e\n\u003cp\u003e\u003cstrong\u003eFly Farther, See Clearer \u003c\/strong\u003e\u003c\/p\u003e\n\u003cp\u003e\u003cspan style=\"font-weight: 400;\"\u003eOcuSync 2.0 10km 1080p\/30fps Video Transmission\u003c\/span\u003e\u003c\/p\u003e\n\u003c\/td\u003e\n\u003c\/tr\u003e\n\u003ctr\u003e\n\u003ctd style=\"text-align: center;\"\u003e\n\u003cp\u003e\u003cstrong\u003eFly Longer \u003c\/strong\u003e\u003c\/p\u003e\n\u003cp\u003e\u003cspan\u003e34-Min Max Flight Time \u003c\/span\u003e\u003c\/p\u003e\n\u003cp\u003e\u003cspan\u003e240-Min Max RC Battery Life\u003c\/span\u003e\u003c\/p\u003e\n\u003c\/td\u003e\n\u003ctd style=\"text-align: center;\"\u003e\n\u003cp\u003e\u003cstrong\u003eCinematic Content \u003c\/strong\u003e\u003c\/p\u003e\n\u003cp\u003e\u003cspan\u003e8K Hyperlapse \u003c\/span\u003e\u003c\/p\u003e\n\u003cp\u003e\u003cspan\u003eQuickShots\u003c\/span\u003e\u003c\/p\u003e\n\u003c\/td\u003e\n\u003c\/tr\u003e\n\u003c\/tbody\u003e\n\u003c\/table\u003e\n\u003c\/div\u003e\n\u003cdiv style=\"text-align: center;\"\u003e\u003cb\u003e\u003cimg alt=\"dji-mavic-air-2-fly-more-combo-drone-content-feature-all\" src=\"https:\/\/cdn.shopify.com\/s\/files\/1\/2532\/7020\/files\/dji-mavic-air-2-fly-more-combo-drone-content-feature-all.jpg?v=1626148044\"\u003e\u003c\/b\u003e\u003c\/div\u003e\n\u003ch3 style=\"text-align: center;\"\u003e\u003cspan style=\"color: #ff8000;\"\u003e\u003cb\u003e\u003c\/b\u003e\u003c\/span\u003e\u003c\/h3\u003e\n\u003ch3 style=\"text-align: center;\"\u003e\u003cspan style=\"color: #ff8000;\"\u003e\u003cb\u003eHigh Image Quality\u003c\/b\u003e\u003c\/span\u003e\u003c\/h3\u003e\n\u003cdiv style=\"text-align: center;\"\u003e\u003cb\u003eEpic is Simple, with 4K\/60fps Video \u003c\/b\u003e\u003c\/div\u003e\n\u003cdiv style=\"text-align: center;\"\u003e\u003cspan style=\"font-weight: 400;\"\u003eFootage Master creative aerial views with 4K\/60fps video that is effortlessly fluid. For post-processing, the D-Cinelike flat color profile maintains more information. The HEVC (H.265) video codec records more visual information, uses less storage, and keeps your footage's dynamic range and quality, delivering next-level content.\u003cbr data-mce-fragment=\"1\"\u003e\u003c\/span\u003e\u003c\/div\u003e\n\u003cdiv style=\"text-align: center;\"\u003e\u003cspan style=\"font-weight: 400;\"\u003e\u003cimg alt=\"dji-mavic-air-2-fly-more-combo-drone-content-feature-1-image-quality\" src=\"https:\/\/cdn.shopify.com\/s\/files\/1\/2532\/7020\/files\/dji-mavic-air-2-fly-more-combo-drone-content-feature-1-image-quality.jpg?v=1626148092\"\u003e\u003c\/span\u003e\u003c\/div\u003e\n\u003ch3 style=\"text-align: center;\"\u003e\u003cspan style=\"color: #ff8000;\"\u003e\u003cb\u003e\u003c\/b\u003e\u003c\/span\u003e\u003c\/h3\u003e\n\u003ch3 style=\"text-align: center;\"\u003e\u003cspan style=\"color: #ff8000;\"\u003e\u003cb\u003eHDR Video\u003c\/b\u003e\u003c\/span\u003e\u003c\/h3\u003e\n\u003cdiv style=\"text-align: center;\"\u003e\u003cb\u003eBy default, everything is dynamic.\u003cbr data-mce-fragment=\"1\"\u003e\u003c\/b\u003e\u003c\/div\u003e\n\u003cdiv style=\"text-align: center;\"\u003e\u003cspan style=\"font-weight: 400;\"\u003eA high-performance Quad Bayer image sensor is the key to outstanding HDR video. A single frame captures light and dark details by separating exposure levels in different places. The photos are stacked to create a picture with a higher dynamic range that is vibrant, balanced, and appealing.\u003c\/span\u003e\u003c\/div\u003e\n\u003cdiv style=\"text-align: center;\"\u003e\u003cspan style=\"font-weight: 400;\"\u003e\u003cimg alt=\"dji-mavic-air-2-fly-more-combo-drone-content-feature-2-hdr-video\" src=\"https:\/\/cdn.shopify.com\/s\/files\/1\/2532\/7020\/files\/dji-mavic-air-2-fly-more-combo-drone-content-feature-2-hdr-video.jpg?v=1626148113\"\u003e\u003c\/span\u003e\u003c\/div\u003e\n\u003ch3 style=\"text-align: center;\"\u003e\u003cspan style=\"color: #ff8000;\"\u003e\u003cb\u003e\u003c\/b\u003e\u003c\/span\u003e\u003c\/h3\u003e\n\u003ch3 style=\"text-align: center;\"\u003e\u003cspan style=\"color: #ff8000;\"\u003e\u003cb\u003eAll in the Details\u003c\/b\u003e\u003c\/span\u003e\u003c\/h3\u003e\n\u003cdiv style=\"text-align: center;\"\u003e\u003cb\u003e48MP Photos\u003c\/b\u003e\u003c\/div\u003e\n\u003cdiv style=\"text-align: center;\"\u003e\u003cspan style=\"font-weight: 400;\"\u003eMavic Air 2 has a 1\/2-inch CMOS sensor that captures 48MP photographs. Prepare to take your airborne content to new heights.\u003cbr data-mce-fragment=\"1\"\u003eThe 48MP camera has a high megapixel count, which means that even when zooming in on an image, you can see vivid details.\u003c\/span\u003e\u003c\/div\u003e\n\u003cdiv style=\"text-align: center;\"\u003e\u003cspan style=\"font-weight: 400;\"\u003e\u003cimg alt=\"dji-mavic-air-2-fly-more-combo-drone-content-feature-3-48mp\" src=\"https:\/\/cdn.shopify.com\/s\/files\/1\/2532\/7020\/files\/dji-mavic-air-2-fly-more-combo-drone-content-feature-3-48mp.jpg?v=1626148140\"\u003e\u003c\/span\u003e\u003c\/div\u003e\n\u003ch3 style=\"text-align: center;\"\u003e\u003cspan style=\"color: #ff8000;\"\u003e\u003cb\u003e\u003c\/b\u003e\u003c\/span\u003e\u003c\/h3\u003e\n\u003ch3 style=\"text-align: center;\"\u003e\u003cspan style=\"color: #ff8000;\"\u003e\u003cb\u003eOptimized Capture\u003c\/b\u003e\u003c\/span\u003e\u003c\/h3\u003e\n\u003cdiv style=\"text-align: center;\"\u003e\u003cb\u003eSmartPhoto\u003c\/b\u003e\u003c\/div\u003e\n\u003cdiv style=\"text-align: center;\"\u003e\u003cspan style=\"font-weight: 400;\"\u003eSmartPhoto on the Mavic Air 2 combines scene recognition, HyperLight, and HDR into a single setting for optimal results. Scene recognition optimizes camera parameters for different scenes and offers intelligent recognition of five different categories: sunsets, sky, grass, snow, and trees. The resolution of photos taken in SmartPhoto mode is 12 MP.\u003c\/span\u003e\u003c\/div\u003e\n\u003cdiv style=\"text-align: center;\"\u003e\n\u003ctable width=\"100%\"\u003e\n\u003ctbody\u003e\n\u003ctr\u003e\n\u003ctd\u003e\n\u003cp\u003e\u003cimg alt=\"dji-mavic-air-2-fly-more-combo-drone-content-feature-4-1-Strong-Lighting-Conditions\" src=\"https:\/\/cdn.shopify.com\/s\/files\/1\/2532\/7020\/files\/dji-mavic-air-2-fly-more-combo-drone-content-feature-4-1-Strong-Lighting-Conditions.jpg?v=1626148348\"\u003e\u003c\/p\u003e\n\u003c\/td\u003e\n\u003ctd\u003e\u003cimg alt=\"dji-mavic-air-2-fly-more-combo-drone-content-feature-4-2-Weak-Lighting-Conditions\" src=\"https:\/\/cdn.shopify.com\/s\/files\/1\/2532\/7020\/files\/dji-mavic-air-2-fly-more-combo-drone-content-feature-4-2-Weak-Lighting-Conditions.jpg?v=1626148384\"\u003e\u003c\/td\u003e\n\u003c\/tr\u003e\n\u003ctr\u003e\n\u003ctd\u003e\n\u003cp data-mce-fragment=\"1\"\u003e\u003cstrong\u003eStrong Lighting\u003c\/strong\u003e\u003c\/p\u003e\n\u003cp data-mce-fragment=\"1\"\u003eConditions HyperLight improves the sharpness of images taken in low-light circumstances by reducing noise.\u003c\/p\u003e\n\u003c\/td\u003e\n\u003ctd\u003e\n\u003cp\u003e\u003cstrong\u003eWeak Lighting Conditions\u003c\/strong\u003e\u003c\/p\u003e\n\u003cp data-mce-fragment=\"1\"\u003e\u003cspan data-mce-fragment=\"1\"\u003eHyperLight improves the sharpness of images taken in low-light circumstances by reducing noise.\u003c\/span\u003e\u003c\/p\u003e\n\u003c\/td\u003e\n\u003c\/tr\u003e\n\u003c\/tbody\u003e\n\u003c\/table\u003e\n\u003c\/div\u003e\n\u003cdiv style=\"text-align: center;\"\u003e \u003c\/div\u003e\n\u003cdiv style=\"text-align: center;\"\u003e \u003c\/div\u003e\n\u003ch3 style=\"text-align: center;\"\u003e\u003cspan style=\"color: #ff8000;\"\u003e\u003cb\u003eHDR Panorama\u003c\/b\u003e\u003c\/span\u003e\u003c\/h3\u003e\n\u003cdiv style=\"text-align: center;\"\u003e\u003cb\u003eLook at the Big Picture\u003c\/b\u003e\u003c\/div\u003e\n\u003cdiv style=\"text-align: center;\"\u003e\u003cspan style=\"font-weight: 400;\"\u003eThe Mavic Air 2 has DJI's most sophisticated panorama mode, with a larger dynamic range and vibrant, amazingly realistic colors.\u003c\/span\u003e\u003c\/div\u003e\n\u003cdiv style=\"text-align: center;\"\u003e\u003cspan style=\"font-weight: 400;\"\u003e\u003cimg alt=\"dji-mavic-air-2-fly-more-combo-drone-content-feature-5-HDR-Panorama\" src=\"https:\/\/cdn.shopify.com\/s\/files\/1\/2532\/7020\/files\/dji-mavic-air-2-fly-more-combo-drone-content-feature-5-HDR-Panorama.jpg?v=1626148445\"\u003e\u003c\/span\u003e\u003c\/div\u003e\n\u003ch3 style=\"text-align: center;\"\u003e\u003cspan style=\"color: #ff8000;\"\u003e\u003cb\u003e\u003c\/b\u003e\u003c\/span\u003e\u003c\/h3\u003e\n\u003ch3 style=\"text-align: center;\"\u003e\u003cspan style=\"color: #ff8000;\"\u003e\u003cb\u003eIntelligent Features\u003c\/b\u003e\u003c\/span\u003e\u003c\/h3\u003e\n\u003cdiv style=\"text-align: center;\"\u003e\u003cb\u003eObtaining Cinematic Shots\u003c\/b\u003e\u003c\/div\u003e\n\u003cdiv style=\"text-align: center;\"\u003e\u003cspan style=\"font-weight: 400;\"\u003eFor breathtaking results, the Mavic Air 2 combines a powerful camera with intelligent shooting modes. Aerial photography has never been easier to create.\u003c\/span\u003e\u003c\/div\u003e\n\u003cdiv style=\"text-align: center;\"\u003e\u003cspan style=\"font-weight: 400;\"\u003e\u003cimg alt=\"dji-mavic-air-2-fly-more-combo-drone-content-feature-6-Intelligent-Features\" src=\"https:\/\/cdn.shopify.com\/s\/files\/1\/2532\/7020\/files\/dji-mavic-air-2-fly-more-combo-drone-content-feature-6-Intelligent-Features.jpg?v=1626148481\"\u003e\u003c\/span\u003e\u003c\/div\u003e\n\u003ch3 style=\"text-align: center;\"\u003e\u003cspan style=\"color: #ff8000;\"\u003e\u003cb\u003e\u003c\/b\u003e\u003c\/span\u003e\u003c\/h3\u003e\n\u003ch3 style=\"text-align: center;\"\u003e\u003cspan style=\"color: #ff8000;\"\u003e\u003cb\u003eFocusTrack\u003c\/b\u003e\u003c\/span\u003e\u003c\/h3\u003e\n\u003cdiv style=\"text-align: center;\"\u003e\u003cb\u003eMaster the Skies\u003c\/b\u003e\u003c\/div\u003e\n\u003cdiv style=\"text-align: center;\"\u003e\u003cspan style=\"font-weight: 400;\"\u003eWith FocusTrack, capturing professional-quality footage is a breeze. Active Track 3.0, Spotlight 2.0, and Point of Interest 3.0 are among the easy-to-use intelligent tracking modes that let you express yourself.\u003c\/span\u003e\u003c\/div\u003e\n\u003cdiv style=\"text-align: center;\"\u003e \u003c\/div\u003e\n\u003cdiv style=\"text-align: center;\"\u003e\n\u003ctable width=\"100%\" data-mce-fragment=\"1\"\u003e\n\u003ctbody data-mce-fragment=\"1\"\u003e\n\u003ctr data-mce-fragment=\"1\"\u003e\n\u003ctd data-mce-fragment=\"1\"\u003e\n\u003cp\u003e \u003c\/p\u003e\n\u003cdiv style=\"text-align: left;\"\u003e\u003cimg style=\"float: none;\" alt=\"dji-mavic-air-2-fly-more-combo-drone-content-feature-7-1-Spotlight 2.0\" src=\"https:\/\/cdn.shopify.com\/s\/files\/1\/2532\/7020\/files\/dji-mavic-air-2-fly-more-combo-drone-content-feature-7-1-Spotlight_2.0.jpg?v=1626148537\"\u003e\u003c\/div\u003e\n\u003c\/td\u003e\n\u003ctd data-mce-fragment=\"1\"\u003e\n\u003cp\u003e\u003cimg src=\"https:\/\/cdn.shopify.com\/s\/files\/1\/2532\/7020\/files\/dji-mavic-air-2-fly-more-combo-drone-content-feature-7-2-ActiveTrack_3.0.jpg?v=1626148709\" alt=\"dji-mavic-air-2-fly-more-combo-drone-content-feature-7-2-ActiveTrack 3.0\" data-mce-fragment=\"1\" data-mce-src=\"https:\/\/cdn.shopify.com\/s\/files\/1\/2532\/7020\/files\/dji-mavic-air-2-fly-more-combo-drone-content-feature-7-2-ActiveTrack_3.0.jpg?v=1626148709\"\u003e\u003cbr\u003e\u003c\/p\u003e\n\u003c\/td\u003e\n\u003ctd data-mce-fragment=\"1\"\u003e\n\u003cp\u003e\u003cimg src=\"https:\/\/cdn.shopify.com\/s\/files\/1\/2532\/7020\/files\/dji-mavic-air-2-fly-more-combo-drone-content-feature-7-3-POI_3.0.jpg?v=1626148918\" alt=\"dji-mavic-air-2-fly-more-combo-drone-content-feature-7-3-POI 3.0\" data-mce-fragment=\"1\" data-mce-src=\"https:\/\/cdn.shopify.com\/s\/files\/1\/2532\/7020\/files\/dji-mavic-air-2-fly-more-combo-drone-content-feature-7-3-POI_3.0.jpg?v=1626148918\"\u003e\u003cbr\u003e\u003c\/p\u003e\n\u003c\/td\u003e\n\u003c\/tr\u003e\n\u003ctr data-mce-fragment=\"1\"\u003e\n\u003ctd data-mce-fragment=\"1\"\u003e\n\u003cp\u003e\u003cstrong\u003eSpotlight 2.0\u003c\/strong\u003e\u003c\/p\u003e\n\u003cp\u003eWith this handy mode, you may fly around freely while the camera remains fixed on the subject. Simply choose your target and take off.\u003c\/p\u003e\n\u003c\/td\u003e\n\u003ctd data-mce-fragment=\"1\"\u003e\n\u003cp\u003e\u003cstrong\u003eActiveTrack 3.0\u003c\/strong\u003e\u003c\/p\u003e\n\u003cp\u003eWith the latest version of DJI's ActiveTrack technology, following subjects while avoiding obstacles has never been easier. This technique keeps your subject in the center of the screen, even if they go behind a tree, with superior pathfinding and a faster and more accurate prediction of lost subjects.\u003c\/p\u003e\n\u003c\/td\u003e\n\u003ctd data-mce-fragment=\"1\"\u003e\n\u003cp\u003e\u003cstrong\u003ePOI 3.0\u003c\/strong\u003e\u003c\/p\u003e\n\u003cp\u003ePOI 3.0 enhances the capabilities of POI 2.0, particularly in terms of flat surface recognition. This updated functionality avoids the problem that POI 2.0 had with losing the target during tracking. POI 3.0 now has the ability to track people, cars, and boats in real time.\u003c\/p\u003e\n\u003c\/td\u003e\n\u003c\/tr\u003e\n\u003c\/tbody\u003e\n\u003c\/table\u003e\n\u003c\/div\u003e\n\u003ch3 style=\"text-align: center;\"\u003e\u003cb\u003e\u003cspan style=\"color: #ff8000;\"\u003e8K Hyperlapse\u003c\/span\u003e\u003c\/b\u003e\u003c\/h3\u003e\n\u003cdiv style=\"text-align: center;\"\u003e\u003cb\u003eTime and Movement\u003c\/b\u003e\u003c\/div\u003e\n\u003cdiv style=\"text-align: center;\"\u003e\u003cspan style=\"font-weight: 400;\"\u003eHyperlapse in 8K is supported by the Mavic Air 2, allowing you to warp time and space for particularly spectacular film. Best of all, you can get this photo without using any complicated post-production techniques. Choose from Free, Circle, Course Lock, and Waypoint modes, then point and shoot using the DJI Fly app. *8K resolution is only available in Free and Waypoint modes.\u003c\/span\u003e\u003c\/div\u003e\n\u003cdiv style=\"text-align: center;\"\u003e\n\u003cul\u003e\n\u003cli style=\"font-weight: 400;\"\u003e\u003cspan style=\"font-weight: 400;\"\u003eCourse Lock\u003c\/span\u003e\u003c\/li\u003e\n\u003cli style=\"font-weight: 400;\"\u003e\u003cspan style=\"font-weight: 400;\"\u003eFree\u003c\/span\u003e\u003c\/li\u003e\n\u003cli style=\"font-weight: 400;\"\u003e\u003cspan style=\"font-weight: 400;\"\u003eWaypoint\u003c\/span\u003e\u003c\/li\u003e\n\u003cli style=\"font-weight: 400;\"\u003e\u003cspan style=\"font-weight: 400;\"\u003eCircle\u003c\/span\u003e\u003c\/li\u003e\n\u003c\/ul\u003e\n\u003c\/div\u003e\n\u003cdiv style=\"text-align: center;\"\u003e\n\u003cimg src=\"https:\/\/cdn.shopify.com\/s\/files\/1\/2532\/7020\/files\/dji-mavic-air-2-fly-more-combo-drone-content-feature-8-2-free.jpg?v=1626148985\" alt=\"dji-mavic-air-2-fly-more-combo-drone-content-feature-8-2-free\" data-mce-fragment=\"1\" data-mce-src=\"https:\/\/cdn.shopify.com\/s\/files\/1\/2532\/7020\/files\/dji-mavic-air-2-fly-more-combo-drone-content-feature-8-2-free.jpg?v=1626148985\"\u003e\u003cbr\u003e\n\u003c\/div\u003e\n\u003cdiv style=\"text-align: center;\"\u003e \u003c\/div\u003e\n\u003ch3 style=\"text-align: center;\"\u003e\u003cspan style=\"color: #ff8000;\"\u003e\u003cb\u003eQuickShots\u003c\/b\u003e\u003c\/span\u003e\u003c\/h3\u003e\n\u003cdiv style=\"text-align: center;\"\u003e\u003cb\u003eImagination Simplified\u003c\/b\u003e\u003c\/div\u003e\n\u003cdiv style=\"text-align: center;\"\u003e\u003cspan style=\"font-weight: 400;\"\u003eQuickShots allows you to capture cinematic video snippets automatically. Mavic Air 2 prepares and flies a difficult aerial route for a professional-quality photo with just a few touches. With super-intuitive Story templates, you can add music, effects, and filters to your creation before sharing it on social media.\u003c\/span\u003e\u003c\/div\u003e\n\u003cdiv style=\"text-align: center;\"\u003e\n\u003cul\u003e\n\u003cli style=\"font-weight: 400;\"\u003e\u003cspan style=\"font-weight: 400;\"\u003eDronie\u003c\/span\u003e\u003c\/li\u003e\n\u003cli style=\"font-weight: 400;\"\u003e\u003cspan style=\"font-weight: 400;\"\u003eCircle\u003c\/span\u003e\u003c\/li\u003e\n\u003cli style=\"font-weight: 400;\"\u003e\u003cspan style=\"font-weight: 400;\"\u003eHelix\u003c\/span\u003e\u003c\/li\u003e\n\u003cli style=\"font-weight: 400;\"\u003e\u003cspan style=\"font-weight: 400;\"\u003eRocket\u003c\/span\u003e\u003c\/li\u003e\n\u003cli style=\"font-weight: 400;\"\u003e\u003cspan style=\"font-weight: 400;\"\u003eBoomerang\u003c\/span\u003e\u003c\/li\u003e\n\u003cli style=\"font-weight: 400;\"\u003e\u003cspan style=\"font-weight: 400;\"\u003eAsteroid\u003c\/span\u003e\u003c\/li\u003e\n\u003c\/ul\u003e\n\u003c\/div\u003e\n\u003ch3 style=\"text-align: center;\"\u003e\u003cspan style=\"color: #ff8000;\"\u003e\u003cb\u003e\u003c\/b\u003e\u003c\/span\u003e\u003c\/h3\u003e\n\u003ch3 style=\"text-align: center;\"\u003e\u003cspan style=\"color: #ff8000;\"\u003e\u003cb\u003eFlight and Safety\u003c\/b\u003e\u003c\/span\u003e\u003c\/h3\u003e\n\u003cdiv style=\"text-align: center;\"\u003e\u003cb\u003eSafer Flight for Stunning Content\u003c\/b\u003e\u003c\/div\u003e\n\u003cdiv style=\"text-align: center;\"\u003e\u003cspan style=\"color: #ffffff;\"\u003e\u003cb\u003e.\u003c\/b\u003e\u003c\/span\u003e\u003c\/div\u003e\n\u003ch3 style=\"text-align: center;\"\u003e\u003cspan style=\"color: #ff8000;\"\u003e\u003cb\u003e\u003c\/b\u003e\u003c\/span\u003e\u003c\/h3\u003e\n\u003ch3 style=\"text-align: center;\"\u003e\u003cspan style=\"color: #ff8000;\"\u003e\u003cb\u003eOcuSync 2.0\u003c\/b\u003e\u003c\/span\u003e\u003c\/h3\u003e\n\u003cdiv style=\"text-align: center;\"\u003e\u003cb\u003eThe Sky’s the Limit\u003c\/b\u003e\u003c\/div\u003e\n\u003cdiv style=\"text-align: center;\"\u003e\u003cspan style=\"font-weight: 400;\"\u003eOcuSync 2.0 can give a 1080p FHD livestream directly from the drone's camera and has a video transmission distance of up to 10 kilometers. Enjoy greater freedom when it comes to exploring and more clarity when it comes to capturing the perfect photo. \u003cbr data-mce-fragment=\"1\"\u003e\u003cbr data-mce-fragment=\"1\"\u003e*When unobstructed, interference-free, and FCC-compliant. The maximum flying range specification is a proxy for the strength and robustness of the radio link.\u003c\/span\u003e\u003c\/div\u003e\n\u003cdiv style=\"text-align: center;\"\u003e\u003cspan style=\"font-weight: 400;\"\u003e\u003cimg alt=\"dji-mavic-air-2-fly-more-combo-drone-content-feature-9-OcuSync 2.0\" src=\"https:\/\/cdn.shopify.com\/s\/files\/1\/2532\/7020\/files\/dji-mavic-air-2-fly-more-combo-drone-content-feature-9-OcuSync_2.0.jpg?v=1626149011\"\u003e\u003c\/span\u003e\u003c\/div\u003e\n\u003cdiv style=\"text-align: center;\"\u003e \u003c\/div\u003e\n\u003ch3 style=\"text-align: center;\"\u003e\u003cspan style=\"color: #ff8000;\"\u003e\u003cb\u003e2.4\/5.8GHz Dual Frequency\u003c\/b\u003e\u003c\/span\u003e\u003c\/h3\u003e\n\u003cdiv style=\"text-align: center;\"\u003e\u003cb\u003eSmooth Flight, Reliable Signal\u003cbr data-mce-fragment=\"1\"\u003e\u003c\/b\u003e\u003c\/div\u003e\n\u003cdiv style=\"text-align: center;\"\u003e\u003cspan style=\"font-weight: 400;\"\u003eThe Mavic Air 2 has dual-frequency connectivity (2.4\/5.8GHz) and automatically shifts to the best channel with the least interference in real time. This increases flight safety by greatly improving the aircraft's anti-interference ability in adverse circumstances. \u003cbr data-mce-fragment=\"1\"\u003e\u003cbr data-mce-fragment=\"1\"\u003e*Some countries do not accept 5.8 GHz transmission due to local laws.\u003c\/span\u003e\u003c\/div\u003e\n\u003cdiv style=\"text-align: center;\"\u003e\u003cspan style=\"font-weight: 400; color: #ffffff;\"\u003e.\u003c\/span\u003e\u003c\/div\u003e\n\u003ch3 style=\"text-align: center;\"\u003e\u003cspan style=\"color: #ff8000;\"\u003e\u003cb\u003e\u003c\/b\u003e\u003c\/span\u003e\u003c\/h3\u003e\n\u003ch3 style=\"text-align: center;\"\u003e\u003cspan style=\"color: #ff8000;\"\u003e\u003cb\u003eBattery and Flight\u003c\/b\u003e\u003c\/span\u003e\u003c\/h3\u003e\n\u003cdiv style=\"text-align: center;\"\u003e\u003cb\u003eFly Longer\u003c\/b\u003e\u003c\/div\u003e\n\u003cdiv style=\"text-align: center;\"\u003e\u003cspan style=\"font-weight: 400;\"\u003eWith a battery life of up to 34 minutes and a maximum flight speed of 68 kph in Sport mode, you'll be able to stay in the air for as long as you want to obtain the ideal image. \u003cbr data-mce-fragment=\"1\"\u003e\u003cbr data-mce-fragment=\"1\"\u003e*Flight time was recorded at a 9° angle and a speed of 5.1 m\/s in a windless environment.\u003c\/span\u003e\u003c\/div\u003e\n\u003cdiv style=\"text-align: center;\"\u003e \u003c\/div\u003e\n\u003cdiv style=\"text-align: center;\"\u003e\u003cspan style=\"font-weight: 400;\"\u003e\u003cimg alt=\"dji-mavic-air-2-fly-more-combo-drone-content-feature-10-battery\" src=\"https:\/\/cdn.shopify.com\/s\/files\/1\/2532\/7020\/files\/dji-mavic-air-2-fly-more-combo-drone-content-feature-10-battery.jpg?v=1626149034\"\u003e\u003c\/span\u003e\u003c\/div\u003e\n\u003ch3 style=\"text-align: center;\"\u003e\u003cspan style=\"color: #ff8000;\"\u003e\u003cb\u003eObstacle Avoidance\u003c\/b\u003e\u003c\/span\u003e\u003c\/h3\u003e\n\u003cdiv style=\"text-align: center;\"\u003e\u003cb\u003eFly Safer\u003c\/b\u003e\u003c\/div\u003e\n\u003cdiv style=\"text-align: center;\"\u003e\u003cspan style=\"font-weight: 400;\"\u003eForward, backward, and downward are the three directions in which Mavic Air 2 observes its surroundings. An auxiliary light improves visibility, and obstacle avoidance adds an extra layer of security that's great for pushing the boundaries of what's possible.\u003c\/span\u003e\u003c\/div\u003e\n\u003cdiv style=\"text-align: center;\"\u003e\n\u003ctable\u003e\n\u003ctbody\u003e\n\u003ctr\u003e\n\u003ctd\u003e\n\u003cp\u003e\u003cb\u003eForward\u003c\/b\u003e\u003cspan style=\"font-weight: 400;\"\u003e: Vision sensor accurate up to 22 meters\u003c\/span\u003e\u003c\/p\u003e\n\u003c\/td\u003e\n\u003c\/tr\u003e\n\u003ctr\u003e\n\u003ctd\u003e\n\u003cp\u003e\u003cb\u003eBackward\u003c\/b\u003e\u003cspan style=\"font-weight: 400;\"\u003e: Vision sensor accurate up to 23.6 meters\u003c\/span\u003e\u003c\/p\u003e\n\u003c\/td\u003e\n\u003c\/tr\u003e\n\u003ctr\u003e\n\u003ctd\u003e\n\u003cp\u003e\u003cb\u003eDownward\u003c\/b\u003e\u003cspan style=\"font-weight: 400;\"\u003e: Vision sensor, infrared sensor. The auxiliary light assist with visual positioning, safe landing, and visibility in the air. It can be turned on and off manually.\u003c\/span\u003e\u003c\/p\u003e\n\u003c\/td\u003e\n\u003c\/tr\u003e\n\u003c\/tbody\u003e\n\u003c\/table\u003e\n\u003c\/div\u003e\n\u003cdiv style=\"text-align: center;\"\u003e\u003cspan style=\"color: #ffffff;\"\u003e\u003cb\u003e.\u003c\/b\u003e\u003c\/span\u003e\u003c\/div\u003e\n\u003cdiv style=\"text-align: center;\"\u003e\u003cb\u003e\u003c\/b\u003e\u003c\/div\u003e\n\u003cdiv style=\"text-align: center;\"\u003e\u003cb\u003eAPAS 3.0\u003c\/b\u003e\u003c\/div\u003e\n\u003cdiv style=\"text-align: center;\"\u003e\u003cspan style=\"font-weight: 400;\"\u003eIn difficult settings, Advanced Pilot Assistance Systems (APAS) 3.0 employs advanced mapping technology for smooth following and dependable obstacle avoidance. When compared to earlier generations, obstacle avoidance performance and autonomous flight planning have improved substantially, boosting safety and enabling more options.\u003c\/span\u003e\u003c\/div\u003e\n\u003cdiv style=\"text-align: center;\"\u003e\u003cspan style=\"font-weight: 400;\"\u003e*While recording in 4K at 60, 50, and 48 fps, 2.7K at 60, 50, and 48 fps, and 1080p at 120 and 240 fps, APAS 3.0 and FocusTrack are not available.\u003cbr data-mce-fragment=\"1\"\u003e\u003c\/span\u003e\u003c\/div\u003e\n\u003cstyle\u003e\u003c!--\n.embed-container { position: relative; padding-bottom: 56.25%; height: 0; overflow: hidden; max-width: 100%; } .embed-container iframe, .embed-container object, .embed-container embed { position: absolute; top: 0; left: 0; width: 100%; height: 100%; }\n--\u003e\u003c\/style\u003e\n\u003cdiv style=\"text-align: center;\" class=\"embed-container\"\u003e\u003ciframe src=\"https:\/\/www.youtube.com\/embed\/IwoyGb-NWDs\" frameborder=\"0\" allowfullscreen=\"\"\u003e\u003c\/iframe\u003e\u003c\/div\u003e\n\u003cdiv style=\"text-align: center;\"\u003e \u003c\/div\u003e\n\u003ch3 style=\"text-align: center;\"\u003e\u003cspan style=\"color: #ff8000;\"\u003e\u003cb\u003eDJI Fly App\u003c\/b\u003e\u003c\/span\u003e\u003c\/h3\u003e\n\u003cdiv style=\"text-align: center;\"\u003e\u003cb\u003eEffortless Editing\u003c\/b\u003e\u003c\/div\u003e\n\u003cdiv style=\"text-align: center;\"\u003e\u003cspan style=\"font-weight: 400;\"\u003eThe DJI Fly app makes creating perfect films easier than ever before. It incorporates the DJI Mimo app's editing suite, giving users access to manual settings, advanced functionalities, and intuitive templates to quickly produce professional compositions.\u003c\/span\u003e\u003c\/div\u003e\n\u003cdiv style=\"text-align: center;\"\u003e\u003cspan style=\"font-weight: 400;\"\u003e\u003cimg alt=\"dji-mavic-air-2-fly-more-combo-drone-content-feature-11-DJI-Fly-App\" src=\"https:\/\/cdn.shopify.com\/s\/files\/1\/2532\/7020\/files\/dji-mavic-air-2-fly-more-combo-drone-content-feature-11-DJI-Fly-App.jpg?v=1626149062\"\u003e\u003c\/span\u003e\u003c\/div\u003e\n\u003ch3 style=\"text-align: center;\"\u003e\u003cspan style=\"color: #ff8000;\"\u003e\u003cb\u003e\u003c\/b\u003e\u003c\/span\u003e\u003c\/h3\u003e\n\u003ch3 style=\"text-align: center;\"\u003e\u003cspan style=\"color: #ff8000;\"\u003e\u003cb\u003eRemote Controller \u003c\/b\u003e\u003c\/span\u003e\u003c\/h3\u003e\n\u003cdiv style=\"text-align: center;\"\u003e\u003cb\u003eDesigned for Pilots\u003c\/b\u003e\u003c\/div\u003e\n\u003cdiv style=\"text-align: center;\"\u003e\u003cspan style=\"font-weight: 400;\"\u003eThe newly designed remote controller has an ergonomic shape for a more comfortable grip and an excellent 240-minute battery life. The redesigned clamp makes it simple to attach devices, and the integrated antennas improve the user experience dramatically.\u003cbr data-mce-fragment=\"1\"\u003e*In an interference-free environment, battery life was measured using an Android phone.\u003c\/span\u003e\u003c\/div\u003e\n\u003cdiv style=\"text-align: center;\"\u003e\u003cspan style=\"font-weight: 400;\"\u003e\u003cimg alt=\"dji-mavic-air-2-fly-more-combo-drone-content-feature-12-remote\" src=\"https:\/\/cdn.shopify.com\/s\/files\/1\/2532\/7020\/files\/dji-mavic-air-2-fly-more-combo-drone-content-feature-12-remote.jpg?v=1626149088\"\u003e\u003c\/span\u003e\u003c\/div\u003e\n\u003cdiv style=\"text-align: center;\"\u003e \u003c\/div\u003e\n\u003ch3 style=\"text-align: center;\"\u003e\u003cspan style=\"color: #ff8000;\"\u003e\u003cb\u003eND Filters\u003c\/b\u003e\u003c\/span\u003e\u003c\/h3\u003e\n\u003cdiv style=\"text-align: center;\"\u003e\u003cb\u003eOptimal Options\u003c\/b\u003e\u003c\/div\u003e\n\u003cdiv style=\"text-align: center;\"\u003eThe Mavic Air 2 comes with two ND filter sets that help with exposure control and give you additional creative options. The ND 16\/64\/256 set is useful for altering shutter speed and in low-light situations, while the ND 4\/8\/32 set allows for colorful photographs even at low ISO.\u003cbr\u003e\u003cbr\u003e*The Fly More Combo comes with ND16\/64\/256 filters. Separately, the ND4\/8\/32 filter set can be ordered.\u003c\/div\u003e\n\u003cdiv style=\"text-align: center;\"\u003e\u003cspan style=\"font-weight: 400;\"\u003e\u003cimg alt=\"dji-mavic-air-2-fly-more-combo-drone-content-feature-13-ND-Filter\" src=\"https:\/\/cdn.shopify.com\/s\/files\/1\/2532\/7020\/files\/dji-mavic-air-2-fly-more-combo-drone-content-feature-13-ND-Filter.jpg?v=1626149110\"\u003e\u003c\/span\u003e\u003c\/div\u003e\n\u003cdiv style=\"text-align: center;\"\u003e \u003c\/div\u003e\n\u003ch2 style=\"text-align: left;\"\u003e\u003cstrong\u003eSpecification\u003c\/strong\u003e\u003c\/h2\u003e\n\u003cp\u003e \u003c\/p\u003e\n\u003cp\u003e \u003c\/p\u003e\n\u003cp\u003e \u003c\/p\u003e\n\u003cdiv style=\"text-align: left;\"\u003e\u003cb\u003eAircraft\u003c\/b\u003e\u003c\/div\u003e\n\u003cdiv style=\"text-align: left;\"\u003e\n\u003cul\u003e\n\u003cli style=\"font-weight: 400;\"\u003e\u003cb\u003eWeight\u003c\/b\u003e\u003c\/li\u003e\n\u003cli style=\"font-weight: 400;\"\u003e570 g\u003c\/li\u003e\n\u003c\/ul\u003e\n\u003cul\u003e\n\u003cli style=\"font-weight: 400;\"\u003e\u003cb\u003eSize\u003c\/b\u003e\u003c\/li\u003e\n\u003cli style=\"font-weight: 400;\"\u003e\n\u003cspan style=\"font-weight: 400;\"\u003eFolded:\u003c\/span\u003e\u003cspan style=\"font-weight: 400;\"\u003e\u003cbr\u003e\u003c\/span\u003e\u003cspan style=\"font-weight: 400;\"\u003e180×97×74 mm (Length×Width×Height)\u003c\/span\u003e\u003cspan style=\"font-weight: 400;\"\u003e\u003cbr\u003e\u003c\/span\u003e\u003cspan style=\"font-weight: 400;\"\u003eUnfolded:\u003c\/span\u003e\u003cspan style=\"font-weight: 400;\"\u003e\u003cbr\u003e\u003c\/span\u003e\u003cspan style=\"font-weight: 400;\"\u003e183×253×77 mm (Length×Width×Height)\u003c\/span\u003e\n\u003c\/li\u003e\n\u003c\/ul\u003e\n\u003cul\u003e\n\u003cli style=\"font-weight: 400;\"\u003e\u003cb\u003eDiagonal Distance\u003c\/b\u003e\u003c\/li\u003e\n\u003cli style=\"font-weight: 400;\"\u003e\u003cspan style=\"font-weight: 400;\"\u003e302 mm\u003c\/span\u003e\u003c\/li\u003e\n\u003cli\u003e\u003cb\u003eTransmitter Power (EIRP)\u003c\/b\u003e\u003c\/li\u003e\n\u003cli\u003e\n\u003cspan\u003e2.400-2.4835 GHz:\u003c\/span\u003e\u003cspan\u003e\u003cbr\u003e\u003c\/span\u003e\u003cspan\u003eFCC: ≤26 dBm\u003c\/span\u003e\u003cspan\u003e\u003cbr\u003e\u003c\/span\u003e\u003cspan\u003eCE: ≤20 dBm\u003c\/span\u003e\u003cspan\u003e\u003cbr\u003e\u003c\/span\u003e\u003cspan\u003eSRRC: ≤20 dBm\u003c\/span\u003e\u003cspan\u003e\u003cbr\u003e\u003c\/span\u003e\u003cspan\u003eMIC: ≤20 dBm\u003c\/span\u003e\u003cspan\u003e\u003cbr\u003e\u003c\/span\u003e\u003cspan\u003e\u003cbr\u003e\u003c\/span\u003e\u003cspan\u003e5.725-5.850 GHz:\u003c\/span\u003e\u003cspan\u003e\u003cbr\u003e\u003c\/span\u003e\u003cspan\u003eFCC: ≤26 dBm\u003c\/span\u003e\u003cspan\u003e\u003cbr\u003e\u003c\/span\u003e\u003cspan\u003eCE: ≤14 dBm\u003c\/span\u003e\u003cspan\u003e\u003cbr\u003e\u003c\/span\u003e\u003cspan\u003eSRRC: ≤26 dBm\u003c\/span\u003e\n\u003c\/li\u003e\n\u003c\/ul\u003e\n\u003cul\u003e\n\u003cli style=\"font-weight: 400;\"\u003e\u003cb\u003eMax Ascent Speed\u003c\/b\u003e\u003c\/li\u003e\n\u003cli style=\"font-weight: 400;\"\u003e\n\u003cspan style=\"font-weight: 400;\"\u003e4 m\/s (S Mode)\u003c\/span\u003e\u003cspan style=\"font-weight: 400;\"\u003e\u003cbr\u003e\u003c\/span\u003e\u003cspan style=\"font-weight: 400;\"\u003e4 m\/s (N Mode)\u003c\/span\u003e\n\u003c\/li\u003e\n\u003c\/ul\u003e\n\u003cul\u003e\n\u003cli style=\"font-weight: 400;\"\u003e\u003cb\u003eMax Service Ceiling Above Sea Level\u003c\/b\u003e\u003c\/li\u003e\n\u003cli style=\"font-weight: 400;\"\u003e\u003cspan style=\"font-weight: 400;\"\u003e5000 m\u003c\/span\u003e\u003c\/li\u003e\n\u003c\/ul\u003e\n\u003cul\u003e\n\u003cli style=\"font-weight: 400;\"\u003e\u003cb\u003eMax Flight Time (without wind)\u003c\/b\u003e\u003c\/li\u003e\n\u003cli style=\"font-weight: 400;\"\u003e\u003cspan style=\"font-weight: 400;\"\u003e34 minutes\u003c\/span\u003e\u003c\/li\u003e\n\u003c\/ul\u003e\n\u003cul\u003e\n\u003cli style=\"font-weight: 400;\"\u003e\u003cb\u003eMax Hover Time (without wind)\u003c\/b\u003e\u003c\/li\u003e\n\u003cli style=\"font-weight: 400;\"\u003e\u003cspan style=\"font-weight: 400;\"\u003e33 minutes\u003c\/span\u003e\u003c\/li\u003e\n\u003c\/ul\u003e\n\u003cul\u003e\n\u003cli style=\"font-weight: 400;\"\u003e\u003cb\u003eMax Flight Distance\u003c\/b\u003e\u003c\/li\u003e\n\u003cli style=\"font-weight: 400;\"\u003e\u003cspan style=\"font-weight: 400;\"\u003e18.5 km\u003c\/span\u003e\u003c\/li\u003e\n\u003cli\u003e\u003cb\u003eMax Descent Speed\u003c\/b\u003e\u003c\/li\u003e\n\u003cli\u003e\n\u003cspan\u003e3 m\/s (S Mode)\u003c\/span\u003e\u003cspan\u003e\u003cbr\u003e\u003c\/span\u003e\u003cspan\u003e3 m\/s (N Mode)\u003c\/span\u003e\u003cspan\u003e\u003cbr\u003e\u003c\/span\u003e\u003cspan\u003e5 m\/s (S Mode and N Mode during a sharp descent)\u003c\/span\u003e\u003cspan\u003e\u003cbr\u003e\u003c\/span\u003e\u003cspan\u003e3 m\/s (all modes at elevations over 4500 m)\u003c\/span\u003e\n\u003c\/li\u003e\n\u003c\/ul\u003e\n\u003cul\u003e\n\u003cli style=\"font-weight: 400;\"\u003e\u003cb\u003eMax Horizontal Flight Speed\u003c\/b\u003e\u003c\/li\u003e\n\u003cli style=\"font-weight: 400;\"\u003e\n\u003cspan style=\"font-weight: 400;\"\u003e19 m\/s (S Mode)\u003c\/span\u003e\u003cspan style=\"font-weight: 400;\"\u003e\u003cbr\u003e\u003c\/span\u003e\u003cspan style=\"font-weight: 400;\"\u003e12 m\/s (N Mode)\u003c\/span\u003e\u003cspan style=\"font-weight: 400;\"\u003e\u003cbr\u003e\u003c\/span\u003e\u003cspan style=\"font-weight: 400;\"\u003e5 m\/s (T Mode)\u003c\/span\u003e\n\u003c\/li\u003e\n\u003cli\u003e\u003cb\u003eHovering Accuracy Range\u003c\/b\u003e\u003c\/li\u003e\n\u003cli\u003e\n\u003cspan\u003eVertical:\u003c\/span\u003e\u003cspan\u003e\u003cbr\u003e\u003c\/span\u003e\u003cspan\u003e±0.1 m (with vision positioning)\u003c\/span\u003e\u003cspan\u003e\u003cbr\u003e\u003c\/span\u003e\u003cspan\u003e±0.5 m (with GPS positioning)\u003c\/span\u003e\u003cspan\u003e\u003cbr\u003e\u003c\/span\u003e\u003cspan\u003e\u003cbr\u003e\u003c\/span\u003e\u003cspan\u003eHorizontal:\u003c\/span\u003e\u003cspan\u003e\u003cbr\u003e\u003c\/span\u003e\u003cspan\u003e±0.1 m (with vision positioning)\u003c\/span\u003e\u003cspan\u003e\u003cbr\u003e\u003c\/span\u003e\u003cspan\u003e±1.5 m (with GPS positioning)\u003c\/span\u003e\n\u003c\/li\u003e\n\u003c\/ul\u003e\n\u003cul\u003e\n\u003cli style=\"font-weight: 400;\"\u003e\u003cb\u003eMax Wind Resistance\u003c\/b\u003e\u003c\/li\u003e\n\u003cli style=\"font-weight: 400;\"\u003e\u003cspan style=\"font-weight: 400;\"\u003e8.5-10.5 m\/s (Level 5)\u003c\/span\u003e\u003c\/li\u003e\n\u003c\/ul\u003e\n\u003cul\u003e\n\u003cli style=\"font-weight: 400;\"\u003e\u003cb\u003eMax Tilt Angle\u003c\/b\u003e\u003c\/li\u003e\n\u003cli style=\"font-weight: 400;\"\u003e\n\u003cspan style=\"font-weight: 400;\"\u003e35° (S Mode)\u003c\/span\u003e\u003cspan style=\"font-weight: 400;\"\u003e\u003cbr\u003e\u003c\/span\u003e\u003cspan style=\"font-weight: 400;\"\u003e20° (N Mode)\u003c\/span\u003e\u003cspan style=\"font-weight: 400;\"\u003e\u003cbr\u003e\u003c\/span\u003e\u003cspan style=\"font-weight: 400;\"\u003e35° (N Mode under strong wind)\u003c\/span\u003e\n\u003c\/li\u003e\n\u003c\/ul\u003e\n\u003cul\u003e\n\u003cli style=\"font-weight: 400;\"\u003e\u003cb\u003eOperating Frequency\u003c\/b\u003e\u003c\/li\u003e\n\u003cli style=\"font-weight: 400;\"\u003e\n\u003cspan style=\"font-weight: 400;\"\u003e2.400-2.4835 GHz\u003c\/span\u003e\u003cspan style=\"font-weight: 400;\"\u003e\u003cbr\u003e\u003c\/span\u003e\u003cspan style=\"font-weight: 400;\"\u003e5.725-5.850 GHz\u003c\/span\u003e\n\u003c\/li\u003e\n\u003c\/ul\u003e\n\u003cul data-mce-fragment=\"1\"\u003e\n\u003cli data-mce-fragment=\"1\"\u003e\u003cb data-mce-fragment=\"1\"\u003eMax Angular Velocity\u003c\/b\u003e\u003c\/li\u003e\n\u003cli data-mce-fragment=\"1\"\u003e\n\u003cspan data-mce-fragment=\"1\"\u003e250°\/s (S Mode)\u003c\/span\u003e\u003cspan data-mce-fragment=\"1\"\u003e\u003cbr data-mce-fragment=\"1\"\u003e\u003c\/span\u003e\u003cspan data-mce-fragment=\"1\"\u003e250°\/s (N Mode)\u003c\/span\u003e\n\u003c\/li\u003e\n\u003c\/ul\u003e\n\u003cul data-mce-fragment=\"1\"\u003e\n\u003cli data-mce-fragment=\"1\"\u003e\u003cb data-mce-fragment=\"1\"\u003eOperating Temperature Range\u003c\/b\u003e\u003c\/li\u003e\n\u003cli data-mce-fragment=\"1\"\u003e\u003cspan data-mce-fragment=\"1\"\u003e-10° to 40°C (14° to 104°F)\u003c\/span\u003e\u003c\/li\u003e\n\u003c\/ul\u003e\n\u003cul\u003e\u003c\/ul\u003e\n\u003cul\u003e\n\u003cli style=\"font-weight: 400;\"\u003e\u003cb\u003ePropellers\u003c\/b\u003e\u003c\/li\u003e\n\u003cli style=\"font-weight: 400;\"\u003e\u003cspan style=\"font-weight: 400;\"\u003eQuick release, low noise, folding\u003c\/span\u003e\u003c\/li\u003e\n\u003c\/ul\u003e\n\u003cul\u003e\n\u003cli style=\"font-weight: 400;\"\u003e\u003cb\u003eSatellite Systems\u003c\/b\u003e\u003c\/li\u003e\n\u003cli style=\"font-weight: 400;\"\u003e\u003cspan style=\"font-weight: 400;\"\u003eGPS+GLONASS\u003c\/span\u003e\u003c\/li\u003e\n\u003c\/ul\u003e\n\u003cul\u003e\n\u003cli style=\"font-weight: 400;\"\u003e\u003cb\u003eCompass\u003c\/b\u003e\u003c\/li\u003e\n\u003cli style=\"font-weight: 400;\"\u003e\u003cspan style=\"font-weight: 400;\"\u003eSingle Compass\u003c\/span\u003e\u003c\/li\u003e\n\u003c\/ul\u003e\n\u003cul\u003e\n\u003cli style=\"font-weight: 400;\"\u003e\u003cb\u003eIMU\u003c\/b\u003e\u003c\/li\u003e\n\u003cli style=\"font-weight: 400;\"\u003e\u003cspan style=\"font-weight: 400;\"\u003eSingle IMU\u003c\/span\u003e\u003c\/li\u003e\n\u003c\/ul\u003e\n\u003cul\u003e\n\u003cli style=\"font-weight: 400;\"\u003e\u003cb\u003eInternal Storage\u003c\/b\u003e\u003c\/li\u003e\n\u003cli style=\"font-weight: 400;\"\u003e\u003cspan style=\"font-weight: 400;\"\u003e8 GB\u003c\/span\u003e\u003c\/li\u003e\n\u003c\/ul\u003e\n\u003c\/div\u003e\n\u003cdiv style=\"text-align: left;\"\u003e\u003cb\u003eBattery\u003c\/b\u003e\u003c\/div\u003e\n\u003cdiv style=\"text-align: left;\"\u003e\n\u003cul\u003e\n\u003cli style=\"font-weight: 400;\"\u003e\u003cb\u003eCapacity\u003c\/b\u003e\u003c\/li\u003e\n\u003cli style=\"font-weight: 400;\"\u003e\u003cspan style=\"font-weight: 400;\"\u003e3500 mAh\u003c\/span\u003e\u003c\/li\u003e\n\u003c\/ul\u003e\n\u003cul\u003e\n\u003cli style=\"font-weight: 400;\"\u003e\u003cb\u003eVoltage\u003c\/b\u003e\u003c\/li\u003e\n\u003cli style=\"font-weight: 400;\"\u003e\u003cspan style=\"font-weight: 400;\"\u003e11.55 V\u003c\/span\u003e\u003c\/li\u003e\n\u003c\/ul\u003e\n\u003cul\u003e\n\u003cli style=\"font-weight: 400;\"\u003e\u003cb\u003eCharging Voltage Limit\u003c\/b\u003e\u003c\/li\u003e\n\u003cli style=\"font-weight: 400;\"\u003e\u003cspan style=\"font-weight: 400;\"\u003e13.2 V\u003c\/span\u003e\u003c\/li\u003e\n\u003c\/ul\u003e\n\u003cul\u003e\u003c\/ul\u003e\n\u003cul\u003e\n\u003cli style=\"font-weight: 400;\"\u003e\u003cb\u003eWeight\u003c\/b\u003e\u003c\/li\u003e\n\u003cli style=\"font-weight: 400;\"\u003e\u003cspan style=\"font-weight: 400;\"\u003e198 g\u003c\/span\u003e\u003c\/li\u003e\n\u003c\/ul\u003e\n\u003cul\u003e\n\u003cli style=\"font-weight: 400;\"\u003e\u003cb\u003eCharging Temperature\u003c\/b\u003e\u003c\/li\u003e\n\u003cli style=\"font-weight: 400;\"\u003e\u003cspan style=\"font-weight: 400;\"\u003e5° to 40°C (41° to 104°F)\u003c\/span\u003e\u003c\/li\u003e\n\u003c\/ul\u003e\n\u003cul data-mce-fragment=\"1\"\u003e\n\u003cli data-mce-fragment=\"1\"\u003e\u003cb data-mce-fragment=\"1\"\u003eBattery Type\u003c\/b\u003e\u003c\/li\u003e\n\u003cli data-mce-fragment=\"1\"\u003e\u003cspan data-mce-fragment=\"1\"\u003eLiPo 3S\u003c\/span\u003e\u003c\/li\u003e\n\u003c\/ul\u003e\n\u003cul data-mce-fragment=\"1\"\u003e\n\u003cli data-mce-fragment=\"1\"\u003e\u003cb data-mce-fragment=\"1\"\u003eEnergy\u003c\/b\u003e\u003c\/li\u003e\n\u003cli data-mce-fragment=\"1\"\u003e\u003cspan data-mce-fragment=\"1\"\u003e40.42 Wh\u003c\/span\u003e\u003c\/li\u003e\n\u003c\/ul\u003e\n\u003cul\u003e\u003c\/ul\u003e\n\u003cul\u003e\n\u003cli style=\"font-weight: 400;\"\u003e\u003cb\u003eMax Charging Power\u003c\/b\u003e\u003c\/li\u003e\n\u003cli style=\"font-weight: 400;\"\u003e\u003cspan style=\"font-weight: 400;\"\u003e38 W\u003c\/span\u003e\u003c\/li\u003e\n\u003c\/ul\u003e\n\u003c\/div\u003e\n\u003cdiv style=\"text-align: left;\"\u003e\u003cb\u003eCamera\u003c\/b\u003e\u003c\/div\u003e\n\u003cdiv\u003e\n\u003cul style=\"text-align: left;\"\u003e\n\u003cli style=\"font-weight: 400;\"\u003e\u003cb\u003eSensor\u003c\/b\u003e\u003c\/li\u003e\n\u003cli style=\"font-weight: 400;\"\u003e\n\u003cspan style=\"font-weight: 400;\"\u003e1\/2\" CMOS\u003c\/span\u003e\u003cspan style=\"font-weight: 400;\"\u003e\u003cbr\u003e\u003c\/span\u003e\u003cspan style=\"font-weight: 400;\"\u003eEffective Pixels: 12 MP and 48 MP\u003c\/span\u003e\n\u003c\/li\u003e\n\u003cli\u003e\u003cb\u003eISO\u003c\/b\u003e\u003c\/li\u003e\n\u003cli\u003e\n\u003cspan\u003eVideo:\u003c\/span\u003e\u003cspan\u003e\u003cbr\u003e\u003c\/span\u003e\u003cspan\u003e100-6400\u003c\/span\u003e\u003cspan\u003e\u003cbr\u003e\u003c\/span\u003e\u003cspan\u003e\u003cbr\u003e\u003c\/span\u003e\u003cspan\u003ePhoto (12 MP):\u003c\/span\u003e\u003cspan\u003e\u003cbr\u003e\u003c\/span\u003e\u003cspan\u003e100-3200 (Auto)\u003c\/span\u003e\u003cspan\u003e\u003cbr\u003e\u003c\/span\u003e\u003cspan\u003e100-6400 (Manual)\u003c\/span\u003e\u003cspan\u003e\u003cbr\u003e\u003c\/span\u003e\u003cspan\u003ePhoto (48 MP):\u003c\/span\u003e\u003cspan\u003e\u003cbr\u003e\u003c\/span\u003e\u003cspan\u003e100-1600 (Auto)\u003c\/span\u003e\u003cspan\u003e\u003cbr\u003e\u003c\/span\u003e\u003cspan\u003e100-3200 (Manual)\u003c\/span\u003e\n\u003c\/li\u003e\n\u003c\/ul\u003e\n\u003cul style=\"text-align: left;\"\u003e\n\u003cli style=\"font-weight: 400;\"\u003e\u003cb\u003eLens\u003c\/b\u003e\u003c\/li\u003e\n\u003cli style=\"font-weight: 400;\"\u003e\n\u003cspan style=\"font-weight: 400;\"\u003eFOV: 84°\u003c\/span\u003e\u003cspan style=\"font-weight: 400;\"\u003e\u003cbr\u003e\u003c\/span\u003e\u003cspan style=\"font-weight: 400;\"\u003eEquivalent Focal Length: 24 mm\u003c\/span\u003e\u003cspan style=\"font-weight: 400;\"\u003e\u003cbr\u003e\u003c\/span\u003e\u003cspan style=\"font-weight: 400;\"\u003eAperture: f\/2.8\u003c\/span\u003e\u003cspan style=\"font-weight: 400;\"\u003e\u003cbr\u003e\u003c\/span\u003e\u003cspan style=\"font-weight: 400;\"\u003eFocus Range: 1 m to ∞\u003c\/span\u003e\n\u003c\/li\u003e\n\u003c\/ul\u003e\n\u003cul data-mce-fragment=\"1\"\u003e\n\u003cli data-mce-fragment=\"1\"\u003e\u003cb data-mce-fragment=\"1\"\u003eVideo Formats\u003c\/b\u003e\u003c\/li\u003e\n\u003cli data-mce-fragment=\"1\"\u003e\u003cspan data-mce-fragment=\"1\"\u003eMP4\/MOV (H.264\/MPEG-4 AVC, H.265\/HEVC)\u003c\/span\u003e\u003c\/li\u003e\n\u003c\/ul\u003e\n\u003cul data-mce-fragment=\"1\"\u003e\n\u003cli data-mce-fragment=\"1\"\u003e\u003cb data-mce-fragment=\"1\"\u003eMax Bitrate\u003c\/b\u003e\u003c\/li\u003e\n\u003cli data-mce-fragment=\"1\"\u003e\u003cspan data-mce-fragment=\"1\"\u003e120 Mbps\u003c\/span\u003e\u003c\/li\u003e\n\u003c\/ul\u003e\n\u003cul style=\"text-align: left;\"\u003e\u003c\/ul\u003e\n\u003cul style=\"text-align: left;\"\u003e\n\u003cli style=\"font-weight: 400;\"\u003e\u003cb\u003eMax Photo Resolution\u003c\/b\u003e\u003c\/li\u003e\n\u003cli style=\"font-weight: 400;\"\u003e\u003cspan style=\"font-weight: 400;\"\u003e48 MP 8000×6000 pixel\u003c\/span\u003e\u003c\/li\u003e\n\u003c\/ul\u003e\n\u003cul style=\"text-align: left;\"\u003e\n\u003cli style=\"font-weight: 400;\"\u003e\u003cb\u003ePhoto Formats\u003c\/b\u003e\u003c\/li\u003e\n\u003cli style=\"font-weight: 400;\"\u003e\u003cspan style=\"font-weight: 400;\"\u003eJPEG\/DNG (RAW)\u003c\/span\u003e\u003c\/li\u003e\n\u003cli\u003e\u003cb\u003ePhoto Modes\u003c\/b\u003e\u003c\/li\u003e\n\u003cli\u003e\n\u003cspan\u003eSingle: 12 MP and 48 MP\u003c\/span\u003e\u003cspan\u003e\u003cbr\u003e\u003c\/span\u003e\u003cspan\u003eBurst: 12 MP, 3\/5\/7 frames\u003c\/span\u003e\u003cspan\u003e\u003cbr\u003e\u003c\/span\u003e\u003cspan\u003eAutomatic Exposure Bracketing (AEB): 12MP, 3\/5 Frames at 0.7EV Bias\u003c\/span\u003e\u003cspan\u003e\u003cbr\u003e\u003c\/span\u003e\u003cspan\u003eTimed: 12 MP 2\/3\/5\/7\/10\/15\/20\/30\/60 seconds\u003c\/span\u003e\u003cspan\u003e\u003cbr\u003e\u003c\/span\u003e\u003cspan\u003eSmartPhoto: Scene Recognition, HyperLight, and HDR\u003c\/span\u003e\u003cspan\u003e\u003cbr\u003e\u003c\/span\u003e\u003cspan\u003eHDR Panorama:\u003c\/span\u003e\u003cspan\u003e\u003cbr\u003e\u003c\/span\u003e\u003cspan\u003eVertical (3×1): 3328×8000 pixels (Width×Height)\u003c\/span\u003e\u003cspan\u003e\u003cbr\u003e\u003c\/span\u003e\u003cspan\u003eWide-angle (3×3): 8000×6144 pixels (Width×Height)\u003c\/span\u003e\u003cspan\u003e\u003cbr\u003e\u003c\/span\u003e\u003cspan\u003e180° Panorama (3×7): 8192×3500 pixels (Width×Height)\u003c\/span\u003e\u003cspan\u003e\u003cbr\u003e\u003c\/span\u003e\u003cspan\u003eSphere (3×8+1): 8192×4096 pixels (Width×Height)\u003c\/span\u003e\n\u003c\/li\u003e\n\u003c\/ul\u003e\n\u003cul style=\"text-align: left;\"\u003e\n\u003cli style=\"font-weight: 400;\"\u003e\u003cb\u003eVideo Resolution and Frame Rates\u003c\/b\u003e\u003c\/li\u003e\n\u003cli style=\"font-weight: 400;\"\u003e\n\u003cspan style=\"font-weight: 400;\"\u003e4K Ultra HD: 3840×2160 24\/25\/30\/48\/50\/60 fps\u003c\/span\u003e\u003cspan style=\"font-weight: 400;\"\u003e\u003cbr\u003e\u003c\/span\u003e\u003cspan style=\"font-weight: 400;\"\u003e2.7K: 2688×1512 24\/25\/30\/48\/50\/60 fps\u003c\/span\u003e\u003cspan style=\"font-weight: 400;\"\u003e\u003cbr\u003e\u003c\/span\u003e\u003cspan style=\"font-weight: 400;\"\u003eFHD: 1920×1080 24\/25\/30\/48\/50\/60\/120\/240 fps\u003c\/span\u003e\u003cspan style=\"font-weight: 400;\"\u003e\u003cbr\u003e\u003c\/span\u003e\u003cspan style=\"font-weight: 400;\"\u003e4K Ultra HD HDR: 3840×2160 24\/25\/30 fps\u003c\/span\u003e\u003cspan style=\"font-weight: 400;\"\u003e\u003cbr\u003e\u003c\/span\u003e\u003cspan style=\"font-weight: 400;\"\u003e2.7K HDR: 2688×1512 24\/25\/30 fps\u003c\/span\u003e\u003cspan style=\"font-weight: 400;\"\u003e\u003cbr\u003e\u003c\/span\u003e\u003cspan style=\"font-weight: 400;\"\u003eFHD HDR: 1920×1080 24\/25\/30 fps\u003c\/span\u003e\n\u003c\/li\u003e\n\u003c\/ul\u003e\n\u003cul style=\"text-align: left;\"\u003e\n\u003cli style=\"font-weight: 400;\"\u003e\u003cb\u003eColor Profiles\u003c\/b\u003e\u003c\/li\u003e\n\u003cli style=\"font-weight: 400;\"\u003e\u003cspan style=\"font-weight: 400;\"\u003eD-Cinelike, Normal\u003c\/span\u003e\u003c\/li\u003e\n\u003c\/ul\u003e\n\u003cul style=\"text-align: left;\"\u003e\n\u003cli style=\"font-weight: 400;\"\u003e\u003cb\u003eSupported SD Cards\u003c\/b\u003e\u003c\/li\u003e\n\u003cli style=\"font-weight: 400;\"\u003e\u003cspan style=\"font-weight: 400;\"\u003eSupports a microSD with capacity of up to 256 GB\u003c\/span\u003e\u003c\/li\u003e\n\u003c\/ul\u003e\n\u003cul style=\"text-align: left;\"\u003e\n\u003cli style=\"font-weight: 400;\"\u003e\u003cb\u003eSupported File Systems\u003c\/b\u003e\u003c\/li\u003e\n\u003cli style=\"font-weight: 400;\"\u003e\u003cspan style=\"font-weight: 400;\"\u003eFAT32 and exFAT\u003c\/span\u003e\u003c\/li\u003e\n\u003c\/ul\u003e\n\u003cul style=\"text-align: center;\"\u003e\n\u003cli style=\"font-weight: 400; text-align: left;\"\u003e\u003cb\u003eZoom\u003c\/b\u003e\u003c\/li\u003e\n\u003cli style=\"font-weight: 400; text-align: left;\"\u003e\u003cspan style=\"font-weight: 400;\"\u003eAvailable\u003c\/span\u003e\u003c\/li\u003e\n\u003c\/ul\u003e\n\u003c\/div\u003e\n\u003c\/div\u003e","published_at":"2022-10-20T06:18:16-04:00","created_at":"2021-07-23T04:25:10-04:00","vendor":"DJI","type":"Drone","tags":["best drone","DJI Drones","DJI Mavic Air 2","DJI Mavic Air 2 Fly More Combo","drone","drone camera","drone dji","drone with camera","FocusTrack","HDR","mini drone","無人機","無人機套裝","航拍機","遙控航拍機","飛行無人機","高清航拍機"],"price":108800,"price_min":108800,"price_max":108800,"available":false,"price_varies":false,"compare_at_price":null,"compare_at_price_min":0,"compare_at_price_max":0,"compare_at_price_varies":false,"variants":[{"id":39446096314443,"title":"Default Title","option1":"Default Title","option2":null,"option3":null,"sku":"DJI-Air2-COMBO","requires_shipping":true,"taxable":true,"featured_image":null,"available":false,"name":"DJI Mavic Air 2 Fly More Combo - Drone Quadcopter UAV with 4K Video|48MP Camera|34min Flight Time|8K Hyperlapse 1\/2\" CMOS Sensor|ActiveTrack 3.0|3-Axis Gimba|Ocusync 2.0","public_title":null,"options":["Default Title"],"price":108800,"weight":2000,"compare_at_price":null,"inventory_management":"shopify","barcode":"","requires_selling_plan":false,"selling_plan_allocations":[]}],"images":["\/\/www.stream-sourcing.com\/cdn\/shop\/products\/dji-mavic-air-2-fly-more-combo-drone-front.jpg?v=1627028713","\/\/www.stream-sourcing.com\/cdn\/shop\/products\/dji-mavic-air-2-fly-more-combo-drone-package.jpg?v=1627028713","\/\/www.stream-sourcing.com\/cdn\/shop\/products\/dji-mavic-air-2-fly-more-combo-drone-bottom.jpg?v=1627028713","\/\/www.stream-sourcing.com\/cdn\/shop\/products\/dji-mavic-air-2-fly-more-combo-drone-open-side.jpg?v=1627028713","\/\/www.stream-sourcing.com\/cdn\/shop\/products\/dji-mavic-air-2-fly-more-combo-drone-all-package.jpg?v=1627028713","\/\/www.stream-sourcing.com\/cdn\/shop\/products\/dji-mavic-air-2-fly-more-combo-drone-closed-side.jpg?v=1627028714","\/\/www.stream-sourcing.com\/cdn\/shop\/products\/dji-mavic-air-2-fly-more-combo-drone-control.jpg?v=1627028714","\/\/www.stream-sourcing.com\/cdn\/shop\/products\/dji-mavic-air-2-fly-more-combo-drone-front-top.jpg?v=1627028714","\/\/www.stream-sourcing.com\/cdn\/shop\/products\/dji-mavic-air-2-fly-more-combo-drone-named-side.jpg?v=1627028714","\/\/www.stream-sourcing.com\/cdn\/shop\/products\/dji-mavic-air-2-fly-more-combo-drone-top-view.jpg?v=1627028714","\/\/www.stream-sourcing.com\/cdn\/shop\/products\/dji-mavic-air-2-fly-more-combo-drone-with-mobile.jpg?v=1627028714","\/\/www.stream-sourcing.com\/cdn\/shop\/products\/dji-mavic-air-2-fly-more-combo-drone-with-mobile-hand.jpg?v=1627028715"],"featured_image":"\/\/www.stream-sourcing.com\/cdn\/shop\/products\/dji-mavic-air-2-fly-more-combo-drone-front.jpg?v=1627028713","options":["Title"],"media":[{"alt":"dji-mavic-air-2-fly-more-combo-drone-front","id":20538303774795,"position":1,"preview_image":{"aspect_ratio":1.762,"height":681,"width":1200,"src":"\/\/www.stream-sourcing.com\/cdn\/shop\/products\/dji-mavic-air-2-fly-more-combo-drone-front.jpg?v=1627028713"},"aspect_ratio":1.762,"height":681,"media_type":"image","src":"\/\/www.stream-sourcing.com\/cdn\/shop\/products\/dji-mavic-air-2-fly-more-combo-drone-front.jpg?v=1627028713","width":1200},{"alt":"dji-mavic-air-2-fly-more-combo-drone-package","id":20538303807563,"position":2,"preview_image":{"aspect_ratio":1.506,"height":797,"width":1200,"src":"\/\/www.stream-sourcing.com\/cdn\/shop\/products\/dji-mavic-air-2-fly-more-combo-drone-package.jpg?v=1627028713"},"aspect_ratio":1.506,"height":797,"media_type":"image","src":"\/\/www.stream-sourcing.com\/cdn\/shop\/products\/dji-mavic-air-2-fly-more-combo-drone-package.jpg?v=1627028713","width":1200},{"alt":"dji-mavic-air-2-fly-more-combo-drone-bottom","id":20538303840331,"position":3,"preview_image":{"aspect_ratio":1.644,"height":730,"width":1200,"src":"\/\/www.stream-sourcing.com\/cdn\/shop\/products\/dji-mavic-air-2-fly-more-combo-drone-bottom.jpg?v=1627028713"},"aspect_ratio":1.644,"height":730,"media_type":"image","src":"\/\/www.stream-sourcing.com\/cdn\/shop\/products\/dji-mavic-air-2-fly-more-combo-drone-bottom.jpg?v=1627028713","width":1200},{"alt":"dji-mavic-air-2-fly-more-combo-drone-open-side","id":20538303873099,"position":4,"preview_image":{"aspect_ratio":1.384,"height":867,"width":1200,"src":"\/\/www.stream-sourcing.com\/cdn\/shop\/products\/dji-mavic-air-2-fly-more-combo-drone-open-side.jpg?v=1627028713"},"aspect_ratio":1.384,"height":867,"media_type":"image","src":"\/\/www.stream-sourcing.com\/cdn\/shop\/products\/dji-mavic-air-2-fly-more-combo-drone-open-side.jpg?v=1627028713","width":1200},{"alt":"dji-mavic-air-2-fly-more-combo-drone-all-package","id":20538303905867,"position":5,"preview_image":{"aspect_ratio":1.453,"height":826,"width":1200,"src":"\/\/www.stream-sourcing.com\/cdn\/shop\/products\/dji-mavic-air-2-fly-more-combo-drone-all-package.jpg?v=1627028713"},"aspect_ratio":1.453,"height":826,"media_type":"image","src":"\/\/www.stream-sourcing.com\/cdn\/shop\/products\/dji-mavic-air-2-fly-more-combo-drone-all-package.jpg?v=1627028713","width":1200},{"alt":"dji mavic air 2 fly more combo drone closed side","id":20538303938635,"position":6,"preview_image":{"aspect_ratio":1.257,"height":955,"width":1200,"src":"\/\/www.stream-sourcing.com\/cdn\/shop\/products\/dji-mavic-air-2-fly-more-combo-drone-closed-side.jpg?v=1627028714"},"aspect_ratio":1.257,"height":955,"media_type":"image","src":"\/\/www.stream-sourcing.com\/cdn\/shop\/products\/dji-mavic-air-2-fly-more-combo-drone-closed-side.jpg?v=1627028714","width":1200},{"alt":"dji-mavic-air-2-fly-more-combo-drone-control","id":20538303971403,"position":7,"preview_image":{"aspect_ratio":1.317,"height":911,"width":1200,"src":"\/\/www.stream-sourcing.com\/cdn\/shop\/products\/dji-mavic-air-2-fly-more-combo-drone-control.jpg?v=1627028714"},"aspect_ratio":1.317,"height":911,"media_type":"image","src":"\/\/www.stream-sourcing.com\/cdn\/shop\/products\/dji-mavic-air-2-fly-more-combo-drone-control.jpg?v=1627028714","width":1200},{"alt":"dji-mavic-air-2-fly-more-combo-drone-front-top","id":20538304004171,"position":8,"preview_image":{"aspect_ratio":1.463,"height":820,"width":1200,"src":"\/\/www.stream-sourcing.com\/cdn\/shop\/products\/dji-mavic-air-2-fly-more-combo-drone-front-top.jpg?v=1627028714"},"aspect_ratio":1.463,"height":820,"media_type":"image","src":"\/\/www.stream-sourcing.com\/cdn\/shop\/products\/dji-mavic-air-2-fly-more-combo-drone-front-top.jpg?v=1627028714","width":1200},{"alt":null,"id":20538304036939,"position":9,"preview_image":{"aspect_ratio":1.359,"height":883,"width":1200,"src":"\/\/www.stream-sourcing.com\/cdn\/shop\/products\/dji-mavic-air-2-fly-more-combo-drone-named-side.jpg?v=1627028714"},"aspect_ratio":1.359,"height":883,"media_type":"image","src":"\/\/www.stream-sourcing.com\/cdn\/shop\/products\/dji-mavic-air-2-fly-more-combo-drone-named-side.jpg?v=1627028714","width":1200},{"alt":null,"id":20538304069707,"position":10,"preview_image":{"aspect_ratio":1.257,"height":955,"width":1200,"src":"\/\/www.stream-sourcing.com\/cdn\/shop\/products\/dji-mavic-air-2-fly-more-combo-drone-top-view.jpg?v=1627028714"},"aspect_ratio":1.257,"height":955,"media_type":"image","src":"\/\/www.stream-sourcing.com\/cdn\/shop\/products\/dji-mavic-air-2-fly-more-combo-drone-top-view.jpg?v=1627028714","width":1200},{"alt":null,"id":20538304102475,"position":11,"preview_image":{"aspect_ratio":1.2,"height":1000,"width":1200,"src":"\/\/www.stream-sourcing.com\/cdn\/shop\/products\/dji-mavic-air-2-fly-more-combo-drone-with-mobile.jpg?v=1627028714"},"aspect_ratio":1.2,"height":1000,"media_type":"image","src":"\/\/www.stream-sourcing.com\/cdn\/shop\/products\/dji-mavic-air-2-fly-more-combo-drone-with-mobile.jpg?v=1627028714","width":1200},{"alt":null,"id":20538304135243,"position":12,"preview_image":{"aspect_ratio":1.292,"height":929,"width":1200,"src":"\/\/www.stream-sourcing.com\/cdn\/shop\/products\/dji-mavic-air-2-fly-more-combo-drone-with-mobile-hand.jpg?v=1627028715"},"aspect_ratio":1.292,"height":929,"media_type":"image","src":"\/\/www.stream-sourcing.com\/cdn\/shop\/products\/dji-mavic-air-2-fly-more-combo-drone-with-mobile-hand.jpg?v=1627028715","width":1200}],"requires_selling_plan":false,"selling_plan_groups":[],"content":"\u003ch1 style=\"text-align: center;\"\u003e\u003cstrong\u003eDJI Mavic Air 2 - giving you a new photos and video recording experience\u003c\/strong\u003e\u003c\/h1\u003e\u003cdiv class=\"desc\"\u003e\n\u003ch2 style=\"text-align: center;\"\u003eThe DJI Mavic Air 2 pushes power and portability to new heights, with advanced capabilities packed into a small package. \u003c\/h2\u003e\n\u003cstyle\u003e\u003c!--\n.embed-container { position: relative; padding-bottom: 56.25%; height: 0; overflow: hidden; max-width: 100%; } .embed-container iframe, .embed-container object, .embed-container embed { position: absolute; top: 0; left: 0; width: 100%; height: 100%; }\n--\u003e\u003c\/style\u003e\n\u003cdiv style=\"text-align: center;\" class=\"embed-container\"\u003e\u003ciframe src=\"https:\/\/www.youtube.com\/embed\/StDjsvNFru0\" allowfullscreen=\"\" frameborder=\"0\"\u003e\u003c\/iframe\u003e\u003c\/div\u003e\n\u003cdiv style=\"text-align: center;\"\u003e \u003c\/div\u003e\n\u003ch3 style=\"text-align: center;\"\u003e\u003cspan style=\"font-weight: 400;\"\u003eAerial masterpieces are within reach thanks to intelligent shooting functions and superb image quality. You can raise your game while fully enjoying the creative process with safer, smarter flight.\u003c\/span\u003e\u003c\/h3\u003e\n\u003ch2 style=\"text-align: center;\"\u003e\u003cstrong\u003eFeature\u003c\/strong\u003e\u003c\/h2\u003e\n\u003cdiv style=\"text-align: center;\"\u003e\u003c\/div\u003e\n\u003cdiv style=\"text-align: center;\"\u003e\n\u003ctable\u003e\n\u003ctbody\u003e\n\u003ctr\u003e\n\u003ctd style=\"text-align: center;\"\u003e\n\u003cp\u003e\u003cstrong\u003eUltra-Clear Details \u003c\/strong\u003e\u003c\/p\u003e\n\u003cp\u003e\u003cspan style=\"font-weight: 400;\"\u003e1\/2-Inch Image Sensor \u003c\/span\u003e\u003c\/p\u003e\n\u003cp\u003e\u003cspan style=\"font-weight: 400;\"\u003e4K\/60fps Video \u003c\/span\u003e\u003c\/p\u003e\n\u003cp\u003e\u003cspan style=\"font-weight: 400;\"\u003e48MP Photo\u003c\/span\u003e\u003c\/p\u003e\n\u003c\/td\u003e\n\u003ctd style=\"text-align: center;\"\u003e\n\u003cp\u003e\u003cstrong\u003eEnhanced HDR \u003c\/strong\u003e\u003c\/p\u003e\n\u003cp\u003e\u003cspan style=\"font-weight: 400;\"\u003ePhoto \u003c\/span\u003e\u003c\/p\u003e\n\u003cp\u003e\u003cspan style=\"font-weight: 400;\"\u003eVideo \u003c\/span\u003e\u003c\/p\u003e\n\u003cp\u003e\u003cspan style=\"font-weight: 400;\"\u003ePanorama\u003c\/span\u003e\u003c\/p\u003e\n\u003c\/td\u003e\n\u003c\/tr\u003e\n\u003ctr\u003e\n\u003ctd style=\"text-align: center;\"\u003e\n\u003cp\u003e\u003cstrong\u003eFly Smarter and Safer \u003c\/strong\u003e\u003c\/p\u003e\n\u003cp\u003e\u003cspan style=\"font-weight: 400;\"\u003eAPAS 3.0 Obstacle Avoidance\u003c\/span\u003e\u003c\/p\u003e\n\u003c\/td\u003e\n\u003ctd style=\"text-align: center;\"\u003e\n\u003cp\u003e\u003cstrong\u003eFly Farther, See Clearer \u003c\/strong\u003e\u003c\/p\u003e\n\u003cp\u003e\u003cspan style=\"font-weight: 400;\"\u003eOcuSync 2.0 10km 1080p\/30fps Video Transmission\u003c\/span\u003e\u003c\/p\u003e\n\u003c\/td\u003e\n\u003c\/tr\u003e\n\u003ctr\u003e\n\u003ctd style=\"text-align: center;\"\u003e\n\u003cp\u003e\u003cstrong\u003eFly Longer \u003c\/strong\u003e\u003c\/p\u003e\n\u003cp\u003e\u003cspan\u003e34-Min Max Flight Time \u003c\/span\u003e\u003c\/p\u003e\n\u003cp\u003e\u003cspan\u003e240-Min Max RC Battery Life\u003c\/span\u003e\u003c\/p\u003e\n\u003c\/td\u003e\n\u003ctd style=\"text-align: center;\"\u003e\n\u003cp\u003e\u003cstrong\u003eCinematic Content \u003c\/strong\u003e\u003c\/p\u003e\n\u003cp\u003e\u003cspan\u003e8K Hyperlapse \u003c\/span\u003e\u003c\/p\u003e\n\u003cp\u003e\u003cspan\u003eQuickShots\u003c\/span\u003e\u003c\/p\u003e\n\u003c\/td\u003e\n\u003c\/tr\u003e\n\u003c\/tbody\u003e\n\u003c\/table\u003e\n\u003c\/div\u003e\n\u003cdiv style=\"text-align: center;\"\u003e\u003cb\u003e\u003cimg alt=\"dji-mavic-air-2-fly-more-combo-drone-content-feature-all\" src=\"https:\/\/cdn.shopify.com\/s\/files\/1\/2532\/7020\/files\/dji-mavic-air-2-fly-more-combo-drone-content-feature-all.jpg?v=1626148044\"\u003e\u003c\/b\u003e\u003c\/div\u003e\n\u003ch3 style=\"text-align: center;\"\u003e\u003cspan style=\"color: #ff8000;\"\u003e\u003cb\u003e\u003c\/b\u003e\u003c\/span\u003e\u003c\/h3\u003e\n\u003ch3 style=\"text-align: center;\"\u003e\u003cspan style=\"color: #ff8000;\"\u003e\u003cb\u003eHigh Image Quality\u003c\/b\u003e\u003c\/span\u003e\u003c\/h3\u003e\n\u003cdiv style=\"text-align: center;\"\u003e\u003cb\u003eEpic is Simple, with 4K\/60fps Video \u003c\/b\u003e\u003c\/div\u003e\n\u003cdiv style=\"text-align: center;\"\u003e\u003cspan style=\"font-weight: 400;\"\u003eFootage Master creative aerial views with 4K\/60fps video that is effortlessly fluid. For post-processing, the D-Cinelike flat color profile maintains more information. The HEVC (H.265) video codec records more visual information, uses less storage, and keeps your footage's dynamic range and quality, delivering next-level content.\u003cbr data-mce-fragment=\"1\"\u003e\u003c\/span\u003e\u003c\/div\u003e\n\u003cdiv style=\"text-align: center;\"\u003e\u003cspan style=\"font-weight: 400;\"\u003e\u003cimg alt=\"dji-mavic-air-2-fly-more-combo-drone-content-feature-1-image-quality\" src=\"https:\/\/cdn.shopify.com\/s\/files\/1\/2532\/7020\/files\/dji-mavic-air-2-fly-more-combo-drone-content-feature-1-image-quality.jpg?v=1626148092\"\u003e\u003c\/span\u003e\u003c\/div\u003e\n\u003ch3 style=\"text-align: center;\"\u003e\u003cspan style=\"color: #ff8000;\"\u003e\u003cb\u003e\u003c\/b\u003e\u003c\/span\u003e\u003c\/h3\u003e\n\u003ch3 style=\"text-align: center;\"\u003e\u003cspan style=\"color: #ff8000;\"\u003e\u003cb\u003eHDR Video\u003c\/b\u003e\u003c\/span\u003e\u003c\/h3\u003e\n\u003cdiv style=\"text-align: center;\"\u003e\u003cb\u003eBy default, everything is dynamic.\u003cbr data-mce-fragment=\"1\"\u003e\u003c\/b\u003e\u003c\/div\u003e\n\u003cdiv style=\"text-align: center;\"\u003e\u003cspan style=\"font-weight: 400;\"\u003eA high-performance Quad Bayer image sensor is the key to outstanding HDR video. A single frame captures light and dark details by separating exposure levels in different places. The photos are stacked to create a picture with a higher dynamic range that is vibrant, balanced, and appealing.\u003c\/span\u003e\u003c\/div\u003e\n\u003cdiv style=\"text-align: center;\"\u003e\u003cspan style=\"font-weight: 400;\"\u003e\u003cimg alt=\"dji-mavic-air-2-fly-more-combo-drone-content-feature-2-hdr-video\" src=\"https:\/\/cdn.shopify.com\/s\/files\/1\/2532\/7020\/files\/dji-mavic-air-2-fly-more-combo-drone-content-feature-2-hdr-video.jpg?v=1626148113\"\u003e\u003c\/span\u003e\u003c\/div\u003e\n\u003ch3 style=\"text-align: center;\"\u003e\u003cspan style=\"color: #ff8000;\"\u003e\u003cb\u003e\u003c\/b\u003e\u003c\/span\u003e\u003c\/h3\u003e\n\u003ch3 style=\"text-align: center;\"\u003e\u003cspan style=\"color: #ff8000;\"\u003e\u003cb\u003eAll in the Details\u003c\/b\u003e\u003c\/span\u003e\u003c\/h3\u003e\n\u003cdiv style=\"text-align: center;\"\u003e\u003cb\u003e48MP Photos\u003c\/b\u003e\u003c\/div\u003e\n\u003cdiv style=\"text-align: center;\"\u003e\u003cspan style=\"font-weight: 400;\"\u003eMavic Air 2 has a 1\/2-inch CMOS sensor that captures 48MP photographs. Prepare to take your airborne content to new heights.\u003cbr data-mce-fragment=\"1\"\u003eThe 48MP camera has a high megapixel count, which means that even when zooming in on an image, you can see vivid details.\u003c\/span\u003e\u003c\/div\u003e\n\u003cdiv style=\"text-align: center;\"\u003e\u003cspan style=\"font-weight: 400;\"\u003e\u003cimg alt=\"dji-mavic-air-2-fly-more-combo-drone-content-feature-3-48mp\" src=\"https:\/\/cdn.shopify.com\/s\/files\/1\/2532\/7020\/files\/dji-mavic-air-2-fly-more-combo-drone-content-feature-3-48mp.jpg?v=1626148140\"\u003e\u003c\/span\u003e\u003c\/div\u003e\n\u003ch3 style=\"text-align: center;\"\u003e\u003cspan style=\"color: #ff8000;\"\u003e\u003cb\u003e\u003c\/b\u003e\u003c\/span\u003e\u003c\/h3\u003e\n\u003ch3 style=\"text-align: center;\"\u003e\u003cspan style=\"color: #ff8000;\"\u003e\u003cb\u003eOptimized Capture\u003c\/b\u003e\u003c\/span\u003e\u003c\/h3\u003e\n\u003cdiv style=\"text-align: center;\"\u003e\u003cb\u003eSmartPhoto\u003c\/b\u003e\u003c\/div\u003e\n\u003cdiv style=\"text-align: center;\"\u003e\u003cspan style=\"font-weight: 400;\"\u003eSmartPhoto on the Mavic Air 2 combines scene recognition, HyperLight, and HDR into a single setting for optimal results. Scene recognition optimizes camera parameters for different scenes and offers intelligent recognition of five different categories: sunsets, sky, grass, snow, and trees. The resolution of photos taken in SmartPhoto mode is 12 MP.\u003c\/span\u003e\u003c\/div\u003e\n\u003cdiv style=\"text-align: center;\"\u003e\n\u003ctable width=\"100%\"\u003e\n\u003ctbody\u003e\n\u003ctr\u003e\n\u003ctd\u003e\n\u003cp\u003e\u003cimg alt=\"dji-mavic-air-2-fly-more-combo-drone-content-feature-4-1-Strong-Lighting-Conditions\" src=\"https:\/\/cdn.shopify.com\/s\/files\/1\/2532\/7020\/files\/dji-mavic-air-2-fly-more-combo-drone-content-feature-4-1-Strong-Lighting-Conditions.jpg?v=1626148348\"\u003e\u003c\/p\u003e\n\u003c\/td\u003e\n\u003ctd\u003e\u003cimg alt=\"dji-mavic-air-2-fly-more-combo-drone-content-feature-4-2-Weak-Lighting-Conditions\" src=\"https:\/\/cdn.shopify.com\/s\/files\/1\/2532\/7020\/files\/dji-mavic-air-2-fly-more-combo-drone-content-feature-4-2-Weak-Lighting-Conditions.jpg?v=1626148384\"\u003e\u003c\/td\u003e\n\u003c\/tr\u003e\n\u003ctr\u003e\n\u003ctd\u003e\n\u003cp data-mce-fragment=\"1\"\u003e\u003cstrong\u003eStrong Lighting\u003c\/strong\u003e\u003c\/p\u003e\n\u003cp data-mce-fragment=\"1\"\u003eConditions HyperLight improves the sharpness of images taken in low-light circumstances by reducing noise.\u003c\/p\u003e\n\u003c\/td\u003e\n\u003ctd\u003e\n\u003cp\u003e\u003cstrong\u003eWeak Lighting Conditions\u003c\/strong\u003e\u003c\/p\u003e\n\u003cp data-mce-fragment=\"1\"\u003e\u003cspan data-mce-fragment=\"1\"\u003eHyperLight improves the sharpness of images taken in low-light circumstances by reducing noise.\u003c\/span\u003e\u003c\/p\u003e\n\u003c\/td\u003e\n\u003c\/tr\u003e\n\u003c\/tbody\u003e\n\u003c\/table\u003e\n\u003c\/div\u003e\n\u003cdiv style=\"text-align: center;\"\u003e \u003c\/div\u003e\n\u003cdiv style=\"text-align: center;\"\u003e \u003c\/div\u003e\n\u003ch3 style=\"text-align: center;\"\u003e\u003cspan style=\"color: #ff8000;\"\u003e\u003cb\u003eHDR Panorama\u003c\/b\u003e\u003c\/span\u003e\u003c\/h3\u003e\n\u003cdiv style=\"text-align: center;\"\u003e\u003cb\u003eLook at the Big Picture\u003c\/b\u003e\u003c\/div\u003e\n\u003cdiv style=\"text-align: center;\"\u003e\u003cspan style=\"font-weight: 400;\"\u003eThe Mavic Air 2 has DJI's most sophisticated panorama mode, with a larger dynamic range and vibrant, amazingly realistic colors.\u003c\/span\u003e\u003c\/div\u003e\n\u003cdiv style=\"text-align: center;\"\u003e\u003cspan style=\"font-weight: 400;\"\u003e\u003cimg alt=\"dji-mavic-air-2-fly-more-combo-drone-content-feature-5-HDR-Panorama\" src=\"https:\/\/cdn.shopify.com\/s\/files\/1\/2532\/7020\/files\/dji-mavic-air-2-fly-more-combo-drone-content-feature-5-HDR-Panorama.jpg?v=1626148445\"\u003e\u003c\/span\u003e\u003c\/div\u003e\n\u003ch3 style=\"text-align: center;\"\u003e\u003cspan style=\"color: #ff8000;\"\u003e\u003cb\u003e\u003c\/b\u003e\u003c\/span\u003e\u003c\/h3\u003e\n\u003ch3 style=\"text-align: center;\"\u003e\u003cspan style=\"color: #ff8000;\"\u003e\u003cb\u003eIntelligent Features\u003c\/b\u003e\u003c\/span\u003e\u003c\/h3\u003e\n\u003cdiv style=\"text-align: center;\"\u003e\u003cb\u003eObtaining Cinematic Shots\u003c\/b\u003e\u003c\/div\u003e\n\u003cdiv style=\"text-align: center;\"\u003e\u003cspan style=\"font-weight: 400;\"\u003eFor breathtaking results, the Mavic Air 2 combines a powerful camera with intelligent shooting modes. Aerial photography has never been easier to create.\u003c\/span\u003e\u003c\/div\u003e\n\u003cdiv style=\"text-align: center;\"\u003e\u003cspan style=\"font-weight: 400;\"\u003e\u003cimg alt=\"dji-mavic-air-2-fly-more-combo-drone-content-feature-6-Intelligent-Features\" src=\"https:\/\/cdn.shopify.com\/s\/files\/1\/2532\/7020\/files\/dji-mavic-air-2-fly-more-combo-drone-content-feature-6-Intelligent-Features.jpg?v=1626148481\"\u003e\u003c\/span\u003e\u003c\/div\u003e\n\u003ch3 style=\"text-align: center;\"\u003e\u003cspan style=\"color: #ff8000;\"\u003e\u003cb\u003e\u003c\/b\u003e\u003c\/span\u003e\u003c\/h3\u003e\n\u003ch3 style=\"text-align: center;\"\u003e\u003cspan style=\"color: #ff8000;\"\u003e\u003cb\u003eFocusTrack\u003c\/b\u003e\u003c\/span\u003e\u003c\/h3\u003e\n\u003cdiv style=\"text-align: center;\"\u003e\u003cb\u003eMaster the Skies\u003c\/b\u003e\u003c\/div\u003e\n\u003cdiv style=\"text-align: center;\"\u003e\u003cspan style=\"font-weight: 400;\"\u003eWith FocusTrack, capturing professional-quality footage is a breeze. Active Track 3.0, Spotlight 2.0, and Point of Interest 3.0 are among the easy-to-use intelligent tracking modes that let you express yourself.\u003c\/span\u003e\u003c\/div\u003e\n\u003cdiv style=\"text-align: center;\"\u003e \u003c\/div\u003e\n\u003cdiv style=\"text-align: center;\"\u003e\n\u003ctable width=\"100%\" data-mce-fragment=\"1\"\u003e\n\u003ctbody data-mce-fragment=\"1\"\u003e\n\u003ctr data-mce-fragment=\"1\"\u003e\n\u003ctd data-mce-fragment=\"1\"\u003e\n\u003cp\u003e \u003c\/p\u003e\n\u003cdiv style=\"text-align: left;\"\u003e\u003cimg style=\"float: none;\" alt=\"dji-mavic-air-2-fly-more-combo-drone-content-feature-7-1-Spotlight 2.0\" src=\"https:\/\/cdn.shopify.com\/s\/files\/1\/2532\/7020\/files\/dji-mavic-air-2-fly-more-combo-drone-content-feature-7-1-Spotlight_2.0.jpg?v=1626148537\"\u003e\u003c\/div\u003e\n\u003c\/td\u003e\n\u003ctd data-mce-fragment=\"1\"\u003e\n\u003cp\u003e\u003cimg src=\"https:\/\/cdn.shopify.com\/s\/files\/1\/2532\/7020\/files\/dji-mavic-air-2-fly-more-combo-drone-content-feature-7-2-ActiveTrack_3.0.jpg?v=1626148709\" alt=\"dji-mavic-air-2-fly-more-combo-drone-content-feature-7-2-ActiveTrack 3.0\" data-mce-fragment=\"1\" data-mce-src=\"https:\/\/cdn.shopify.com\/s\/files\/1\/2532\/7020\/files\/dji-mavic-air-2-fly-more-combo-drone-content-feature-7-2-ActiveTrack_3.0.jpg?v=1626148709\"\u003e\u003cbr\u003e\u003c\/p\u003e\n\u003c\/td\u003e\n\u003ctd data-mce-fragment=\"1\"\u003e\n\u003cp\u003e\u003cimg src=\"https:\/\/cdn.shopify.com\/s\/files\/1\/2532\/7020\/files\/dji-mavic-air-2-fly-more-combo-drone-content-feature-7-3-POI_3.0.jpg?v=1626148918\" alt=\"dji-mavic-air-2-fly-more-combo-drone-content-feature-7-3-POI 3.0\" data-mce-fragment=\"1\" data-mce-src=\"https:\/\/cdn.shopify.com\/s\/files\/1\/2532\/7020\/files\/dji-mavic-air-2-fly-more-combo-drone-content-feature-7-3-POI_3.0.jpg?v=1626148918\"\u003e\u003cbr\u003e\u003c\/p\u003e\n\u003c\/td\u003e\n\u003c\/tr\u003e\n\u003ctr data-mce-fragment=\"1\"\u003e\n\u003ctd data-mce-fragment=\"1\"\u003e\n\u003cp\u003e\u003cstrong\u003eSpotlight 2.0\u003c\/strong\u003e\u003c\/p\u003e\n\u003cp\u003eWith this handy mode, you may fly around freely while the camera remains fixed on the subject. Simply choose your target and take off.\u003c\/p\u003e\n\u003c\/td\u003e\n\u003ctd data-mce-fragment=\"1\"\u003e\n\u003cp\u003e\u003cstrong\u003eActiveTrack 3.0\u003c\/strong\u003e\u003c\/p\u003e\n\u003cp\u003eWith the latest version of DJI's ActiveTrack technology, following subjects while avoiding obstacles has never been easier. This technique keeps your subject in the center of the screen, even if they go behind a tree, with superior pathfinding and a faster and more accurate prediction of lost subjects.\u003c\/p\u003e\n\u003c\/td\u003e\n\u003ctd data-mce-fragment=\"1\"\u003e\n\u003cp\u003e\u003cstrong\u003ePOI 3.0\u003c\/strong\u003e\u003c\/p\u003e\n\u003cp\u003ePOI 3.0 enhances the capabilities of POI 2.0, particularly in terms of flat surface recognition. This updated functionality avoids the problem that POI 2.0 had with losing the target during tracking. POI 3.0 now has the ability to track people, cars, and boats in real time.\u003c\/p\u003e\n\u003c\/td\u003e\n\u003c\/tr\u003e\n\u003c\/tbody\u003e\n\u003c\/table\u003e\n\u003c\/div\u003e\n\u003ch3 style=\"text-align: center;\"\u003e\u003cb\u003e\u003cspan style=\"color: #ff8000;\"\u003e8K Hyperlapse\u003c\/span\u003e\u003c\/b\u003e\u003c\/h3\u003e\n\u003cdiv style=\"text-align: center;\"\u003e\u003cb\u003eTime and Movement\u003c\/b\u003e\u003c\/div\u003e\n\u003cdiv style=\"text-align: center;\"\u003e\u003cspan style=\"font-weight: 400;\"\u003eHyperlapse in 8K is supported by the Mavic Air 2, allowing you to warp time and space for particularly spectacular film. Best of all, you can get this photo without using any complicated post-production techniques. Choose from Free, Circle, Course Lock, and Waypoint modes, then point and shoot using the DJI Fly app. *8K resolution is only available in Free and Waypoint modes.\u003c\/span\u003e\u003c\/div\u003e\n\u003cdiv style=\"text-align: center;\"\u003e\n\u003cul\u003e\n\u003cli style=\"font-weight: 400;\"\u003e\u003cspan style=\"font-weight: 400;\"\u003eCourse Lock\u003c\/span\u003e\u003c\/li\u003e\n\u003cli style=\"font-weight: 400;\"\u003e\u003cspan style=\"font-weight: 400;\"\u003eFree\u003c\/span\u003e\u003c\/li\u003e\n\u003cli style=\"font-weight: 400;\"\u003e\u003cspan style=\"font-weight: 400;\"\u003eWaypoint\u003c\/span\u003e\u003c\/li\u003e\n\u003cli style=\"font-weight: 400;\"\u003e\u003cspan style=\"font-weight: 400;\"\u003eCircle\u003c\/span\u003e\u003c\/li\u003e\n\u003c\/ul\u003e\n\u003c\/div\u003e\n\u003cdiv style=\"text-align: center;\"\u003e\n\u003cimg src=\"https:\/\/cdn.shopify.com\/s\/files\/1\/2532\/7020\/files\/dji-mavic-air-2-fly-more-combo-drone-content-feature-8-2-free.jpg?v=1626148985\" alt=\"dji-mavic-air-2-fly-more-combo-drone-content-feature-8-2-free\" data-mce-fragment=\"1\" data-mce-src=\"https:\/\/cdn.shopify.com\/s\/files\/1\/2532\/7020\/files\/dji-mavic-air-2-fly-more-combo-drone-content-feature-8-2-free.jpg?v=1626148985\"\u003e\u003cbr\u003e\n\u003c\/div\u003e\n\u003cdiv style=\"text-align: center;\"\u003e \u003c\/div\u003e\n\u003ch3 style=\"text-align: center;\"\u003e\u003cspan style=\"color: #ff8000;\"\u003e\u003cb\u003eQuickShots\u003c\/b\u003e\u003c\/span\u003e\u003c\/h3\u003e\n\u003cdiv style=\"text-align: center;\"\u003e\u003cb\u003eImagination Simplified\u003c\/b\u003e\u003c\/div\u003e\n\u003cdiv style=\"text-align: center;\"\u003e\u003cspan style=\"font-weight: 400;\"\u003eQuickShots allows you to capture cinematic video snippets automatically. Mavic Air 2 prepares and flies a difficult aerial route for a professional-quality photo with just a few touches. With super-intuitive Story templates, you can add music, effects, and filters to your creation before sharing it on social media.\u003c\/span\u003e\u003c\/div\u003e\n\u003cdiv style=\"text-align: center;\"\u003e\n\u003cul\u003e\n\u003cli style=\"font-weight: 400;\"\u003e\u003cspan style=\"font-weight: 400;\"\u003eDronie\u003c\/span\u003e\u003c\/li\u003e\n\u003cli style=\"font-weight: 400;\"\u003e\u003cspan style=\"font-weight: 400;\"\u003eCircle\u003c\/span\u003e\u003c\/li\u003e\n\u003cli style=\"font-weight: 400;\"\u003e\u003cspan style=\"font-weight: 400;\"\u003eHelix\u003c\/span\u003e\u003c\/li\u003e\n\u003cli style=\"font-weight: 400;\"\u003e\u003cspan style=\"font-weight: 400;\"\u003eRocket\u003c\/span\u003e\u003c\/li\u003e\n\u003cli style=\"font-weight: 400;\"\u003e\u003cspan style=\"font-weight: 400;\"\u003eBoomerang\u003c\/span\u003e\u003c\/li\u003e\n\u003cli style=\"font-weight: 400;\"\u003e\u003cspan style=\"font-weight: 400;\"\u003eAsteroid\u003c\/span\u003e\u003c\/li\u003e\n\u003c\/ul\u003e\n\u003c\/div\u003e\n\u003ch3 style=\"text-align: center;\"\u003e\u003cspan style=\"color: #ff8000;\"\u003e\u003cb\u003e\u003c\/b\u003e\u003c\/span\u003e\u003c\/h3\u003e\n\u003ch3 style=\"text-align: center;\"\u003e\u003cspan style=\"color: #ff8000;\"\u003e\u003cb\u003eFlight and Safety\u003c\/b\u003e\u003c\/span\u003e\u003c\/h3\u003e\n\u003cdiv style=\"text-align: center;\"\u003e\u003cb\u003eSafer Flight for Stunning Content\u003c\/b\u003e\u003c\/div\u003e\n\u003cdiv style=\"text-align: center;\"\u003e\u003cspan style=\"color: #ffffff;\"\u003e\u003cb\u003e.\u003c\/b\u003e\u003c\/span\u003e\u003c\/div\u003e\n\u003ch3 style=\"text-align: center;\"\u003e\u003cspan style=\"color: #ff8000;\"\u003e\u003cb\u003e\u003c\/b\u003e\u003c\/span\u003e\u003c\/h3\u003e\n\u003ch3 style=\"text-align: center;\"\u003e\u003cspan style=\"color: #ff8000;\"\u003e\u003cb\u003eOcuSync 2.0\u003c\/b\u003e\u003c\/span\u003e\u003c\/h3\u003e\n\u003cdiv style=\"text-align: center;\"\u003e\u003cb\u003eThe Sky’s the Limit\u003c\/b\u003e\u003c\/div\u003e\n\u003cdiv style=\"text-align: center;\"\u003e\u003cspan style=\"font-weight: 400;\"\u003eOcuSync 2.0 can give a 1080p FHD livestream directly from the drone's camera and has a video transmission distance of up to 10 kilometers. Enjoy greater freedom when it comes to exploring and more clarity when it comes to capturing the perfect photo. \u003cbr data-mce-fragment=\"1\"\u003e\u003cbr data-mce-fragment=\"1\"\u003e*When unobstructed, interference-free, and FCC-compliant. The maximum flying range specification is a proxy for the strength and robustness of the radio link.\u003c\/span\u003e\u003c\/div\u003e\n\u003cdiv style=\"text-align: center;\"\u003e\u003cspan style=\"font-weight: 400;\"\u003e\u003cimg alt=\"dji-mavic-air-2-fly-more-combo-drone-content-feature-9-OcuSync 2.0\" src=\"https:\/\/cdn.shopify.com\/s\/files\/1\/2532\/7020\/files\/dji-mavic-air-2-fly-more-combo-drone-content-feature-9-OcuSync_2.0.jpg?v=1626149011\"\u003e\u003c\/span\u003e\u003c\/div\u003e\n\u003cdiv style=\"text-align: center;\"\u003e \u003c\/div\u003e\n\u003ch3 style=\"text-align: center;\"\u003e\u003cspan style=\"color: #ff8000;\"\u003e\u003cb\u003e2.4\/5.8GHz Dual Frequency\u003c\/b\u003e\u003c\/span\u003e\u003c\/h3\u003e\n\u003cdiv style=\"text-align: center;\"\u003e\u003cb\u003eSmooth Flight, Reliable Signal\u003cbr data-mce-fragment=\"1\"\u003e\u003c\/b\u003e\u003c\/div\u003e\n\u003cdiv style=\"text-align: center;\"\u003e\u003cspan style=\"font-weight: 400;\"\u003eThe Mavic Air 2 has dual-frequency connectivity (2.4\/5.8GHz) and automatically shifts to the best channel with the least interference in real time. This increases flight safety by greatly improving the aircraft's anti-interference ability in adverse circumstances. \u003cbr data-mce-fragment=\"1\"\u003e\u003cbr data-mce-fragment=\"1\"\u003e*Some countries do not accept 5.8 GHz transmission due to local laws.\u003c\/span\u003e\u003c\/div\u003e\n\u003cdiv style=\"text-align: center;\"\u003e\u003cspan style=\"font-weight: 400; color: #ffffff;\"\u003e.\u003c\/span\u003e\u003c\/div\u003e\n\u003ch3 style=\"text-align: center;\"\u003e\u003cspan style=\"color: #ff8000;\"\u003e\u003cb\u003e\u003c\/b\u003e\u003c\/span\u003e\u003c\/h3\u003e\n\u003ch3 style=\"text-align: center;\"\u003e\u003cspan style=\"color: #ff8000;\"\u003e\u003cb\u003eBattery and Flight\u003c\/b\u003e\u003c\/span\u003e\u003c\/h3\u003e\n\u003cdiv style=\"text-align: center;\"\u003e\u003cb\u003eFly Longer\u003c\/b\u003e\u003c\/div\u003e\n\u003cdiv style=\"text-align: center;\"\u003e\u003cspan style=\"font-weight: 400;\"\u003eWith a battery life of up to 34 minutes and a maximum flight speed of 68 kph in Sport mode, you'll be able to stay in the air for as long as you want to obtain the ideal image. \u003cbr data-mce-fragment=\"1\"\u003e\u003cbr data-mce-fragment=\"1\"\u003e*Flight time was recorded at a 9° angle and a speed of 5.1 m\/s in a windless environment.\u003c\/span\u003e\u003c\/div\u003e\n\u003cdiv style=\"text-align: center;\"\u003e \u003c\/div\u003e\n\u003cdiv style=\"text-align: center;\"\u003e\u003cspan style=\"font-weight: 400;\"\u003e\u003cimg alt=\"dji-mavic-air-2-fly-more-combo-drone-content-feature-10-battery\" src=\"https:\/\/cdn.shopify.com\/s\/files\/1\/2532\/7020\/files\/dji-mavic-air-2-fly-more-combo-drone-content-feature-10-battery.jpg?v=1626149034\"\u003e\u003c\/span\u003e\u003c\/div\u003e\n\u003ch3 style=\"text-align: center;\"\u003e\u003cspan style=\"color: #ff8000;\"\u003e\u003cb\u003eObstacle Avoidance\u003c\/b\u003e\u003c\/span\u003e\u003c\/h3\u003e\n\u003cdiv style=\"text-align: center;\"\u003e\u003cb\u003eFly Safer\u003c\/b\u003e\u003c\/div\u003e\n\u003cdiv style=\"text-align: center;\"\u003e\u003cspan style=\"font-weight: 400;\"\u003eForward, backward, and downward are the three directions in which Mavic Air 2 observes its surroundings. An auxiliary light improves visibility, and obstacle avoidance adds an extra layer of security that's great for pushing the boundaries of what's possible.\u003c\/span\u003e\u003c\/div\u003e\n\u003cdiv style=\"text-align: center;\"\u003e\n\u003ctable\u003e\n\u003ctbody\u003e\n\u003ctr\u003e\n\u003ctd\u003e\n\u003cp\u003e\u003cb\u003eForward\u003c\/b\u003e\u003cspan style=\"font-weight: 400;\"\u003e: Vision sensor accurate up to 22 meters\u003c\/span\u003e\u003c\/p\u003e\n\u003c\/td\u003e\n\u003c\/tr\u003e\n\u003ctr\u003e\n\u003ctd\u003e\n\u003cp\u003e\u003cb\u003eBackward\u003c\/b\u003e\u003cspan style=\"font-weight: 400;\"\u003e: Vision sensor accurate up to 23.6 meters\u003c\/span\u003e\u003c\/p\u003e\n\u003c\/td\u003e\n\u003c\/tr\u003e\n\u003ctr\u003e\n\u003ctd\u003e\n\u003cp\u003e\u003cb\u003eDownward\u003c\/b\u003e\u003cspan style=\"font-weight: 400;\"\u003e: Vision sensor, infrared sensor. The auxiliary light assist with visual positioning, safe landing, and visibility in the air. It can be turned on and off manually.\u003c\/span\u003e\u003c\/p\u003e\n\u003c\/td\u003e\n\u003c\/tr\u003e\n\u003c\/tbody\u003e\n\u003c\/table\u003e\n\u003c\/div\u003e\n\u003cdiv style=\"text-align: center;\"\u003e\u003cspan style=\"color: #ffffff;\"\u003e\u003cb\u003e.\u003c\/b\u003e\u003c\/span\u003e\u003c\/div\u003e\n\u003cdiv style=\"text-align: center;\"\u003e\u003cb\u003e\u003c\/b\u003e\u003c\/div\u003e\n\u003cdiv style=\"text-align: center;\"\u003e\u003cb\u003eAPAS 3.0\u003c\/b\u003e\u003c\/div\u003e\n\u003cdiv style=\"text-align: center;\"\u003e\u003cspan style=\"font-weight: 400;\"\u003eIn difficult settings, Advanced Pilot Assistance Systems (APAS) 3.0 employs advanced mapping technology for smooth following and dependable obstacle avoidance. When compared to earlier generations, obstacle avoidance performance and autonomous flight planning have improved substantially, boosting safety and enabling more options.\u003c\/span\u003e\u003c\/div\u003e\n\u003cdiv style=\"text-align: center;\"\u003e\u003cspan style=\"font-weight: 400;\"\u003e*While recording in 4K at 60, 50, and 48 fps, 2.7K at 60, 50, and 48 fps, and 1080p at 120 and 240 fps, APAS 3.0 and FocusTrack are not available.\u003cbr data-mce-fragment=\"1\"\u003e\u003c\/span\u003e\u003c\/div\u003e\n\u003cstyle\u003e\u003c!--\n.embed-container { position: relative; padding-bottom: 56.25%; height: 0; overflow: hidden; max-width: 100%; } .embed-container iframe, .embed-container object, .embed-container embed { position: absolute; top: 0; left: 0; width: 100%; height: 100%; }\n--\u003e\u003c\/style\u003e\n\u003cdiv style=\"text-align: center;\" class=\"embed-container\"\u003e\u003ciframe src=\"https:\/\/www.youtube.com\/embed\/IwoyGb-NWDs\" frameborder=\"0\" allowfullscreen=\"\"\u003e\u003c\/iframe\u003e\u003c\/div\u003e\n\u003cdiv style=\"text-align: center;\"\u003e \u003c\/div\u003e\n\u003ch3 style=\"text-align: center;\"\u003e\u003cspan style=\"color: #ff8000;\"\u003e\u003cb\u003eDJI Fly App\u003c\/b\u003e\u003c\/span\u003e\u003c\/h3\u003e\n\u003cdiv style=\"text-align: center;\"\u003e\u003cb\u003eEffortless Editing\u003c\/b\u003e\u003c\/div\u003e\n\u003cdiv style=\"text-align: center;\"\u003e\u003cspan style=\"font-weight: 400;\"\u003eThe DJI Fly app makes creating perfect films easier than ever before. It incorporates the DJI Mimo app's editing suite, giving users access to manual settings, advanced functionalities, and intuitive templates to quickly produce professional compositions.\u003c\/span\u003e\u003c\/div\u003e\n\u003cdiv style=\"text-align: center;\"\u003e\u003cspan style=\"font-weight: 400;\"\u003e\u003cimg alt=\"dji-mavic-air-2-fly-more-combo-drone-content-feature-11-DJI-Fly-App\" src=\"https:\/\/cdn.shopify.com\/s\/files\/1\/2532\/7020\/files\/dji-mavic-air-2-fly-more-combo-drone-content-feature-11-DJI-Fly-App.jpg?v=1626149062\"\u003e\u003c\/span\u003e\u003c\/div\u003e\n\u003ch3 style=\"text-align: center;\"\u003e\u003cspan style=\"color: #ff8000;\"\u003e\u003cb\u003e\u003c\/b\u003e\u003c\/span\u003e\u003c\/h3\u003e\n\u003ch3 style=\"text-align: center;\"\u003e\u003cspan style=\"color: #ff8000;\"\u003e\u003cb\u003eRemote Controller \u003c\/b\u003e\u003c\/span\u003e\u003c\/h3\u003e\n\u003cdiv style=\"text-align: center;\"\u003e\u003cb\u003eDesigned for Pilots\u003c\/b\u003e\u003c\/div\u003e\n\u003cdiv style=\"text-align: center;\"\u003e\u003cspan style=\"font-weight: 400;\"\u003eThe newly designed remote controller has an ergonomic shape for a more comfortable grip and an excellent 240-minute battery life. The redesigned clamp makes it simple to attach devices, and the integrated antennas improve the user experience dramatically.\u003cbr data-mce-fragment=\"1\"\u003e*In an interference-free environment, battery life was measured using an Android phone.\u003c\/span\u003e\u003c\/div\u003e\n\u003cdiv style=\"text-align: center;\"\u003e\u003cspan style=\"font-weight: 400;\"\u003e\u003cimg alt=\"dji-mavic-air-2-fly-more-combo-drone-content-feature-12-remote\" src=\"https:\/\/cdn.shopify.com\/s\/files\/1\/2532\/7020\/files\/dji-mavic-air-2-fly-more-combo-drone-content-feature-12-remote.jpg?v=1626149088\"\u003e\u003c\/span\u003e\u003c\/div\u003e\n\u003cdiv style=\"text-align: center;\"\u003e \u003c\/div\u003e\n\u003ch3 style=\"text-align: center;\"\u003e\u003cspan style=\"color: #ff8000;\"\u003e\u003cb\u003eND Filters\u003c\/b\u003e\u003c\/span\u003e\u003c\/h3\u003e\n\u003cdiv style=\"text-align: center;\"\u003e\u003cb\u003eOptimal Options\u003c\/b\u003e\u003c\/div\u003e\n\u003cdiv style=\"text-align: center;\"\u003eThe Mavic Air 2 comes with two ND filter sets that help with exposure control and give you additional creative options. The ND 16\/64\/256 set is useful for altering shutter speed and in low-light situations, while the ND 4\/8\/32 set allows for colorful photographs even at low ISO.\u003cbr\u003e\u003cbr\u003e*The Fly More Combo comes with ND16\/64\/256 filters. Separately, the ND4\/8\/32 filter set can be ordered.\u003c\/div\u003e\n\u003cdiv style=\"text-align: center;\"\u003e\u003cspan style=\"font-weight: 400;\"\u003e\u003cimg alt=\"dji-mavic-air-2-fly-more-combo-drone-content-feature-13-ND-Filter\" src=\"https:\/\/cdn.shopify.com\/s\/files\/1\/2532\/7020\/files\/dji-mavic-air-2-fly-more-combo-drone-content-feature-13-ND-Filter.jpg?v=1626149110\"\u003e\u003c\/span\u003e\u003c\/div\u003e\n\u003cdiv style=\"text-align: center;\"\u003e \u003c\/div\u003e\n\u003ch2 style=\"text-align: left;\"\u003e\u003cstrong\u003eSpecification\u003c\/strong\u003e\u003c\/h2\u003e\n\u003cp\u003e \u003c\/p\u003e\n\u003cp\u003e \u003c\/p\u003e\n\u003cp\u003e \u003c\/p\u003e\n\u003cdiv style=\"text-align: left;\"\u003e\u003cb\u003eAircraft\u003c\/b\u003e\u003c\/div\u003e\n\u003cdiv style=\"text-align: left;\"\u003e\n\u003cul\u003e\n\u003cli style=\"font-weight: 400;\"\u003e\u003cb\u003eWeight\u003c\/b\u003e\u003c\/li\u003e\n\u003cli style=\"font-weight: 400;\"\u003e570 g\u003c\/li\u003e\n\u003c\/ul\u003e\n\u003cul\u003e\n\u003cli style=\"font-weight: 400;\"\u003e\u003cb\u003eSize\u003c\/b\u003e\u003c\/li\u003e\n\u003cli style=\"font-weight: 400;\"\u003e\n\u003cspan style=\"font-weight: 400;\"\u003eFolded:\u003c\/span\u003e\u003cspan style=\"font-weight: 400;\"\u003e\u003cbr\u003e\u003c\/span\u003e\u003cspan style=\"font-weight: 400;\"\u003e180×97×74 mm (Length×Width×Height)\u003c\/span\u003e\u003cspan style=\"font-weight: 400;\"\u003e\u003cbr\u003e\u003c\/span\u003e\u003cspan style=\"font-weight: 400;\"\u003eUnfolded:\u003c\/span\u003e\u003cspan style=\"font-weight: 400;\"\u003e\u003cbr\u003e\u003c\/span\u003e\u003cspan style=\"font-weight: 400;\"\u003e183×253×77 mm (Length×Width×Height)\u003c\/span\u003e\n\u003c\/li\u003e\n\u003c\/ul\u003e\n\u003cul\u003e\n\u003cli style=\"font-weight: 400;\"\u003e\u003cb\u003eDiagonal Distance\u003c\/b\u003e\u003c\/li\u003e\n\u003cli style=\"font-weight: 400;\"\u003e\u003cspan style=\"font-weight: 400;\"\u003e302 mm\u003c\/span\u003e\u003c\/li\u003e\n\u003cli\u003e\u003cb\u003eTransmitter Power (EIRP)\u003c\/b\u003e\u003c\/li\u003e\n\u003cli\u003e\n\u003cspan\u003e2.400-2.4835 GHz:\u003c\/span\u003e\u003cspan\u003e\u003cbr\u003e\u003c\/span\u003e\u003cspan\u003eFCC: ≤26 dBm\u003c\/span\u003e\u003cspan\u003e\u003cbr\u003e\u003c\/span\u003e\u003cspan\u003eCE: ≤20 dBm\u003c\/span\u003e\u003cspan\u003e\u003cbr\u003e\u003c\/span\u003e\u003cspan\u003eSRRC: ≤20 dBm\u003c\/span\u003e\u003cspan\u003e\u003cbr\u003e\u003c\/span\u003e\u003cspan\u003eMIC: ≤20 dBm\u003c\/span\u003e\u003cspan\u003e\u003cbr\u003e\u003c\/span\u003e\u003cspan\u003e\u003cbr\u003e\u003c\/span\u003e\u003cspan\u003e5.725-5.850 GHz:\u003c\/span\u003e\u003cspan\u003e\u003cbr\u003e\u003c\/span\u003e\u003cspan\u003eFCC: ≤26 dBm\u003c\/span\u003e\u003cspan\u003e\u003cbr\u003e\u003c\/span\u003e\u003cspan\u003eCE: ≤14 dBm\u003c\/span\u003e\u003cspan\u003e\u003cbr\u003e\u003c\/span\u003e\u003cspan\u003eSRRC: ≤26 dBm\u003c\/span\u003e\n\u003c\/li\u003e\n\u003c\/ul\u003e\n\u003cul\u003e\n\u003cli style=\"font-weight: 400;\"\u003e\u003cb\u003eMax Ascent Speed\u003c\/b\u003e\u003c\/li\u003e\n\u003cli style=\"font-weight: 400;\"\u003e\n\u003cspan style=\"font-weight: 400;\"\u003e4 m\/s (S Mode)\u003c\/span\u003e\u003cspan style=\"font-weight: 400;\"\u003e\u003cbr\u003e\u003c\/span\u003e\u003cspan style=\"font-weight: 400;\"\u003e4 m\/s (N Mode)\u003c\/span\u003e\n\u003c\/li\u003e\n\u003c\/ul\u003e\n\u003cul\u003e\n\u003cli style=\"font-weight: 400;\"\u003e\u003cb\u003eMax Service Ceiling Above Sea Level\u003c\/b\u003e\u003c\/li\u003e\n\u003cli style=\"font-weight: 400;\"\u003e\u003cspan style=\"font-weight: 400;\"\u003e5000 m\u003c\/span\u003e\u003c\/li\u003e\n\u003c\/ul\u003e\n\u003cul\u003e\n\u003cli style=\"font-weight: 400;\"\u003e\u003cb\u003eMax Flight Time (without wind)\u003c\/b\u003e\u003c\/li\u003e\n\u003cli style=\"font-weight: 400;\"\u003e\u003cspan style=\"font-weight: 400;\"\u003e34 minutes\u003c\/span\u003e\u003c\/li\u003e\n\u003c\/ul\u003e\n\u003cul\u003e\n\u003cli style=\"font-weight: 400;\"\u003e\u003cb\u003eMax Hover Time (without wind)\u003c\/b\u003e\u003c\/li\u003e\n\u003cli style=\"font-weight: 400;\"\u003e\u003cspan style=\"font-weight: 400;\"\u003e33 minutes\u003c\/span\u003e\u003c\/li\u003e\n\u003c\/ul\u003e\n\u003cul\u003e\n\u003cli style=\"font-weight: 400;\"\u003e\u003cb\u003eMax Flight Distance\u003c\/b\u003e\u003c\/li\u003e\n\u003cli style=\"font-weight: 400;\"\u003e\u003cspan style=\"font-weight: 400;\"\u003e18.5 km\u003c\/span\u003e\u003c\/li\u003e\n\u003cli\u003e\u003cb\u003eMax Descent Speed\u003c\/b\u003e\u003c\/li\u003e\n\u003cli\u003e\n\u003cspan\u003e3 m\/s (S Mode)\u003c\/span\u003e\u003cspan\u003e\u003cbr\u003e\u003c\/span\u003e\u003cspan\u003e3 m\/s (N Mode)\u003c\/span\u003e\u003cspan\u003e\u003cbr\u003e\u003c\/span\u003e\u003cspan\u003e5 m\/s (S Mode and N Mode during a sharp descent)\u003c\/span\u003e\u003cspan\u003e\u003cbr\u003e\u003c\/span\u003e\u003cspan\u003e3 m\/s (all modes at elevations over 4500 m)\u003c\/span\u003e\n\u003c\/li\u003e\n\u003c\/ul\u003e\n\u003cul\u003e\n\u003cli style=\"font-weight: 400;\"\u003e\u003cb\u003eMax Horizontal Flight Speed\u003c\/b\u003e\u003c\/li\u003e\n\u003cli style=\"font-weight: 400;\"\u003e\n\u003cspan style=\"font-weight: 400;\"\u003e19 m\/s (S Mode)\u003c\/span\u003e\u003cspan style=\"font-weight: 400;\"\u003e\u003cbr\u003e\u003c\/span\u003e\u003cspan style=\"font-weight: 400;\"\u003e12 m\/s (N Mode)\u003c\/span\u003e\u003cspan style=\"font-weight: 400;\"\u003e\u003cbr\u003e\u003c\/span\u003e\u003cspan style=\"font-weight: 400;\"\u003e5 m\/s (T Mode)\u003c\/span\u003e\n\u003c\/li\u003e\n\u003cli\u003e\u003cb\u003eHovering Accuracy Range\u003c\/b\u003e\u003c\/li\u003e\n\u003cli\u003e\n\u003cspan\u003eVertical:\u003c\/span\u003e\u003cspan\u003e\u003cbr\u003e\u003c\/span\u003e\u003cspan\u003e±0.1 m (with vision positioning)\u003c\/span\u003e\u003cspan\u003e\u003cbr\u003e\u003c\/span\u003e\u003cspan\u003e±0.5 m (with GPS positioning)\u003c\/span\u003e\u003cspan\u003e\u003cbr\u003e\u003c\/span\u003e\u003cspan\u003e\u003cbr\u003e\u003c\/span\u003e\u003cspan\u003eHorizontal:\u003c\/span\u003e\u003cspan\u003e\u003cbr\u003e\u003c\/span\u003e\u003cspan\u003e±0.1 m (with vision positioning)\u003c\/span\u003e\u003cspan\u003e\u003cbr\u003e\u003c\/span\u003e\u003cspan\u003e±1.5 m (with GPS positioning)\u003c\/span\u003e\n\u003c\/li\u003e\n\u003c\/ul\u003e\n\u003cul\u003e\n\u003cli style=\"font-weight: 400;\"\u003e\u003cb\u003eMax Wind Resistance\u003c\/b\u003e\u003c\/li\u003e\n\u003cli style=\"font-weight: 400;\"\u003e\u003cspan style=\"font-weight: 400;\"\u003e8.5-10.5 m\/s (Level 5)\u003c\/span\u003e\u003c\/li\u003e\n\u003c\/ul\u003e\n\u003cul\u003e\n\u003cli style=\"font-weight: 400;\"\u003e\u003cb\u003eMax Tilt Angle\u003c\/b\u003e\u003c\/li\u003e\n\u003cli style=\"font-weight: 400;\"\u003e\n\u003cspan style=\"font-weight: 400;\"\u003e35° (S Mode)\u003c\/span\u003e\u003cspan style=\"font-weight: 400;\"\u003e\u003cbr\u003e\u003c\/span\u003e\u003cspan style=\"font-weight: 400;\"\u003e20° (N Mode)\u003c\/span\u003e\u003cspan style=\"font-weight: 400;\"\u003e\u003cbr\u003e\u003c\/span\u003e\u003cspan style=\"font-weight: 400;\"\u003e35° (N Mode under strong wind)\u003c\/span\u003e\n\u003c\/li\u003e\n\u003c\/ul\u003e\n\u003cul\u003e\n\u003cli style=\"font-weight: 400;\"\u003e\u003cb\u003eOperating Frequency\u003c\/b\u003e\u003c\/li\u003e\n\u003cli style=\"font-weight: 400;\"\u003e\n\u003cspan style=\"font-weight: 400;\"\u003e2.400-2.4835 GHz\u003c\/span\u003e\u003cspan style=\"font-weight: 400;\"\u003e\u003cbr\u003e\u003c\/span\u003e\u003cspan style=\"font-weight: 400;\"\u003e5.725-5.850 GHz\u003c\/span\u003e\n\u003c\/li\u003e\n\u003c\/ul\u003e\n\u003cul data-mce-fragment=\"1\"\u003e\n\u003cli data-mce-fragment=\"1\"\u003e\u003cb data-mce-fragment=\"1\"\u003eMax Angular Velocity\u003c\/b\u003e\u003c\/li\u003e\n\u003cli data-mce-fragment=\"1\"\u003e\n\u003cspan data-mce-fragment=\"1\"\u003e250°\/s (S Mode)\u003c\/span\u003e\u003cspan data-mce-fragment=\"1\"\u003e\u003cbr data-mce-fragment=\"1\"\u003e\u003c\/span\u003e\u003cspan data-mce-fragment=\"1\"\u003e250°\/s (N Mode)\u003c\/span\u003e\n\u003c\/li\u003e\n\u003c\/ul\u003e\n\u003cul data-mce-fragment=\"1\"\u003e\n\u003cli data-mce-fragment=\"1\"\u003e\u003cb data-mce-fragment=\"1\"\u003eOperating Temperature Range\u003c\/b\u003e\u003c\/li\u003e\n\u003cli data-mce-fragment=\"1\"\u003e\u003cspan data-mce-fragment=\"1\"\u003e-10° to 40°C (14° to 104°F)\u003c\/span\u003e\u003c\/li\u003e\n\u003c\/ul\u003e\n\u003cul\u003e\u003c\/ul\u003e\n\u003cul\u003e\n\u003cli style=\"font-weight: 400;\"\u003e\u003cb\u003ePropellers\u003c\/b\u003e\u003c\/li\u003e\n\u003cli style=\"font-weight: 400;\"\u003e\u003cspan style=\"font-weight: 400;\"\u003eQuick release, low noise, folding\u003c\/span\u003e\u003c\/li\u003e\n\u003c\/ul\u003e\n\u003cul\u003e\n\u003cli style=\"font-weight: 400;\"\u003e\u003cb\u003eSatellite Systems\u003c\/b\u003e\u003c\/li\u003e\n\u003cli style=\"font-weight: 400;\"\u003e\u003cspan style=\"font-weight: 400;\"\u003eGPS+GLONASS\u003c\/span\u003e\u003c\/li\u003e\n\u003c\/ul\u003e\n\u003cul\u003e\n\u003cli style=\"font-weight: 400;\"\u003e\u003cb\u003eCompass\u003c\/b\u003e\u003c\/li\u003e\n\u003cli style=\"font-weight: 400;\"\u003e\u003cspan style=\"font-weight: 400;\"\u003eSingle Compass\u003c\/span\u003e\u003c\/li\u003e\n\u003c\/ul\u003e\n\u003cul\u003e\n\u003cli style=\"font-weight: 400;\"\u003e\u003cb\u003eIMU\u003c\/b\u003e\u003c\/li\u003e\n\u003cli style=\"font-weight: 400;\"\u003e\u003cspan style=\"font-weight: 400;\"\u003eSingle IMU\u003c\/span\u003e\u003c\/li\u003e\n\u003c\/ul\u003e\n\u003cul\u003e\n\u003cli style=\"font-weight: 400;\"\u003e\u003cb\u003eInternal Storage\u003c\/b\u003e\u003c\/li\u003e\n\u003cli style=\"font-weight: 400;\"\u003e\u003cspan style=\"font-weight: 400;\"\u003e8 GB\u003c\/span\u003e\u003c\/li\u003e\n\u003c\/ul\u003e\n\u003c\/div\u003e\n\u003cdiv style=\"text-align: left;\"\u003e\u003cb\u003eBattery\u003c\/b\u003e\u003c\/div\u003e\n\u003cdiv style=\"text-align: left;\"\u003e\n\u003cul\u003e\n\u003cli style=\"font-weight: 400;\"\u003e\u003cb\u003eCapacity\u003c\/b\u003e\u003c\/li\u003e\n\u003cli style=\"font-weight: 400;\"\u003e\u003cspan style=\"font-weight: 400;\"\u003e3500 mAh\u003c\/span\u003e\u003c\/li\u003e\n\u003c\/ul\u003e\n\u003cul\u003e\n\u003cli style=\"font-weight: 400;\"\u003e\u003cb\u003eVoltage\u003c\/b\u003e\u003c\/li\u003e\n\u003cli style=\"font-weight: 400;\"\u003e\u003cspan style=\"font-weight: 400;\"\u003e11.55 V\u003c\/span\u003e\u003c\/li\u003e\n\u003c\/ul\u003e\n\u003cul\u003e\n\u003cli style=\"font-weight: 400;\"\u003e\u003cb\u003eCharging Voltage Limit\u003c\/b\u003e\u003c\/li\u003e\n\u003cli style=\"font-weight: 400;\"\u003e\u003cspan style=\"font-weight: 400;\"\u003e13.2 V\u003c\/span\u003e\u003c\/li\u003e\n\u003c\/ul\u003e\n\u003cul\u003e\u003c\/ul\u003e\n\u003cul\u003e\n\u003cli style=\"font-weight: 400;\"\u003e\u003cb\u003eWeight\u003c\/b\u003e\u003c\/li\u003e\n\u003cli style=\"font-weight: 400;\"\u003e\u003cspan style=\"font-weight: 400;\"\u003e198 g\u003c\/span\u003e\u003c\/li\u003e\n\u003c\/ul\u003e\n\u003cul\u003e\n\u003cli style=\"font-weight: 400;\"\u003e\u003cb\u003eCharging Temperature\u003c\/b\u003e\u003c\/li\u003e\n\u003cli style=\"font-weight: 400;\"\u003e\u003cspan style=\"font-weight: 400;\"\u003e5° to 40°C (41° to 104°F)\u003c\/span\u003e\u003c\/li\u003e\n\u003c\/ul\u003e\n\u003cul data-mce-fragment=\"1\"\u003e\n\u003cli data-mce-fragment=\"1\"\u003e\u003cb data-mce-fragment=\"1\"\u003eBattery Type\u003c\/b\u003e\u003c\/li\u003e\n\u003cli data-mce-fragment=\"1\"\u003e\u003cspan data-mce-fragment=\"1\"\u003eLiPo 3S\u003c\/span\u003e\u003c\/li\u003e\n\u003c\/ul\u003e\n\u003cul data-mce-fragment=\"1\"\u003e\n\u003cli data-mce-fragment=\"1\"\u003e\u003cb data-mce-fragment=\"1\"\u003eEnergy\u003c\/b\u003e\u003c\/li\u003e\n\u003cli data-mce-fragment=\"1\"\u003e\u003cspan data-mce-fragment=\"1\"\u003e40.42 Wh\u003c\/span\u003e\u003c\/li\u003e\n\u003c\/ul\u003e\n\u003cul\u003e\u003c\/ul\u003e\n\u003cul\u003e\n\u003cli style=\"font-weight: 400;\"\u003e\u003cb\u003eMax Charging Power\u003c\/b\u003e\u003c\/li\u003e\n\u003cli style=\"font-weight: 400;\"\u003e\u003cspan style=\"font-weight: 400;\"\u003e38 W\u003c\/span\u003e\u003c\/li\u003e\n\u003c\/ul\u003e\n\u003c\/div\u003e\n\u003cdiv style=\"text-align: left;\"\u003e\u003cb\u003eCamera\u003c\/b\u003e\u003c\/div\u003e\n\u003cdiv\u003e\n\u003cul style=\"text-align: left;\"\u003e\n\u003cli style=\"font-weight: 400;\"\u003e\u003cb\u003eSensor\u003c\/b\u003e\u003c\/li\u003e\n\u003cli style=\"font-weight: 400;\"\u003e\n\u003cspan style=\"font-weight: 400;\"\u003e1\/2\" CMOS\u003c\/span\u003e\u003cspan style=\"font-weight: 400;\"\u003e\u003cbr\u003e\u003c\/span\u003e\u003cspan style=\"font-weight: 400;\"\u003eEffective Pixels: 12 MP and 48 MP\u003c\/span\u003e\n\u003c\/li\u003e\n\u003cli\u003e\u003cb\u003eISO\u003c\/b\u003e\u003c\/li\u003e\n\u003cli\u003e\n\u003cspan\u003eVideo:\u003c\/span\u003e\u003cspan\u003e\u003cbr\u003e\u003c\/span\u003e\u003cspan\u003e100-6400\u003c\/span\u003e\u003cspan\u003e\u003cbr\u003e\u003c\/span\u003e\u003cspan\u003e\u003cbr\u003e\u003c\/span\u003e\u003cspan\u003ePhoto (12 MP):\u003c\/span\u003e\u003cspan\u003e\u003cbr\u003e\u003c\/span\u003e\u003cspan\u003e100-3200 (Auto)\u003c\/span\u003e\u003cspan\u003e\u003cbr\u003e\u003c\/span\u003e\u003cspan\u003e100-6400 (Manual)\u003c\/span\u003e\u003cspan\u003e\u003cbr\u003e\u003c\/span\u003e\u003cspan\u003ePhoto (48 MP):\u003c\/span\u003e\u003cspan\u003e\u003cbr\u003e\u003c\/span\u003e\u003cspan\u003e100-1600 (Auto)\u003c\/span\u003e\u003cspan\u003e\u003cbr\u003e\u003c\/span\u003e\u003cspan\u003e100-3200 (Manual)\u003c\/span\u003e\n\u003c\/li\u003e\n\u003c\/ul\u003e\n\u003cul style=\"text-align: left;\"\u003e\n\u003cli style=\"font-weight: 400;\"\u003e\u003cb\u003eLens\u003c\/b\u003e\u003c\/li\u003e\n\u003cli style=\"font-weight: 400;\"\u003e\n\u003cspan style=\"font-weight: 400;\"\u003eFOV: 84°\u003c\/span\u003e\u003cspan style=\"font-weight: 400;\"\u003e\u003cbr\u003e\u003c\/span\u003e\u003cspan style=\"font-weight: 400;\"\u003eEquivalent Focal Length: 24 mm\u003c\/span\u003e\u003cspan style=\"font-weight: 400;\"\u003e\u003cbr\u003e\u003c\/span\u003e\u003cspan style=\"font-weight: 400;\"\u003eAperture: f\/2.8\u003c\/span\u003e\u003cspan style=\"font-weight: 400;\"\u003e\u003cbr\u003e\u003c\/span\u003e\u003cspan style=\"font-weight: 400;\"\u003eFocus Range: 1 m to ∞\u003c\/span\u003e\n\u003c\/li\u003e\n\u003c\/ul\u003e\n\u003cul data-mce-fragment=\"1\"\u003e\n\u003cli data-mce-fragment=\"1\"\u003e\u003cb data-mce-fragment=\"1\"\u003eVideo Formats\u003c\/b\u003e\u003c\/li\u003e\n\u003cli data-mce-fragment=\"1\"\u003e\u003cspan data-mce-fragment=\"1\"\u003eMP4\/MOV (H.264\/MPEG-4 AVC, H.265\/HEVC)\u003c\/span\u003e\u003c\/li\u003e\n\u003c\/ul\u003e\n\u003cul data-mce-fragment=\"1\"\u003e\n\u003cli data-mce-fragment=\"1\"\u003e\u003cb data-mce-fragment=\"1\"\u003eMax Bitrate\u003c\/b\u003e\u003c\/li\u003e\n\u003cli data-mce-fragment=\"1\"\u003e\u003cspan data-mce-fragment=\"1\"\u003e120 Mbps\u003c\/span\u003e\u003c\/li\u003e\n\u003c\/ul\u003e\n\u003cul style=\"text-align: left;\"\u003e\u003c\/ul\u003e\n\u003cul style=\"text-align: left;\"\u003e\n\u003cli style=\"font-weight: 400;\"\u003e\u003cb\u003eMax Photo Resolution\u003c\/b\u003e\u003c\/li\u003e\n\u003cli style=\"font-weight: 400;\"\u003e\u003cspan style=\"font-weight: 400;\"\u003e48 MP 8000×6000 pixel\u003c\/span\u003e\u003c\/li\u003e\n\u003c\/ul\u003e\n\u003cul style=\"text-align: left;\"\u003e\n\u003cli style=\"font-weight: 400;\"\u003e\u003cb\u003ePhoto Formats\u003c\/b\u003e\u003c\/li\u003e\n\u003cli style=\"font-weight: 400;\"\u003e\u003cspan style=\"font-weight: 400;\"\u003eJPEG\/DNG (RAW)\u003c\/span\u003e\u003c\/li\u003e\n\u003cli\u003e\u003cb\u003ePhoto Modes\u003c\/b\u003e\u003c\/li\u003e\n\u003cli\u003e\n\u003cspan\u003eSingle: 12 MP and 48 MP\u003c\/span\u003e\u003cspan\u003e\u003cbr\u003e\u003c\/span\u003e\u003cspan\u003eBurst: 12 MP, 3\/5\/7 frames\u003c\/span\u003e\u003cspan\u003e\u003cbr\u003e\u003c\/span\u003e\u003cspan\u003eAutomatic Exposure Bracketing (AEB): 12MP, 3\/5 Frames at 0.7EV Bias\u003c\/span\u003e\u003cspan\u003e\u003cbr\u003e\u003c\/span\u003e\u003cspan\u003eTimed: 12 MP 2\/3\/5\/7\/10\/15\/20\/30\/60 seconds\u003c\/span\u003e\u003cspan\u003e\u003cbr\u003e\u003c\/span\u003e\u003cspan\u003eSmartPhoto: Scene Recognition, HyperLight, and HDR\u003c\/span\u003e\u003cspan\u003e\u003cbr\u003e\u003c\/span\u003e\u003cspan\u003eHDR Panorama:\u003c\/span\u003e\u003cspan\u003e\u003cbr\u003e\u003c\/span\u003e\u003cspan\u003eVertical (3×1): 3328×8000 pixels (Width×Height)\u003c\/span\u003e\u003cspan\u003e\u003cbr\u003e\u003c\/span\u003e\u003cspan\u003eWide-angle (3×3): 8000×6144 pixels (Width×Height)\u003c\/span\u003e\u003cspan\u003e\u003cbr\u003e\u003c\/span\u003e\u003cspan\u003e180° Panorama (3×7): 8192×3500 pixels (Width×Height)\u003c\/span\u003e\u003cspan\u003e\u003cbr\u003e\u003c\/span\u003e\u003cspan\u003eSphere (3×8+1): 8192×4096 pixels (Width×Height)\u003c\/span\u003e\n\u003c\/li\u003e\n\u003c\/ul\u003e\n\u003cul style=\"text-align: left;\"\u003e\n\u003cli style=\"font-weight: 400;\"\u003e\u003cb\u003eVideo Resolution and Frame Rates\u003c\/b\u003e\u003c\/li\u003e\n\u003cli style=\"font-weight: 400;\"\u003e\n\u003cspan style=\"font-weight: 400;\"\u003e4K Ultra HD: 3840×2160 24\/25\/30\/48\/50\/60 fps\u003c\/span\u003e\u003cspan style=\"font-weight: 400;\"\u003e\u003cbr\u003e\u003c\/span\u003e\u003cspan style=\"font-weight: 400;\"\u003e2.7K: 2688×1512 24\/25\/30\/48\/50\/60 fps\u003c\/span\u003e\u003cspan style=\"font-weight: 400;\"\u003e\u003cbr\u003e\u003c\/span\u003e\u003cspan style=\"font-weight: 400;\"\u003eFHD: 1920×1080 24\/25\/30\/48\/50\/60\/120\/240 fps\u003c\/span\u003e\u003cspan style=\"font-weight: 400;\"\u003e\u003cbr\u003e\u003c\/span\u003e\u003cspan style=\"font-weight: 400;\"\u003e4K Ultra HD HDR: 3840×2160 24\/25\/30 fps\u003c\/span\u003e\u003cspan style=\"font-weight: 400;\"\u003e\u003cbr\u003e\u003c\/span\u003e\u003cspan style=\"font-weight: 400;\"\u003e2.7K HDR: 2688×1512 24\/25\/30 fps\u003c\/span\u003e\u003cspan style=\"font-weight: 400;\"\u003e\u003cbr\u003e\u003c\/span\u003e\u003cspan style=\"font-weight: 400;\"\u003eFHD HDR: 1920×1080 24\/25\/30 fps\u003c\/span\u003e\n\u003c\/li\u003e\n\u003c\/ul\u003e\n\u003cul style=\"text-align: left;\"\u003e\n\u003cli style=\"font-weight: 400;\"\u003e\u003cb\u003eColor Profiles\u003c\/b\u003e\u003c\/li\u003e\n\u003cli style=\"font-weight: 400;\"\u003e\u003cspan style=\"font-weight: 400;\"\u003eD-Cinelike, Normal\u003c\/span\u003e\u003c\/li\u003e\n\u003c\/ul\u003e\n\u003cul style=\"text-align: left;\"\u003e\n\u003cli style=\"font-weight: 400;\"\u003e\u003cb\u003eSupported SD Cards\u003c\/b\u003e\u003c\/li\u003e\n\u003cli style=\"font-weight: 400;\"\u003e\u003cspan style=\"font-weight: 400;\"\u003eSupports a microSD with capacity of up to 256 GB\u003c\/span\u003e\u003c\/li\u003e\n\u003c\/ul\u003e\n\u003cul style=\"text-align: left;\"\u003e\n\u003cli style=\"font-weight: 400;\"\u003e\u003cb\u003eSupported File Systems\u003c\/b\u003e\u003c\/li\u003e\n\u003cli style=\"font-weight: 400;\"\u003e\u003cspan style=\"font-weight: 400;\"\u003eFAT32 and exFAT\u003c\/span\u003e\u003c\/li\u003e\n\u003c\/ul\u003e\n\u003cul style=\"text-align: center;\"\u003e\n\u003cli style=\"font-weight: 400; text-align: left;\"\u003e\u003cb\u003eZoom\u003c\/b\u003e\u003c\/li\u003e\n\u003cli style=\"font-weight: 400; text-align: left;\"\u003e\u003cspan style=\"font-weight: 400;\"\u003eAvailable\u003c\/span\u003e\u003c\/li\u003e\n\u003c\/ul\u003e\n\u003c\/div\u003e\n\u003c\/div\u003e"}
Translation missing: en.products.product.regular_price$10.00$9.00 On SaleTranslation missing: en.products.product.regular_price $1,088.00 Sold OutInsta360 GO 2 Lens Guard
Insta360 GO 2 Action camera accessories | Lens Guard
Specially designed for Insta360 GO 2 sports camera accessories
 Screw-on replaceable lens protector.
Designed with hardened glass and an anti-fogging protective coating.
High definition and light transmittance, showing real camera lens color and image quality.
Insta360 GO 2 camera fits accurately and fully covers the camera lens to prevent scratches, dust, oil, and fingerprints on the camera lens.
2.5D curved rounded edges. Easy to install and no air bubbles.
Guidelines for replacing the lens protector

1. Twist the lens guard counterclockwise to remove it.
2. Twist the lens guard clockwise to secure onto the lens.
Note
- Before use, please make sure that the rubber ring of the lens protection lens and the lens are clean and dry. Be sure to install the lens protector in a clean and dry environment. Any dust or dirt on the lens or lens protector may affect the shooting effect.
- Before using it underwater, be sure to install the GO 2 lens protector. Without the lens protector, GO 2 is not waterproof. Please securely tighten the lens protector to prevent image quality problems.
Size: 3.86 x 2.52 x 0.55 inches-
{"id":6592445022283,"title":"DJI Mavic Air 2 Fly More Combo - Drone Quadcopter UAV with 4K Video|48MP Camera|34min Flight Time|8K Hyperlapse 1\/2\" CMOS Sensor|ActiveTrack 3.0|3-Axis Gimba|Ocusync 2.0","handle":"dji-mavic-air-2-fly-more-combo-drone-quadcopter-uav-with-4k-video-48mp-camera-34min-flight-time-8k-hyperlapse-1-2-cmos-sensor-activetrack-3-0-3-axis-gimba-ocusync-2-0","description":"\u003ch1 style=\"text-align: center;\"\u003e\u003cstrong\u003eDJI Mavic Air 2 - giving you a new photos and video recording experience\u003c\/strong\u003e\u003c\/h1\u003e\u003cdiv class=\"desc\"\u003e\n\u003ch2 style=\"text-align: center;\"\u003eThe DJI Mavic Air 2 pushes power and portability to new heights, with advanced capabilities packed into a small package. \u003c\/h2\u003e\n\u003cstyle\u003e\u003c!--\n.embed-container { position: relative; padding-bottom: 56.25%; height: 0; overflow: hidden; max-width: 100%; } .embed-container iframe, .embed-container object, .embed-container embed { position: absolute; top: 0; left: 0; width: 100%; height: 100%; }\n--\u003e\u003c\/style\u003e\n\u003cdiv style=\"text-align: center;\" class=\"embed-container\"\u003e\u003ciframe src=\"https:\/\/www.youtube.com\/embed\/StDjsvNFru0\" allowfullscreen=\"\" frameborder=\"0\"\u003e\u003c\/iframe\u003e\u003c\/div\u003e\n\u003cdiv style=\"text-align: center;\"\u003e \u003c\/div\u003e\n\u003ch3 style=\"text-align: center;\"\u003e\u003cspan style=\"font-weight: 400;\"\u003eAerial masterpieces are within reach thanks to intelligent shooting functions and superb image quality. You can raise your game while fully enjoying the creative process with safer, smarter flight.\u003c\/span\u003e\u003c\/h3\u003e\n\u003ch2 style=\"text-align: center;\"\u003e\u003cstrong\u003eFeature\u003c\/strong\u003e\u003c\/h2\u003e\n\u003cdiv style=\"text-align: center;\"\u003e\u003c\/div\u003e\n\u003cdiv style=\"text-align: center;\"\u003e\n\u003ctable\u003e\n\u003ctbody\u003e\n\u003ctr\u003e\n\u003ctd style=\"text-align: center;\"\u003e\n\u003cp\u003e\u003cstrong\u003eUltra-Clear Details \u003c\/strong\u003e\u003c\/p\u003e\n\u003cp\u003e\u003cspan style=\"font-weight: 400;\"\u003e1\/2-Inch Image Sensor \u003c\/span\u003e\u003c\/p\u003e\n\u003cp\u003e\u003cspan style=\"font-weight: 400;\"\u003e4K\/60fps Video \u003c\/span\u003e\u003c\/p\u003e\n\u003cp\u003e\u003cspan style=\"font-weight: 400;\"\u003e48MP Photo\u003c\/span\u003e\u003c\/p\u003e\n\u003c\/td\u003e\n\u003ctd style=\"text-align: center;\"\u003e\n\u003cp\u003e\u003cstrong\u003eEnhanced HDR \u003c\/strong\u003e\u003c\/p\u003e\n\u003cp\u003e\u003cspan style=\"font-weight: 400;\"\u003ePhoto \u003c\/span\u003e\u003c\/p\u003e\n\u003cp\u003e\u003cspan style=\"font-weight: 400;\"\u003eVideo \u003c\/span\u003e\u003c\/p\u003e\n\u003cp\u003e\u003cspan style=\"font-weight: 400;\"\u003ePanorama\u003c\/span\u003e\u003c\/p\u003e\n\u003c\/td\u003e\n\u003c\/tr\u003e\n\u003ctr\u003e\n\u003ctd style=\"text-align: center;\"\u003e\n\u003cp\u003e\u003cstrong\u003eFly Smarter and Safer \u003c\/strong\u003e\u003c\/p\u003e\n\u003cp\u003e\u003cspan style=\"font-weight: 400;\"\u003eAPAS 3.0 Obstacle Avoidance\u003c\/span\u003e\u003c\/p\u003e\n\u003c\/td\u003e\n\u003ctd style=\"text-align: center;\"\u003e\n\u003cp\u003e\u003cstrong\u003eFly Farther, See Clearer \u003c\/strong\u003e\u003c\/p\u003e\n\u003cp\u003e\u003cspan style=\"font-weight: 400;\"\u003eOcuSync 2.0 10km 1080p\/30fps Video Transmission\u003c\/span\u003e\u003c\/p\u003e\n\u003c\/td\u003e\n\u003c\/tr\u003e\n\u003ctr\u003e\n\u003ctd style=\"text-align: center;\"\u003e\n\u003cp\u003e\u003cstrong\u003eFly Longer \u003c\/strong\u003e\u003c\/p\u003e\n\u003cp\u003e\u003cspan\u003e34-Min Max Flight Time \u003c\/span\u003e\u003c\/p\u003e\n\u003cp\u003e\u003cspan\u003e240-Min Max RC Battery Life\u003c\/span\u003e\u003c\/p\u003e\n\u003c\/td\u003e\n\u003ctd style=\"text-align: center;\"\u003e\n\u003cp\u003e\u003cstrong\u003eCinematic Content \u003c\/strong\u003e\u003c\/p\u003e\n\u003cp\u003e\u003cspan\u003e8K Hyperlapse \u003c\/span\u003e\u003c\/p\u003e\n\u003cp\u003e\u003cspan\u003eQuickShots\u003c\/span\u003e\u003c\/p\u003e\n\u003c\/td\u003e\n\u003c\/tr\u003e\n\u003c\/tbody\u003e\n\u003c\/table\u003e\n\u003c\/div\u003e\n\u003cdiv style=\"text-align: center;\"\u003e\u003cb\u003e\u003cimg alt=\"dji-mavic-air-2-fly-more-combo-drone-content-feature-all\" src=\"https:\/\/cdn.shopify.com\/s\/files\/1\/2532\/7020\/files\/dji-mavic-air-2-fly-more-combo-drone-content-feature-all.jpg?v=1626148044\"\u003e\u003c\/b\u003e\u003c\/div\u003e\n\u003ch3 style=\"text-align: center;\"\u003e\u003cspan style=\"color: #ff8000;\"\u003e\u003cb\u003e\u003c\/b\u003e\u003c\/span\u003e\u003c\/h3\u003e\n\u003ch3 style=\"text-align: center;\"\u003e\u003cspan style=\"color: #ff8000;\"\u003e\u003cb\u003eHigh Image Quality\u003c\/b\u003e\u003c\/span\u003e\u003c\/h3\u003e\n\u003cdiv style=\"text-align: center;\"\u003e\u003cb\u003eEpic is Simple, with 4K\/60fps Video \u003c\/b\u003e\u003c\/div\u003e\n\u003cdiv style=\"text-align: center;\"\u003e\u003cspan style=\"font-weight: 400;\"\u003eFootage Master creative aerial views with 4K\/60fps video that is effortlessly fluid. For post-processing, the D-Cinelike flat color profile maintains more information. The HEVC (H.265) video codec records more visual information, uses less storage, and keeps your footage's dynamic range and quality, delivering next-level content.\u003cbr data-mce-fragment=\"1\"\u003e\u003c\/span\u003e\u003c\/div\u003e\n\u003cdiv style=\"text-align: center;\"\u003e\u003cspan style=\"font-weight: 400;\"\u003e\u003cimg alt=\"dji-mavic-air-2-fly-more-combo-drone-content-feature-1-image-quality\" src=\"https:\/\/cdn.shopify.com\/s\/files\/1\/2532\/7020\/files\/dji-mavic-air-2-fly-more-combo-drone-content-feature-1-image-quality.jpg?v=1626148092\"\u003e\u003c\/span\u003e\u003c\/div\u003e\n\u003ch3 style=\"text-align: center;\"\u003e\u003cspan style=\"color: #ff8000;\"\u003e\u003cb\u003e\u003c\/b\u003e\u003c\/span\u003e\u003c\/h3\u003e\n\u003ch3 style=\"text-align: center;\"\u003e\u003cspan style=\"color: #ff8000;\"\u003e\u003cb\u003eHDR Video\u003c\/b\u003e\u003c\/span\u003e\u003c\/h3\u003e\n\u003cdiv style=\"text-align: center;\"\u003e\u003cb\u003eBy default, everything is dynamic.\u003cbr data-mce-fragment=\"1\"\u003e\u003c\/b\u003e\u003c\/div\u003e\n\u003cdiv style=\"text-align: center;\"\u003e\u003cspan style=\"font-weight: 400;\"\u003eA high-performance Quad Bayer image sensor is the key to outstanding HDR video. A single frame captures light and dark details by separating exposure levels in different places. The photos are stacked to create a picture with a higher dynamic range that is vibrant, balanced, and appealing.\u003c\/span\u003e\u003c\/div\u003e\n\u003cdiv style=\"text-align: center;\"\u003e\u003cspan style=\"font-weight: 400;\"\u003e\u003cimg alt=\"dji-mavic-air-2-fly-more-combo-drone-content-feature-2-hdr-video\" src=\"https:\/\/cdn.shopify.com\/s\/files\/1\/2532\/7020\/files\/dji-mavic-air-2-fly-more-combo-drone-content-feature-2-hdr-video.jpg?v=1626148113\"\u003e\u003c\/span\u003e\u003c\/div\u003e\n\u003ch3 style=\"text-align: center;\"\u003e\u003cspan style=\"color: #ff8000;\"\u003e\u003cb\u003e\u003c\/b\u003e\u003c\/span\u003e\u003c\/h3\u003e\n\u003ch3 style=\"text-align: center;\"\u003e\u003cspan style=\"color: #ff8000;\"\u003e\u003cb\u003eAll in the Details\u003c\/b\u003e\u003c\/span\u003e\u003c\/h3\u003e\n\u003cdiv style=\"text-align: center;\"\u003e\u003cb\u003e48MP Photos\u003c\/b\u003e\u003c\/div\u003e\n\u003cdiv style=\"text-align: center;\"\u003e\u003cspan style=\"font-weight: 400;\"\u003eMavic Air 2 has a 1\/2-inch CMOS sensor that captures 48MP photographs. Prepare to take your airborne content to new heights.\u003cbr data-mce-fragment=\"1\"\u003eThe 48MP camera has a high megapixel count, which means that even when zooming in on an image, you can see vivid details.\u003c\/span\u003e\u003c\/div\u003e\n\u003cdiv style=\"text-align: center;\"\u003e\u003cspan style=\"font-weight: 400;\"\u003e\u003cimg alt=\"dji-mavic-air-2-fly-more-combo-drone-content-feature-3-48mp\" src=\"https:\/\/cdn.shopify.com\/s\/files\/1\/2532\/7020\/files\/dji-mavic-air-2-fly-more-combo-drone-content-feature-3-48mp.jpg?v=1626148140\"\u003e\u003c\/span\u003e\u003c\/div\u003e\n\u003ch3 style=\"text-align: center;\"\u003e\u003cspan style=\"color: #ff8000;\"\u003e\u003cb\u003e\u003c\/b\u003e\u003c\/span\u003e\u003c\/h3\u003e\n\u003ch3 style=\"text-align: center;\"\u003e\u003cspan style=\"color: #ff8000;\"\u003e\u003cb\u003eOptimized Capture\u003c\/b\u003e\u003c\/span\u003e\u003c\/h3\u003e\n\u003cdiv style=\"text-align: center;\"\u003e\u003cb\u003eSmartPhoto\u003c\/b\u003e\u003c\/div\u003e\n\u003cdiv style=\"text-align: center;\"\u003e\u003cspan style=\"font-weight: 400;\"\u003eSmartPhoto on the Mavic Air 2 combines scene recognition, HyperLight, and HDR into a single setting for optimal results. Scene recognition optimizes camera parameters for different scenes and offers intelligent recognition of five different categories: sunsets, sky, grass, snow, and trees. The resolution of photos taken in SmartPhoto mode is 12 MP.\u003c\/span\u003e\u003c\/div\u003e\n\u003cdiv style=\"text-align: center;\"\u003e\n\u003ctable width=\"100%\"\u003e\n\u003ctbody\u003e\n\u003ctr\u003e\n\u003ctd\u003e\n\u003cp\u003e\u003cimg alt=\"dji-mavic-air-2-fly-more-combo-drone-content-feature-4-1-Strong-Lighting-Conditions\" src=\"https:\/\/cdn.shopify.com\/s\/files\/1\/2532\/7020\/files\/dji-mavic-air-2-fly-more-combo-drone-content-feature-4-1-Strong-Lighting-Conditions.jpg?v=1626148348\"\u003e\u003c\/p\u003e\n\u003c\/td\u003e\n\u003ctd\u003e\u003cimg alt=\"dji-mavic-air-2-fly-more-combo-drone-content-feature-4-2-Weak-Lighting-Conditions\" src=\"https:\/\/cdn.shopify.com\/s\/files\/1\/2532\/7020\/files\/dji-mavic-air-2-fly-more-combo-drone-content-feature-4-2-Weak-Lighting-Conditions.jpg?v=1626148384\"\u003e\u003c\/td\u003e\n\u003c\/tr\u003e\n\u003ctr\u003e\n\u003ctd\u003e\n\u003cp data-mce-fragment=\"1\"\u003e\u003cstrong\u003eStrong Lighting\u003c\/strong\u003e\u003c\/p\u003e\n\u003cp data-mce-fragment=\"1\"\u003eConditions HyperLight improves the sharpness of images taken in low-light circumstances by reducing noise.\u003c\/p\u003e\n\u003c\/td\u003e\n\u003ctd\u003e\n\u003cp\u003e\u003cstrong\u003eWeak Lighting Conditions\u003c\/strong\u003e\u003c\/p\u003e\n\u003cp data-mce-fragment=\"1\"\u003e\u003cspan data-mce-fragment=\"1\"\u003eHyperLight improves the sharpness of images taken in low-light circumstances by reducing noise.\u003c\/span\u003e\u003c\/p\u003e\n\u003c\/td\u003e\n\u003c\/tr\u003e\n\u003c\/tbody\u003e\n\u003c\/table\u003e\n\u003c\/div\u003e\n\u003cdiv style=\"text-align: center;\"\u003e \u003c\/div\u003e\n\u003cdiv style=\"text-align: center;\"\u003e \u003c\/div\u003e\n\u003ch3 style=\"text-align: center;\"\u003e\u003cspan style=\"color: #ff8000;\"\u003e\u003cb\u003eHDR Panorama\u003c\/b\u003e\u003c\/span\u003e\u003c\/h3\u003e\n\u003cdiv style=\"text-align: center;\"\u003e\u003cb\u003eLook at the Big Picture\u003c\/b\u003e\u003c\/div\u003e\n\u003cdiv style=\"text-align: center;\"\u003e\u003cspan style=\"font-weight: 400;\"\u003eThe Mavic Air 2 has DJI's most sophisticated panorama mode, with a larger dynamic range and vibrant, amazingly realistic colors.\u003c\/span\u003e\u003c\/div\u003e\n\u003cdiv style=\"text-align: center;\"\u003e\u003cspan style=\"font-weight: 400;\"\u003e\u003cimg alt=\"dji-mavic-air-2-fly-more-combo-drone-content-feature-5-HDR-Panorama\" src=\"https:\/\/cdn.shopify.com\/s\/files\/1\/2532\/7020\/files\/dji-mavic-air-2-fly-more-combo-drone-content-feature-5-HDR-Panorama.jpg?v=1626148445\"\u003e\u003c\/span\u003e\u003c\/div\u003e\n\u003ch3 style=\"text-align: center;\"\u003e\u003cspan style=\"color: #ff8000;\"\u003e\u003cb\u003e\u003c\/b\u003e\u003c\/span\u003e\u003c\/h3\u003e\n\u003ch3 style=\"text-align: center;\"\u003e\u003cspan style=\"color: #ff8000;\"\u003e\u003cb\u003eIntelligent Features\u003c\/b\u003e\u003c\/span\u003e\u003c\/h3\u003e\n\u003cdiv style=\"text-align: center;\"\u003e\u003cb\u003eObtaining Cinematic Shots\u003c\/b\u003e\u003c\/div\u003e\n\u003cdiv style=\"text-align: center;\"\u003e\u003cspan style=\"font-weight: 400;\"\u003eFor breathtaking results, the Mavic Air 2 combines a powerful camera with intelligent shooting modes. Aerial photography has never been easier to create.\u003c\/span\u003e\u003c\/div\u003e\n\u003cdiv style=\"text-align: center;\"\u003e\u003cspan style=\"font-weight: 400;\"\u003e\u003cimg alt=\"dji-mavic-air-2-fly-more-combo-drone-content-feature-6-Intelligent-Features\" src=\"https:\/\/cdn.shopify.com\/s\/files\/1\/2532\/7020\/files\/dji-mavic-air-2-fly-more-combo-drone-content-feature-6-Intelligent-Features.jpg?v=1626148481\"\u003e\u003c\/span\u003e\u003c\/div\u003e\n\u003ch3 style=\"text-align: center;\"\u003e\u003cspan style=\"color: #ff8000;\"\u003e\u003cb\u003e\u003c\/b\u003e\u003c\/span\u003e\u003c\/h3\u003e\n\u003ch3 style=\"text-align: center;\"\u003e\u003cspan style=\"color: #ff8000;\"\u003e\u003cb\u003eFocusTrack\u003c\/b\u003e\u003c\/span\u003e\u003c\/h3\u003e\n\u003cdiv style=\"text-align: center;\"\u003e\u003cb\u003eMaster the Skies\u003c\/b\u003e\u003c\/div\u003e\n\u003cdiv style=\"text-align: center;\"\u003e\u003cspan style=\"font-weight: 400;\"\u003eWith FocusTrack, capturing professional-quality footage is a breeze. Active Track 3.0, Spotlight 2.0, and Point of Interest 3.0 are among the easy-to-use intelligent tracking modes that let you express yourself.\u003c\/span\u003e\u003c\/div\u003e\n\u003cdiv style=\"text-align: center;\"\u003e \u003c\/div\u003e\n\u003cdiv style=\"text-align: center;\"\u003e\n\u003ctable width=\"100%\" data-mce-fragment=\"1\"\u003e\n\u003ctbody data-mce-fragment=\"1\"\u003e\n\u003ctr data-mce-fragment=\"1\"\u003e\n\u003ctd data-mce-fragment=\"1\"\u003e\n\u003cp\u003e \u003c\/p\u003e\n\u003cdiv style=\"text-align: left;\"\u003e\u003cimg style=\"float: none;\" alt=\"dji-mavic-air-2-fly-more-combo-drone-content-feature-7-1-Spotlight 2.0\" src=\"https:\/\/cdn.shopify.com\/s\/files\/1\/2532\/7020\/files\/dji-mavic-air-2-fly-more-combo-drone-content-feature-7-1-Spotlight_2.0.jpg?v=1626148537\"\u003e\u003c\/div\u003e\n\u003c\/td\u003e\n\u003ctd data-mce-fragment=\"1\"\u003e\n\u003cp\u003e\u003cimg src=\"https:\/\/cdn.shopify.com\/s\/files\/1\/2532\/7020\/files\/dji-mavic-air-2-fly-more-combo-drone-content-feature-7-2-ActiveTrack_3.0.jpg?v=1626148709\" alt=\"dji-mavic-air-2-fly-more-combo-drone-content-feature-7-2-ActiveTrack 3.0\" data-mce-fragment=\"1\" data-mce-src=\"https:\/\/cdn.shopify.com\/s\/files\/1\/2532\/7020\/files\/dji-mavic-air-2-fly-more-combo-drone-content-feature-7-2-ActiveTrack_3.0.jpg?v=1626148709\"\u003e\u003cbr\u003e\u003c\/p\u003e\n\u003c\/td\u003e\n\u003ctd data-mce-fragment=\"1\"\u003e\n\u003cp\u003e\u003cimg src=\"https:\/\/cdn.shopify.com\/s\/files\/1\/2532\/7020\/files\/dji-mavic-air-2-fly-more-combo-drone-content-feature-7-3-POI_3.0.jpg?v=1626148918\" alt=\"dji-mavic-air-2-fly-more-combo-drone-content-feature-7-3-POI 3.0\" data-mce-fragment=\"1\" data-mce-src=\"https:\/\/cdn.shopify.com\/s\/files\/1\/2532\/7020\/files\/dji-mavic-air-2-fly-more-combo-drone-content-feature-7-3-POI_3.0.jpg?v=1626148918\"\u003e\u003cbr\u003e\u003c\/p\u003e\n\u003c\/td\u003e\n\u003c\/tr\u003e\n\u003ctr data-mce-fragment=\"1\"\u003e\n\u003ctd data-mce-fragment=\"1\"\u003e\n\u003cp\u003e\u003cstrong\u003eSpotlight 2.0\u003c\/strong\u003e\u003c\/p\u003e\n\u003cp\u003eWith this handy mode, you may fly around freely while the camera remains fixed on the subject. Simply choose your target and take off.\u003c\/p\u003e\n\u003c\/td\u003e\n\u003ctd data-mce-fragment=\"1\"\u003e\n\u003cp\u003e\u003cstrong\u003eActiveTrack 3.0\u003c\/strong\u003e\u003c\/p\u003e\n\u003cp\u003eWith the latest version of DJI's ActiveTrack technology, following subjects while avoiding obstacles has never been easier. This technique keeps your subject in the center of the screen, even if they go behind a tree, with superior pathfinding and a faster and more accurate prediction of lost subjects.\u003c\/p\u003e\n\u003c\/td\u003e\n\u003ctd data-mce-fragment=\"1\"\u003e\n\u003cp\u003e\u003cstrong\u003ePOI 3.0\u003c\/strong\u003e\u003c\/p\u003e\n\u003cp\u003ePOI 3.0 enhances the capabilities of POI 2.0, particularly in terms of flat surface recognition. This updated functionality avoids the problem that POI 2.0 had with losing the target during tracking. POI 3.0 now has the ability to track people, cars, and boats in real time.\u003c\/p\u003e\n\u003c\/td\u003e\n\u003c\/tr\u003e\n\u003c\/tbody\u003e\n\u003c\/table\u003e\n\u003c\/div\u003e\n\u003ch3 style=\"text-align: center;\"\u003e\u003cb\u003e\u003cspan style=\"color: #ff8000;\"\u003e8K Hyperlapse\u003c\/span\u003e\u003c\/b\u003e\u003c\/h3\u003e\n\u003cdiv style=\"text-align: center;\"\u003e\u003cb\u003eTime and Movement\u003c\/b\u003e\u003c\/div\u003e\n\u003cdiv style=\"text-align: center;\"\u003e\u003cspan style=\"font-weight: 400;\"\u003eHyperlapse in 8K is supported by the Mavic Air 2, allowing you to warp time and space for particularly spectacular film. Best of all, you can get this photo without using any complicated post-production techniques. Choose from Free, Circle, Course Lock, and Waypoint modes, then point and shoot using the DJI Fly app. *8K resolution is only available in Free and Waypoint modes.\u003c\/span\u003e\u003c\/div\u003e\n\u003cdiv style=\"text-align: center;\"\u003e\n\u003cul\u003e\n\u003cli style=\"font-weight: 400;\"\u003e\u003cspan style=\"font-weight: 400;\"\u003eCourse Lock\u003c\/span\u003e\u003c\/li\u003e\n\u003cli style=\"font-weight: 400;\"\u003e\u003cspan style=\"font-weight: 400;\"\u003eFree\u003c\/span\u003e\u003c\/li\u003e\n\u003cli style=\"font-weight: 400;\"\u003e\u003cspan style=\"font-weight: 400;\"\u003eWaypoint\u003c\/span\u003e\u003c\/li\u003e\n\u003cli style=\"font-weight: 400;\"\u003e\u003cspan style=\"font-weight: 400;\"\u003eCircle\u003c\/span\u003e\u003c\/li\u003e\n\u003c\/ul\u003e\n\u003c\/div\u003e\n\u003cdiv style=\"text-align: center;\"\u003e\n\u003cimg src=\"https:\/\/cdn.shopify.com\/s\/files\/1\/2532\/7020\/files\/dji-mavic-air-2-fly-more-combo-drone-content-feature-8-2-free.jpg?v=1626148985\" alt=\"dji-mavic-air-2-fly-more-combo-drone-content-feature-8-2-free\" data-mce-fragment=\"1\" data-mce-src=\"https:\/\/cdn.shopify.com\/s\/files\/1\/2532\/7020\/files\/dji-mavic-air-2-fly-more-combo-drone-content-feature-8-2-free.jpg?v=1626148985\"\u003e\u003cbr\u003e\n\u003c\/div\u003e\n\u003cdiv style=\"text-align: center;\"\u003e \u003c\/div\u003e\n\u003ch3 style=\"text-align: center;\"\u003e\u003cspan style=\"color: #ff8000;\"\u003e\u003cb\u003eQuickShots\u003c\/b\u003e\u003c\/span\u003e\u003c\/h3\u003e\n\u003cdiv style=\"text-align: center;\"\u003e\u003cb\u003eImagination Simplified\u003c\/b\u003e\u003c\/div\u003e\n\u003cdiv style=\"text-align: center;\"\u003e\u003cspan style=\"font-weight: 400;\"\u003eQuickShots allows you to capture cinematic video snippets automatically. Mavic Air 2 prepares and flies a difficult aerial route for a professional-quality photo with just a few touches. With super-intuitive Story templates, you can add music, effects, and filters to your creation before sharing it on social media.\u003c\/span\u003e\u003c\/div\u003e\n\u003cdiv style=\"text-align: center;\"\u003e\n\u003cul\u003e\n\u003cli style=\"font-weight: 400;\"\u003e\u003cspan style=\"font-weight: 400;\"\u003eDronie\u003c\/span\u003e\u003c\/li\u003e\n\u003cli style=\"font-weight: 400;\"\u003e\u003cspan style=\"font-weight: 400;\"\u003eCircle\u003c\/span\u003e\u003c\/li\u003e\n\u003cli style=\"font-weight: 400;\"\u003e\u003cspan style=\"font-weight: 400;\"\u003eHelix\u003c\/span\u003e\u003c\/li\u003e\n\u003cli style=\"font-weight: 400;\"\u003e\u003cspan style=\"font-weight: 400;\"\u003eRocket\u003c\/span\u003e\u003c\/li\u003e\n\u003cli style=\"font-weight: 400;\"\u003e\u003cspan style=\"font-weight: 400;\"\u003eBoomerang\u003c\/span\u003e\u003c\/li\u003e\n\u003cli style=\"font-weight: 400;\"\u003e\u003cspan style=\"font-weight: 400;\"\u003eAsteroid\u003c\/span\u003e\u003c\/li\u003e\n\u003c\/ul\u003e\n\u003c\/div\u003e\n\u003ch3 style=\"text-align: center;\"\u003e\u003cspan style=\"color: #ff8000;\"\u003e\u003cb\u003e\u003c\/b\u003e\u003c\/span\u003e\u003c\/h3\u003e\n\u003ch3 style=\"text-align: center;\"\u003e\u003cspan style=\"color: #ff8000;\"\u003e\u003cb\u003eFlight and Safety\u003c\/b\u003e\u003c\/span\u003e\u003c\/h3\u003e\n\u003cdiv style=\"text-align: center;\"\u003e\u003cb\u003eSafer Flight for Stunning Content\u003c\/b\u003e\u003c\/div\u003e\n\u003cdiv style=\"text-align: center;\"\u003e\u003cspan style=\"color: #ffffff;\"\u003e\u003cb\u003e.\u003c\/b\u003e\u003c\/span\u003e\u003c\/div\u003e\n\u003ch3 style=\"text-align: center;\"\u003e\u003cspan style=\"color: #ff8000;\"\u003e\u003cb\u003e\u003c\/b\u003e\u003c\/span\u003e\u003c\/h3\u003e\n\u003ch3 style=\"text-align: center;\"\u003e\u003cspan style=\"color: #ff8000;\"\u003e\u003cb\u003eOcuSync 2.0\u003c\/b\u003e\u003c\/span\u003e\u003c\/h3\u003e\n\u003cdiv style=\"text-align: center;\"\u003e\u003cb\u003eThe Sky’s the Limit\u003c\/b\u003e\u003c\/div\u003e\n\u003cdiv style=\"text-align: center;\"\u003e\u003cspan style=\"font-weight: 400;\"\u003eOcuSync 2.0 can give a 1080p FHD livestream directly from the drone's camera and has a video transmission distance of up to 10 kilometers. Enjoy greater freedom when it comes to exploring and more clarity when it comes to capturing the perfect photo. \u003cbr data-mce-fragment=\"1\"\u003e\u003cbr data-mce-fragment=\"1\"\u003e*When unobstructed, interference-free, and FCC-compliant. The maximum flying range specification is a proxy for the strength and robustness of the radio link.\u003c\/span\u003e\u003c\/div\u003e\n\u003cdiv style=\"text-align: center;\"\u003e\u003cspan style=\"font-weight: 400;\"\u003e\u003cimg alt=\"dji-mavic-air-2-fly-more-combo-drone-content-feature-9-OcuSync 2.0\" src=\"https:\/\/cdn.shopify.com\/s\/files\/1\/2532\/7020\/files\/dji-mavic-air-2-fly-more-combo-drone-content-feature-9-OcuSync_2.0.jpg?v=1626149011\"\u003e\u003c\/span\u003e\u003c\/div\u003e\n\u003cdiv style=\"text-align: center;\"\u003e \u003c\/div\u003e\n\u003ch3 style=\"text-align: center;\"\u003e\u003cspan style=\"color: #ff8000;\"\u003e\u003cb\u003e2.4\/5.8GHz Dual Frequency\u003c\/b\u003e\u003c\/span\u003e\u003c\/h3\u003e\n\u003cdiv style=\"text-align: center;\"\u003e\u003cb\u003eSmooth Flight, Reliable Signal\u003cbr data-mce-fragment=\"1\"\u003e\u003c\/b\u003e\u003c\/div\u003e\n\u003cdiv style=\"text-align: center;\"\u003e\u003cspan style=\"font-weight: 400;\"\u003eThe Mavic Air 2 has dual-frequency connectivity (2.4\/5.8GHz) and automatically shifts to the best channel with the least interference in real time. This increases flight safety by greatly improving the aircraft's anti-interference ability in adverse circumstances. \u003cbr data-mce-fragment=\"1\"\u003e\u003cbr data-mce-fragment=\"1\"\u003e*Some countries do not accept 5.8 GHz transmission due to local laws.\u003c\/span\u003e\u003c\/div\u003e\n\u003cdiv style=\"text-align: center;\"\u003e\u003cspan style=\"font-weight: 400; color: #ffffff;\"\u003e.\u003c\/span\u003e\u003c\/div\u003e\n\u003ch3 style=\"text-align: center;\"\u003e\u003cspan style=\"color: #ff8000;\"\u003e\u003cb\u003e\u003c\/b\u003e\u003c\/span\u003e\u003c\/h3\u003e\n\u003ch3 style=\"text-align: center;\"\u003e\u003cspan style=\"color: #ff8000;\"\u003e\u003cb\u003eBattery and Flight\u003c\/b\u003e\u003c\/span\u003e\u003c\/h3\u003e\n\u003cdiv style=\"text-align: center;\"\u003e\u003cb\u003eFly Longer\u003c\/b\u003e\u003c\/div\u003e\n\u003cdiv style=\"text-align: center;\"\u003e\u003cspan style=\"font-weight: 400;\"\u003eWith a battery life of up to 34 minutes and a maximum flight speed of 68 kph in Sport mode, you'll be able to stay in the air for as long as you want to obtain the ideal image. \u003cbr data-mce-fragment=\"1\"\u003e\u003cbr data-mce-fragment=\"1\"\u003e*Flight time was recorded at a 9° angle and a speed of 5.1 m\/s in a windless environment.\u003c\/span\u003e\u003c\/div\u003e\n\u003cdiv style=\"text-align: center;\"\u003e \u003c\/div\u003e\n\u003cdiv style=\"text-align: center;\"\u003e\u003cspan style=\"font-weight: 400;\"\u003e\u003cimg alt=\"dji-mavic-air-2-fly-more-combo-drone-content-feature-10-battery\" src=\"https:\/\/cdn.shopify.com\/s\/files\/1\/2532\/7020\/files\/dji-mavic-air-2-fly-more-combo-drone-content-feature-10-battery.jpg?v=1626149034\"\u003e\u003c\/span\u003e\u003c\/div\u003e\n\u003ch3 style=\"text-align: center;\"\u003e\u003cspan style=\"color: #ff8000;\"\u003e\u003cb\u003eObstacle Avoidance\u003c\/b\u003e\u003c\/span\u003e\u003c\/h3\u003e\n\u003cdiv style=\"text-align: center;\"\u003e\u003cb\u003eFly Safer\u003c\/b\u003e\u003c\/div\u003e\n\u003cdiv style=\"text-align: center;\"\u003e\u003cspan style=\"font-weight: 400;\"\u003eForward, backward, and downward are the three directions in which Mavic Air 2 observes its surroundings. An auxiliary light improves visibility, and obstacle avoidance adds an extra layer of security that's great for pushing the boundaries of what's possible.\u003c\/span\u003e\u003c\/div\u003e\n\u003cdiv style=\"text-align: center;\"\u003e\n\u003ctable\u003e\n\u003ctbody\u003e\n\u003ctr\u003e\n\u003ctd\u003e\n\u003cp\u003e\u003cb\u003eForward\u003c\/b\u003e\u003cspan style=\"font-weight: 400;\"\u003e: Vision sensor accurate up to 22 meters\u003c\/span\u003e\u003c\/p\u003e\n\u003c\/td\u003e\n\u003c\/tr\u003e\n\u003ctr\u003e\n\u003ctd\u003e\n\u003cp\u003e\u003cb\u003eBackward\u003c\/b\u003e\u003cspan style=\"font-weight: 400;\"\u003e: Vision sensor accurate up to 23.6 meters\u003c\/span\u003e\u003c\/p\u003e\n\u003c\/td\u003e\n\u003c\/tr\u003e\n\u003ctr\u003e\n\u003ctd\u003e\n\u003cp\u003e\u003cb\u003eDownward\u003c\/b\u003e\u003cspan style=\"font-weight: 400;\"\u003e: Vision sensor, infrared sensor. The auxiliary light assist with visual positioning, safe landing, and visibility in the air. It can be turned on and off manually.\u003c\/span\u003e\u003c\/p\u003e\n\u003c\/td\u003e\n\u003c\/tr\u003e\n\u003c\/tbody\u003e\n\u003c\/table\u003e\n\u003c\/div\u003e\n\u003cdiv style=\"text-align: center;\"\u003e\u003cspan style=\"color: #ffffff;\"\u003e\u003cb\u003e.\u003c\/b\u003e\u003c\/span\u003e\u003c\/div\u003e\n\u003cdiv style=\"text-align: center;\"\u003e\u003cb\u003e\u003c\/b\u003e\u003c\/div\u003e\n\u003cdiv style=\"text-align: center;\"\u003e\u003cb\u003eAPAS 3.0\u003c\/b\u003e\u003c\/div\u003e\n\u003cdiv style=\"text-align: center;\"\u003e\u003cspan style=\"font-weight: 400;\"\u003eIn difficult settings, Advanced Pilot Assistance Systems (APAS) 3.0 employs advanced mapping technology for smooth following and dependable obstacle avoidance. When compared to earlier generations, obstacle avoidance performance and autonomous flight planning have improved substantially, boosting safety and enabling more options.\u003c\/span\u003e\u003c\/div\u003e\n\u003cdiv style=\"text-align: center;\"\u003e\u003cspan style=\"font-weight: 400;\"\u003e*While recording in 4K at 60, 50, and 48 fps, 2.7K at 60, 50, and 48 fps, and 1080p at 120 and 240 fps, APAS 3.0 and FocusTrack are not available.\u003cbr data-mce-fragment=\"1\"\u003e\u003c\/span\u003e\u003c\/div\u003e\n\u003cstyle\u003e\u003c!--\n.embed-container { position: relative; padding-bottom: 56.25%; height: 0; overflow: hidden; max-width: 100%; } .embed-container iframe, .embed-container object, .embed-container embed { position: absolute; top: 0; left: 0; width: 100%; height: 100%; }\n--\u003e\u003c\/style\u003e\n\u003cdiv style=\"text-align: center;\" class=\"embed-container\"\u003e\u003ciframe src=\"https:\/\/www.youtube.com\/embed\/IwoyGb-NWDs\" frameborder=\"0\" allowfullscreen=\"\"\u003e\u003c\/iframe\u003e\u003c\/div\u003e\n\u003cdiv style=\"text-align: center;\"\u003e \u003c\/div\u003e\n\u003ch3 style=\"text-align: center;\"\u003e\u003cspan style=\"color: #ff8000;\"\u003e\u003cb\u003eDJI Fly App\u003c\/b\u003e\u003c\/span\u003e\u003c\/h3\u003e\n\u003cdiv style=\"text-align: center;\"\u003e\u003cb\u003eEffortless Editing\u003c\/b\u003e\u003c\/div\u003e\n\u003cdiv style=\"text-align: center;\"\u003e\u003cspan style=\"font-weight: 400;\"\u003eThe DJI Fly app makes creating perfect films easier than ever before. It incorporates the DJI Mimo app's editing suite, giving users access to manual settings, advanced functionalities, and intuitive templates to quickly produce professional compositions.\u003c\/span\u003e\u003c\/div\u003e\n\u003cdiv style=\"text-align: center;\"\u003e\u003cspan style=\"font-weight: 400;\"\u003e\u003cimg alt=\"dji-mavic-air-2-fly-more-combo-drone-content-feature-11-DJI-Fly-App\" src=\"https:\/\/cdn.shopify.com\/s\/files\/1\/2532\/7020\/files\/dji-mavic-air-2-fly-more-combo-drone-content-feature-11-DJI-Fly-App.jpg?v=1626149062\"\u003e\u003c\/span\u003e\u003c\/div\u003e\n\u003ch3 style=\"text-align: center;\"\u003e\u003cspan style=\"color: #ff8000;\"\u003e\u003cb\u003e\u003c\/b\u003e\u003c\/span\u003e\u003c\/h3\u003e\n\u003ch3 style=\"text-align: center;\"\u003e\u003cspan style=\"color: #ff8000;\"\u003e\u003cb\u003eRemote Controller \u003c\/b\u003e\u003c\/span\u003e\u003c\/h3\u003e\n\u003cdiv style=\"text-align: center;\"\u003e\u003cb\u003eDesigned for Pilots\u003c\/b\u003e\u003c\/div\u003e\n\u003cdiv style=\"text-align: center;\"\u003e\u003cspan style=\"font-weight: 400;\"\u003eThe newly designed remote controller has an ergonomic shape for a more comfortable grip and an excellent 240-minute battery life. The redesigned clamp makes it simple to attach devices, and the integrated antennas improve the user experience dramatically.\u003cbr data-mce-fragment=\"1\"\u003e*In an interference-free environment, battery life was measured using an Android phone.\u003c\/span\u003e\u003c\/div\u003e\n\u003cdiv style=\"text-align: center;\"\u003e\u003cspan style=\"font-weight: 400;\"\u003e\u003cimg alt=\"dji-mavic-air-2-fly-more-combo-drone-content-feature-12-remote\" src=\"https:\/\/cdn.shopify.com\/s\/files\/1\/2532\/7020\/files\/dji-mavic-air-2-fly-more-combo-drone-content-feature-12-remote.jpg?v=1626149088\"\u003e\u003c\/span\u003e\u003c\/div\u003e\n\u003cdiv style=\"text-align: center;\"\u003e \u003c\/div\u003e\n\u003ch3 style=\"text-align: center;\"\u003e\u003cspan style=\"color: #ff8000;\"\u003e\u003cb\u003eND Filters\u003c\/b\u003e\u003c\/span\u003e\u003c\/h3\u003e\n\u003cdiv style=\"text-align: center;\"\u003e\u003cb\u003eOptimal Options\u003c\/b\u003e\u003c\/div\u003e\n\u003cdiv style=\"text-align: center;\"\u003eThe Mavic Air 2 comes with two ND filter sets that help with exposure control and give you additional creative options. The ND 16\/64\/256 set is useful for altering shutter speed and in low-light situations, while the ND 4\/8\/32 set allows for colorful photographs even at low ISO.\u003cbr\u003e\u003cbr\u003e*The Fly More Combo comes with ND16\/64\/256 filters. Separately, the ND4\/8\/32 filter set can be ordered.\u003c\/div\u003e\n\u003cdiv style=\"text-align: center;\"\u003e\u003cspan style=\"font-weight: 400;\"\u003e\u003cimg alt=\"dji-mavic-air-2-fly-more-combo-drone-content-feature-13-ND-Filter\" src=\"https:\/\/cdn.shopify.com\/s\/files\/1\/2532\/7020\/files\/dji-mavic-air-2-fly-more-combo-drone-content-feature-13-ND-Filter.jpg?v=1626149110\"\u003e\u003c\/span\u003e\u003c\/div\u003e\n\u003cdiv style=\"text-align: center;\"\u003e \u003c\/div\u003e\n\u003ch2 style=\"text-align: left;\"\u003e\u003cstrong\u003eSpecification\u003c\/strong\u003e\u003c\/h2\u003e\n\u003cp\u003e \u003c\/p\u003e\n\u003cp\u003e \u003c\/p\u003e\n\u003cp\u003e \u003c\/p\u003e\n\u003cdiv style=\"text-align: left;\"\u003e\u003cb\u003eAircraft\u003c\/b\u003e\u003c\/div\u003e\n\u003cdiv style=\"text-align: left;\"\u003e\n\u003cul\u003e\n\u003cli style=\"font-weight: 400;\"\u003e\u003cb\u003eWeight\u003c\/b\u003e\u003c\/li\u003e\n\u003cli style=\"font-weight: 400;\"\u003e570 g\u003c\/li\u003e\n\u003c\/ul\u003e\n\u003cul\u003e\n\u003cli style=\"font-weight: 400;\"\u003e\u003cb\u003eSize\u003c\/b\u003e\u003c\/li\u003e\n\u003cli style=\"font-weight: 400;\"\u003e\n\u003cspan style=\"font-weight: 400;\"\u003eFolded:\u003c\/span\u003e\u003cspan style=\"font-weight: 400;\"\u003e\u003cbr\u003e\u003c\/span\u003e\u003cspan style=\"font-weight: 400;\"\u003e180×97×74 mm (Length×Width×Height)\u003c\/span\u003e\u003cspan style=\"font-weight: 400;\"\u003e\u003cbr\u003e\u003c\/span\u003e\u003cspan style=\"font-weight: 400;\"\u003eUnfolded:\u003c\/span\u003e\u003cspan style=\"font-weight: 400;\"\u003e\u003cbr\u003e\u003c\/span\u003e\u003cspan style=\"font-weight: 400;\"\u003e183×253×77 mm (Length×Width×Height)\u003c\/span\u003e\n\u003c\/li\u003e\n\u003c\/ul\u003e\n\u003cul\u003e\n\u003cli style=\"font-weight: 400;\"\u003e\u003cb\u003eDiagonal Distance\u003c\/b\u003e\u003c\/li\u003e\n\u003cli style=\"font-weight: 400;\"\u003e\u003cspan style=\"font-weight: 400;\"\u003e302 mm\u003c\/span\u003e\u003c\/li\u003e\n\u003cli\u003e\u003cb\u003eTransmitter Power (EIRP)\u003c\/b\u003e\u003c\/li\u003e\n\u003cli\u003e\n\u003cspan\u003e2.400-2.4835 GHz:\u003c\/span\u003e\u003cspan\u003e\u003cbr\u003e\u003c\/span\u003e\u003cspan\u003eFCC: ≤26 dBm\u003c\/span\u003e\u003cspan\u003e\u003cbr\u003e\u003c\/span\u003e\u003cspan\u003eCE: ≤20 dBm\u003c\/span\u003e\u003cspan\u003e\u003cbr\u003e\u003c\/span\u003e\u003cspan\u003eSRRC: ≤20 dBm\u003c\/span\u003e\u003cspan\u003e\u003cbr\u003e\u003c\/span\u003e\u003cspan\u003eMIC: ≤20 dBm\u003c\/span\u003e\u003cspan\u003e\u003cbr\u003e\u003c\/span\u003e\u003cspan\u003e\u003cbr\u003e\u003c\/span\u003e\u003cspan\u003e5.725-5.850 GHz:\u003c\/span\u003e\u003cspan\u003e\u003cbr\u003e\u003c\/span\u003e\u003cspan\u003eFCC: ≤26 dBm\u003c\/span\u003e\u003cspan\u003e\u003cbr\u003e\u003c\/span\u003e\u003cspan\u003eCE: ≤14 dBm\u003c\/span\u003e\u003cspan\u003e\u003cbr\u003e\u003c\/span\u003e\u003cspan\u003eSRRC: ≤26 dBm\u003c\/span\u003e\n\u003c\/li\u003e\n\u003c\/ul\u003e\n\u003cul\u003e\n\u003cli style=\"font-weight: 400;\"\u003e\u003cb\u003eMax Ascent Speed\u003c\/b\u003e\u003c\/li\u003e\n\u003cli style=\"font-weight: 400;\"\u003e\n\u003cspan style=\"font-weight: 400;\"\u003e4 m\/s (S Mode)\u003c\/span\u003e\u003cspan style=\"font-weight: 400;\"\u003e\u003cbr\u003e\u003c\/span\u003e\u003cspan style=\"font-weight: 400;\"\u003e4 m\/s (N Mode)\u003c\/span\u003e\n\u003c\/li\u003e\n\u003c\/ul\u003e\n\u003cul\u003e\n\u003cli style=\"font-weight: 400;\"\u003e\u003cb\u003eMax Service Ceiling Above Sea Level\u003c\/b\u003e\u003c\/li\u003e\n\u003cli style=\"font-weight: 400;\"\u003e\u003cspan style=\"font-weight: 400;\"\u003e5000 m\u003c\/span\u003e\u003c\/li\u003e\n\u003c\/ul\u003e\n\u003cul\u003e\n\u003cli style=\"font-weight: 400;\"\u003e\u003cb\u003eMax Flight Time (without wind)\u003c\/b\u003e\u003c\/li\u003e\n\u003cli style=\"font-weight: 400;\"\u003e\u003cspan style=\"font-weight: 400;\"\u003e34 minutes\u003c\/span\u003e\u003c\/li\u003e\n\u003c\/ul\u003e\n\u003cul\u003e\n\u003cli style=\"font-weight: 400;\"\u003e\u003cb\u003eMax Hover Time (without wind)\u003c\/b\u003e\u003c\/li\u003e\n\u003cli style=\"font-weight: 400;\"\u003e\u003cspan style=\"font-weight: 400;\"\u003e33 minutes\u003c\/span\u003e\u003c\/li\u003e\n\u003c\/ul\u003e\n\u003cul\u003e\n\u003cli style=\"font-weight: 400;\"\u003e\u003cb\u003eMax Flight Distance\u003c\/b\u003e\u003c\/li\u003e\n\u003cli style=\"font-weight: 400;\"\u003e\u003cspan style=\"font-weight: 400;\"\u003e18.5 km\u003c\/span\u003e\u003c\/li\u003e\n\u003cli\u003e\u003cb\u003eMax Descent Speed\u003c\/b\u003e\u003c\/li\u003e\n\u003cli\u003e\n\u003cspan\u003e3 m\/s (S Mode)\u003c\/span\u003e\u003cspan\u003e\u003cbr\u003e\u003c\/span\u003e\u003cspan\u003e3 m\/s (N Mode)\u003c\/span\u003e\u003cspan\u003e\u003cbr\u003e\u003c\/span\u003e\u003cspan\u003e5 m\/s (S Mode and N Mode during a sharp descent)\u003c\/span\u003e\u003cspan\u003e\u003cbr\u003e\u003c\/span\u003e\u003cspan\u003e3 m\/s (all modes at elevations over 4500 m)\u003c\/span\u003e\n\u003c\/li\u003e\n\u003c\/ul\u003e\n\u003cul\u003e\n\u003cli style=\"font-weight: 400;\"\u003e\u003cb\u003eMax Horizontal Flight Speed\u003c\/b\u003e\u003c\/li\u003e\n\u003cli style=\"font-weight: 400;\"\u003e\n\u003cspan style=\"font-weight: 400;\"\u003e19 m\/s (S Mode)\u003c\/span\u003e\u003cspan style=\"font-weight: 400;\"\u003e\u003cbr\u003e\u003c\/span\u003e\u003cspan style=\"font-weight: 400;\"\u003e12 m\/s (N Mode)\u003c\/span\u003e\u003cspan style=\"font-weight: 400;\"\u003e\u003cbr\u003e\u003c\/span\u003e\u003cspan style=\"font-weight: 400;\"\u003e5 m\/s (T Mode)\u003c\/span\u003e\n\u003c\/li\u003e\n\u003cli\u003e\u003cb\u003eHovering Accuracy Range\u003c\/b\u003e\u003c\/li\u003e\n\u003cli\u003e\n\u003cspan\u003eVertical:\u003c\/span\u003e\u003cspan\u003e\u003cbr\u003e\u003c\/span\u003e\u003cspan\u003e±0.1 m (with vision positioning)\u003c\/span\u003e\u003cspan\u003e\u003cbr\u003e\u003c\/span\u003e\u003cspan\u003e±0.5 m (with GPS positioning)\u003c\/span\u003e\u003cspan\u003e\u003cbr\u003e\u003c\/span\u003e\u003cspan\u003e\u003cbr\u003e\u003c\/span\u003e\u003cspan\u003eHorizontal:\u003c\/span\u003e\u003cspan\u003e\u003cbr\u003e\u003c\/span\u003e\u003cspan\u003e±0.1 m (with vision positioning)\u003c\/span\u003e\u003cspan\u003e\u003cbr\u003e\u003c\/span\u003e\u003cspan\u003e±1.5 m (with GPS positioning)\u003c\/span\u003e\n\u003c\/li\u003e\n\u003c\/ul\u003e\n\u003cul\u003e\n\u003cli style=\"font-weight: 400;\"\u003e\u003cb\u003eMax Wind Resistance\u003c\/b\u003e\u003c\/li\u003e\n\u003cli style=\"font-weight: 400;\"\u003e\u003cspan style=\"font-weight: 400;\"\u003e8.5-10.5 m\/s (Level 5)\u003c\/span\u003e\u003c\/li\u003e\n\u003c\/ul\u003e\n\u003cul\u003e\n\u003cli style=\"font-weight: 400;\"\u003e\u003cb\u003eMax Tilt Angle\u003c\/b\u003e\u003c\/li\u003e\n\u003cli style=\"font-weight: 400;\"\u003e\n\u003cspan style=\"font-weight: 400;\"\u003e35° (S Mode)\u003c\/span\u003e\u003cspan style=\"font-weight: 400;\"\u003e\u003cbr\u003e\u003c\/span\u003e\u003cspan style=\"font-weight: 400;\"\u003e20° (N Mode)\u003c\/span\u003e\u003cspan style=\"font-weight: 400;\"\u003e\u003cbr\u003e\u003c\/span\u003e\u003cspan style=\"font-weight: 400;\"\u003e35° (N Mode under strong wind)\u003c\/span\u003e\n\u003c\/li\u003e\n\u003c\/ul\u003e\n\u003cul\u003e\n\u003cli style=\"font-weight: 400;\"\u003e\u003cb\u003eOperating Frequency\u003c\/b\u003e\u003c\/li\u003e\n\u003cli style=\"font-weight: 400;\"\u003e\n\u003cspan style=\"font-weight: 400;\"\u003e2.400-2.4835 GHz\u003c\/span\u003e\u003cspan style=\"font-weight: 400;\"\u003e\u003cbr\u003e\u003c\/span\u003e\u003cspan style=\"font-weight: 400;\"\u003e5.725-5.850 GHz\u003c\/span\u003e\n\u003c\/li\u003e\n\u003c\/ul\u003e\n\u003cul data-mce-fragment=\"1\"\u003e\n\u003cli data-mce-fragment=\"1\"\u003e\u003cb data-mce-fragment=\"1\"\u003eMax Angular Velocity\u003c\/b\u003e\u003c\/li\u003e\n\u003cli data-mce-fragment=\"1\"\u003e\n\u003cspan data-mce-fragment=\"1\"\u003e250°\/s (S Mode)\u003c\/span\u003e\u003cspan data-mce-fragment=\"1\"\u003e\u003cbr data-mce-fragment=\"1\"\u003e\u003c\/span\u003e\u003cspan data-mce-fragment=\"1\"\u003e250°\/s (N Mode)\u003c\/span\u003e\n\u003c\/li\u003e\n\u003c\/ul\u003e\n\u003cul data-mce-fragment=\"1\"\u003e\n\u003cli data-mce-fragment=\"1\"\u003e\u003cb data-mce-fragment=\"1\"\u003eOperating Temperature Range\u003c\/b\u003e\u003c\/li\u003e\n\u003cli data-mce-fragment=\"1\"\u003e\u003cspan data-mce-fragment=\"1\"\u003e-10° to 40°C (14° to 104°F)\u003c\/span\u003e\u003c\/li\u003e\n\u003c\/ul\u003e\n\u003cul\u003e\u003c\/ul\u003e\n\u003cul\u003e\n\u003cli style=\"font-weight: 400;\"\u003e\u003cb\u003ePropellers\u003c\/b\u003e\u003c\/li\u003e\n\u003cli style=\"font-weight: 400;\"\u003e\u003cspan style=\"font-weight: 400;\"\u003eQuick release, low noise, folding\u003c\/span\u003e\u003c\/li\u003e\n\u003c\/ul\u003e\n\u003cul\u003e\n\u003cli style=\"font-weight: 400;\"\u003e\u003cb\u003eSatellite Systems\u003c\/b\u003e\u003c\/li\u003e\n\u003cli style=\"font-weight: 400;\"\u003e\u003cspan style=\"font-weight: 400;\"\u003eGPS+GLONASS\u003c\/span\u003e\u003c\/li\u003e\n\u003c\/ul\u003e\n\u003cul\u003e\n\u003cli style=\"font-weight: 400;\"\u003e\u003cb\u003eCompass\u003c\/b\u003e\u003c\/li\u003e\n\u003cli style=\"font-weight: 400;\"\u003e\u003cspan style=\"font-weight: 400;\"\u003eSingle Compass\u003c\/span\u003e\u003c\/li\u003e\n\u003c\/ul\u003e\n\u003cul\u003e\n\u003cli style=\"font-weight: 400;\"\u003e\u003cb\u003eIMU\u003c\/b\u003e\u003c\/li\u003e\n\u003cli style=\"font-weight: 400;\"\u003e\u003cspan style=\"font-weight: 400;\"\u003eSingle IMU\u003c\/span\u003e\u003c\/li\u003e\n\u003c\/ul\u003e\n\u003cul\u003e\n\u003cli style=\"font-weight: 400;\"\u003e\u003cb\u003eInternal Storage\u003c\/b\u003e\u003c\/li\u003e\n\u003cli style=\"font-weight: 400;\"\u003e\u003cspan style=\"font-weight: 400;\"\u003e8 GB\u003c\/span\u003e\u003c\/li\u003e\n\u003c\/ul\u003e\n\u003c\/div\u003e\n\u003cdiv style=\"text-align: left;\"\u003e\u003cb\u003eBattery\u003c\/b\u003e\u003c\/div\u003e\n\u003cdiv style=\"text-align: left;\"\u003e\n\u003cul\u003e\n\u003cli style=\"font-weight: 400;\"\u003e\u003cb\u003eCapacity\u003c\/b\u003e\u003c\/li\u003e\n\u003cli style=\"font-weight: 400;\"\u003e\u003cspan style=\"font-weight: 400;\"\u003e3500 mAh\u003c\/span\u003e\u003c\/li\u003e\n\u003c\/ul\u003e\n\u003cul\u003e\n\u003cli style=\"font-weight: 400;\"\u003e\u003cb\u003eVoltage\u003c\/b\u003e\u003c\/li\u003e\n\u003cli style=\"font-weight: 400;\"\u003e\u003cspan style=\"font-weight: 400;\"\u003e11.55 V\u003c\/span\u003e\u003c\/li\u003e\n\u003c\/ul\u003e\n\u003cul\u003e\n\u003cli style=\"font-weight: 400;\"\u003e\u003cb\u003eCharging Voltage Limit\u003c\/b\u003e\u003c\/li\u003e\n\u003cli style=\"font-weight: 400;\"\u003e\u003cspan style=\"font-weight: 400;\"\u003e13.2 V\u003c\/span\u003e\u003c\/li\u003e\n\u003c\/ul\u003e\n\u003cul\u003e\u003c\/ul\u003e\n\u003cul\u003e\n\u003cli style=\"font-weight: 400;\"\u003e\u003cb\u003eWeight\u003c\/b\u003e\u003c\/li\u003e\n\u003cli style=\"font-weight: 400;\"\u003e\u003cspan style=\"font-weight: 400;\"\u003e198 g\u003c\/span\u003e\u003c\/li\u003e\n\u003c\/ul\u003e\n\u003cul\u003e\n\u003cli style=\"font-weight: 400;\"\u003e\u003cb\u003eCharging Temperature\u003c\/b\u003e\u003c\/li\u003e\n\u003cli style=\"font-weight: 400;\"\u003e\u003cspan style=\"font-weight: 400;\"\u003e5° to 40°C (41° to 104°F)\u003c\/span\u003e\u003c\/li\u003e\n\u003c\/ul\u003e\n\u003cul data-mce-fragment=\"1\"\u003e\n\u003cli data-mce-fragment=\"1\"\u003e\u003cb data-mce-fragment=\"1\"\u003eBattery Type\u003c\/b\u003e\u003c\/li\u003e\n\u003cli data-mce-fragment=\"1\"\u003e\u003cspan data-mce-fragment=\"1\"\u003eLiPo 3S\u003c\/span\u003e\u003c\/li\u003e\n\u003c\/ul\u003e\n\u003cul data-mce-fragment=\"1\"\u003e\n\u003cli data-mce-fragment=\"1\"\u003e\u003cb data-mce-fragment=\"1\"\u003eEnergy\u003c\/b\u003e\u003c\/li\u003e\n\u003cli data-mce-fragment=\"1\"\u003e\u003cspan data-mce-fragment=\"1\"\u003e40.42 Wh\u003c\/span\u003e\u003c\/li\u003e\n\u003c\/ul\u003e\n\u003cul\u003e\u003c\/ul\u003e\n\u003cul\u003e\n\u003cli style=\"font-weight: 400;\"\u003e\u003cb\u003eMax Charging Power\u003c\/b\u003e\u003c\/li\u003e\n\u003cli style=\"font-weight: 400;\"\u003e\u003cspan style=\"font-weight: 400;\"\u003e38 W\u003c\/span\u003e\u003c\/li\u003e\n\u003c\/ul\u003e\n\u003c\/div\u003e\n\u003cdiv style=\"text-align: left;\"\u003e\u003cb\u003eCamera\u003c\/b\u003e\u003c\/div\u003e\n\u003cdiv\u003e\n\u003cul style=\"text-align: left;\"\u003e\n\u003cli style=\"font-weight: 400;\"\u003e\u003cb\u003eSensor\u003c\/b\u003e\u003c\/li\u003e\n\u003cli style=\"font-weight: 400;\"\u003e\n\u003cspan style=\"font-weight: 400;\"\u003e1\/2\" CMOS\u003c\/span\u003e\u003cspan style=\"font-weight: 400;\"\u003e\u003cbr\u003e\u003c\/span\u003e\u003cspan style=\"font-weight: 400;\"\u003eEffective Pixels: 12 MP and 48 MP\u003c\/span\u003e\n\u003c\/li\u003e\n\u003cli\u003e\u003cb\u003eISO\u003c\/b\u003e\u003c\/li\u003e\n\u003cli\u003e\n\u003cspan\u003eVideo:\u003c\/span\u003e\u003cspan\u003e\u003cbr\u003e\u003c\/span\u003e\u003cspan\u003e100-6400\u003c\/span\u003e\u003cspan\u003e\u003cbr\u003e\u003c\/span\u003e\u003cspan\u003e\u003cbr\u003e\u003c\/span\u003e\u003cspan\u003ePhoto (12 MP):\u003c\/span\u003e\u003cspan\u003e\u003cbr\u003e\u003c\/span\u003e\u003cspan\u003e100-3200 (Auto)\u003c\/span\u003e\u003cspan\u003e\u003cbr\u003e\u003c\/span\u003e\u003cspan\u003e100-6400 (Manual)\u003c\/span\u003e\u003cspan\u003e\u003cbr\u003e\u003c\/span\u003e\u003cspan\u003ePhoto (48 MP):\u003c\/span\u003e\u003cspan\u003e\u003cbr\u003e\u003c\/span\u003e\u003cspan\u003e100-1600 (Auto)\u003c\/span\u003e\u003cspan\u003e\u003cbr\u003e\u003c\/span\u003e\u003cspan\u003e100-3200 (Manual)\u003c\/span\u003e\n\u003c\/li\u003e\n\u003c\/ul\u003e\n\u003cul style=\"text-align: left;\"\u003e\n\u003cli style=\"font-weight: 400;\"\u003e\u003cb\u003eLens\u003c\/b\u003e\u003c\/li\u003e\n\u003cli style=\"font-weight: 400;\"\u003e\n\u003cspan style=\"font-weight: 400;\"\u003eFOV: 84°\u003c\/span\u003e\u003cspan style=\"font-weight: 400;\"\u003e\u003cbr\u003e\u003c\/span\u003e\u003cspan style=\"font-weight: 400;\"\u003eEquivalent Focal Length: 24 mm\u003c\/span\u003e\u003cspan style=\"font-weight: 400;\"\u003e\u003cbr\u003e\u003c\/span\u003e\u003cspan style=\"font-weight: 400;\"\u003eAperture: f\/2.8\u003c\/span\u003e\u003cspan style=\"font-weight: 400;\"\u003e\u003cbr\u003e\u003c\/span\u003e\u003cspan style=\"font-weight: 400;\"\u003eFocus Range: 1 m to ∞\u003c\/span\u003e\n\u003c\/li\u003e\n\u003c\/ul\u003e\n\u003cul data-mce-fragment=\"1\"\u003e\n\u003cli data-mce-fragment=\"1\"\u003e\u003cb data-mce-fragment=\"1\"\u003eVideo Formats\u003c\/b\u003e\u003c\/li\u003e\n\u003cli data-mce-fragment=\"1\"\u003e\u003cspan data-mce-fragment=\"1\"\u003eMP4\/MOV (H.264\/MPEG-4 AVC, H.265\/HEVC)\u003c\/span\u003e\u003c\/li\u003e\n\u003c\/ul\u003e\n\u003cul data-mce-fragment=\"1\"\u003e\n\u003cli data-mce-fragment=\"1\"\u003e\u003cb data-mce-fragment=\"1\"\u003eMax Bitrate\u003c\/b\u003e\u003c\/li\u003e\n\u003cli data-mce-fragment=\"1\"\u003e\u003cspan data-mce-fragment=\"1\"\u003e120 Mbps\u003c\/span\u003e\u003c\/li\u003e\n\u003c\/ul\u003e\n\u003cul style=\"text-align: left;\"\u003e\u003c\/ul\u003e\n\u003cul style=\"text-align: left;\"\u003e\n\u003cli style=\"font-weight: 400;\"\u003e\u003cb\u003eMax Photo Resolution\u003c\/b\u003e\u003c\/li\u003e\n\u003cli style=\"font-weight: 400;\"\u003e\u003cspan style=\"font-weight: 400;\"\u003e48 MP 8000×6000 pixel\u003c\/span\u003e\u003c\/li\u003e\n\u003c\/ul\u003e\n\u003cul style=\"text-align: left;\"\u003e\n\u003cli style=\"font-weight: 400;\"\u003e\u003cb\u003ePhoto Formats\u003c\/b\u003e\u003c\/li\u003e\n\u003cli style=\"font-weight: 400;\"\u003e\u003cspan style=\"font-weight: 400;\"\u003eJPEG\/DNG (RAW)\u003c\/span\u003e\u003c\/li\u003e\n\u003cli\u003e\u003cb\u003ePhoto Modes\u003c\/b\u003e\u003c\/li\u003e\n\u003cli\u003e\n\u003cspan\u003eSingle: 12 MP and 48 MP\u003c\/span\u003e\u003cspan\u003e\u003cbr\u003e\u003c\/span\u003e\u003cspan\u003eBurst: 12 MP, 3\/5\/7 frames\u003c\/span\u003e\u003cspan\u003e\u003cbr\u003e\u003c\/span\u003e\u003cspan\u003eAutomatic Exposure Bracketing (AEB): 12MP, 3\/5 Frames at 0.7EV Bias\u003c\/span\u003e\u003cspan\u003e\u003cbr\u003e\u003c\/span\u003e\u003cspan\u003eTimed: 12 MP 2\/3\/5\/7\/10\/15\/20\/30\/60 seconds\u003c\/span\u003e\u003cspan\u003e\u003cbr\u003e\u003c\/span\u003e\u003cspan\u003eSmartPhoto: Scene Recognition, HyperLight, and HDR\u003c\/span\u003e\u003cspan\u003e\u003cbr\u003e\u003c\/span\u003e\u003cspan\u003eHDR Panorama:\u003c\/span\u003e\u003cspan\u003e\u003cbr\u003e\u003c\/span\u003e\u003cspan\u003eVertical (3×1): 3328×8000 pixels (Width×Height)\u003c\/span\u003e\u003cspan\u003e\u003cbr\u003e\u003c\/span\u003e\u003cspan\u003eWide-angle (3×3): 8000×6144 pixels (Width×Height)\u003c\/span\u003e\u003cspan\u003e\u003cbr\u003e\u003c\/span\u003e\u003cspan\u003e180° Panorama (3×7): 8192×3500 pixels (Width×Height)\u003c\/span\u003e\u003cspan\u003e\u003cbr\u003e\u003c\/span\u003e\u003cspan\u003eSphere (3×8+1): 8192×4096 pixels (Width×Height)\u003c\/span\u003e\n\u003c\/li\u003e\n\u003c\/ul\u003e\n\u003cul style=\"text-align: left;\"\u003e\n\u003cli style=\"font-weight: 400;\"\u003e\u003cb\u003eVideo Resolution and Frame Rates\u003c\/b\u003e\u003c\/li\u003e\n\u003cli style=\"font-weight: 400;\"\u003e\n\u003cspan style=\"font-weight: 400;\"\u003e4K Ultra HD: 3840×2160 24\/25\/30\/48\/50\/60 fps\u003c\/span\u003e\u003cspan style=\"font-weight: 400;\"\u003e\u003cbr\u003e\u003c\/span\u003e\u003cspan style=\"font-weight: 400;\"\u003e2.7K: 2688×1512 24\/25\/30\/48\/50\/60 fps\u003c\/span\u003e\u003cspan style=\"font-weight: 400;\"\u003e\u003cbr\u003e\u003c\/span\u003e\u003cspan style=\"font-weight: 400;\"\u003eFHD: 1920×1080 24\/25\/30\/48\/50\/60\/120\/240 fps\u003c\/span\u003e\u003cspan style=\"font-weight: 400;\"\u003e\u003cbr\u003e\u003c\/span\u003e\u003cspan style=\"font-weight: 400;\"\u003e4K Ultra HD HDR: 3840×2160 24\/25\/30 fps\u003c\/span\u003e\u003cspan style=\"font-weight: 400;\"\u003e\u003cbr\u003e\u003c\/span\u003e\u003cspan style=\"font-weight: 400;\"\u003e2.7K HDR: 2688×1512 24\/25\/30 fps\u003c\/span\u003e\u003cspan style=\"font-weight: 400;\"\u003e\u003cbr\u003e\u003c\/span\u003e\u003cspan style=\"font-weight: 400;\"\u003eFHD HDR: 1920×1080 24\/25\/30 fps\u003c\/span\u003e\n\u003c\/li\u003e\n\u003c\/ul\u003e\n\u003cul style=\"text-align: left;\"\u003e\n\u003cli style=\"font-weight: 400;\"\u003e\u003cb\u003eColor Profiles\u003c\/b\u003e\u003c\/li\u003e\n\u003cli style=\"font-weight: 400;\"\u003e\u003cspan style=\"font-weight: 400;\"\u003eD-Cinelike, Normal\u003c\/span\u003e\u003c\/li\u003e\n\u003c\/ul\u003e\n\u003cul style=\"text-align: left;\"\u003e\n\u003cli style=\"font-weight: 400;\"\u003e\u003cb\u003eSupported SD Cards\u003c\/b\u003e\u003c\/li\u003e\n\u003cli style=\"font-weight: 400;\"\u003e\u003cspan style=\"font-weight: 400;\"\u003eSupports a microSD with capacity of up to 256 GB\u003c\/span\u003e\u003c\/li\u003e\n\u003c\/ul\u003e\n\u003cul style=\"text-align: left;\"\u003e\n\u003cli style=\"font-weight: 400;\"\u003e\u003cb\u003eSupported File Systems\u003c\/b\u003e\u003c\/li\u003e\n\u003cli style=\"font-weight: 400;\"\u003e\u003cspan style=\"font-weight: 400;\"\u003eFAT32 and exFAT\u003c\/span\u003e\u003c\/li\u003e\n\u003c\/ul\u003e\n\u003cul style=\"text-align: center;\"\u003e\n\u003cli style=\"font-weight: 400; text-align: left;\"\u003e\u003cb\u003eZoom\u003c\/b\u003e\u003c\/li\u003e\n\u003cli style=\"font-weight: 400; text-align: left;\"\u003e\u003cspan style=\"font-weight: 400;\"\u003eAvailable\u003c\/span\u003e\u003c\/li\u003e\n\u003c\/ul\u003e\n\u003c\/div\u003e\n\u003c\/div\u003e","published_at":"2022-10-20T06:18:16-04:00","created_at":"2021-07-23T04:25:10-04:00","vendor":"DJI","type":"Drone","tags":["best drone","DJI Drones","DJI Mavic Air 2","DJI Mavic Air 2 Fly More Combo","drone","drone camera","drone dji","drone with camera","FocusTrack","HDR","mini drone","無人機","無人機套裝","航拍機","遙控航拍機","飛行無人機","高清航拍機"],"price":108800,"price_min":108800,"price_max":108800,"available":false,"price_varies":false,"compare_at_price":null,"compare_at_price_min":0,"compare_at_price_max":0,"compare_at_price_varies":false,"variants":[{"id":39446096314443,"title":"Default Title","option1":"Default Title","option2":null,"option3":null,"sku":"DJI-Air2-COMBO","requires_shipping":true,"taxable":true,"featured_image":null,"available":false,"name":"DJI Mavic Air 2 Fly More Combo - Drone Quadcopter UAV with 4K Video|48MP Camera|34min Flight Time|8K Hyperlapse 1\/2\" CMOS Sensor|ActiveTrack 3.0|3-Axis Gimba|Ocusync 2.0","public_title":null,"options":["Default Title"],"price":108800,"weight":2000,"compare_at_price":null,"inventory_management":"shopify","barcode":"","requires_selling_plan":false,"selling_plan_allocations":[]}],"images":["\/\/www.stream-sourcing.com\/cdn\/shop\/products\/dji-mavic-air-2-fly-more-combo-drone-front.jpg?v=1627028713","\/\/www.stream-sourcing.com\/cdn\/shop\/products\/dji-mavic-air-2-fly-more-combo-drone-package.jpg?v=1627028713","\/\/www.stream-sourcing.com\/cdn\/shop\/products\/dji-mavic-air-2-fly-more-combo-drone-bottom.jpg?v=1627028713","\/\/www.stream-sourcing.com\/cdn\/shop\/products\/dji-mavic-air-2-fly-more-combo-drone-open-side.jpg?v=1627028713","\/\/www.stream-sourcing.com\/cdn\/shop\/products\/dji-mavic-air-2-fly-more-combo-drone-all-package.jpg?v=1627028713","\/\/www.stream-sourcing.com\/cdn\/shop\/products\/dji-mavic-air-2-fly-more-combo-drone-closed-side.jpg?v=1627028714","\/\/www.stream-sourcing.com\/cdn\/shop\/products\/dji-mavic-air-2-fly-more-combo-drone-control.jpg?v=1627028714","\/\/www.stream-sourcing.com\/cdn\/shop\/products\/dji-mavic-air-2-fly-more-combo-drone-front-top.jpg?v=1627028714","\/\/www.stream-sourcing.com\/cdn\/shop\/products\/dji-mavic-air-2-fly-more-combo-drone-named-side.jpg?v=1627028714","\/\/www.stream-sourcing.com\/cdn\/shop\/products\/dji-mavic-air-2-fly-more-combo-drone-top-view.jpg?v=1627028714","\/\/www.stream-sourcing.com\/cdn\/shop\/products\/dji-mavic-air-2-fly-more-combo-drone-with-mobile.jpg?v=1627028714","\/\/www.stream-sourcing.com\/cdn\/shop\/products\/dji-mavic-air-2-fly-more-combo-drone-with-mobile-hand.jpg?v=1627028715"],"featured_image":"\/\/www.stream-sourcing.com\/cdn\/shop\/products\/dji-mavic-air-2-fly-more-combo-drone-front.jpg?v=1627028713","options":["Title"],"media":[{"alt":"dji-mavic-air-2-fly-more-combo-drone-front","id":20538303774795,"position":1,"preview_image":{"aspect_ratio":1.762,"height":681,"width":1200,"src":"\/\/www.stream-sourcing.com\/cdn\/shop\/products\/dji-mavic-air-2-fly-more-combo-drone-front.jpg?v=1627028713"},"aspect_ratio":1.762,"height":681,"media_type":"image","src":"\/\/www.stream-sourcing.com\/cdn\/shop\/products\/dji-mavic-air-2-fly-more-combo-drone-front.jpg?v=1627028713","width":1200},{"alt":"dji-mavic-air-2-fly-more-combo-drone-package","id":20538303807563,"position":2,"preview_image":{"aspect_ratio":1.506,"height":797,"width":1200,"src":"\/\/www.stream-sourcing.com\/cdn\/shop\/products\/dji-mavic-air-2-fly-more-combo-drone-package.jpg?v=1627028713"},"aspect_ratio":1.506,"height":797,"media_type":"image","src":"\/\/www.stream-sourcing.com\/cdn\/shop\/products\/dji-mavic-air-2-fly-more-combo-drone-package.jpg?v=1627028713","width":1200},{"alt":"dji-mavic-air-2-fly-more-combo-drone-bottom","id":20538303840331,"position":3,"preview_image":{"aspect_ratio":1.644,"height":730,"width":1200,"src":"\/\/www.stream-sourcing.com\/cdn\/shop\/products\/dji-mavic-air-2-fly-more-combo-drone-bottom.jpg?v=1627028713"},"aspect_ratio":1.644,"height":730,"media_type":"image","src":"\/\/www.stream-sourcing.com\/cdn\/shop\/products\/dji-mavic-air-2-fly-more-combo-drone-bottom.jpg?v=1627028713","width":1200},{"alt":"dji-mavic-air-2-fly-more-combo-drone-open-side","id":20538303873099,"position":4,"preview_image":{"aspect_ratio":1.384,"height":867,"width":1200,"src":"\/\/www.stream-sourcing.com\/cdn\/shop\/products\/dji-mavic-air-2-fly-more-combo-drone-open-side.jpg?v=1627028713"},"aspect_ratio":1.384,"height":867,"media_type":"image","src":"\/\/www.stream-sourcing.com\/cdn\/shop\/products\/dji-mavic-air-2-fly-more-combo-drone-open-side.jpg?v=1627028713","width":1200},{"alt":"dji-mavic-air-2-fly-more-combo-drone-all-package","id":20538303905867,"position":5,"preview_image":{"aspect_ratio":1.453,"height":826,"width":1200,"src":"\/\/www.stream-sourcing.com\/cdn\/shop\/products\/dji-mavic-air-2-fly-more-combo-drone-all-package.jpg?v=1627028713"},"aspect_ratio":1.453,"height":826,"media_type":"image","src":"\/\/www.stream-sourcing.com\/cdn\/shop\/products\/dji-mavic-air-2-fly-more-combo-drone-all-package.jpg?v=1627028713","width":1200},{"alt":"dji mavic air 2 fly more combo drone closed side","id":20538303938635,"position":6,"preview_image":{"aspect_ratio":1.257,"height":955,"width":1200,"src":"\/\/www.stream-sourcing.com\/cdn\/shop\/products\/dji-mavic-air-2-fly-more-combo-drone-closed-side.jpg?v=1627028714"},"aspect_ratio":1.257,"height":955,"media_type":"image","src":"\/\/www.stream-sourcing.com\/cdn\/shop\/products\/dji-mavic-air-2-fly-more-combo-drone-closed-side.jpg?v=1627028714","width":1200},{"alt":"dji-mavic-air-2-fly-more-combo-drone-control","id":20538303971403,"position":7,"preview_image":{"aspect_ratio":1.317,"height":911,"width":1200,"src":"\/\/www.stream-sourcing.com\/cdn\/shop\/products\/dji-mavic-air-2-fly-more-combo-drone-control.jpg?v=1627028714"},"aspect_ratio":1.317,"height":911,"media_type":"image","src":"\/\/www.stream-sourcing.com\/cdn\/shop\/products\/dji-mavic-air-2-fly-more-combo-drone-control.jpg?v=1627028714","width":1200},{"alt":"dji-mavic-air-2-fly-more-combo-drone-front-top","id":20538304004171,"position":8,"preview_image":{"aspect_ratio":1.463,"height":820,"width":1200,"src":"\/\/www.stream-sourcing.com\/cdn\/shop\/products\/dji-mavic-air-2-fly-more-combo-drone-front-top.jpg?v=1627028714"},"aspect_ratio":1.463,"height":820,"media_type":"image","src":"\/\/www.stream-sourcing.com\/cdn\/shop\/products\/dji-mavic-air-2-fly-more-combo-drone-front-top.jpg?v=1627028714","width":1200},{"alt":null,"id":20538304036939,"position":9,"preview_image":{"aspect_ratio":1.359,"height":883,"width":1200,"src":"\/\/www.stream-sourcing.com\/cdn\/shop\/products\/dji-mavic-air-2-fly-more-combo-drone-named-side.jpg?v=1627028714"},"aspect_ratio":1.359,"height":883,"media_type":"image","src":"\/\/www.stream-sourcing.com\/cdn\/shop\/products\/dji-mavic-air-2-fly-more-combo-drone-named-side.jpg?v=1627028714","width":1200},{"alt":null,"id":20538304069707,"position":10,"preview_image":{"aspect_ratio":1.257,"height":955,"width":1200,"src":"\/\/www.stream-sourcing.com\/cdn\/shop\/products\/dji-mavic-air-2-fly-more-combo-drone-top-view.jpg?v=1627028714"},"aspect_ratio":1.257,"height":955,"media_type":"image","src":"\/\/www.stream-sourcing.com\/cdn\/shop\/products\/dji-mavic-air-2-fly-more-combo-drone-top-view.jpg?v=1627028714","width":1200},{"alt":null,"id":20538304102475,"position":11,"preview_image":{"aspect_ratio":1.2,"height":1000,"width":1200,"src":"\/\/www.stream-sourcing.com\/cdn\/shop\/products\/dji-mavic-air-2-fly-more-combo-drone-with-mobile.jpg?v=1627028714"},"aspect_ratio":1.2,"height":1000,"media_type":"image","src":"\/\/www.stream-sourcing.com\/cdn\/shop\/products\/dji-mavic-air-2-fly-more-combo-drone-with-mobile.jpg?v=1627028714","width":1200},{"alt":null,"id":20538304135243,"position":12,"preview_image":{"aspect_ratio":1.292,"height":929,"width":1200,"src":"\/\/www.stream-sourcing.com\/cdn\/shop\/products\/dji-mavic-air-2-fly-more-combo-drone-with-mobile-hand.jpg?v=1627028715"},"aspect_ratio":1.292,"height":929,"media_type":"image","src":"\/\/www.stream-sourcing.com\/cdn\/shop\/products\/dji-mavic-air-2-fly-more-combo-drone-with-mobile-hand.jpg?v=1627028715","width":1200}],"requires_selling_plan":false,"selling_plan_groups":[],"content":"\u003ch1 style=\"text-align: center;\"\u003e\u003cstrong\u003eDJI Mavic Air 2 - giving you a new photos and video recording experience\u003c\/strong\u003e\u003c\/h1\u003e\u003cdiv class=\"desc\"\u003e\n\u003ch2 style=\"text-align: center;\"\u003eThe DJI Mavic Air 2 pushes power and portability to new heights, with advanced capabilities packed into a small package. \u003c\/h2\u003e\n\u003cstyle\u003e\u003c!--\n.embed-container { position: relative; padding-bottom: 56.25%; height: 0; overflow: hidden; max-width: 100%; } .embed-container iframe, .embed-container object, .embed-container embed { position: absolute; top: 0; left: 0; width: 100%; height: 100%; }\n--\u003e\u003c\/style\u003e\n\u003cdiv style=\"text-align: center;\" class=\"embed-container\"\u003e\u003ciframe src=\"https:\/\/www.youtube.com\/embed\/StDjsvNFru0\" allowfullscreen=\"\" frameborder=\"0\"\u003e\u003c\/iframe\u003e\u003c\/div\u003e\n\u003cdiv style=\"text-align: center;\"\u003e \u003c\/div\u003e\n\u003ch3 style=\"text-align: center;\"\u003e\u003cspan style=\"font-weight: 400;\"\u003eAerial masterpieces are within reach thanks to intelligent shooting functions and superb image quality. You can raise your game while fully enjoying the creative process with safer, smarter flight.\u003c\/span\u003e\u003c\/h3\u003e\n\u003ch2 style=\"text-align: center;\"\u003e\u003cstrong\u003eFeature\u003c\/strong\u003e\u003c\/h2\u003e\n\u003cdiv style=\"text-align: center;\"\u003e\u003c\/div\u003e\n\u003cdiv style=\"text-align: center;\"\u003e\n\u003ctable\u003e\n\u003ctbody\u003e\n\u003ctr\u003e\n\u003ctd style=\"text-align: center;\"\u003e\n\u003cp\u003e\u003cstrong\u003eUltra-Clear Details \u003c\/strong\u003e\u003c\/p\u003e\n\u003cp\u003e\u003cspan style=\"font-weight: 400;\"\u003e1\/2-Inch Image Sensor \u003c\/span\u003e\u003c\/p\u003e\n\u003cp\u003e\u003cspan style=\"font-weight: 400;\"\u003e4K\/60fps Video \u003c\/span\u003e\u003c\/p\u003e\n\u003cp\u003e\u003cspan style=\"font-weight: 400;\"\u003e48MP Photo\u003c\/span\u003e\u003c\/p\u003e\n\u003c\/td\u003e\n\u003ctd style=\"text-align: center;\"\u003e\n\u003cp\u003e\u003cstrong\u003eEnhanced HDR \u003c\/strong\u003e\u003c\/p\u003e\n\u003cp\u003e\u003cspan style=\"font-weight: 400;\"\u003ePhoto \u003c\/span\u003e\u003c\/p\u003e\n\u003cp\u003e\u003cspan style=\"font-weight: 400;\"\u003eVideo \u003c\/span\u003e\u003c\/p\u003e\n\u003cp\u003e\u003cspan style=\"font-weight: 400;\"\u003ePanorama\u003c\/span\u003e\u003c\/p\u003e\n\u003c\/td\u003e\n\u003c\/tr\u003e\n\u003ctr\u003e\n\u003ctd style=\"text-align: center;\"\u003e\n\u003cp\u003e\u003cstrong\u003eFly Smarter and Safer \u003c\/strong\u003e\u003c\/p\u003e\n\u003cp\u003e\u003cspan style=\"font-weight: 400;\"\u003eAPAS 3.0 Obstacle Avoidance\u003c\/span\u003e\u003c\/p\u003e\n\u003c\/td\u003e\n\u003ctd style=\"text-align: center;\"\u003e\n\u003cp\u003e\u003cstrong\u003eFly Farther, See Clearer \u003c\/strong\u003e\u003c\/p\u003e\n\u003cp\u003e\u003cspan style=\"font-weight: 400;\"\u003eOcuSync 2.0 10km 1080p\/30fps Video Transmission\u003c\/span\u003e\u003c\/p\u003e\n\u003c\/td\u003e\n\u003c\/tr\u003e\n\u003ctr\u003e\n\u003ctd style=\"text-align: center;\"\u003e\n\u003cp\u003e\u003cstrong\u003eFly Longer \u003c\/strong\u003e\u003c\/p\u003e\n\u003cp\u003e\u003cspan\u003e34-Min Max Flight Time \u003c\/span\u003e\u003c\/p\u003e\n\u003cp\u003e\u003cspan\u003e240-Min Max RC Battery Life\u003c\/span\u003e\u003c\/p\u003e\n\u003c\/td\u003e\n\u003ctd style=\"text-align: center;\"\u003e\n\u003cp\u003e\u003cstrong\u003eCinematic Content \u003c\/strong\u003e\u003c\/p\u003e\n\u003cp\u003e\u003cspan\u003e8K Hyperlapse \u003c\/span\u003e\u003c\/p\u003e\n\u003cp\u003e\u003cspan\u003eQuickShots\u003c\/span\u003e\u003c\/p\u003e\n\u003c\/td\u003e\n\u003c\/tr\u003e\n\u003c\/tbody\u003e\n\u003c\/table\u003e\n\u003c\/div\u003e\n\u003cdiv style=\"text-align: center;\"\u003e\u003cb\u003e\u003cimg alt=\"dji-mavic-air-2-fly-more-combo-drone-content-feature-all\" src=\"https:\/\/cdn.shopify.com\/s\/files\/1\/2532\/7020\/files\/dji-mavic-air-2-fly-more-combo-drone-content-feature-all.jpg?v=1626148044\"\u003e\u003c\/b\u003e\u003c\/div\u003e\n\u003ch3 style=\"text-align: center;\"\u003e\u003cspan style=\"color: #ff8000;\"\u003e\u003cb\u003e\u003c\/b\u003e\u003c\/span\u003e\u003c\/h3\u003e\n\u003ch3 style=\"text-align: center;\"\u003e\u003cspan style=\"color: #ff8000;\"\u003e\u003cb\u003eHigh Image Quality\u003c\/b\u003e\u003c\/span\u003e\u003c\/h3\u003e\n\u003cdiv style=\"text-align: center;\"\u003e\u003cb\u003eEpic is Simple, with 4K\/60fps Video \u003c\/b\u003e\u003c\/div\u003e\n\u003cdiv style=\"text-align: center;\"\u003e\u003cspan style=\"font-weight: 400;\"\u003eFootage Master creative aerial views with 4K\/60fps video that is effortlessly fluid. For post-processing, the D-Cinelike flat color profile maintains more information. The HEVC (H.265) video codec records more visual information, uses less storage, and keeps your footage's dynamic range and quality, delivering next-level content.\u003cbr data-mce-fragment=\"1\"\u003e\u003c\/span\u003e\u003c\/div\u003e\n\u003cdiv style=\"text-align: center;\"\u003e\u003cspan style=\"font-weight: 400;\"\u003e\u003cimg alt=\"dji-mavic-air-2-fly-more-combo-drone-content-feature-1-image-quality\" src=\"https:\/\/cdn.shopify.com\/s\/files\/1\/2532\/7020\/files\/dji-mavic-air-2-fly-more-combo-drone-content-feature-1-image-quality.jpg?v=1626148092\"\u003e\u003c\/span\u003e\u003c\/div\u003e\n\u003ch3 style=\"text-align: center;\"\u003e\u003cspan style=\"color: #ff8000;\"\u003e\u003cb\u003e\u003c\/b\u003e\u003c\/span\u003e\u003c\/h3\u003e\n\u003ch3 style=\"text-align: center;\"\u003e\u003cspan style=\"color: #ff8000;\"\u003e\u003cb\u003eHDR Video\u003c\/b\u003e\u003c\/span\u003e\u003c\/h3\u003e\n\u003cdiv style=\"text-align: center;\"\u003e\u003cb\u003eBy default, everything is dynamic.\u003cbr data-mce-fragment=\"1\"\u003e\u003c\/b\u003e\u003c\/div\u003e\n\u003cdiv style=\"text-align: center;\"\u003e\u003cspan style=\"font-weight: 400;\"\u003eA high-performance Quad Bayer image sensor is the key to outstanding HDR video. A single frame captures light and dark details by separating exposure levels in different places. The photos are stacked to create a picture with a higher dynamic range that is vibrant, balanced, and appealing.\u003c\/span\u003e\u003c\/div\u003e\n\u003cdiv style=\"text-align: center;\"\u003e\u003cspan style=\"font-weight: 400;\"\u003e\u003cimg alt=\"dji-mavic-air-2-fly-more-combo-drone-content-feature-2-hdr-video\" src=\"https:\/\/cdn.shopify.com\/s\/files\/1\/2532\/7020\/files\/dji-mavic-air-2-fly-more-combo-drone-content-feature-2-hdr-video.jpg?v=1626148113\"\u003e\u003c\/span\u003e\u003c\/div\u003e\n\u003ch3 style=\"text-align: center;\"\u003e\u003cspan style=\"color: #ff8000;\"\u003e\u003cb\u003e\u003c\/b\u003e\u003c\/span\u003e\u003c\/h3\u003e\n\u003ch3 style=\"text-align: center;\"\u003e\u003cspan style=\"color: #ff8000;\"\u003e\u003cb\u003eAll in the Details\u003c\/b\u003e\u003c\/span\u003e\u003c\/h3\u003e\n\u003cdiv style=\"text-align: center;\"\u003e\u003cb\u003e48MP Photos\u003c\/b\u003e\u003c\/div\u003e\n\u003cdiv style=\"text-align: center;\"\u003e\u003cspan style=\"font-weight: 400;\"\u003eMavic Air 2 has a 1\/2-inch CMOS sensor that captures 48MP photographs. Prepare to take your airborne content to new heights.\u003cbr data-mce-fragment=\"1\"\u003eThe 48MP camera has a high megapixel count, which means that even when zooming in on an image, you can see vivid details.\u003c\/span\u003e\u003c\/div\u003e\n\u003cdiv style=\"text-align: center;\"\u003e\u003cspan style=\"font-weight: 400;\"\u003e\u003cimg alt=\"dji-mavic-air-2-fly-more-combo-drone-content-feature-3-48mp\" src=\"https:\/\/cdn.shopify.com\/s\/files\/1\/2532\/7020\/files\/dji-mavic-air-2-fly-more-combo-drone-content-feature-3-48mp.jpg?v=1626148140\"\u003e\u003c\/span\u003e\u003c\/div\u003e\n\u003ch3 style=\"text-align: center;\"\u003e\u003cspan style=\"color: #ff8000;\"\u003e\u003cb\u003e\u003c\/b\u003e\u003c\/span\u003e\u003c\/h3\u003e\n\u003ch3 style=\"text-align: center;\"\u003e\u003cspan style=\"color: #ff8000;\"\u003e\u003cb\u003eOptimized Capture\u003c\/b\u003e\u003c\/span\u003e\u003c\/h3\u003e\n\u003cdiv style=\"text-align: center;\"\u003e\u003cb\u003eSmartPhoto\u003c\/b\u003e\u003c\/div\u003e\n\u003cdiv style=\"text-align: center;\"\u003e\u003cspan style=\"font-weight: 400;\"\u003eSmartPhoto on the Mavic Air 2 combines scene recognition, HyperLight, and HDR into a single setting for optimal results. Scene recognition optimizes camera parameters for different scenes and offers intelligent recognition of five different categories: sunsets, sky, grass, snow, and trees. The resolution of photos taken in SmartPhoto mode is 12 MP.\u003c\/span\u003e\u003c\/div\u003e\n\u003cdiv style=\"text-align: center;\"\u003e\n\u003ctable width=\"100%\"\u003e\n\u003ctbody\u003e\n\u003ctr\u003e\n\u003ctd\u003e\n\u003cp\u003e\u003cimg alt=\"dji-mavic-air-2-fly-more-combo-drone-content-feature-4-1-Strong-Lighting-Conditions\" src=\"https:\/\/cdn.shopify.com\/s\/files\/1\/2532\/7020\/files\/dji-mavic-air-2-fly-more-combo-drone-content-feature-4-1-Strong-Lighting-Conditions.jpg?v=1626148348\"\u003e\u003c\/p\u003e\n\u003c\/td\u003e\n\u003ctd\u003e\u003cimg alt=\"dji-mavic-air-2-fly-more-combo-drone-content-feature-4-2-Weak-Lighting-Conditions\" src=\"https:\/\/cdn.shopify.com\/s\/files\/1\/2532\/7020\/files\/dji-mavic-air-2-fly-more-combo-drone-content-feature-4-2-Weak-Lighting-Conditions.jpg?v=1626148384\"\u003e\u003c\/td\u003e\n\u003c\/tr\u003e\n\u003ctr\u003e\n\u003ctd\u003e\n\u003cp data-mce-fragment=\"1\"\u003e\u003cstrong\u003eStrong Lighting\u003c\/strong\u003e\u003c\/p\u003e\n\u003cp data-mce-fragment=\"1\"\u003eConditions HyperLight improves the sharpness of images taken in low-light circumstances by reducing noise.\u003c\/p\u003e\n\u003c\/td\u003e\n\u003ctd\u003e\n\u003cp\u003e\u003cstrong\u003eWeak Lighting Conditions\u003c\/strong\u003e\u003c\/p\u003e\n\u003cp data-mce-fragment=\"1\"\u003e\u003cspan data-mce-fragment=\"1\"\u003eHyperLight improves the sharpness of images taken in low-light circumstances by reducing noise.\u003c\/span\u003e\u003c\/p\u003e\n\u003c\/td\u003e\n\u003c\/tr\u003e\n\u003c\/tbody\u003e\n\u003c\/table\u003e\n\u003c\/div\u003e\n\u003cdiv style=\"text-align: center;\"\u003e \u003c\/div\u003e\n\u003cdiv style=\"text-align: center;\"\u003e \u003c\/div\u003e\n\u003ch3 style=\"text-align: center;\"\u003e\u003cspan style=\"color: #ff8000;\"\u003e\u003cb\u003eHDR Panorama\u003c\/b\u003e\u003c\/span\u003e\u003c\/h3\u003e\n\u003cdiv style=\"text-align: center;\"\u003e\u003cb\u003eLook at the Big Picture\u003c\/b\u003e\u003c\/div\u003e\n\u003cdiv style=\"text-align: center;\"\u003e\u003cspan style=\"font-weight: 400;\"\u003eThe Mavic Air 2 has DJI's most sophisticated panorama mode, with a larger dynamic range and vibrant, amazingly realistic colors.\u003c\/span\u003e\u003c\/div\u003e\n\u003cdiv style=\"text-align: center;\"\u003e\u003cspan style=\"font-weight: 400;\"\u003e\u003cimg alt=\"dji-mavic-air-2-fly-more-combo-drone-content-feature-5-HDR-Panorama\" src=\"https:\/\/cdn.shopify.com\/s\/files\/1\/2532\/7020\/files\/dji-mavic-air-2-fly-more-combo-drone-content-feature-5-HDR-Panorama.jpg?v=1626148445\"\u003e\u003c\/span\u003e\u003c\/div\u003e\n\u003ch3 style=\"text-align: center;\"\u003e\u003cspan style=\"color: #ff8000;\"\u003e\u003cb\u003e\u003c\/b\u003e\u003c\/span\u003e\u003c\/h3\u003e\n\u003ch3 style=\"text-align: center;\"\u003e\u003cspan style=\"color: #ff8000;\"\u003e\u003cb\u003eIntelligent Features\u003c\/b\u003e\u003c\/span\u003e\u003c\/h3\u003e\n\u003cdiv style=\"text-align: center;\"\u003e\u003cb\u003eObtaining Cinematic Shots\u003c\/b\u003e\u003c\/div\u003e\n\u003cdiv style=\"text-align: center;\"\u003e\u003cspan style=\"font-weight: 400;\"\u003eFor breathtaking results, the Mavic Air 2 combines a powerful camera with intelligent shooting modes. Aerial photography has never been easier to create.\u003c\/span\u003e\u003c\/div\u003e\n\u003cdiv style=\"text-align: center;\"\u003e\u003cspan style=\"font-weight: 400;\"\u003e\u003cimg alt=\"dji-mavic-air-2-fly-more-combo-drone-content-feature-6-Intelligent-Features\" src=\"https:\/\/cdn.shopify.com\/s\/files\/1\/2532\/7020\/files\/dji-mavic-air-2-fly-more-combo-drone-content-feature-6-Intelligent-Features.jpg?v=1626148481\"\u003e\u003c\/span\u003e\u003c\/div\u003e\n\u003ch3 style=\"text-align: center;\"\u003e\u003cspan style=\"color: #ff8000;\"\u003e\u003cb\u003e\u003c\/b\u003e\u003c\/span\u003e\u003c\/h3\u003e\n\u003ch3 style=\"text-align: center;\"\u003e\u003cspan style=\"color: #ff8000;\"\u003e\u003cb\u003eFocusTrack\u003c\/b\u003e\u003c\/span\u003e\u003c\/h3\u003e\n\u003cdiv style=\"text-align: center;\"\u003e\u003cb\u003eMaster the Skies\u003c\/b\u003e\u003c\/div\u003e\n\u003cdiv style=\"text-align: center;\"\u003e\u003cspan style=\"font-weight: 400;\"\u003eWith FocusTrack, capturing professional-quality footage is a breeze. Active Track 3.0, Spotlight 2.0, and Point of Interest 3.0 are among the easy-to-use intelligent tracking modes that let you express yourself.\u003c\/span\u003e\u003c\/div\u003e\n\u003cdiv style=\"text-align: center;\"\u003e \u003c\/div\u003e\n\u003cdiv style=\"text-align: center;\"\u003e\n\u003ctable width=\"100%\" data-mce-fragment=\"1\"\u003e\n\u003ctbody data-mce-fragment=\"1\"\u003e\n\u003ctr data-mce-fragment=\"1\"\u003e\n\u003ctd data-mce-fragment=\"1\"\u003e\n\u003cp\u003e \u003c\/p\u003e\n\u003cdiv style=\"text-align: left;\"\u003e\u003cimg style=\"float: none;\" alt=\"dji-mavic-air-2-fly-more-combo-drone-content-feature-7-1-Spotlight 2.0\" src=\"https:\/\/cdn.shopify.com\/s\/files\/1\/2532\/7020\/files\/dji-mavic-air-2-fly-more-combo-drone-content-feature-7-1-Spotlight_2.0.jpg?v=1626148537\"\u003e\u003c\/div\u003e\n\u003c\/td\u003e\n\u003ctd data-mce-fragment=\"1\"\u003e\n\u003cp\u003e\u003cimg src=\"https:\/\/cdn.shopify.com\/s\/files\/1\/2532\/7020\/files\/dji-mavic-air-2-fly-more-combo-drone-content-feature-7-2-ActiveTrack_3.0.jpg?v=1626148709\" alt=\"dji-mavic-air-2-fly-more-combo-drone-content-feature-7-2-ActiveTrack 3.0\" data-mce-fragment=\"1\" data-mce-src=\"https:\/\/cdn.shopify.com\/s\/files\/1\/2532\/7020\/files\/dji-mavic-air-2-fly-more-combo-drone-content-feature-7-2-ActiveTrack_3.0.jpg?v=1626148709\"\u003e\u003cbr\u003e\u003c\/p\u003e\n\u003c\/td\u003e\n\u003ctd data-mce-fragment=\"1\"\u003e\n\u003cp\u003e\u003cimg src=\"https:\/\/cdn.shopify.com\/s\/files\/1\/2532\/7020\/files\/dji-mavic-air-2-fly-more-combo-drone-content-feature-7-3-POI_3.0.jpg?v=1626148918\" alt=\"dji-mavic-air-2-fly-more-combo-drone-content-feature-7-3-POI 3.0\" data-mce-fragment=\"1\" data-mce-src=\"https:\/\/cdn.shopify.com\/s\/files\/1\/2532\/7020\/files\/dji-mavic-air-2-fly-more-combo-drone-content-feature-7-3-POI_3.0.jpg?v=1626148918\"\u003e\u003cbr\u003e\u003c\/p\u003e\n\u003c\/td\u003e\n\u003c\/tr\u003e\n\u003ctr data-mce-fragment=\"1\"\u003e\n\u003ctd data-mce-fragment=\"1\"\u003e\n\u003cp\u003e\u003cstrong\u003eSpotlight 2.0\u003c\/strong\u003e\u003c\/p\u003e\n\u003cp\u003eWith this handy mode, you may fly around freely while the camera remains fixed on the subject. Simply choose your target and take off.\u003c\/p\u003e\n\u003c\/td\u003e\n\u003ctd data-mce-fragment=\"1\"\u003e\n\u003cp\u003e\u003cstrong\u003eActiveTrack 3.0\u003c\/strong\u003e\u003c\/p\u003e\n\u003cp\u003eWith the latest version of DJI's ActiveTrack technology, following subjects while avoiding obstacles has never been easier. This technique keeps your subject in the center of the screen, even if they go behind a tree, with superior pathfinding and a faster and more accurate prediction of lost subjects.\u003c\/p\u003e\n\u003c\/td\u003e\n\u003ctd data-mce-fragment=\"1\"\u003e\n\u003cp\u003e\u003cstrong\u003ePOI 3.0\u003c\/strong\u003e\u003c\/p\u003e\n\u003cp\u003ePOI 3.0 enhances the capabilities of POI 2.0, particularly in terms of flat surface recognition. This updated functionality avoids the problem that POI 2.0 had with losing the target during tracking. POI 3.0 now has the ability to track people, cars, and boats in real time.\u003c\/p\u003e\n\u003c\/td\u003e\n\u003c\/tr\u003e\n\u003c\/tbody\u003e\n\u003c\/table\u003e\n\u003c\/div\u003e\n\u003ch3 style=\"text-align: center;\"\u003e\u003cb\u003e\u003cspan style=\"color: #ff8000;\"\u003e8K Hyperlapse\u003c\/span\u003e\u003c\/b\u003e\u003c\/h3\u003e\n\u003cdiv style=\"text-align: center;\"\u003e\u003cb\u003eTime and Movement\u003c\/b\u003e\u003c\/div\u003e\n\u003cdiv style=\"text-align: center;\"\u003e\u003cspan style=\"font-weight: 400;\"\u003eHyperlapse in 8K is supported by the Mavic Air 2, allowing you to warp time and space for particularly spectacular film. Best of all, you can get this photo without using any complicated post-production techniques. Choose from Free, Circle, Course Lock, and Waypoint modes, then point and shoot using the DJI Fly app. *8K resolution is only available in Free and Waypoint modes.\u003c\/span\u003e\u003c\/div\u003e\n\u003cdiv style=\"text-align: center;\"\u003e\n\u003cul\u003e\n\u003cli style=\"font-weight: 400;\"\u003e\u003cspan style=\"font-weight: 400;\"\u003eCourse Lock\u003c\/span\u003e\u003c\/li\u003e\n\u003cli style=\"font-weight: 400;\"\u003e\u003cspan style=\"font-weight: 400;\"\u003eFree\u003c\/span\u003e\u003c\/li\u003e\n\u003cli style=\"font-weight: 400;\"\u003e\u003cspan style=\"font-weight: 400;\"\u003eWaypoint\u003c\/span\u003e\u003c\/li\u003e\n\u003cli style=\"font-weight: 400;\"\u003e\u003cspan style=\"font-weight: 400;\"\u003eCircle\u003c\/span\u003e\u003c\/li\u003e\n\u003c\/ul\u003e\n\u003c\/div\u003e\n\u003cdiv style=\"text-align: center;\"\u003e\n\u003cimg src=\"https:\/\/cdn.shopify.com\/s\/files\/1\/2532\/7020\/files\/dji-mavic-air-2-fly-more-combo-drone-content-feature-8-2-free.jpg?v=1626148985\" alt=\"dji-mavic-air-2-fly-more-combo-drone-content-feature-8-2-free\" data-mce-fragment=\"1\" data-mce-src=\"https:\/\/cdn.shopify.com\/s\/files\/1\/2532\/7020\/files\/dji-mavic-air-2-fly-more-combo-drone-content-feature-8-2-free.jpg?v=1626148985\"\u003e\u003cbr\u003e\n\u003c\/div\u003e\n\u003cdiv style=\"text-align: center;\"\u003e \u003c\/div\u003e\n\u003ch3 style=\"text-align: center;\"\u003e\u003cspan style=\"color: #ff8000;\"\u003e\u003cb\u003eQuickShots\u003c\/b\u003e\u003c\/span\u003e\u003c\/h3\u003e\n\u003cdiv style=\"text-align: center;\"\u003e\u003cb\u003eImagination Simplified\u003c\/b\u003e\u003c\/div\u003e\n\u003cdiv style=\"text-align: center;\"\u003e\u003cspan style=\"font-weight: 400;\"\u003eQuickShots allows you to capture cinematic video snippets automatically. Mavic Air 2 prepares and flies a difficult aerial route for a professional-quality photo with just a few touches. With super-intuitive Story templates, you can add music, effects, and filters to your creation before sharing it on social media.\u003c\/span\u003e\u003c\/div\u003e\n\u003cdiv style=\"text-align: center;\"\u003e\n\u003cul\u003e\n\u003cli style=\"font-weight: 400;\"\u003e\u003cspan style=\"font-weight: 400;\"\u003eDronie\u003c\/span\u003e\u003c\/li\u003e\n\u003cli style=\"font-weight: 400;\"\u003e\u003cspan style=\"font-weight: 400;\"\u003eCircle\u003c\/span\u003e\u003c\/li\u003e\n\u003cli style=\"font-weight: 400;\"\u003e\u003cspan style=\"font-weight: 400;\"\u003eHelix\u003c\/span\u003e\u003c\/li\u003e\n\u003cli style=\"font-weight: 400;\"\u003e\u003cspan style=\"font-weight: 400;\"\u003eRocket\u003c\/span\u003e\u003c\/li\u003e\n\u003cli style=\"font-weight: 400;\"\u003e\u003cspan style=\"font-weight: 400;\"\u003eBoomerang\u003c\/span\u003e\u003c\/li\u003e\n\u003cli style=\"font-weight: 400;\"\u003e\u003cspan style=\"font-weight: 400;\"\u003eAsteroid\u003c\/span\u003e\u003c\/li\u003e\n\u003c\/ul\u003e\n\u003c\/div\u003e\n\u003ch3 style=\"text-align: center;\"\u003e\u003cspan style=\"color: #ff8000;\"\u003e\u003cb\u003e\u003c\/b\u003e\u003c\/span\u003e\u003c\/h3\u003e\n\u003ch3 style=\"text-align: center;\"\u003e\u003cspan style=\"color: #ff8000;\"\u003e\u003cb\u003eFlight and Safety\u003c\/b\u003e\u003c\/span\u003e\u003c\/h3\u003e\n\u003cdiv style=\"text-align: center;\"\u003e\u003cb\u003eSafer Flight for Stunning Content\u003c\/b\u003e\u003c\/div\u003e\n\u003cdiv style=\"text-align: center;\"\u003e\u003cspan style=\"color: #ffffff;\"\u003e\u003cb\u003e.\u003c\/b\u003e\u003c\/span\u003e\u003c\/div\u003e\n\u003ch3 style=\"text-align: center;\"\u003e\u003cspan style=\"color: #ff8000;\"\u003e\u003cb\u003e\u003c\/b\u003e\u003c\/span\u003e\u003c\/h3\u003e\n\u003ch3 style=\"text-align: center;\"\u003e\u003cspan style=\"color: #ff8000;\"\u003e\u003cb\u003eOcuSync 2.0\u003c\/b\u003e\u003c\/span\u003e\u003c\/h3\u003e\n\u003cdiv style=\"text-align: center;\"\u003e\u003cb\u003eThe Sky’s the Limit\u003c\/b\u003e\u003c\/div\u003e\n\u003cdiv style=\"text-align: center;\"\u003e\u003cspan style=\"font-weight: 400;\"\u003eOcuSync 2.0 can give a 1080p FHD livestream directly from the drone's camera and has a video transmission distance of up to 10 kilometers. Enjoy greater freedom when it comes to exploring and more clarity when it comes to capturing the perfect photo. \u003cbr data-mce-fragment=\"1\"\u003e\u003cbr data-mce-fragment=\"1\"\u003e*When unobstructed, interference-free, and FCC-compliant. The maximum flying range specification is a proxy for the strength and robustness of the radio link.\u003c\/span\u003e\u003c\/div\u003e\n\u003cdiv style=\"text-align: center;\"\u003e\u003cspan style=\"font-weight: 400;\"\u003e\u003cimg alt=\"dji-mavic-air-2-fly-more-combo-drone-content-feature-9-OcuSync 2.0\" src=\"https:\/\/cdn.shopify.com\/s\/files\/1\/2532\/7020\/files\/dji-mavic-air-2-fly-more-combo-drone-content-feature-9-OcuSync_2.0.jpg?v=1626149011\"\u003e\u003c\/span\u003e\u003c\/div\u003e\n\u003cdiv style=\"text-align: center;\"\u003e \u003c\/div\u003e\n\u003ch3 style=\"text-align: center;\"\u003e\u003cspan style=\"color: #ff8000;\"\u003e\u003cb\u003e2.4\/5.8GHz Dual Frequency\u003c\/b\u003e\u003c\/span\u003e\u003c\/h3\u003e\n\u003cdiv style=\"text-align: center;\"\u003e\u003cb\u003eSmooth Flight, Reliable Signal\u003cbr data-mce-fragment=\"1\"\u003e\u003c\/b\u003e\u003c\/div\u003e\n\u003cdiv style=\"text-align: center;\"\u003e\u003cspan style=\"font-weight: 400;\"\u003eThe Mavic Air 2 has dual-frequency connectivity (2.4\/5.8GHz) and automatically shifts to the best channel with the least interference in real time. This increases flight safety by greatly improving the aircraft's anti-interference ability in adverse circumstances. \u003cbr data-mce-fragment=\"1\"\u003e\u003cbr data-mce-fragment=\"1\"\u003e*Some countries do not accept 5.8 GHz transmission due to local laws.\u003c\/span\u003e\u003c\/div\u003e\n\u003cdiv style=\"text-align: center;\"\u003e\u003cspan style=\"font-weight: 400; color: #ffffff;\"\u003e.\u003c\/span\u003e\u003c\/div\u003e\n\u003ch3 style=\"text-align: center;\"\u003e\u003cspan style=\"color: #ff8000;\"\u003e\u003cb\u003e\u003c\/b\u003e\u003c\/span\u003e\u003c\/h3\u003e\n\u003ch3 style=\"text-align: center;\"\u003e\u003cspan style=\"color: #ff8000;\"\u003e\u003cb\u003eBattery and Flight\u003c\/b\u003e\u003c\/span\u003e\u003c\/h3\u003e\n\u003cdiv style=\"text-align: center;\"\u003e\u003cb\u003eFly Longer\u003c\/b\u003e\u003c\/div\u003e\n\u003cdiv style=\"text-align: center;\"\u003e\u003cspan style=\"font-weight: 400;\"\u003eWith a battery life of up to 34 minutes and a maximum flight speed of 68 kph in Sport mode, you'll be able to stay in the air for as long as you want to obtain the ideal image. \u003cbr data-mce-fragment=\"1\"\u003e\u003cbr data-mce-fragment=\"1\"\u003e*Flight time was recorded at a 9° angle and a speed of 5.1 m\/s in a windless environment.\u003c\/span\u003e\u003c\/div\u003e\n\u003cdiv style=\"text-align: center;\"\u003e \u003c\/div\u003e\n\u003cdiv style=\"text-align: center;\"\u003e\u003cspan style=\"font-weight: 400;\"\u003e\u003cimg alt=\"dji-mavic-air-2-fly-more-combo-drone-content-feature-10-battery\" src=\"https:\/\/cdn.shopify.com\/s\/files\/1\/2532\/7020\/files\/dji-mavic-air-2-fly-more-combo-drone-content-feature-10-battery.jpg?v=1626149034\"\u003e\u003c\/span\u003e\u003c\/div\u003e\n\u003ch3 style=\"text-align: center;\"\u003e\u003cspan style=\"color: #ff8000;\"\u003e\u003cb\u003eObstacle Avoidance\u003c\/b\u003e\u003c\/span\u003e\u003c\/h3\u003e\n\u003cdiv style=\"text-align: center;\"\u003e\u003cb\u003eFly Safer\u003c\/b\u003e\u003c\/div\u003e\n\u003cdiv style=\"text-align: center;\"\u003e\u003cspan style=\"font-weight: 400;\"\u003eForward, backward, and downward are the three directions in which Mavic Air 2 observes its surroundings. An auxiliary light improves visibility, and obstacle avoidance adds an extra layer of security that's great for pushing the boundaries of what's possible.\u003c\/span\u003e\u003c\/div\u003e\n\u003cdiv style=\"text-align: center;\"\u003e\n\u003ctable\u003e\n\u003ctbody\u003e\n\u003ctr\u003e\n\u003ctd\u003e\n\u003cp\u003e\u003cb\u003eForward\u003c\/b\u003e\u003cspan style=\"font-weight: 400;\"\u003e: Vision sensor accurate up to 22 meters\u003c\/span\u003e\u003c\/p\u003e\n\u003c\/td\u003e\n\u003c\/tr\u003e\n\u003ctr\u003e\n\u003ctd\u003e\n\u003cp\u003e\u003cb\u003eBackward\u003c\/b\u003e\u003cspan style=\"font-weight: 400;\"\u003e: Vision sensor accurate up to 23.6 meters\u003c\/span\u003e\u003c\/p\u003e\n\u003c\/td\u003e\n\u003c\/tr\u003e\n\u003ctr\u003e\n\u003ctd\u003e\n\u003cp\u003e\u003cb\u003eDownward\u003c\/b\u003e\u003cspan style=\"font-weight: 400;\"\u003e: Vision sensor, infrared sensor. The auxiliary light assist with visual positioning, safe landing, and visibility in the air. It can be turned on and off manually.\u003c\/span\u003e\u003c\/p\u003e\n\u003c\/td\u003e\n\u003c\/tr\u003e\n\u003c\/tbody\u003e\n\u003c\/table\u003e\n\u003c\/div\u003e\n\u003cdiv style=\"text-align: center;\"\u003e\u003cspan style=\"color: #ffffff;\"\u003e\u003cb\u003e.\u003c\/b\u003e\u003c\/span\u003e\u003c\/div\u003e\n\u003cdiv style=\"text-align: center;\"\u003e\u003cb\u003e\u003c\/b\u003e\u003c\/div\u003e\n\u003cdiv style=\"text-align: center;\"\u003e\u003cb\u003eAPAS 3.0\u003c\/b\u003e\u003c\/div\u003e\n\u003cdiv style=\"text-align: center;\"\u003e\u003cspan style=\"font-weight: 400;\"\u003eIn difficult settings, Advanced Pilot Assistance Systems (APAS) 3.0 employs advanced mapping technology for smooth following and dependable obstacle avoidance. When compared to earlier generations, obstacle avoidance performance and autonomous flight planning have improved substantially, boosting safety and enabling more options.\u003c\/span\u003e\u003c\/div\u003e\n\u003cdiv style=\"text-align: center;\"\u003e\u003cspan style=\"font-weight: 400;\"\u003e*While recording in 4K at 60, 50, and 48 fps, 2.7K at 60, 50, and 48 fps, and 1080p at 120 and 240 fps, APAS 3.0 and FocusTrack are not available.\u003cbr data-mce-fragment=\"1\"\u003e\u003c\/span\u003e\u003c\/div\u003e\n\u003cstyle\u003e\u003c!--\n.embed-container { position: relative; padding-bottom: 56.25%; height: 0; overflow: hidden; max-width: 100%; } .embed-container iframe, .embed-container object, .embed-container embed { position: absolute; top: 0; left: 0; width: 100%; height: 100%; }\n--\u003e\u003c\/style\u003e\n\u003cdiv style=\"text-align: center;\" class=\"embed-container\"\u003e\u003ciframe src=\"https:\/\/www.youtube.com\/embed\/IwoyGb-NWDs\" frameborder=\"0\" allowfullscreen=\"\"\u003e\u003c\/iframe\u003e\u003c\/div\u003e\n\u003cdiv style=\"text-align: center;\"\u003e \u003c\/div\u003e\n\u003ch3 style=\"text-align: center;\"\u003e\u003cspan style=\"color: #ff8000;\"\u003e\u003cb\u003eDJI Fly App\u003c\/b\u003e\u003c\/span\u003e\u003c\/h3\u003e\n\u003cdiv style=\"text-align: center;\"\u003e\u003cb\u003eEffortless Editing\u003c\/b\u003e\u003c\/div\u003e\n\u003cdiv style=\"text-align: center;\"\u003e\u003cspan style=\"font-weight: 400;\"\u003eThe DJI Fly app makes creating perfect films easier than ever before. It incorporates the DJI Mimo app's editing suite, giving users access to manual settings, advanced functionalities, and intuitive templates to quickly produce professional compositions.\u003c\/span\u003e\u003c\/div\u003e\n\u003cdiv style=\"text-align: center;\"\u003e\u003cspan style=\"font-weight: 400;\"\u003e\u003cimg alt=\"dji-mavic-air-2-fly-more-combo-drone-content-feature-11-DJI-Fly-App\" src=\"https:\/\/cdn.shopify.com\/s\/files\/1\/2532\/7020\/files\/dji-mavic-air-2-fly-more-combo-drone-content-feature-11-DJI-Fly-App.jpg?v=1626149062\"\u003e\u003c\/span\u003e\u003c\/div\u003e\n\u003ch3 style=\"text-align: center;\"\u003e\u003cspan style=\"color: #ff8000;\"\u003e\u003cb\u003e\u003c\/b\u003e\u003c\/span\u003e\u003c\/h3\u003e\n\u003ch3 style=\"text-align: center;\"\u003e\u003cspan style=\"color: #ff8000;\"\u003e\u003cb\u003eRemote Controller \u003c\/b\u003e\u003c\/span\u003e\u003c\/h3\u003e\n\u003cdiv style=\"text-align: center;\"\u003e\u003cb\u003eDesigned for Pilots\u003c\/b\u003e\u003c\/div\u003e\n\u003cdiv style=\"text-align: center;\"\u003e\u003cspan style=\"font-weight: 400;\"\u003eThe newly designed remote controller has an ergonomic shape for a more comfortable grip and an excellent 240-minute battery life. The redesigned clamp makes it simple to attach devices, and the integrated antennas improve the user experience dramatically.\u003cbr data-mce-fragment=\"1\"\u003e*In an interference-free environment, battery life was measured using an Android phone.\u003c\/span\u003e\u003c\/div\u003e\n\u003cdiv style=\"text-align: center;\"\u003e\u003cspan style=\"font-weight: 400;\"\u003e\u003cimg alt=\"dji-mavic-air-2-fly-more-combo-drone-content-feature-12-remote\" src=\"https:\/\/cdn.shopify.com\/s\/files\/1\/2532\/7020\/files\/dji-mavic-air-2-fly-more-combo-drone-content-feature-12-remote.jpg?v=1626149088\"\u003e\u003c\/span\u003e\u003c\/div\u003e\n\u003cdiv style=\"text-align: center;\"\u003e \u003c\/div\u003e\n\u003ch3 style=\"text-align: center;\"\u003e\u003cspan style=\"color: #ff8000;\"\u003e\u003cb\u003eND Filters\u003c\/b\u003e\u003c\/span\u003e\u003c\/h3\u003e\n\u003cdiv style=\"text-align: center;\"\u003e\u003cb\u003eOptimal Options\u003c\/b\u003e\u003c\/div\u003e\n\u003cdiv style=\"text-align: center;\"\u003eThe Mavic Air 2 comes with two ND filter sets that help with exposure control and give you additional creative options. The ND 16\/64\/256 set is useful for altering shutter speed and in low-light situations, while the ND 4\/8\/32 set allows for colorful photographs even at low ISO.\u003cbr\u003e\u003cbr\u003e*The Fly More Combo comes with ND16\/64\/256 filters. Separately, the ND4\/8\/32 filter set can be ordered.\u003c\/div\u003e\n\u003cdiv style=\"text-align: center;\"\u003e\u003cspan style=\"font-weight: 400;\"\u003e\u003cimg alt=\"dji-mavic-air-2-fly-more-combo-drone-content-feature-13-ND-Filter\" src=\"https:\/\/cdn.shopify.com\/s\/files\/1\/2532\/7020\/files\/dji-mavic-air-2-fly-more-combo-drone-content-feature-13-ND-Filter.jpg?v=1626149110\"\u003e\u003c\/span\u003e\u003c\/div\u003e\n\u003cdiv style=\"text-align: center;\"\u003e \u003c\/div\u003e\n\u003ch2 style=\"text-align: left;\"\u003e\u003cstrong\u003eSpecification\u003c\/strong\u003e\u003c\/h2\u003e\n\u003cp\u003e \u003c\/p\u003e\n\u003cp\u003e \u003c\/p\u003e\n\u003cp\u003e \u003c\/p\u003e\n\u003cdiv style=\"text-align: left;\"\u003e\u003cb\u003eAircraft\u003c\/b\u003e\u003c\/div\u003e\n\u003cdiv style=\"text-align: left;\"\u003e\n\u003cul\u003e\n\u003cli style=\"font-weight: 400;\"\u003e\u003cb\u003eWeight\u003c\/b\u003e\u003c\/li\u003e\n\u003cli style=\"font-weight: 400;\"\u003e570 g\u003c\/li\u003e\n\u003c\/ul\u003e\n\u003cul\u003e\n\u003cli style=\"font-weight: 400;\"\u003e\u003cb\u003eSize\u003c\/b\u003e\u003c\/li\u003e\n\u003cli style=\"font-weight: 400;\"\u003e\n\u003cspan style=\"font-weight: 400;\"\u003eFolded:\u003c\/span\u003e\u003cspan style=\"font-weight: 400;\"\u003e\u003cbr\u003e\u003c\/span\u003e\u003cspan style=\"font-weight: 400;\"\u003e180×97×74 mm (Length×Width×Height)\u003c\/span\u003e\u003cspan style=\"font-weight: 400;\"\u003e\u003cbr\u003e\u003c\/span\u003e\u003cspan style=\"font-weight: 400;\"\u003eUnfolded:\u003c\/span\u003e\u003cspan style=\"font-weight: 400;\"\u003e\u003cbr\u003e\u003c\/span\u003e\u003cspan style=\"font-weight: 400;\"\u003e183×253×77 mm (Length×Width×Height)\u003c\/span\u003e\n\u003c\/li\u003e\n\u003c\/ul\u003e\n\u003cul\u003e\n\u003cli style=\"font-weight: 400;\"\u003e\u003cb\u003eDiagonal Distance\u003c\/b\u003e\u003c\/li\u003e\n\u003cli style=\"font-weight: 400;\"\u003e\u003cspan style=\"font-weight: 400;\"\u003e302 mm\u003c\/span\u003e\u003c\/li\u003e\n\u003cli\u003e\u003cb\u003eTransmitter Power (EIRP)\u003c\/b\u003e\u003c\/li\u003e\n\u003cli\u003e\n\u003cspan\u003e2.400-2.4835 GHz:\u003c\/span\u003e\u003cspan\u003e\u003cbr\u003e\u003c\/span\u003e\u003cspan\u003eFCC: ≤26 dBm\u003c\/span\u003e\u003cspan\u003e\u003cbr\u003e\u003c\/span\u003e\u003cspan\u003eCE: ≤20 dBm\u003c\/span\u003e\u003cspan\u003e\u003cbr\u003e\u003c\/span\u003e\u003cspan\u003eSRRC: ≤20 dBm\u003c\/span\u003e\u003cspan\u003e\u003cbr\u003e\u003c\/span\u003e\u003cspan\u003eMIC: ≤20 dBm\u003c\/span\u003e\u003cspan\u003e\u003cbr\u003e\u003c\/span\u003e\u003cspan\u003e\u003cbr\u003e\u003c\/span\u003e\u003cspan\u003e5.725-5.850 GHz:\u003c\/span\u003e\u003cspan\u003e\u003cbr\u003e\u003c\/span\u003e\u003cspan\u003eFCC: ≤26 dBm\u003c\/span\u003e\u003cspan\u003e\u003cbr\u003e\u003c\/span\u003e\u003cspan\u003eCE: ≤14 dBm\u003c\/span\u003e\u003cspan\u003e\u003cbr\u003e\u003c\/span\u003e\u003cspan\u003eSRRC: ≤26 dBm\u003c\/span\u003e\n\u003c\/li\u003e\n\u003c\/ul\u003e\n\u003cul\u003e\n\u003cli style=\"font-weight: 400;\"\u003e\u003cb\u003eMax Ascent Speed\u003c\/b\u003e\u003c\/li\u003e\n\u003cli style=\"font-weight: 400;\"\u003e\n\u003cspan style=\"font-weight: 400;\"\u003e4 m\/s (S Mode)\u003c\/span\u003e\u003cspan style=\"font-weight: 400;\"\u003e\u003cbr\u003e\u003c\/span\u003e\u003cspan style=\"font-weight: 400;\"\u003e4 m\/s (N Mode)\u003c\/span\u003e\n\u003c\/li\u003e\n\u003c\/ul\u003e\n\u003cul\u003e\n\u003cli style=\"font-weight: 400;\"\u003e\u003cb\u003eMax Service Ceiling Above Sea Level\u003c\/b\u003e\u003c\/li\u003e\n\u003cli style=\"font-weight: 400;\"\u003e\u003cspan style=\"font-weight: 400;\"\u003e5000 m\u003c\/span\u003e\u003c\/li\u003e\n\u003c\/ul\u003e\n\u003cul\u003e\n\u003cli style=\"font-weight: 400;\"\u003e\u003cb\u003eMax Flight Time (without wind)\u003c\/b\u003e\u003c\/li\u003e\n\u003cli style=\"font-weight: 400;\"\u003e\u003cspan style=\"font-weight: 400;\"\u003e34 minutes\u003c\/span\u003e\u003c\/li\u003e\n\u003c\/ul\u003e\n\u003cul\u003e\n\u003cli style=\"font-weight: 400;\"\u003e\u003cb\u003eMax Hover Time (without wind)\u003c\/b\u003e\u003c\/li\u003e\n\u003cli style=\"font-weight: 400;\"\u003e\u003cspan style=\"font-weight: 400;\"\u003e33 minutes\u003c\/span\u003e\u003c\/li\u003e\n\u003c\/ul\u003e\n\u003cul\u003e\n\u003cli style=\"font-weight: 400;\"\u003e\u003cb\u003eMax Flight Distance\u003c\/b\u003e\u003c\/li\u003e\n\u003cli style=\"font-weight: 400;\"\u003e\u003cspan style=\"font-weight: 400;\"\u003e18.5 km\u003c\/span\u003e\u003c\/li\u003e\n\u003cli\u003e\u003cb\u003eMax Descent Speed\u003c\/b\u003e\u003c\/li\u003e\n\u003cli\u003e\n\u003cspan\u003e3 m\/s (S Mode)\u003c\/span\u003e\u003cspan\u003e\u003cbr\u003e\u003c\/span\u003e\u003cspan\u003e3 m\/s (N Mode)\u003c\/span\u003e\u003cspan\u003e\u003cbr\u003e\u003c\/span\u003e\u003cspan\u003e5 m\/s (S Mode and N Mode during a sharp descent)\u003c\/span\u003e\u003cspan\u003e\u003cbr\u003e\u003c\/span\u003e\u003cspan\u003e3 m\/s (all modes at elevations over 4500 m)\u003c\/span\u003e\n\u003c\/li\u003e\n\u003c\/ul\u003e\n\u003cul\u003e\n\u003cli style=\"font-weight: 400;\"\u003e\u003cb\u003eMax Horizontal Flight Speed\u003c\/b\u003e\u003c\/li\u003e\n\u003cli style=\"font-weight: 400;\"\u003e\n\u003cspan style=\"font-weight: 400;\"\u003e19 m\/s (S Mode)\u003c\/span\u003e\u003cspan style=\"font-weight: 400;\"\u003e\u003cbr\u003e\u003c\/span\u003e\u003cspan style=\"font-weight: 400;\"\u003e12 m\/s (N Mode)\u003c\/span\u003e\u003cspan style=\"font-weight: 400;\"\u003e\u003cbr\u003e\u003c\/span\u003e\u003cspan style=\"font-weight: 400;\"\u003e5 m\/s (T Mode)\u003c\/span\u003e\n\u003c\/li\u003e\n\u003cli\u003e\u003cb\u003eHovering Accuracy Range\u003c\/b\u003e\u003c\/li\u003e\n\u003cli\u003e\n\u003cspan\u003eVertical:\u003c\/span\u003e\u003cspan\u003e\u003cbr\u003e\u003c\/span\u003e\u003cspan\u003e±0.1 m (with vision positioning)\u003c\/span\u003e\u003cspan\u003e\u003cbr\u003e\u003c\/span\u003e\u003cspan\u003e±0.5 m (with GPS positioning)\u003c\/span\u003e\u003cspan\u003e\u003cbr\u003e\u003c\/span\u003e\u003cspan\u003e\u003cbr\u003e\u003c\/span\u003e\u003cspan\u003eHorizontal:\u003c\/span\u003e\u003cspan\u003e\u003cbr\u003e\u003c\/span\u003e\u003cspan\u003e±0.1 m (with vision positioning)\u003c\/span\u003e\u003cspan\u003e\u003cbr\u003e\u003c\/span\u003e\u003cspan\u003e±1.5 m (with GPS positioning)\u003c\/span\u003e\n\u003c\/li\u003e\n\u003c\/ul\u003e\n\u003cul\u003e\n\u003cli style=\"font-weight: 400;\"\u003e\u003cb\u003eMax Wind Resistance\u003c\/b\u003e\u003c\/li\u003e\n\u003cli style=\"font-weight: 400;\"\u003e\u003cspan style=\"font-weight: 400;\"\u003e8.5-10.5 m\/s (Level 5)\u003c\/span\u003e\u003c\/li\u003e\n\u003c\/ul\u003e\n\u003cul\u003e\n\u003cli style=\"font-weight: 400;\"\u003e\u003cb\u003eMax Tilt Angle\u003c\/b\u003e\u003c\/li\u003e\n\u003cli style=\"font-weight: 400;\"\u003e\n\u003cspan style=\"font-weight: 400;\"\u003e35° (S Mode)\u003c\/span\u003e\u003cspan style=\"font-weight: 400;\"\u003e\u003cbr\u003e\u003c\/span\u003e\u003cspan style=\"font-weight: 400;\"\u003e20° (N Mode)\u003c\/span\u003e\u003cspan style=\"font-weight: 400;\"\u003e\u003cbr\u003e\u003c\/span\u003e\u003cspan style=\"font-weight: 400;\"\u003e35° (N Mode under strong wind)\u003c\/span\u003e\n\u003c\/li\u003e\n\u003c\/ul\u003e\n\u003cul\u003e\n\u003cli style=\"font-weight: 400;\"\u003e\u003cb\u003eOperating Frequency\u003c\/b\u003e\u003c\/li\u003e\n\u003cli style=\"font-weight: 400;\"\u003e\n\u003cspan style=\"font-weight: 400;\"\u003e2.400-2.4835 GHz\u003c\/span\u003e\u003cspan style=\"font-weight: 400;\"\u003e\u003cbr\u003e\u003c\/span\u003e\u003cspan style=\"font-weight: 400;\"\u003e5.725-5.850 GHz\u003c\/span\u003e\n\u003c\/li\u003e\n\u003c\/ul\u003e\n\u003cul data-mce-fragment=\"1\"\u003e\n\u003cli data-mce-fragment=\"1\"\u003e\u003cb data-mce-fragment=\"1\"\u003eMax Angular Velocity\u003c\/b\u003e\u003c\/li\u003e\n\u003cli data-mce-fragment=\"1\"\u003e\n\u003cspan data-mce-fragment=\"1\"\u003e250°\/s (S Mode)\u003c\/span\u003e\u003cspan data-mce-fragment=\"1\"\u003e\u003cbr data-mce-fragment=\"1\"\u003e\u003c\/span\u003e\u003cspan data-mce-fragment=\"1\"\u003e250°\/s (N Mode)\u003c\/span\u003e\n\u003c\/li\u003e\n\u003c\/ul\u003e\n\u003cul data-mce-fragment=\"1\"\u003e\n\u003cli data-mce-fragment=\"1\"\u003e\u003cb data-mce-fragment=\"1\"\u003eOperating Temperature Range\u003c\/b\u003e\u003c\/li\u003e\n\u003cli data-mce-fragment=\"1\"\u003e\u003cspan data-mce-fragment=\"1\"\u003e-10° to 40°C (14° to 104°F)\u003c\/span\u003e\u003c\/li\u003e\n\u003c\/ul\u003e\n\u003cul\u003e\u003c\/ul\u003e\n\u003cul\u003e\n\u003cli style=\"font-weight: 400;\"\u003e\u003cb\u003ePropellers\u003c\/b\u003e\u003c\/li\u003e\n\u003cli style=\"font-weight: 400;\"\u003e\u003cspan style=\"font-weight: 400;\"\u003eQuick release, low noise, folding\u003c\/span\u003e\u003c\/li\u003e\n\u003c\/ul\u003e\n\u003cul\u003e\n\u003cli style=\"font-weight: 400;\"\u003e\u003cb\u003eSatellite Systems\u003c\/b\u003e\u003c\/li\u003e\n\u003cli style=\"font-weight: 400;\"\u003e\u003cspan style=\"font-weight: 400;\"\u003eGPS+GLONASS\u003c\/span\u003e\u003c\/li\u003e\n\u003c\/ul\u003e\n\u003cul\u003e\n\u003cli style=\"font-weight: 400;\"\u003e\u003cb\u003eCompass\u003c\/b\u003e\u003c\/li\u003e\n\u003cli style=\"font-weight: 400;\"\u003e\u003cspan style=\"font-weight: 400;\"\u003eSingle Compass\u003c\/span\u003e\u003c\/li\u003e\n\u003c\/ul\u003e\n\u003cul\u003e\n\u003cli style=\"font-weight: 400;\"\u003e\u003cb\u003eIMU\u003c\/b\u003e\u003c\/li\u003e\n\u003cli style=\"font-weight: 400;\"\u003e\u003cspan style=\"font-weight: 400;\"\u003eSingle IMU\u003c\/span\u003e\u003c\/li\u003e\n\u003c\/ul\u003e\n\u003cul\u003e\n\u003cli style=\"font-weight: 400;\"\u003e\u003cb\u003eInternal Storage\u003c\/b\u003e\u003c\/li\u003e\n\u003cli style=\"font-weight: 400;\"\u003e\u003cspan style=\"font-weight: 400;\"\u003e8 GB\u003c\/span\u003e\u003c\/li\u003e\n\u003c\/ul\u003e\n\u003c\/div\u003e\n\u003cdiv style=\"text-align: left;\"\u003e\u003cb\u003eBattery\u003c\/b\u003e\u003c\/div\u003e\n\u003cdiv style=\"text-align: left;\"\u003e\n\u003cul\u003e\n\u003cli style=\"font-weight: 400;\"\u003e\u003cb\u003eCapacity\u003c\/b\u003e\u003c\/li\u003e\n\u003cli style=\"font-weight: 400;\"\u003e\u003cspan style=\"font-weight: 400;\"\u003e3500 mAh\u003c\/span\u003e\u003c\/li\u003e\n\u003c\/ul\u003e\n\u003cul\u003e\n\u003cli style=\"font-weight: 400;\"\u003e\u003cb\u003eVoltage\u003c\/b\u003e\u003c\/li\u003e\n\u003cli style=\"font-weight: 400;\"\u003e\u003cspan style=\"font-weight: 400;\"\u003e11.55 V\u003c\/span\u003e\u003c\/li\u003e\n\u003c\/ul\u003e\n\u003cul\u003e\n\u003cli style=\"font-weight: 400;\"\u003e\u003cb\u003eCharging Voltage Limit\u003c\/b\u003e\u003c\/li\u003e\n\u003cli style=\"font-weight: 400;\"\u003e\u003cspan style=\"font-weight: 400;\"\u003e13.2 V\u003c\/span\u003e\u003c\/li\u003e\n\u003c\/ul\u003e\n\u003cul\u003e\u003c\/ul\u003e\n\u003cul\u003e\n\u003cli style=\"font-weight: 400;\"\u003e\u003cb\u003eWeight\u003c\/b\u003e\u003c\/li\u003e\n\u003cli style=\"font-weight: 400;\"\u003e\u003cspan style=\"font-weight: 400;\"\u003e198 g\u003c\/span\u003e\u003c\/li\u003e\n\u003c\/ul\u003e\n\u003cul\u003e\n\u003cli style=\"font-weight: 400;\"\u003e\u003cb\u003eCharging Temperature\u003c\/b\u003e\u003c\/li\u003e\n\u003cli style=\"font-weight: 400;\"\u003e\u003cspan style=\"font-weight: 400;\"\u003e5° to 40°C (41° to 104°F)\u003c\/span\u003e\u003c\/li\u003e\n\u003c\/ul\u003e\n\u003cul data-mce-fragment=\"1\"\u003e\n\u003cli data-mce-fragment=\"1\"\u003e\u003cb data-mce-fragment=\"1\"\u003eBattery Type\u003c\/b\u003e\u003c\/li\u003e\n\u003cli data-mce-fragment=\"1\"\u003e\u003cspan data-mce-fragment=\"1\"\u003eLiPo 3S\u003c\/span\u003e\u003c\/li\u003e\n\u003c\/ul\u003e\n\u003cul data-mce-fragment=\"1\"\u003e\n\u003cli data-mce-fragment=\"1\"\u003e\u003cb data-mce-fragment=\"1\"\u003eEnergy\u003c\/b\u003e\u003c\/li\u003e\n\u003cli data-mce-fragment=\"1\"\u003e\u003cspan data-mce-fragment=\"1\"\u003e40.42 Wh\u003c\/span\u003e\u003c\/li\u003e\n\u003c\/ul\u003e\n\u003cul\u003e\u003c\/ul\u003e\n\u003cul\u003e\n\u003cli style=\"font-weight: 400;\"\u003e\u003cb\u003eMax Charging Power\u003c\/b\u003e\u003c\/li\u003e\n\u003cli style=\"font-weight: 400;\"\u003e\u003cspan style=\"font-weight: 400;\"\u003e38 W\u003c\/span\u003e\u003c\/li\u003e\n\u003c\/ul\u003e\n\u003c\/div\u003e\n\u003cdiv style=\"text-align: left;\"\u003e\u003cb\u003eCamera\u003c\/b\u003e\u003c\/div\u003e\n\u003cdiv\u003e\n\u003cul style=\"text-align: left;\"\u003e\n\u003cli style=\"font-weight: 400;\"\u003e\u003cb\u003eSensor\u003c\/b\u003e\u003c\/li\u003e\n\u003cli style=\"font-weight: 400;\"\u003e\n\u003cspan style=\"font-weight: 400;\"\u003e1\/2\" CMOS\u003c\/span\u003e\u003cspan style=\"font-weight: 400;\"\u003e\u003cbr\u003e\u003c\/span\u003e\u003cspan style=\"font-weight: 400;\"\u003eEffective Pixels: 12 MP and 48 MP\u003c\/span\u003e\n\u003c\/li\u003e\n\u003cli\u003e\u003cb\u003eISO\u003c\/b\u003e\u003c\/li\u003e\n\u003cli\u003e\n\u003cspan\u003eVideo:\u003c\/span\u003e\u003cspan\u003e\u003cbr\u003e\u003c\/span\u003e\u003cspan\u003e100-6400\u003c\/span\u003e\u003cspan\u003e\u003cbr\u003e\u003c\/span\u003e\u003cspan\u003e\u003cbr\u003e\u003c\/span\u003e\u003cspan\u003ePhoto (12 MP):\u003c\/span\u003e\u003cspan\u003e\u003cbr\u003e\u003c\/span\u003e\u003cspan\u003e100-3200 (Auto)\u003c\/span\u003e\u003cspan\u003e\u003cbr\u003e\u003c\/span\u003e\u003cspan\u003e100-6400 (Manual)\u003c\/span\u003e\u003cspan\u003e\u003cbr\u003e\u003c\/span\u003e\u003cspan\u003ePhoto (48 MP):\u003c\/span\u003e\u003cspan\u003e\u003cbr\u003e\u003c\/span\u003e\u003cspan\u003e100-1600 (Auto)\u003c\/span\u003e\u003cspan\u003e\u003cbr\u003e\u003c\/span\u003e\u003cspan\u003e100-3200 (Manual)\u003c\/span\u003e\n\u003c\/li\u003e\n\u003c\/ul\u003e\n\u003cul style=\"text-align: left;\"\u003e\n\u003cli style=\"font-weight: 400;\"\u003e\u003cb\u003eLens\u003c\/b\u003e\u003c\/li\u003e\n\u003cli style=\"font-weight: 400;\"\u003e\n\u003cspan style=\"font-weight: 400;\"\u003eFOV: 84°\u003c\/span\u003e\u003cspan style=\"font-weight: 400;\"\u003e\u003cbr\u003e\u003c\/span\u003e\u003cspan style=\"font-weight: 400;\"\u003eEquivalent Focal Length: 24 mm\u003c\/span\u003e\u003cspan style=\"font-weight: 400;\"\u003e\u003cbr\u003e\u003c\/span\u003e\u003cspan style=\"font-weight: 400;\"\u003eAperture: f\/2.8\u003c\/span\u003e\u003cspan style=\"font-weight: 400;\"\u003e\u003cbr\u003e\u003c\/span\u003e\u003cspan style=\"font-weight: 400;\"\u003eFocus Range: 1 m to ∞\u003c\/span\u003e\n\u003c\/li\u003e\n\u003c\/ul\u003e\n\u003cul data-mce-fragment=\"1\"\u003e\n\u003cli data-mce-fragment=\"1\"\u003e\u003cb data-mce-fragment=\"1\"\u003eVideo Formats\u003c\/b\u003e\u003c\/li\u003e\n\u003cli data-mce-fragment=\"1\"\u003e\u003cspan data-mce-fragment=\"1\"\u003eMP4\/MOV (H.264\/MPEG-4 AVC, H.265\/HEVC)\u003c\/span\u003e\u003c\/li\u003e\n\u003c\/ul\u003e\n\u003cul data-mce-fragment=\"1\"\u003e\n\u003cli data-mce-fragment=\"1\"\u003e\u003cb data-mce-fragment=\"1\"\u003eMax Bitrate\u003c\/b\u003e\u003c\/li\u003e\n\u003cli data-mce-fragment=\"1\"\u003e\u003cspan data-mce-fragment=\"1\"\u003e120 Mbps\u003c\/span\u003e\u003c\/li\u003e\n\u003c\/ul\u003e\n\u003cul style=\"text-align: left;\"\u003e\u003c\/ul\u003e\n\u003cul style=\"text-align: left;\"\u003e\n\u003cli style=\"font-weight: 400;\"\u003e\u003cb\u003eMax Photo Resolution\u003c\/b\u003e\u003c\/li\u003e\n\u003cli style=\"font-weight: 400;\"\u003e\u003cspan style=\"font-weight: 400;\"\u003e48 MP 8000×6000 pixel\u003c\/span\u003e\u003c\/li\u003e\n\u003c\/ul\u003e\n\u003cul style=\"text-align: left;\"\u003e\n\u003cli style=\"font-weight: 400;\"\u003e\u003cb\u003ePhoto Formats\u003c\/b\u003e\u003c\/li\u003e\n\u003cli style=\"font-weight: 400;\"\u003e\u003cspan style=\"font-weight: 400;\"\u003eJPEG\/DNG (RAW)\u003c\/span\u003e\u003c\/li\u003e\n\u003cli\u003e\u003cb\u003ePhoto Modes\u003c\/b\u003e\u003c\/li\u003e\n\u003cli\u003e\n\u003cspan\u003eSingle: 12 MP and 48 MP\u003c\/span\u003e\u003cspan\u003e\u003cbr\u003e\u003c\/span\u003e\u003cspan\u003eBurst: 12 MP, 3\/5\/7 frames\u003c\/span\u003e\u003cspan\u003e\u003cbr\u003e\u003c\/span\u003e\u003cspan\u003eAutomatic Exposure Bracketing (AEB): 12MP, 3\/5 Frames at 0.7EV Bias\u003c\/span\u003e\u003cspan\u003e\u003cbr\u003e\u003c\/span\u003e\u003cspan\u003eTimed: 12 MP 2\/3\/5\/7\/10\/15\/20\/30\/60 seconds\u003c\/span\u003e\u003cspan\u003e\u003cbr\u003e\u003c\/span\u003e\u003cspan\u003eSmartPhoto: Scene Recognition, HyperLight, and HDR\u003c\/span\u003e\u003cspan\u003e\u003cbr\u003e\u003c\/span\u003e\u003cspan\u003eHDR Panorama:\u003c\/span\u003e\u003cspan\u003e\u003cbr\u003e\u003c\/span\u003e\u003cspan\u003eVertical (3×1): 3328×8000 pixels (Width×Height)\u003c\/span\u003e\u003cspan\u003e\u003cbr\u003e\u003c\/span\u003e\u003cspan\u003eWide-angle (3×3): 8000×6144 pixels (Width×Height)\u003c\/span\u003e\u003cspan\u003e\u003cbr\u003e\u003c\/span\u003e\u003cspan\u003e180° Panorama (3×7): 8192×3500 pixels (Width×Height)\u003c\/span\u003e\u003cspan\u003e\u003cbr\u003e\u003c\/span\u003e\u003cspan\u003eSphere (3×8+1): 8192×4096 pixels (Width×Height)\u003c\/span\u003e\n\u003c\/li\u003e\n\u003c\/ul\u003e\n\u003cul style=\"text-align: left;\"\u003e\n\u003cli style=\"font-weight: 400;\"\u003e\u003cb\u003eVideo Resolution and Frame Rates\u003c\/b\u003e\u003c\/li\u003e\n\u003cli style=\"font-weight: 400;\"\u003e\n\u003cspan style=\"font-weight: 400;\"\u003e4K Ultra HD: 3840×2160 24\/25\/30\/48\/50\/60 fps\u003c\/span\u003e\u003cspan style=\"font-weight: 400;\"\u003e\u003cbr\u003e\u003c\/span\u003e\u003cspan style=\"font-weight: 400;\"\u003e2.7K: 2688×1512 24\/25\/30\/48\/50\/60 fps\u003c\/span\u003e\u003cspan style=\"font-weight: 400;\"\u003e\u003cbr\u003e\u003c\/span\u003e\u003cspan style=\"font-weight: 400;\"\u003eFHD: 1920×1080 24\/25\/30\/48\/50\/60\/120\/240 fps\u003c\/span\u003e\u003cspan style=\"font-weight: 400;\"\u003e\u003cbr\u003e\u003c\/span\u003e\u003cspan style=\"font-weight: 400;\"\u003e4K Ultra HD HDR: 3840×2160 24\/25\/30 fps\u003c\/span\u003e\u003cspan style=\"font-weight: 400;\"\u003e\u003cbr\u003e\u003c\/span\u003e\u003cspan style=\"font-weight: 400;\"\u003e2.7K HDR: 2688×1512 24\/25\/30 fps\u003c\/span\u003e\u003cspan style=\"font-weight: 400;\"\u003e\u003cbr\u003e\u003c\/span\u003e\u003cspan style=\"font-weight: 400;\"\u003eFHD HDR: 1920×1080 24\/25\/30 fps\u003c\/span\u003e\n\u003c\/li\u003e\n\u003c\/ul\u003e\n\u003cul style=\"text-align: left;\"\u003e\n\u003cli style=\"font-weight: 400;\"\u003e\u003cb\u003eColor Profiles\u003c\/b\u003e\u003c\/li\u003e\n\u003cli style=\"font-weight: 400;\"\u003e\u003cspan style=\"font-weight: 400;\"\u003eD-Cinelike, Normal\u003c\/span\u003e\u003c\/li\u003e\n\u003c\/ul\u003e\n\u003cul style=\"text-align: left;\"\u003e\n\u003cli style=\"font-weight: 400;\"\u003e\u003cb\u003eSupported SD Cards\u003c\/b\u003e\u003c\/li\u003e\n\u003cli style=\"font-weight: 400;\"\u003e\u003cspan style=\"font-weight: 400;\"\u003eSupports a microSD with capacity of up to 256 GB\u003c\/span\u003e\u003c\/li\u003e\n\u003c\/ul\u003e\n\u003cul style=\"text-align: left;\"\u003e\n\u003cli style=\"font-weight: 400;\"\u003e\u003cb\u003eSupported File Systems\u003c\/b\u003e\u003c\/li\u003e\n\u003cli style=\"font-weight: 400;\"\u003e\u003cspan style=\"font-weight: 400;\"\u003eFAT32 and exFAT\u003c\/span\u003e\u003c\/li\u003e\n\u003c\/ul\u003e\n\u003cul style=\"text-align: center;\"\u003e\n\u003cli style=\"font-weight: 400; text-align: left;\"\u003e\u003cb\u003eZoom\u003c\/b\u003e\u003c\/li\u003e\n\u003cli style=\"font-weight: 400; text-align: left;\"\u003e\u003cspan style=\"font-weight: 400;\"\u003eAvailable\u003c\/span\u003e\u003c\/li\u003e\n\u003c\/ul\u003e\n\u003c\/div\u003e\n\u003c\/div\u003e"}
-
Translation missing: en.products.product.regular_price
$10.00$9.00 On Sale Sold OutTranslation missing: en.products.product.regular_price $1,088.00 Sold OutInsta360 GO 2 Easy Clip
Insta360 GO 2 accessories| Easy Clip
The adjustable simple clip design allows you to find a suitable shooting angle, and you can quickly disassemble and assemble in a few seconds.

Adjustable design so you can get the right angle.
Clip-on and off in seconds.
Insert your Insta360 GO 2 camera directly into this simple clip, and then you can clip it on the front or back of your hat or headband, or clip it to various other objects or locations that you find useful. The camera can be tilted in a simple clip so that you can switch the angle anytime and anywhere.
The simple clip is provided with the GO 2 camera package. This simple clip can be purchased separately and used as a spare or replacement.
Brand: Insta360
Product size: length x width x height 3.5 x 3.4 x 1.5 inches
Commodity weight: 0.05 Pounds -
Translation missing: en.products.product.regular_price
$39.00$35.00 On Sale Sold OutTranslation missing: en.products.product.regular_price $1,088.00 Sold OutInsta360 GO 2 Dive Case
Start your water-based adventures by using
Insta360 GO 2
Dive Case

IPX 8 waterproof to depths of 45 m
Protect your GO 2 action camera on all your water-based adventures

How to use it
1. Open the Case
Push the lock block (1) in the direction shown in the figure. After locking, remove the hook (2).

2. Attach the Anti-Fog Inserts
Attach the anti-fog inserts into the buckle on the backside of the Dive Case door, as shown.
 Note:1) Attach the anti-fog inserts into the buckle on the backside of the Dive Case door.
2) When using third-party anti-fog inserts, ensure that the size is within 20 X 20 X 0.5 mm. If the inserts are too large, they may cause water leakage and potentially damage the camera.3. Insert the Camera
 Note:When inserting the camera, take care not to scratch the lens.
4. Close the Case
To close the Dive Case, latch the buckle onto the case's hook and firmly push it down until it clicks. Note:1) Always ensure the Dive Case is firmly closed before use. Check that the parts of the Dive Case in contact with its rubber seal are free of dirt or dust.2) For best results, keep the Dive Case clean, particularly the area protecting GO 2's lens.
Specs:
Maximum depth:45 mIncluded items:Insta360 GO 2 Dive Case, Anti-Fog Inserts, Protective Pouch, Instructions & WarrantyWeight: 131 g -
Translation missing: en.products.product.regular_price
$899.00$728.00 On Sale Sold OutTranslation missing: en.products.product.regular_price $1,088.00 Sold OutYoloLiv YoloBox Portable Live Stream Studio
Professional Live Streaming Made Simple & Affordable Event
Exclusive Hong Kong International Version with built-in YouTube & Facebook Live integration
Tap to Start Your Full HD Live Stream
Professional streaming made simple. Whether streaming to social or producing an event streamed around the world, our YoloBox Plus (international version) is designed to make you look like a pro. Reach your audience everywhere. Distribute high-quality video to your you'rewebsite, apps, Cloud and social channels. Your videos will be ready for viewing within seconds and are captured with high resolution and great contrast.
3 Simple Steps
STEP 1 CONNECT
Connect to the internet via Ethernet/WiFi/4G, sign up your YoloLiv account, then plug your camera into YoloBox, you are way to go.

STEP 2 CAPTURE
YoloBox can input video from different sources including multiple cameras, GoPro, drone, local library, SD card, Computer, etc.

STEP 3 STREAM
Boost your viewership in cross-channels like Facebook, YouTube, Twitch, or any other RTMP(s) supported websites.
 YoloBox helps you start live broadcasting events with unprecedented scale and effectiveness
Support various kinds of captures
Not only can YoloBox Plus (international version) stream from DSLR, DV, action cams, drones, Youtube and Facebook, YoloBox are now available to stream your screen from mainstream smartphones, tablets and computers.
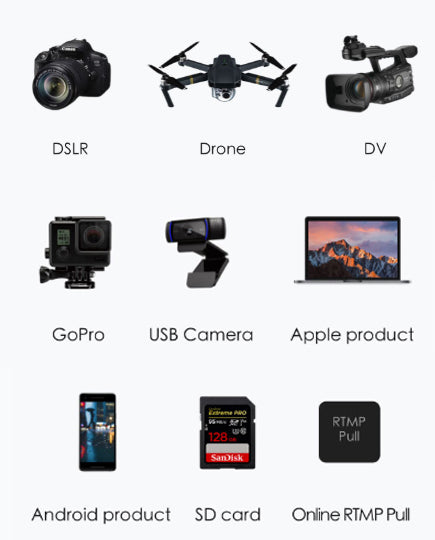

Do you know live streaming is the new trend on social media platforms? Check out "3 reasons why live streaming is the new trend" blog now!
Touch Screen Live Production
With encoder, switcher, monitor and record built-in one, YoloBox is a studio and play device which allows you to do Full HD Live Stream, Multi-camera production, Picture in picture, Watermarks and many more.

Multi-Camera Capture
Switch up to 5 video sources simultaneously
Independent Audio Input/ Output
Add Video Sources From Local SD Card
Roll in pre-recorded video for intro, countdown, B-rolls or special segments.

Load PDF as an Extra Source Locally
Enhance the storytelling by one extra source. You can simple control the PDF by clicking the buttons on the screen with your finger.

Picture in Picture
YoloBox Plus (international version) supports "Picture in Picture" feature that will allow producers to show two camera shots in one graphic layer at the same time. You can now decide which video source you would like to appear on the screen with one simple click.
Add Custom Graphic Layers
A more professional settings with customized picture in picture options including Interview Mode. You can also add logos, banner in the screen to show the information of the live.
Interview Mode
Show two video source at the same time and make instant communication.

Add and Edit on the Built-in Lower-Thirds Templates
Display the intro of the speaker or Call-to-Action messages to drive viewers' instant actions.
Feature Comment Overlays to the Stream
Engage with your audience in real-time and enrich the content of your live.

Add Customizable Scoreboard
Display real-time controlled scoreboard to make your game look professional.
Make everything professional!

Cross Platforms Streaming
Stream your live event to three destinations simultaneously, seamless integration with major platforms.

No Monthly Subscription Fee
Unlimited streaming data, unlimited streaming time.
Reach your audience across multiple social media platforms at the same time.
Product Spec
We are trying to do better on every tiny little detail as we can.


Specifications
Dimensions and Weight
Length:185mm
Width:107mm
Height:19.5mm
Weight:480g
Encoded Format
Video Encoded Format:H.264
Audio Encoded Format:AAC (48k)
Video Recorded format:MP4
Audio Input Format:32kHz, 44.1kHz, 48kHz, 16-bit
Video Input Format (HDMI 1):1080i/ 720p/ 1080p
Video Input Format (HDMI 2):1080i/ 720p/
Video Recorded Resolution:Up to 1080p:60fps
Live Broadcast Resolution:540P/720P/1080P
Video Storage
Storage Card Type:SD Card
Storage Card Capacity:Expanded to 128G
Network Connection
WiFi:2.4G/5G, Support 802.11a/b/g/n/ac
4G Network:LTE-FDD B2/4/5/7/12/13/17/25/26,LTE-TDD B41
SIM Card Size:Standard SIM Card
Power
Power Interface:Type C, Quick Charge 3.0
Battery Capacity:3.7V/5700mAh
Working Environment
Operating Temperature:-10℃-40℃
Storage Temperature:5℃-40℃
Package
YoloBox, USB Charging Cable
HotShoe Mount, Storage Bag
User ManualFrequently Asked Questions for Yolobox
-
Translation missing: en.products.product.regular_price
$299.99$254.00 On Sale Sold OutTranslation missing: en.products.product.regular_price $1,088.00 Sold OutInsta360 GO 2 1440P Remote Control Sports Camera (32GB / 64GB)
Package


The smallest action camera in the world
Main function

First-person perspective
Share the world in your eyes
Tap the camera body lightly to shoot at will. The first perspective records every moment of life, allowing the audience to empathize and immerse themselves in it.

FlowState shockproof technology
Small and exquisite without fear of bumps
Insta360 GO 2 is equipped with FlowState anti-shock technology, the picture is smooth and smooth, and the shooting moves as you like.

Level correction
Correct the horizon, the picture is more stable
Super video mode can automatically start a horizontal correction, the camera rotates continuously, and the picture is stable.
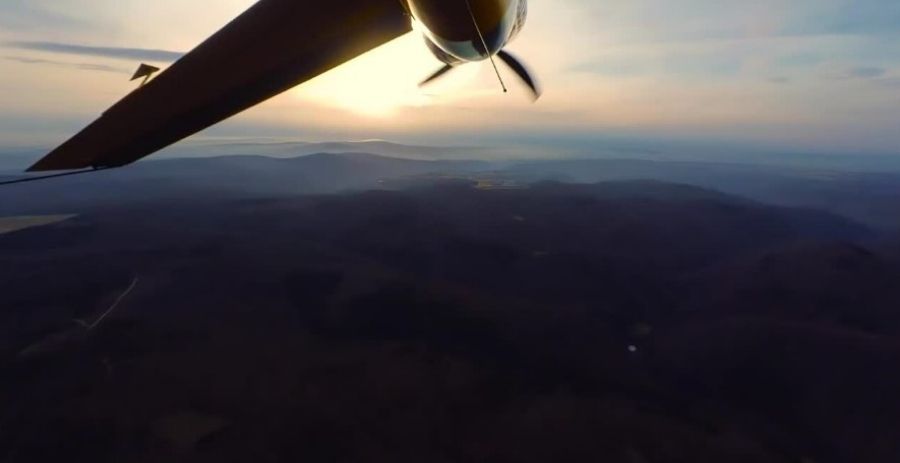
Movement delay
Stride Meteor Shuttle Time
Insta360 GO 2 provides 6 times acceleration function. There is no need for a stabilizer, and time is under control between steps.

Time-lapse photography
Containing the footprints of time
Insta360 GO 2 supports continuous shooting for 3 hours of time-lapse photography to generate time-lapse movies. Adjust the angle, set the shooting interval, and feel the excitement of time condensed.
Slow-motion
Frozen your time, focus on the wonderful
Insta360 GO 2 supports 120fps shooting, which can be slowed down to 4 times. Reminisce about the wonderful moments, every frame of fun is not to be missed.

HDR video
Highlights and shadows are preserved
HDR mode shooting, optimize the light and dark details. In strong light and shadow, it can be clearly restored.

One charging box, multiple uses
The Insta360 GO 2 charging box is ushered in a new upgrade. It integrates a charging box, Bluetooth remote control, and a tripod. The powerful functions are beyond imagination.
IPX8 waterproof
Up the mountain and down the sea omnipotent
The bare metal is waterproof to 4 meters, the lens does not fog, and it can focus underwater
Underwater color reproduction
Really feel the colorful sea under the sea
Import the underwater shots into APP/Studio, you can adjust the white balance with one click, and restore the colorful underwater world.

Wi-Fi preview
Insta360 GO 2 can connect to a mobile phone via Wi-Fi for real-time preview and content transmission, and you can view the shooting screen anytime, anywhere.
AI editing
Post-production soundtrack in one go
AI editing is upgraded again, diversified theme templates, intelligent selection of wonderful moments, saving you worry and effort.

Export multiple ratios
A variety of movie export ratios are available for selection, one creative movie, and multiple platforms for publishing.

Package
Package includes 1x GO 2 (32GB), 1x Charge Case, 1x Lens Guard (pre-installed on the lens by default), 1x Magnet Pendant, 1x Pivot Stand, 1x Easy Clip and 1x Type-C Charge Cable.

Parameter
Video resolution
FlowState shockproof shooting
2560x1440@50fps, 30fps, 25fps, 24fps / 1920x1080@50fps, 30fps, 25fps, 24fps
Ordinary shockproof shooting
2560x1440@50fps, 30fps, 25fps, 24fps / 1920x1080@50fps, 30fps, 25fps, 24fps
HDR shooting
2560x1440@25fps, 24fps / 1920x1080@25fps, 24fps
Positioning delay
2560x1440@30fps / 1920x1080@30fps
Movement delay
2560x1440@30fps / 1920x1080@30fps
Slow motion
1920x1080@120fps
Photo resolution
16:9, 2560x1440
1:1, 2560x2560
9:16, 1440x2560
Film Panorama, 2938x1088
Video format
MP4
Photo format
INSP (can be exported via APP or Studio)
DNG (this mode only supports editing on smartphone/PC/Mac)
Photo mode
Normal mode, interval shooting, starry sky mode shooting, night scene mode
Movie mode
Ordinary shockproof recording mode, FlowState shockproof recording, HDR recording, positioning delay, moving delay, slow motion mode
Video exposure mode
automatic,
Manual (Shutter 1/8000-1/30, ISO 100-3200)
Photo exposure mode
automatic,
Manual (Shutter 1/8000s-120s, ISO 100-3200)
Video encoding format
H.264
Maximum video bitrate
80Mbps
Video length
FlowState shockproof shooting: 10 minutes
Ordinary shockproof shooting: 15 minutes
FPV mode shooting: 30 minutes
Time-lapse shooting: with a charging box, it can record 110 minutes of time-lapse movies with a playback time of 7 minutesAdapted models
iOS device:
Compatible chip A11 or above and iOS version 10.0 or above iOS devices, including iPhone SE2, iPhone 8, iPhone 8P, iPhone XR, iPhone XS, iPhone XS Max, iPhone X, iPhone 11, iPhone 11 Pro, iPhone 11 Pro Max , IPhone 12, iPhone 12 Pro, iPhone 12 Pro Max, iPhone 12 mini, iPad Air (2020), iPad Pro and above models.
Android Android device:
Compatible with Android mobile devices that meet the following capabilities, including:
Android devices with Kirin 980 and above chips, including Huawei Mate20, P30 and above models;
Android devices with Snapdragon 845 and above chips, including Samsung S9, Xiaomi 8 and above models;
Android devices with Exynos 9810 and above chips, including Samsung S9, S9+, Note9 and above models.
Notice:
1. As long as the mobile phone whose performance does not meet the above requirements can be installed with the app, it may also support the use of the app to control camera shooting and basic editing, but some AI analysis or video playback that requires high processing performance may be slow and lagging. Condition.
2. After testing, mobile phones equipped with Qualcomm SDM765 5G chip have poor hardware decoding capabilities and do not support use, such as OPPO Reno 3 5G mobile phones.
3. The mobile phone's 64-bit system is required to install the app, and the 32-bit mobile phone does not support the installation of the app.White balance
Automatic, 2700K, 4000K, 5000K, 6500K, 7500K
Bluetooth
BLE 5.0
aperture
F/2.2
ISO
Automatic, 100-3200
USB interface
Type-C
Storage capacity
32GB
Charging method
Type-C
Charging time
GO 2: 23 minutes-80%, 35 minutes-100%
Charging box: 47 minutes-80%, 65 minutes-100%
Battery life
Independent use:
30 minutes (normal shockproof video shooting)
20 minutes (FlowState shockproof video shooting)
Use with charging case:
150 minutes (normal shockproof video shooting)
110 minutes (FlowState shockproof video shooting)
Use environment
-10℃ to 40℃
weight
GO 2-26.5g
Charging case-63.5g
size
GO 2
52.9mm x 23.6mm x 20.7mm
Charging case
Unfolded state: 132.5mm x 26.0mm x 26.6mm
Closed state: 68.1mm x 48.54mm x 26.5mm
colour
White
Exposure compensation (EV)
±4 EV
35mm equivalent focal length
11.24mm- HDR recording mode is suitable for static recording; FlowState anti-shock recording mode is recommended for sports scenes.
- The single time to fully charge the GO 2 with the charging case is 35 minutes. When used with a fully charged charging box, GO 2 uses 1080P@30fps to shoot in the video recording (in-camera shockproof) mode, and the accumulated battery life can reach up to 150 minutes.
- GO 2 can only achieve 4 meters water resistance when a lens protector is installed.
- The steering bracket can only be used on a dry and clean surface.


