DJI Mavic Air 2S - 4 Directions of Obstacle Sensing Drone with 3-Axis Gimbal Camera | 5.4K Video | 1-Inch Sensor | MasterShots


- guaranteeQuality checked
- World Wide ShippingExpedite / Standard services
- Warranty1-year warranty
- ConsultancyLifetime 24/7/356
DJI Mavic Air 2S
DJI Air 2S is the ultimate drone for creators on the move, with a 1-inch CMOS sensor, powerful autonomous functions, and a compact body weighing less than 600 g.
Take this all-in-one aerial powerhouse along anywhere to experience and record your world in stunning detail.
Difference Between DJI Mavic Air 2S Fly More Combo and DJI Mavic Air 2 Fly More Combo:
Upgrades
Highlights and Features
| 1-inch CMOS Sensor | MasterShots | 5.4K Video |
| 12km FHD Transmission [1] | Obstacle Sensing in 4 Directions | ADS-B |

Incredible Image System

Turn On the Night

One billion colors

Shoot RAWFormat photos with a dynamic range of up to 12.6 stops to capture more visual information in every scene, even when lighting conditions are bad or complex. This provides more flexibility in post-processing, giving creators more possibilities to get the look they want. |
 |
 |
Intelligent HDR technologyMerges multiple shots automatically, increasing the dynamic range of images without the need for post-processing. That means more nuanced details in both the highlights and shadows for richer images with greater depth. |
Hyperlapse and Panorama

Smart features, perfect shots
Introducing Mastershots

| Spotlight 2.0 |
ActiveTrack 4.0
|
Point of Interest 3.0 |
|
Follow your subject smoothly while autonomously avoiding obstacles. Even if the subject is momentarily lost, you can quickly resume tracking during flight.
|
Follow your subject smoothly while autonomously avoiding obstacles. Even if the subject is momentarily lost, you can quickly resume tracking during flight.
|
Easily take a perfect circle shot while keeping your subject centered.
|


Feel the Flight
Environment Sensing

O3 Tranmission
| 12Km
Max Video Transmission |
1080p
Transmission |
4Antennas
2.4/5.8GHz Dual Frequency |
 .
.Safer Skies with ADS-B

Expansive Accessories
Get the Most Out Of Air 2S
DJI Smart Controller

Specification
Aircraft
| Takeoff Weight | 595 g |
| Dimensions | Folded: 180×97×77 mm (length×width×height) Unfolded: 183×253×77 mm (length×width×height) |
| Diagonal Length | 302 mm |
| Max Ascent Speed | 6 m/s (S Mode) 6 m/s (N Mode) |
| Max Descent Speed |
6 m/s (S Mode) |
| Max Service Ceiling Above Sea Level |
5000 m |
| Max Flight Time (no wind) |
31 minutes |
| Max Hovering Time (no wind) |
30 minutes |
| Max Flight Distance (no wind) |
18.5 km |
| Max Flight Speed (near sea level, no wind) | 19 m/s (S Mode) 15 m/s (N Mode) 5 m/s (C Mode) |
| Max Wind Speed Resistance | 10.7 m/s |
| Max Tilt Angle | 35° (S Mode) Front: 30°, Back: 20°, Left: 35°, Right: 35° (N Mode) |
| Max Angular Velocity | 250°/s (S Mode) 90°/s (N Mode) 60°/s (C Mode) |
| Operating Temperature Range | 0° to 40°C (32° to 104°F) |
| Operating Frequency | 2.4 GHz 5.8 GHz Transmission Power (EIRP) 2.4 GHz: FCC: ≤30 dBm CE: ≤20 dBm SRRC: ≤20 dBm MIC: ≤20 dBm 5.8 GHz: FCC: ≤30 dBm CE: ≤14 dBm SRRC: ≤29 dBm |
| Hovering Accuracy Range | Vertical: ± 0.1 m (with vision positioning) ± 0.5 m (with GNSS positioning) Horizontal: ± 0.1 m (with vision positioning) ± 1.5 m (with GNSS positioning) |
| Propellers | Quick release, low noise, folding |
| Aircraft Arms | Foldable |
| GNSS | GPS+GLONASS+GALILEO |
| Compass | Single Compass |
| IMU | Single IMU |
| Internal Storage | 8 GB |
Intelligent Flight Battery
| Capacity | 3500 mAh |
| Voltage | 11.55 V |
| Max Charging Voltage | 13.2 V |
| Battery Type | LiPo 3S |
| Energy | 40.42 Wh |
| Weight | 198 g |
| Charging Temperature Range | 5° to 40°C (41° to 104°F) |
| Max Charging Power | 38 W |
| Built-in Battery | N/A |
Camera
| Sensor |
1" CMOS Effective Pixels: 20 MP; 2.4μm Pixel Size |
| Lens | FOV: 88° 35 mm Format Equivalent: 22 mm Aperture: f/2.8 Shooting Range: 0.6 m to ∞ |
| ISO Range | Video: 100-3200 (Auto) 100-6400 (Manual) 10-Bit Dlog-M Video: 100-800 (Auto) 100-1600 (Manual) Photo: 100-3200 (Auto) 100-12800 (Manual) |
| Still Image Size | 20 MP 5472×3648 (3:2) 5472×3078 (16:9) |
| Still Photography Modes | Single shot: 20 MP Burst shooting: 20 MP (continuous burst) Auto Exposure Bracketing (AEB): 20 MP, 3/5 bracketed frames at 0.7 EV bias Timed: 20 MP, 2/3/5/7/10/15/20/30/60s SmartPhoto (including HDR and HyperLight): 20 MP HDR Panorama: Vertical (3×1): 3328×8000 (width×height) Wide-angle (3×3): 8000×6144 (width×height) 180° (3×7): 8192×3500 (width×height) Sphere (3×8+1): 8192×4096 (width×height) JPEG/DNG (RAW) |
| Video Resolution | 5.4K: 5472×3078 @ 24/25/30 fps 4K Ultra HD: 3840×2160 @ 24/25/30/48/50/60 fps 2.7K: 2688x1512 @ 24/25/30/48/50/60 fps FHD: 1920×1080 @ 24/25/30/48/50/60/120 fps MP4/MOV (H.264/MPEG-4 AVC, H.265/HEVC) |
| Max Video Bitrate | 150 Mbps |
| Supported File System |
FAT32/exFAT Supports a microSD card with a capacity of up to 256 GB. |
| Digital Zoom |
Zoom recording is not available while recording 10-bit videos and 120fps videos. 4K/30fps: |
Gimbal
| Stabilization | 3-axis (tilt, roll, pan) |
| Mechanical Range | Tilt: -135° to 45° Roll: -45° to 45° Pan: -100° to 100° |
| Pan Axis | Not Controllable |
| Controllable Range | Tilt: -90° to 0°(default); -90° to 24° (extended) |
| Max Controllable Speed (tilt) | 100°/s |
| Angular Vibration Range | ±0.01° |
Sensing System
| Forward |
Precision Measurement Range: 0.38-23.8 m Effective Sensing Speed: ≤15 m/s |
| Backward | Precision Measurement Range: 0.37-23.4 m Effective Sensing Speed: ≤12 m/s Field of View (FOV): 57° (horizontal), 44° (vertical) |
| Downward | ToF Measurement Range: 0.1-8 m Hovering Range: 0.5-30 m Vision Sensor Hovering Range: 0.5-60 m |
| Left/Right | N/A |
| Upward | Precision Measurement Range: 0.34-28.6 m Field of View (FOV): 63° (horizontal), 78° (vertical) |
| Downward Auxiliary Light | Single LED |
Video Transmission
| Transmission System |
O3 2.4 GHz/5.8 GHz Auto-Switching (compatible with OcuSync 2.0) |
| Max Transmission Distance | 12 km (FCC), 8 km (CE) 8 km (SRRC), 8 km (MIC) |
| Live View Quality/Latency | Drone + Remote Controller: 1080p/30fps 12 Mbps 120 ms Drone + DJI Smart Controller: 1080p/30fps 12Mbps 130 ms |
| Max Transmission Bitrate | 44 Mbps (download bitrate) 16 Mbps (live video bitrate) |
| Operating Frequency | 2.4 GHz 5.8 GHz |
Remote Controller
| Multiple Controllers | N/A |
| DJI Smart Controller | Supported |
| Remote Controller Transmission System | OcuSync 2.0 |
| Battery Life | 6 hours (4 hours when charging a mobile device) |
| Supported Mobile Device Connectors | Lightning, Micro USB, USB-C |
| Max Supported Mobile Device Size | 180×86×10 mm (length×width×height) |
| Operating Temperature | 0° to 40°C (14° to 104°F) |
| Transmitter Power (EIRP) | 2.4 GHz: FCC: ≤26 dBm CE: ≤20 dBm SRRC: ≤20 dBm MIC: ≤20 dBm 5.8 GHz: FCC: ≤26 dBm CE: ≤14 dBm SRRC: ≤26 dBm |
Charger
| Charging Input | 100-240V, 50/60 Hz, 1.3 A |
| Charging Output | Charging Port: 13.2 V⎓2.82 A USB Port: 5 V⎓2 A |
| Voltage | 13.2 V |
| Rated Power | 38 W |
Other Customers also buy:
-
-
{"id":6773433335883,"title":"DJI Mavic Air 2S - 4 Directions of Obstacle Sensing Drone with 3-Axis Gimbal Camera | 5.4K Video | 1-Inch Sensor | MasterShots","handle":"dji-mavic-air-2s-4-directions-of-obstacle-sensing-drone-with-3-axis-gimbal-camera-5-4k-video-1-inch-sensor-mastershots","description":"\u003ch1 style=\"text-align: center;\"\u003e\u003cstrong\u003eDJI Mavic Air 2S\u003c\/strong\u003e\u003c\/h1\u003e\u003cdiv class=\"desc\"\u003e\n\u003ch2 style=\"text-align: center;\"\u003eDJI Air 2S is the ultimate drone for creators on the move, with a 1-inch CMOS sensor, powerful autonomous functions, and a compact body weighing less than 600 g. \u003c\/h2\u003e\n\u003cstyle\u003e\u003c!--\n.embed-container { position: relative; padding-bottom: 56.25%; height: 0; overflow: hidden; max-width: 100%; } .embed-container iframe, .embed-container object, .embed-container embed { position: absolute; top: 0; left: 0; width: 100%; height: 100%; }\n--\u003e\u003c\/style\u003e\n\u003cdiv class=\"embed-container\" style=\"text-align: center;\"\u003e\u003ciframe src=\"https:\/\/www.youtube.com\/embed\/NJ3Z1hSOoMc\" frameborder=\"0\" allowfullscreen=\"\"\u003e\u003c\/iframe\u003e\u003c\/div\u003e\n\u003cdiv style=\"text-align: center;\"\u003e \u003c\/div\u003e\n\u003ch3 style=\"text-align: center;\"\u003e\u003cspan style=\"font-weight: 400;\"\u003eTake this all-in-one aerial powerhouse along anywhere to experience and record your world in stunning detail.\u003c\/span\u003e\u003c\/h3\u003e\n\u003cp\u003e \u003c\/p\u003e\n\u003ch2 style=\"text-align: left;\"\u003e\n\u003cstrong\u003eDifference Between DJI Mavic Air 2S Fly More Combo and DJI Mavic Air 2 Fly More Combo:\u003c\/strong\u003e \u003c\/h2\u003e\n\u003cp\u003e \u003c\/p\u003e\n\u003ch3 style=\"text-align: center;\"\u003e\u003cspan style=\"color: #ff8000;\"\u003e\u003cb\u003eUpgrades\u003c\/b\u003e\u003c\/span\u003e\u003c\/h3\u003e\n\u003cdiv\u003eUpgrades include a 1-inch CMOS sensor, four-antenna low-latency transmission, APAS 4.0, added upward-facing dual-vision sensors, and MasterShots. The camera performance, intelligent features, obstacle sensing system, and transmission system have all improved significantly. \u003c\/div\u003e\n\u003ch2 style=\"text-align: center;\"\u003e\u003cstrong\u003e\u003c\/strong\u003e\u003c\/h2\u003e\n\u003cp\u003e \u003c\/p\u003e\n\u003ch2 style=\"text-align: center;\"\u003e\u003cstrong\u003eHighlights and Features\u003c\/strong\u003e\u003c\/h2\u003e\n\u003ctable data-mce-fragment=\"1\"\u003e\n\u003ctbody data-mce-fragment=\"1\"\u003e\n\u003ctr data-mce-fragment=\"1\"\u003e\n\u003ctd width=\"184\" data-mce-fragment=\"1\"\u003e1-inch CMOS Sensor\u003c\/td\u003e\n\u003ctd width=\"184\" data-mce-fragment=\"1\"\u003eMasterShots\u003c\/td\u003e\n\u003ctd width=\"184\" data-mce-fragment=\"1\"\u003e5.4K Video\u003c\/td\u003e\n\u003c\/tr\u003e\n\u003ctr data-mce-fragment=\"1\"\u003e\n\u003ctd width=\"184\" data-mce-fragment=\"1\"\u003e12km FHD Transmission\u003cspan data-mce-fragment=\"1\"\u003e \u003c\/span\u003e\u003csup data-mce-fragment=\"1\"\u003e[1]\u003c\/sup\u003e\n\u003c\/td\u003e\n\u003ctd width=\"184\" data-mce-fragment=\"1\"\u003eObstacle Sensing in 4 Directions\u003c\/td\u003e\n\u003ctd width=\"184\" data-mce-fragment=\"1\"\u003eADS-B\u003c\/td\u003e\n\u003c\/tr\u003e\n\u003c\/tbody\u003e\n\u003c\/table\u003e\n\u003cbr\u003e\n\u003cdiv style=\"text-align: start;\"\u003e\u003cimg style=\"margin-right: auto; float: none; display: block; margin-left: auto;\" src=\"https:\/\/cdn.shopify.com\/s\/files\/1\/2532\/7020\/files\/Screenshot_2021-08-06_183943.png?v=1628246675\" alt=\"dji-mavic-air-2S-fly-more-combo-drone-content-feature-all\"\u003e\u003c\/div\u003e\n\u003cp\u003e \u003c\/p\u003e\n\u003ch3 style=\"text-align: center;\"\u003e\u003cspan style=\"color: #ff8000;\"\u003e\u003cb\u003e\u003c\/b\u003e\u003c\/span\u003e\u003c\/h3\u003e\n\u003cdiv style=\"text-align: center;\"\u003e\u003c\/div\u003e\n\u003cdiv style=\"text-align: center;\"\u003e\u003c\/div\u003e\n\u003cdiv style=\"text-align: center;\"\u003e\u003c\/div\u003e\n\u003cdiv style=\"text-align: center;\"\u003e\n\u003cp\u003e \u003c\/p\u003e\n\u003ch3\u003e\u003cspan style=\"color: #ff8000;\"\u003e\u003cb\u003eIncredible Image System\u003c\/b\u003e\u003c\/span\u003e\u003c\/h3\u003e\n\u003cdiv style=\"text-align: center;\"\u003e\u003cb\u003eBig World, Big Sensor\u003c\/b\u003e\u003c\/div\u003e\n\u003cdiv style=\"text-align: center;\"\u003e\u003cb\u003e\u003c\/b\u003e\u003c\/div\u003e\n\u003c\/div\u003e\n\u003cdiv style=\"text-align: center;\"\u003e\u003cspan\u003eEquipped with a 1-inch CMOS image sensor and large 2.4μm pixels, DJI Air 2S is capable of 5.4K\/30fps and 4K\/60fps video. Capture any moment with the rich clarity and authentic color tones it deserves.\u003c\/span\u003e\u003c\/div\u003e\n\u003cdiv style=\"text-align: center;\"\u003e\u003cspan\u003e\u003cimg src=\"https:\/\/cdn.shopify.com\/s\/files\/1\/2532\/7020\/files\/DJI_Mavic_Air_2S_Fly_More_Combo_8.jpg?v=1628248569\" style=\"float: none;\" alt=\"dji-mavic-air-2S-fly-more-combo-drone-content-feature-Good-Image-System\"\u003e\u003c\/span\u003e\u003c\/div\u003e\n\u003cdiv style=\"text-align: center;\"\u003e\u003cspan\u003e\u003c\/span\u003e\u003c\/div\u003e\n\u003cdiv style=\"text-align: center;\"\u003e\u003cspan\u003e\u003c\/span\u003e\u003c\/div\u003e\n\u003cdiv style=\"text-align: center;\"\u003e\u003cspan\u003e\u003c\/span\u003e\u003c\/div\u003e\n\u003ch3 style=\"text-align: center;\"\u003e\u003cspan style=\"color: #ff8000;\"\u003e\u003cb\u003e\u003c\/b\u003e\u003c\/span\u003e\u003c\/h3\u003e\n\u003ch3 style=\"text-align: center;\"\u003e\u003cspan style=\"color: #ff8000;\"\u003e\u003cb\u003e\u003c\/b\u003e\u003c\/span\u003e\u003c\/h3\u003e\n\u003ch3 style=\"text-align: center;\"\u003e\u003cspan style=\"color: #ff8000;\"\u003eTurn On the Night\u003c\/span\u003e\u003c\/h3\u003e\n\u003cdiv style=\"text-align: center;\"\u003e\u003cspan style=\"font-weight: 400;\"\u003e\u003cspan data-mce-fragment=\"1\"\u003eCapture the allure of the world, even as it darkens. Thanks to a high dynamic range, high resolution, and accurate color reproduction, even low-light scenes are sharp and vibrant.\u003c\/span\u003e\u003c\/span\u003e\u003c\/div\u003e\n\u003cdiv style=\"text-align: center;\"\u003e\u003cimg style=\"float: none;\" src=\"https:\/\/cdn.shopify.com\/s\/files\/1\/2532\/7020\/files\/DJI_Mavic_Air_2S_Fly_More_Combo_9.jpg?v=1628573124\" alt=\"dji-mavic-air-2S-fly-more-combo-drone-content-feature-Turn-On-the-Night\"\u003e\u003c\/div\u003e\n\u003ch3 style=\"text-align: center;\"\u003e\u003cspan style=\"color: #ff8000;\"\u003e\u003cb\u003e\u003c\/b\u003e\u003c\/span\u003e\u003c\/h3\u003e\n\u003ch3 style=\"text-align: center;\"\u003e\u003cspan style=\"color: #ff8000;\"\u003e\u003cb\u003e\u003cspan data-mce-fragment=\"1\"\u003eOne billion colors\u003c\/span\u003e\u003c\/b\u003e\u003c\/span\u003e\u003c\/h3\u003e\n\u003cdiv style=\"text-align: center;\"\u003e\u003cspan style=\"font-weight: 400;\"\u003e\u003cspan data-mce-fragment=\"1\"\u003eCaptured by the 10-bit Dlog-M color profile of DJI Air 2S let you fully immerse yourself in all the hues of your environment.\u003c\/span\u003e\u003c\/span\u003e\u003c\/div\u003e\n\u003cdiv style=\"text-align: center;\"\u003e\u003cimg style=\"float: none;\" src=\"https:\/\/cdn.shopify.com\/s\/files\/1\/2532\/7020\/files\/DJI_Mavic_Air_2S_Fly_More_Combo_10.jpg?v=1628573285\" alt=\"dji-mavic-air-2S-fly-more-combo-drone-content-feature-One-billion-colors\"\u003e\u003c\/div\u003e\n\u003ch3 style=\"text-align: center;\"\u003e\u003cspan style=\"color: #ff8000;\"\u003e\u003cb\u003e\u003c\/b\u003e\u003c\/span\u003e\u003c\/h3\u003e\n\u003ctable width=\"100%\"\u003e\n\u003ctbody\u003e\n\u003ctr\u003e\n\u003ctd style=\"width: 47.3093%;\"\u003e\n\u003ch3 data-mce-fragment=\"1\"\u003e\u003cspan style=\"color: #ff8000;\" data-mce-fragment=\"1\"\u003e\u003cb data-mce-fragment=\"1\"\u003eShoot RAW\u003c\/b\u003e\u003c\/span\u003e\u003c\/h3\u003e\n\u003cp style=\"text-align: left;\"\u003e\u003cspan\u003eFormat photos with a dynamic \u003c\/span\u003e\u003cspan style=\"font-weight: 400;\" data-mce-fragment=\"1\" data-mce-style=\"font-weight: 400;\"\u003erange of up to 12.6 stops to\u003c\/span\u003e\u003cspan style=\"font-weight: 400;\" data-mce-fragment=\"1\" data-mce-style=\"font-weight: 400;\"\u003e capture more visual information in every scene, even when lighting conditions are bad or complex. This provides more flexibility in post-processing, giving creators more possibilities to get the look they want. \u003c\/span\u003e\u003c\/p\u003e\n\u003c\/td\u003e\n\u003ctd style=\"width: 47.6907%;\"\u003e\n\u003cdiv style=\"text-align: center;\"\u003e\u003cimg src=\"https:\/\/cdn.shopify.com\/s\/files\/1\/2532\/7020\/files\/DJI-Mavic-Air-2S-Fly-More-Combo_600x600.jpg?v=1628577003\" alt=\"dji-mavic-air-2S-fly-more-combo-drone-content-feature-all\" style=\"float: none;\" width=\"600x600\" height=\"600x600\"\u003e\u003c\/div\u003e\n\u003c\/td\u003e\n\u003c\/tr\u003e\n\u003ctr\u003e\n\u003ctd style=\"width: 47.3093%;\"\u003e\n\u003cdiv style=\"text-align: center;\" data-mce-fragment=\"1\" data-mce-style=\"text-align: center;\"\u003e\u003cimg style=\"float: none;\" alt=\"dji-mavic-air-2S-fly-more-combo-drone-content-feature-Shoot-RAW\" src=\"https:\/\/cdn.shopify.com\/s\/files\/1\/2532\/7020\/files\/3b0718d6123b5e2827b85292dc6322fa_600x600.jpg?v=1628577485\" width=\"600x600\" height=\"600x600\" data-mce-fragment=\"1\" data-mce-src=\"https:\/\/cdn.shopify.com\/s\/files\/1\/2532\/7020\/files\/3b0718d6123b5e2827b85292dc6322fa_600x600.jpg?v=1628577485\" data-mce-style=\"float: none;\"\u003e\u003c\/div\u003e\n\u003ch3 style=\"text-align: center;\"\u003e\n\u003cspan style=\"color: #ff8000;\"\u003e\u003cb\u003e\u003c\/b\u003e\u003c\/span\u003e\u003cbr\u003e\n\u003c\/h3\u003e\n\u003c\/td\u003e\n\u003ctd style=\"width: 47.6907%;\"\u003e\n\u003ch3 style=\"text-align: right;\"\u003e\u003cspan style=\"color: #ff8000;\"\u003e\u003cb\u003eIntelligent HDR technology\u003c\/b\u003e\u003c\/span\u003e\u003c\/h3\u003e\n\u003cp style=\"text-align: right;\"\u003e\u003cspan\u003eMerges multiple shots automatically, increasing the dynamic range of images without the need for post-processing. That means more nuanced details in both the highlights and shadows for richer images with greater depth.\u003c\/span\u003e\u003c\/p\u003e\n\u003c\/td\u003e\n\u003c\/tr\u003e\n\u003c\/tbody\u003e\n\u003c\/table\u003e\n\u003ch3 style=\"text-align: center;\"\u003e\u003cspan style=\"color: #ff8000;\"\u003e\u003cb\u003e\u003cspan data-mce-fragment=\"1\"\u003e\u003c\/span\u003e\u003c\/b\u003e\u003c\/span\u003e\u003c\/h3\u003e\n\u003ch3 style=\"text-align: center;\"\u003e\u003cspan style=\"color: #ff8000;\"\u003e\u003cb\u003e\u003cspan data-mce-fragment=\"1\"\u003e\u003c\/span\u003e\u003c\/b\u003e\u003c\/span\u003e\u003c\/h3\u003e\n\u003ch3 style=\"text-align: center;\"\u003e\u003cspan style=\"color: #ff8000;\"\u003e\u003cb\u003e\u003cspan data-mce-fragment=\"1\"\u003e\u003c\/span\u003e\u003c\/b\u003e\u003c\/span\u003e\u003c\/h3\u003e\n\u003ch3 style=\"text-align: center;\"\u003e\u003cspan style=\"font-weight: 400;\"\u003e\u003cspan data-mce-fragment=\"1\"\u003e\u003cbr\u003e\u003c\/span\u003e\u003c\/span\u003e\u003c\/h3\u003e\n\u003cdiv style=\"text-align: center;\"\u003e\n\u003ch3 style=\"text-align: center;\"\u003e\u003cspan style=\"color: #ff8000;\"\u003eHyperlapse and Panorama\u003c\/span\u003e\u003c\/h3\u003e\n\u003c\/div\u003e\n\u003cdiv style=\"text-align: center;\"\u003e\u003cspan style=\"font-weight: 400;\"\u003e\u003cspan data-mce-fragment=\"1\"\u003eSpeed up time and movement with a single tap by creating a striking hyperlapse. You can also capture larger, more detailed shots of your surroundings with panorama.\u003c\/span\u003e\u003c\/span\u003e\u003c\/div\u003e\n\u003cdiv style=\"text-align: center;\"\u003e\u003cimg style=\"float: none;\" src=\"https:\/\/cdn.shopify.com\/s\/files\/1\/2532\/7020\/files\/DJI_Mavic_Air_2S_Fly_More_Combo_12.jpg?v=1628575937\" alt=\"dji-mavic-air-2S-fly-more-combo-drone-content-feature-Hyperlapse-and-Panorama\"\u003e\u003c\/div\u003e\n\u003ch3 style=\"text-align: center;\"\u003e\u003cspan style=\"color: #ff8000;\"\u003e\u003cb\u003e\u003c\/b\u003e\u003c\/span\u003e\u003c\/h3\u003e\n\u003ch2 class=\"text style__eyebrow___2tBWn\" style=\"text-align: center;\"\u003e\u003cspan style=\"color: #ff8000;\"\u003eSmart features, perfect shots\u003c\/span\u003e\u003c\/h2\u003e\n\u003ch3 style=\"text-align: center;\"\u003e\u003cspan style=\"color: #ff8000;\"\u003e\u003cb\u003e\u003c\/b\u003e\u003c\/span\u003e\u003c\/h3\u003e\n\u003ch3 style=\"text-align: center;\"\u003e\u003cspan style=\"color: #ff8000;\"\u003e\u003cb\u003eIntroducing Mastershots\u003c\/b\u003e\u003c\/span\u003e\u003c\/h3\u003e\n\u003cdiv style=\"text-align: center;\"\u003e\u003cspan style=\"font-weight: 400;\"\u003e\u003cspan data-mce-fragment=\"1\"\u003eThe next evolution of QuickShots, MasterShots is an advanced intelligent feature that gives users the best shots in any location with just a tap. Simply select your subject, and the drone will film while executing ten different maneuvers in sequence, keeping your subject center-frame and generating a short cinematic video afterward.\u003c\/span\u003e\u003c\/span\u003e\u003c\/div\u003e\n\u003cdiv style=\"text-align: center;\"\u003e\u003cspan style=\"font-weight: 400;\"\u003e\u003cspan data-mce-fragment=\"1\"\u003e\u003cimg src=\"https:\/\/cdn.shopify.com\/s\/files\/1\/2532\/7020\/files\/DJI_Mavic_Air_2S_Fly_More_Combo_13.jpg?v=1628578139\" style=\"float: none;\" alt=\"dji-mavic-air-2S-fly-more-combo-drone-content-feature-Autonomous-Functions-Matershots\"\u003e\u003c\/span\u003e\u003c\/span\u003e\u003c\/div\u003e\n\u003cdiv style=\"text-align: center;\"\u003e\u003cb\u003e\u003cspan style=\"color: #ff8000;\"\u003e\u003c\/span\u003e\u003c\/b\u003e\u003c\/div\u003e\n\u003cdiv style=\"text-align: center;\"\u003e\u003cb\u003e\u003cspan style=\"color: #ff8000;\"\u003e\u003c\/span\u003e\u003c\/b\u003e\u003c\/div\u003e\n\u003cdiv style=\"text-align: center;\"\u003e\u003cb\u003e\u003cspan style=\"color: #ff8000;\"\u003e\u003c\/span\u003e\u003c\/b\u003e\u003c\/div\u003e\n\u003cdiv style=\"text-align: center;\"\u003e\u003cb\u003e\u003cspan style=\"color: #ff8000;\"\u003e\u003c\/span\u003e\u003c\/b\u003e\u003c\/div\u003e\n\u003cdiv style=\"text-align: center;\"\u003e\n\u003cdiv\u003e\u003cspan style=\"color: #ff8000;\"\u003e\u003cb\u003e\u003c\/b\u003e\u003c\/span\u003e\u003c\/div\u003e\n\u003cdiv\u003e\u003cspan style=\"color: #ff8000;\"\u003e\u003cb\u003e\u003c\/b\u003e\u003c\/span\u003e\u003c\/div\u003e\n\u003cdiv\u003e\u003cspan style=\"color: #ff8000;\"\u003e\u003cb\u003eThe Center of Attention \u003c\/b\u003e\u003c\/span\u003e\u003c\/div\u003e\n\u003cdiv\u003e\n\u003cb\u003e\u003cspan\u003e\u003c\/span\u003e\u003c\/b\u003e\u003cbr\u003e\n\u003c\/div\u003e\n\u003cdiv\u003e\u003cspan\u003eFocusTrack features Spotlight 2.0, ActiveTrack 4.0, and Point of Interest 3.0, making it a breeze for DJI Air 2S to follow or circle your subject.\u003c\/span\u003e\u003c\/div\u003e\n\u003cdiv style=\"text-align: center;\"\u003e\u003cbr\u003e\u003c\/div\u003e\n\u003cdiv style=\"text-align: center;\"\u003e\u003c\/div\u003e\n\u003c\/div\u003e\n\u003cdiv style=\"text-align: center;\"\u003e\n\u003ctable width=\"100%\"\u003e\n\u003ctbody\u003e\n\u003ctr\u003e\n\u003ctd style=\"width: 31%; text-align: center;\"\u003e \u003cstrong\u003e\u003cspan style=\"color: #ff8000;\" data-mce-fragment=\"1\"\u003eSpotlight 2.0 \u003c\/span\u003e\u003c\/strong\u003e\n\u003c\/td\u003e\n\u003ctd style=\"width: 31.7106%;\"\u003e\n\u003cdiv data-ga-label=\"all-1-tab-button\" class=\"style__tab-item___1yKLp\"\u003e\n\u003cdiv style=\"text-align: center;\"\u003e\u003cstrong\u003e\u003cspan style=\"color: #ff8000;\"\u003eActiveTrack 4.0\u003c\/span\u003e\u003c\/strong\u003e\u003c\/div\u003e\n\u003c\/div\u003e\n\u003c\/td\u003e\n\u003ctd style=\"width: 31.2894%; text-align: center;\"\u003e\u003cstrong\u003e\u003cspan style=\"color: #ff8000;\"\u003ePoint of Interest 3.0\u003c\/span\u003e\u003c\/strong\u003e\u003c\/td\u003e\n\u003c\/tr\u003e\n\u003ctr\u003e\n\u003ctd style=\"width: 31%;\"\u003e\n\u003cp\u003e\u003cspan data-mce-fragment=\"1\"\u003eFollow your subject smoothly while autonomously avoiding obstacles. Even if the subject is momentarily lost, you can quickly resume tracking during flight.\u003c\/span\u003e\u003c\/p\u003e\n\u003cp\u003e\u003cspan data-mce-fragment=\"1\"\u003e\u003cimg src=\"https:\/\/cdn.shopify.com\/s\/files\/1\/2532\/7020\/files\/DJI_Mavic_Air_2S_Fly_More_Combo_14_480x480.jpg?v=1628578319\" alt=\"dji-mavic-air-2S-fly-more-combo-drone-content-feature-The-Center-of-Aattention-Spotlight-2.0\" width=\"480x480\" height=\"480x480\" style=\"float: none;\" data-mce-fragment=\"1\" data-mce-src=\"https:\/\/cdn.shopify.com\/s\/files\/1\/2532\/7020\/files\/DJI_Mavic_Air_2S_Fly_More_Combo_14_480x480.jpg?v=1628578319\"\u003e\u003c\/span\u003e\u003c\/p\u003e\n\u003cdiv\u003e\u003cspan style=\"color: #ff8000;\"\u003e\u003cb\u003e\u003c\/b\u003e\u003c\/span\u003e\u003c\/div\u003e\n\u003c\/td\u003e\n\u003ctd style=\"width: 31.7106%;\"\u003e\n\u003cp\u003e\u003cspan\u003eFollow your subject smoothly while autonomously avoiding obstacles. Even if the subject is momentarily lost, you can quickly resume tracking during flight.\u003c\/span\u003e\u003c\/p\u003e\n\u003cp\u003e\u003cimg alt=\"dji-mavic-air-2S-fly-more-combo-drone-content-feature-The-Center-of-Aattention-ActiveTrack-4.0\" src=\"https:\/\/cdn.shopify.com\/s\/files\/1\/2532\/7020\/files\/DJI_Mavic_Air_2S_Fly_More_Combo_15_480x480.jpg?v=1628578617\" width=\"480x480\" height=\"480x480\" style=\"float: none;\"\u003e\u003c\/p\u003e\n\u003c\/td\u003e\n\u003ctd style=\"width: 31.2894%;\"\u003e\n\u003cp\u003e\u003cspan\u003eEasily take a perfect circle shot while keeping your subject centered. \u003c\/span\u003e\u003c\/p\u003e\n\u003cp\u003e \u003c\/p\u003e\n\u003cp\u003e \u003cimg alt=\"dji-mavic-air-2S-fly-more-combo-drone-content-feature-The-Center-of-Aattention-Point-of-Interest-3.0\" src=\"https:\/\/cdn.shopify.com\/s\/files\/1\/2532\/7020\/files\/DJI_Mavic_Air_2S_Fly_More_Combo_16_480x480.jpg?v=1628578705\" width=\"480x480\" height=\"480x480\" style=\"float: none;\" data-mce-fragment=\"1\" data-mce-src=\"https:\/\/cdn.shopify.com\/s\/files\/1\/2532\/7020\/files\/DJI_Mavic_Air_2S_Fly_More_Combo_16_480x480.jpg?v=1628578705\"\u003e\u003c\/p\u003e\n\u003c\/td\u003e\n\u003c\/tr\u003e\n\u003c\/tbody\u003e\n\u003c\/table\u003e\n\u003c\/div\u003e\n\u003cdiv style=\"text-align: center;\"\u003e\u003cb\u003e\u003cspan style=\"color: #ff8000;\"\u003e\u003c\/span\u003e\u003c\/b\u003e\u003c\/div\u003e\n\u003cdiv style=\"text-align: center;\"\u003e\u003cb\u003e\u003cspan style=\"color: #ff8000;\"\u003e\u003c\/span\u003e\u003c\/b\u003e\u003c\/div\u003e\n\u003cdiv style=\"text-align: center;\"\u003e \u003c\/div\u003e\n\u003ch3 style=\"text-align: center;\"\u003e\u003cspan style=\"color: #ff8000;\"\u003eFeel the Flight\u003c\/span\u003e\u003c\/h3\u003e\n\u003cdiv style=\"text-align: center;\"\u003e\u003cb\u003eWorry Less, Discover More \u003c\/b\u003e\u003c\/div\u003e\n\u003cdiv style=\"text-align: center;\"\u003e\u003cspan style=\"font-weight: 400;\"\u003e\u003cspan data-mce-fragment=\"1\"\u003eThe combination of portability, safety, and intelligent technology means you can spend more time enjoying flights and less time worrying about them. Take DJI Air 2S into the sky confidently, every flight.\u003c\/span\u003e\u003c\/span\u003e\u003c\/div\u003e\n\u003ch3 style=\"text-align: center;\"\u003e\u003cspan style=\"color: #ff8000;\"\u003e\u003cb\u003e\u003c\/b\u003e\u003c\/span\u003e\u003c\/h3\u003e\n\u003ch3 style=\"text-align: center;\"\u003e\u003cspan style=\"color: #ff8000;\"\u003eEnvironment Sensing\u003c\/span\u003e\u003c\/h3\u003e\n\u003cdiv style=\"text-align: center;\"\u003e\u003cspan style=\"font-weight: 400;\"\u003e\u003cspan data-mce-fragment=\"1\"\u003eDJI Air 2S has the ability to perceive its environment in four directions: up, down, forward, and backward. The algorithms for Advanced Pilot Assistance Systems (APAS 4.0) have been further improved, allowing DJI Air 2S to actively avoid obstacles in more complex scenarios and at high speeds.\u003c\/span\u003e\u003c\/span\u003e\u003c\/div\u003e\n\u003cdiv style=\"text-align: center;\"\u003e\u003cimg style=\"float: none;\" src=\"https:\/\/cdn.shopify.com\/s\/files\/1\/2532\/7020\/files\/DJI_Mavic_Air_2S_Fly_More_Combo_17.jpg?v=1628579395\" alt=\"dji-mavic-air-2S-fly-more-combo-drone-content-feature-Feel-the-Flight-Environment-Sensing\"\u003e\u003c\/div\u003e\n\u003cdiv style=\"text-align: center;\"\u003e \u003c\/div\u003e\n\u003ch3 style=\"text-align: center;\"\u003e\u003cspan style=\"color: #ff8000;\"\u003e\u003cb\u003eO3 Tranmission\u003c\/b\u003e\u003c\/span\u003e\u003c\/h3\u003e\n\u003cdiv style=\"text-align: center;\"\u003e\u003cspan style=\"font-weight: 400;\"\u003e\u003cspan data-mce-fragment=\"1\"\u003eDJI Air 2S features DJI's most advanced O3 (OcuSync 3.0) image transmission technology, delivering an ultra-smooth, clear, and reliable image feed.\u003c\/span\u003e\u003c\/span\u003e\u003c\/div\u003e\n\u003cdiv style=\"text-align: center;\"\u003e\n\u003ctable width=\"100%\"\u003e\n\u003ctbody\u003e\n\u003ctr\u003e\n\u003ctd style=\"text-align: center;\"\u003e \u003cspan style=\"color: #ff8000;\"\u003e\u003cstrong\u003e\u003cspan class=\"style__icon-number___2OOlV\" data-mce-fragment=\"1\"\u003e12\u003c\/span\u003e\u003cspan class=\"style__icon-unit___2hz_k\" data-mce-fragment=\"1\"\u003eKm\u003c\/span\u003e\u003c\/strong\u003e\u003c\/span\u003e\n\u003cp class=\"style__icon-desc___Otw9j\" data-mce-fragment=\"1\"\u003eMax Video Transmission\u003c\/p\u003e\n\u003c\/td\u003e\n\u003ctd\u003e\n\u003cdiv style=\"text-align: center;\" class=\"style__icon-number-container___2cK9V\"\u003e\u003cspan style=\"color: #ff8000;\"\u003e\u003cstrong\u003e\u003cspan class=\"style__icon-number___2OOlV\"\u003e1080\u003c\/span\u003e\u003cspan class=\"style__icon-unit___2hz_k\"\u003ep\u003c\/span\u003e\u003c\/strong\u003e\u003c\/span\u003e\u003c\/div\u003e\n\u003cp style=\"text-align: center;\" class=\"style__icon-desc___Otw9j\"\u003eTransmission\u003c\/p\u003e\n\u003c\/td\u003e\n\u003ctd\u003e\n\u003cdiv style=\"text-align: center;\" class=\"style__icon-number-container___2cK9V\"\u003e\u003cspan style=\"color: #ff8000;\"\u003e\u003cstrong\u003e\u003cspan class=\"style__icon-number___2OOlV\"\u003e4\u003c\/span\u003e\u003cspan class=\"style__icon-unit___2hz_k\"\u003eAntennas\u003c\/span\u003e\u003c\/strong\u003e\u003c\/span\u003e\u003c\/div\u003e\n\u003cp style=\"text-align: center;\" class=\"style__icon-desc___Otw9j\"\u003e2.4\/5.8GHz Dual Frequency\u003c\/p\u003e\n\u003c\/td\u003e\n\u003c\/tr\u003e\n\u003c\/tbody\u003e\n\u003c\/table\u003e\n\u003c\/div\u003e\n\u003cdiv style=\"text-align: center;\"\u003e\u003cspan style=\"font-weight: 400; color: #ffffff;\"\u003e\u003c\/span\u003e\u003c\/div\u003e\n\u003cdiv style=\"text-align: center;\"\u003e\u003cspan style=\"font-weight: 400; color: #ffffff;\"\u003e\u003cimg style=\"float: none;\" src=\"https:\/\/cdn.shopify.com\/s\/files\/1\/2532\/7020\/files\/DJI_Mavic_Air_2S_Fly_More_Combo_18_480x480.jpg?v=1628579621\" alt=\"dji-mavic-air-2S-fly-more-combo-drone-content-feature-O3-Tranmission\" data-mce-fragment=\"1\" data-mce-src=\"https:\/\/cdn.shopify.com\/s\/files\/1\/2532\/7020\/files\/DJI_Mavic_Air_2S_Fly_More_Combo_18_480x480.jpg?v=1628579621\"\u003e.\u003c\/span\u003e\u003c\/div\u003e\n\u003ch3 style=\"text-align: center;\"\u003e\u003cspan style=\"color: #ff8000;\"\u003e\u003cb\u003e\u003c\/b\u003e\u003c\/span\u003e\u003c\/h3\u003e\n\u003ch3 style=\"text-align: center;\"\u003e\u003cspan style=\"color: #ff8000;\"\u003e\u003cb\u003e\u003c\/b\u003e\u003c\/span\u003e\u003c\/h3\u003e\n\u003ch3 style=\"text-align: center;\"\u003e\u003cspan style=\"color: #ff8000;\"\u003e\u003cb\u003eSafer Skies with ADS-B\u003c\/b\u003e\u003c\/span\u003e\u003c\/h3\u003e\n\u003cdiv style=\"text-align: center;\"\u003e\u003cspan style=\"font-weight: 400;\"\u003e\u003cspan data-mce-fragment=\"1\"\u003eDJI Air 2S provides an added layer of airspace safety with the industry-leading AirSense safety system. This receives Automatic Dependent Surveillance-Broadcast (ADS-B) flight location information from airplanes and helicopters in your area that transmit ADS-B signals, displays those aircraft on a map, and provides audio and visual alerts through the DJI Fly app to help you keep the drone out of the way of those aircraft.\u003c\/span\u003e\u003c\/span\u003e\u003c\/div\u003e\n\u003cdiv style=\"text-align: center;\"\u003e\u003cspan style=\"font-weight: 400;\"\u003e\u003cspan data-mce-fragment=\"1\"\u003e\u003cimg src=\"https:\/\/cdn.shopify.com\/s\/files\/1\/2532\/7020\/files\/DJI_Mavic_Air_2S_Fly_More_Combo_19.jpg?v=1628579892\" style=\"float: none;\" alt=\"dji-mavic-air-2S-fly-more-combo-drone-content-feature-Safer-Skies-with-ADS-B\"\u003e\u003c\/span\u003e\u003c\/span\u003e\u003c\/div\u003e\n\u003cdiv style=\"text-align: center;\"\u003e \u003c\/div\u003e\n\u003cdiv style=\"text-align: center;\"\u003e\u003cbr\u003e\u003c\/div\u003e\n\u003ch3 style=\"text-align: center;\"\u003e\u003cspan style=\"color: #ff8000;\"\u003e\u003cb\u003eExpansive Accessories\u003c\/b\u003e\u003c\/span\u003e\u003c\/h3\u003e\n\u003ch3 style=\"text-align: center;\"\u003e\u003cb\u003eGet the Most Out Of Air 2S\u003c\/b\u003e\u003c\/h3\u003e\n\u003cdiv style=\"text-align: center;\"\u003e\u003cspan style=\"font-weight: 400;\"\u003e\u003cspan data-mce-fragment=\"1\"\u003eWith a diverse range of accessories, the sky is truly the limit.\u003c\/span\u003e\u003c\/span\u003e\u003c\/div\u003e\n\u003cdiv style=\"text-align: center;\"\u003e\u003cspan style=\"font-weight: 400;\"\u003e\u003cspan data-mce-fragment=\"1\"\u003e\u003c\/span\u003e\u003c\/span\u003e\u003c\/div\u003e\n\u003ch3 style=\"text-align: center;\"\u003e\u003cspan style=\"color: #ff8000;\"\u003e\u003cb\u003e\u003c\/b\u003e\u003c\/span\u003e\u003c\/h3\u003e\n\u003cp\u003e \u003c\/p\u003e\n\u003cp\u003e \u003c\/p\u003e\n\u003ch3 style=\"text-align: center;\"\u003e\u003cspan style=\"color: #ff8000;\"\u003e\u003cb\u003e\u003c\/b\u003e\u003c\/span\u003e\u003c\/h3\u003e\n\u003ch3\u003e\u003cspan\u003e\u003cb\u003e\u003c\/b\u003e\u003c\/span\u003e\u003c\/h3\u003e\n\u003ch3 style=\"text-align: center;\"\u003e\u003cspan style=\"color: #ff8000;\"\u003e\u003cb\u003eDJI Smart Controller\u003c\/b\u003e\u003c\/span\u003e\u003c\/h3\u003e\n\u003cdiv\u003e\u003cspan\u003eThis powerful remote controller features a 5.5-inch 1080p high-brightness display for pure performance. Compatible with the DJI GO 4 and DJI Fly apps, it also supports the installation of third-party apps.\u003c\/span\u003e\u003c\/div\u003e\n\u003cdiv\u003e\u003cimg alt=\"dji-mavic-air-2S-fly-more-combo-drone-content-feature-Expansive-Accessories-Fly-More-Combo-DJI Smart Controller\" src=\"https:\/\/cdn.shopify.com\/s\/files\/1\/2532\/7020\/files\/DJI_Mavic_Air_2S_Fly_More_Combo_22.jpg?v=1628580371\"\u003e\u003c\/div\u003e\n\u003ch3 style=\"text-align: center;\"\u003e\u003cspan style=\"color: #ff8000;\"\u003e\u003cb\u003e\u003c\/b\u003e\u003c\/span\u003e\u003c\/h3\u003e\n\u003ch3 style=\"text-align: center;\"\u003e\u003cspan style=\"color: #ff8000;\"\u003e\u003cb\u003e\u003c\/b\u003e\u003c\/span\u003e\u003c\/h3\u003e\n\u003cdiv style=\"text-align: center;\"\u003e \u003c\/div\u003e\n\u003ch2 style=\"text-align: left;\"\u003e\u003cstrong\u003e\u003c\/strong\u003e\u003c\/h2\u003e\n\u003ch2 style=\"text-align: left;\"\u003e\u003cstrong\u003eSpecification\u003c\/strong\u003e\u003c\/h2\u003e\n\u003cp\u003e \u003c\/p\u003e\n\u003cp\u003e \u003c\/p\u003e\n\u003cp\u003e \u003c\/p\u003e\n\u003ch3 class=\"group-list-title\"\u003eAircraft\u003c\/h3\u003e\n\u003ctable width=\"523\"\u003e\n\u003ctbody\u003e\n\u003ctr style=\"height: 19px;\"\u003e\n\u003ctd style=\"width: 245.562px; height: 19px;\"\u003e Takeoff Weight\u003c\/td\u003e\n\u003ctd style=\"width: 254.438px; height: 19px;\"\u003e595 g\u003c\/td\u003e\n\u003c\/tr\u003e\n\u003ctr style=\"height: 76px;\"\u003e\n\u003ctd style=\"width: 245.562px; height: 76px;\"\u003eDimensions\u003c\/td\u003e\n\u003ctd style=\"width: 254.438px; height: 76px;\"\u003eFolded:\u003cbr\u003e180×97×77 mm (length×width×height)\u003cbr\u003eUnfolded:\u003cbr\u003e183×253×77 mm (length×width×height)\u003c\/td\u003e\n\u003c\/tr\u003e\n\u003ctr style=\"height: 19px;\"\u003e\n\u003ctd style=\"width: 245.562px; height: 19px;\"\u003eDiagonal Length\u003c\/td\u003e\n\u003ctd style=\"width: 254.438px; height: 19px;\"\u003e302 mm\u003c\/td\u003e\n\u003c\/tr\u003e\n\u003ctr style=\"height: 38px;\"\u003e\n\u003ctd style=\"width: 245.562px; height: 38px;\"\u003eMax Ascent Speed\u003c\/td\u003e\n\u003ctd style=\"width: 254.438px; height: 38px;\"\u003e6 m\/s (S Mode)\u003cbr\u003e6 m\/s (N Mode)\u003c\/td\u003e\n\u003c\/tr\u003e\n\u003ctr style=\"height: 52px;\"\u003e\n\u003ctd style=\"width: 245.562px; height: 52px;\"\u003eMax Descent Speed\u003c\/td\u003e\n\u003ctd style=\"width: 254.438px; height: 52px;\"\u003e\n\u003cp\u003e6 m\/s (S Mode)\u003cbr\u003e6 m\/s (N Mode)\u003c\/p\u003e\n\u003c\/td\u003e\n\u003c\/tr\u003e\n\u003ctr style=\"height: 27px;\"\u003e\n\u003ctd style=\"width: 245.562px; height: 27px;\"\u003eMax Service Ceiling Above Sea Level\u003c\/td\u003e\n\u003ctd style=\"width: 254.438px; height: 27px;\"\u003e\n\u003cp\u003e5000 m\u003cbr\u003e\u003c\/p\u003e\n\u003c\/td\u003e\n\u003c\/tr\u003e\n\u003ctr style=\"height: 9px;\"\u003e\n\u003ctd style=\"width: 245.562px; height: 9px;\"\u003eMax Flight Time (no wind)\u003c\/td\u003e\n\u003ctd style=\"width: 254.438px; height: 9px;\"\u003e\n\u003cp\u003e31 minutes\u003c\/p\u003e\n\u003c\/td\u003e\n\u003c\/tr\u003e\n\u003ctr style=\"height: 9px;\"\u003e\n\u003ctd style=\"width: 245.562px; height: 9px;\"\u003eMax Hovering Time (no wind)\u003c\/td\u003e\n\u003ctd style=\"width: 254.438px; height: 9px;\"\u003e\n\u003cp\u003e30 minutes\u003c\/p\u003e\n\u003c\/td\u003e\n\u003c\/tr\u003e\n\u003ctr style=\"height: 9px;\"\u003e\n\u003ctd style=\"width: 245.562px; height: 9px;\"\u003eMax Flight Distance (no wind)\u003c\/td\u003e\n\u003ctd style=\"width: 254.438px; height: 9px;\"\u003e\n\u003cp\u003e18.5 km\u003c\/p\u003e\n\u003c\/td\u003e\n\u003c\/tr\u003e\n\u003ctr style=\"height: 9px;\"\u003e\n\u003ctd style=\"width: 245.562px; height: 9px;\"\u003eMax Flight Speed (near sea level, no wind)\u003c\/td\u003e\n\u003ctd style=\"width: 254.438px; height: 9px;\"\u003e19 m\/s (S Mode)\u003cbr\u003e15 m\/s (N Mode)\u003cbr\u003e5 m\/s (C Mode)\u003c\/td\u003e\n\u003c\/tr\u003e\n\u003ctr style=\"height: 9px;\"\u003e\n\u003ctd style=\"width: 245.562px; height: 9px;\"\u003eMax Wind Speed Resistance\u003c\/td\u003e\n\u003ctd style=\"width: 254.438px; height: 9px;\"\u003e10.7 m\/s\u003c\/td\u003e\n\u003c\/tr\u003e\n\u003ctr style=\"height: 9px;\"\u003e\n\u003ctd style=\"width: 245.562px; height: 9px;\"\u003eMax Tilt Angle\u003c\/td\u003e\n\u003ctd style=\"width: 254.438px; height: 9px;\"\u003e35° (S Mode)\u003cbr\u003eFront: 30°, Back: 20°, Left: 35°, Right: 35° (N Mode)\u003c\/td\u003e\n\u003c\/tr\u003e\n\u003ctr style=\"height: 9px;\"\u003e\n\u003ctd style=\"width: 245.562px; height: 9px;\"\u003eMax Angular Velocity\u003c\/td\u003e\n\u003ctd style=\"width: 254.438px; height: 9px;\"\u003e250°\/s (S Mode)\u003cbr\u003e90°\/s (N Mode)\u003cbr\u003e60°\/s (C Mode)\u003c\/td\u003e\n\u003c\/tr\u003e\n\u003ctr style=\"height: 9px;\"\u003e\n\u003ctd style=\"width: 245.562px; height: 9px;\"\u003eOperating Temperature Range\u003c\/td\u003e\n\u003ctd style=\"width: 254.438px; height: 9px;\"\u003e0° to 40°C (32° to 104°F)\u003c\/td\u003e\n\u003c\/tr\u003e\n\u003ctr style=\"height: 9px;\"\u003e\n\u003ctd style=\"width: 245.562px; height: 9px;\"\u003eOperating Frequency\u003c\/td\u003e\n\u003ctd style=\"width: 254.438px; height: 9px;\"\u003e2.4 GHz\u003cbr\u003e5.8 GHz\u003cbr\u003eTransmission Power (EIRP)\u003cbr\u003e2.4 GHz:\u003cbr\u003eFCC: ≤30 dBm\u003cbr\u003eCE: ≤20 dBm\u003cbr\u003eSRRC: ≤20 dBm\u003cbr\u003eMIC: ≤20 dBm\u003cbr\u003e5.8 GHz:\u003cbr\u003eFCC: ≤30 dBm\u003cbr\u003eCE: ≤14 dBm\u003cbr\u003eSRRC: ≤29 dBm\u003c\/td\u003e\n\u003c\/tr\u003e\n\u003ctr style=\"height: 9px;\"\u003e\n\u003ctd style=\"width: 245.562px; height: 9px;\"\u003eHovering Accuracy Range\u003c\/td\u003e\n\u003ctd style=\"width: 254.438px; height: 9px;\"\u003eVertical:\u003cbr\u003e± 0.1 m (with vision positioning)\u003cbr\u003e± 0.5 m (with GNSS positioning)\u003cbr\u003eHorizontal:\u003cbr\u003e± 0.1 m (with vision positioning)\u003cbr\u003e± 1.5 m (with GNSS positioning)\u003c\/td\u003e\n\u003c\/tr\u003e\n\u003ctr style=\"height: 9px;\"\u003e\n\u003ctd style=\"width: 245.562px; height: 9px;\"\u003ePropellers\u003c\/td\u003e\n\u003ctd style=\"width: 254.438px; height: 9px;\"\u003eQuick release, low noise, folding\u003c\/td\u003e\n\u003c\/tr\u003e\n\u003ctr style=\"height: 9px;\"\u003e\n\u003ctd style=\"width: 245.562px; height: 9px;\"\u003eAircraft Arms\u003c\/td\u003e\n\u003ctd style=\"width: 254.438px; height: 9px;\"\u003eFoldable\u003c\/td\u003e\n\u003c\/tr\u003e\n\u003ctr style=\"height: 9px;\"\u003e\n\u003ctd style=\"width: 245.562px; height: 9px;\"\u003eGNSS\u003c\/td\u003e\n\u003ctd style=\"width: 254.438px; height: 9px;\"\u003eGPS+GLONASS+GALILEO\u003c\/td\u003e\n\u003c\/tr\u003e\n\u003ctr style=\"height: 9px;\"\u003e\n\u003ctd style=\"width: 245.562px; height: 9px;\"\u003eCompass\u003c\/td\u003e\n\u003ctd style=\"width: 254.438px; height: 9px;\"\u003eSingle Compass\u003c\/td\u003e\n\u003c\/tr\u003e\n\u003ctr style=\"height: 9px;\"\u003e\n\u003ctd style=\"width: 245.562px; height: 9px;\"\u003eIMU\u003c\/td\u003e\n\u003ctd style=\"width: 254.438px; height: 9px;\"\u003eSingle IMU\u003c\/td\u003e\n\u003c\/tr\u003e\n\u003ctr style=\"height: 9px;\"\u003e\n\u003ctd style=\"width: 245.562px; height: 9px;\"\u003eInternal Storage\u003c\/td\u003e\n\u003ctd style=\"width: 254.438px; height: 9px;\"\u003e8 GB\u003c\/td\u003e\n\u003c\/tr\u003e\n\u003c\/tbody\u003e\n\u003c\/table\u003e\n\u003cp\u003e\u003cbr\u003e\u003cbr\u003e\u003c\/p\u003e\n\u003ch3 class=\"group-list-title\"\u003eIntelligent Flight Battery\u003c\/h3\u003e\n\u003ctable width=\"100%\"\u003e\n\u003ctbody\u003e\n\u003ctr\u003e\n\u003ctd style=\"width: 46.981%;\"\u003e Capacity\u003c\/td\u003e\n\u003ctd style=\"width: 49.7244%;\"\u003e3500 mAh\u003c\/td\u003e\n\u003c\/tr\u003e\n\u003ctr\u003e\n\u003ctd style=\"width: 46.981%;\"\u003eVoltage\u003c\/td\u003e\n\u003ctd style=\"width: 49.7244%;\"\u003e11.55 V\u003c\/td\u003e\n\u003c\/tr\u003e\n\u003ctr\u003e\n\u003ctd style=\"width: 46.981%;\"\u003eMax Charging Voltage\u003c\/td\u003e\n\u003ctd style=\"width: 49.7244%;\"\u003e13.2 V\u003c\/td\u003e\n\u003c\/tr\u003e\n\u003ctr\u003e\n\u003ctd style=\"width: 46.981%;\"\u003eBattery Type\u003c\/td\u003e\n\u003ctd style=\"width: 49.7244%;\"\u003eLiPo 3S\u003c\/td\u003e\n\u003c\/tr\u003e\n\u003ctr\u003e\n\u003ctd style=\"width: 46.981%;\"\u003eEnergy\u003c\/td\u003e\n\u003ctd style=\"width: 49.7244%;\"\u003e40.42 Wh\u003c\/td\u003e\n\u003c\/tr\u003e\n\u003ctr\u003e\n\u003ctd style=\"width: 46.981%;\"\u003eWeight\u003c\/td\u003e\n\u003ctd style=\"width: 49.7244%;\"\u003e198 g\u003c\/td\u003e\n\u003c\/tr\u003e\n\u003ctr\u003e\n\u003ctd style=\"width: 46.981%;\"\u003eCharging Temperature Range\u003c\/td\u003e\n\u003ctd style=\"width: 49.7244%;\"\u003e5° to 40°C (41° to 104°F)\u003c\/td\u003e\n\u003c\/tr\u003e\n\u003ctr\u003e\n\u003ctd style=\"width: 46.981%;\"\u003eMax Charging Power\u003c\/td\u003e\n\u003ctd style=\"width: 49.7244%;\"\u003e38 W\u003c\/td\u003e\n\u003c\/tr\u003e\n\u003ctr\u003e\n\u003ctd style=\"width: 46.981%;\"\u003eBuilt-in Battery\u003c\/td\u003e\n\u003ctd style=\"width: 49.7244%;\"\u003eN\/A\u003c\/td\u003e\n\u003c\/tr\u003e\n\u003c\/tbody\u003e\n\u003c\/table\u003e\n\u003cp\u003e\u003cbr\u003e\u003c\/p\u003e\n\u003ch3 class=\"group-list-title\"\u003eCamera\u003c\/h3\u003e\n\u003ctable width=\"100%\"\u003e\n\u003ctbody\u003e\n\u003ctr\u003e\n\u003ctd style=\"width: 47.0159%;\"\u003e Sensor\u003c\/td\u003e\n\u003ctd style=\"width: 48.9841%;\"\u003e\n\u003cp\u003e1\" CMOS\u003c\/p\u003e\n\u003cp\u003eEffective Pixels: 20 MP; 2.4μm Pixel Size\u003c\/p\u003e\n\u003c\/td\u003e\n\u003c\/tr\u003e\n\u003ctr\u003e\n\u003ctd style=\"width: 47.0159%;\"\u003eLens\u003c\/td\u003e\n\u003ctd style=\"width: 48.9841%;\"\u003eFOV: 88°\u003cbr\u003e35 mm Format Equivalent: 22 mm\u003cbr\u003eAperture: f\/2.8\u003cbr\u003eShooting Range: 0.6 m to ∞\u003c\/td\u003e\n\u003c\/tr\u003e\n\u003ctr\u003e\n\u003ctd style=\"width: 47.0159%;\"\u003eISO Range\u003c\/td\u003e\n\u003ctd style=\"width: 48.9841%;\"\u003eVideo:\u003cbr\u003e100-3200 (Auto)\u003cbr\u003e100-6400 (Manual)\u003cbr\u003e10-Bit Dlog-M Video:\u003cbr\u003e100-800 (Auto)\u003cbr\u003e100-1600 (Manual)\u003cbr\u003ePhoto:\u003cbr\u003e100-3200 (Auto)\u003cbr\u003e100-12800 (Manual)\u003c\/td\u003e\n\u003c\/tr\u003e\n\u003ctr\u003e\n\u003ctd style=\"width: 47.0159%;\"\u003eStill Image Size\u003c\/td\u003e\n\u003ctd style=\"width: 48.9841%;\"\u003e20 MP\u003cbr\u003e5472×3648 (3:2)\u003cbr\u003e5472×3078 (16:9)\u003c\/td\u003e\n\u003c\/tr\u003e\n\u003ctr\u003e\n\u003ctd style=\"width: 47.0159%;\"\u003eStill Photography Modes\u003c\/td\u003e\n\u003ctd style=\"width: 48.9841%;\"\u003eSingle shot: 20 MP\u003cbr\u003eBurst shooting: 20 MP (continuous burst)\u003cbr\u003eAuto Exposure Bracketing (AEB): 20 MP, 3\/5 bracketed frames at 0.7 EV bias\u003cbr\u003eTimed: 20 MP, 2\/3\/5\/7\/10\/15\/20\/30\/60s\u003cbr\u003eSmartPhoto (including HDR and HyperLight): 20 MP\u003cbr\u003eHDR Panorama:\u003cbr\u003eVertical (3×1): 3328×8000 (width×height)\u003cbr\u003eWide-angle (3×3): 8000×6144 (width×height)\u003cbr\u003e180° (3×7): 8192×3500 (width×height)\u003cbr\u003eSphere (3×8+1): 8192×4096 (width×height)\u003cbr\u003eJPEG\/DNG (RAW)\u003c\/td\u003e\n\u003c\/tr\u003e\n\u003ctr\u003e\n\u003ctd style=\"width: 47.0159%;\"\u003eVideo Resolution\u003c\/td\u003e\n\u003ctd style=\"width: 48.9841%;\"\u003e5.4K: 5472×3078 @ 24\/25\/30 fps\u003cbr\u003e4K Ultra HD: 3840×2160 @ 24\/25\/30\/48\/50\/60 fps\u003cbr\u003e2.7K: 2688x1512 @ 24\/25\/30\/48\/50\/60 fps\u003cbr\u003eFHD: 1920×1080 @ 24\/25\/30\/48\/50\/60\/120 fps\u003cbr\u003eMP4\/MOV (H.264\/MPEG-4 AVC, H.265\/HEVC)\u003c\/td\u003e\n\u003c\/tr\u003e\n\u003ctr\u003e\n\u003ctd style=\"width: 47.0159%;\"\u003eMax Video Bitrate\u003c\/td\u003e\n\u003ctd style=\"width: 48.9841%;\"\u003e150 Mbps\u003c\/td\u003e\n\u003c\/tr\u003e\n\u003ctr\u003e\n\u003ctd style=\"width: 47.0159%;\"\u003eSupported File System\u003c\/td\u003e\n\u003ctd style=\"width: 48.9841%;\"\u003e\n\u003cp\u003eFAT32\/exFAT\u003c\/p\u003e\n\u003cp\u003eSupports a microSD card with a capacity of up to 256 GB.\u003c\/p\u003e\n\u003c\/td\u003e\n\u003c\/tr\u003e\n\u003ctr\u003e\n\u003ctd style=\"width: 47.0159%;\"\u003eDigital Zoom\u003c\/td\u003e\n\u003ctd style=\"width: 48.9841%;\"\u003e\n\u003cp\u003eZoom recording is not available while recording 10-bit videos and 120fps videos.\u003c\/p\u003e\n\u003cp\u003e4K\/30fps:\u003cbr\u003e4x;\u003cbr\u003e2.7K\/60fps:\u003cbr\u003e4x;\u003cbr\u003e2.7K\/30fps:\u003cbr\u003e6x;\u003cbr\u003e1080p\/60fps:\u003cbr\u003e6x;\u003cbr\u003e1080p\/30fps:\u003cbr\u003e8x\u003c\/p\u003e\n\u003c\/td\u003e\n\u003c\/tr\u003e\n\u003c\/tbody\u003e\n\u003c\/table\u003e\n\u003cp\u003e \u003c\/p\u003e\n\u003ch3 class=\"group-list-title\"\u003eGimbal\u003c\/h3\u003e\n\u003ctable width=\"100%\"\u003e\n\u003ctbody\u003e\n\u003ctr\u003e\n\u003ctd style=\"width: 46.8312%;\"\u003e Stabilization\u003c\/td\u003e\n\u003ctd style=\"width: 48.1688%;\"\u003e3-axis (tilt, roll, pan)\u003c\/td\u003e\n\u003c\/tr\u003e\n\u003ctr\u003e\n\u003ctd style=\"width: 46.8312%;\"\u003eMechanical Range\u003c\/td\u003e\n\u003ctd style=\"width: 48.1688%;\"\u003eTilt: -135° to 45°\u003cbr\u003eRoll: -45° to 45°\u003cbr\u003ePan: -100° to 100°\u003c\/td\u003e\n\u003c\/tr\u003e\n\u003ctr\u003e\n\u003ctd style=\"width: 46.8312%;\"\u003ePan Axis\u003c\/td\u003e\n\u003ctd style=\"width: 48.1688%;\"\u003eNot Controllable\u003c\/td\u003e\n\u003c\/tr\u003e\n\u003ctr\u003e\n\u003ctd style=\"width: 46.8312%;\"\u003eControllable Range\u003c\/td\u003e\n\u003ctd style=\"width: 48.1688%;\"\u003eTilt: -90° to 0°(default); -90° to 24° (extended)\u003c\/td\u003e\n\u003c\/tr\u003e\n\u003ctr\u003e\n\u003ctd style=\"width: 46.8312%;\"\u003eMax Controllable Speed (tilt)\u003c\/td\u003e\n\u003ctd style=\"width: 48.1688%;\"\u003e100°\/s\u003c\/td\u003e\n\u003c\/tr\u003e\n\u003ctr\u003e\n\u003ctd style=\"width: 46.8312%;\"\u003eAngular Vibration Range\u003c\/td\u003e\n\u003ctd style=\"width: 48.1688%;\"\u003e±0.01°\u003c\/td\u003e\n\u003c\/tr\u003e\n\u003c\/tbody\u003e\n\u003c\/table\u003e\n\u003cp\u003e\u003cbr\u003e\u003c\/p\u003e\n\u003ch3 class=\"group-list-title\"\u003eSensing System\u003c\/h3\u003e\n\u003ctable width=\"100%\"\u003e\n\u003ctbody\u003e\n\u003ctr\u003e\n\u003ctd style=\"width: 48.1438%;\"\u003e Forward\u003c\/td\u003e\n\u003ctd style=\"width: 48.5617%;\"\u003e\n\u003cp\u003ePrecision Measurement Range: 0.38-23.8 m\u003c\/p\u003e\n\u003cp\u003eEffective Sensing Speed: ≤15 m\/s\u003cbr\u003eField of View (FOV): 72° (horizontal), 58° (vertical)\u003c\/p\u003e\n\u003c\/td\u003e\n\u003c\/tr\u003e\n\u003ctr\u003e\n\u003ctd style=\"width: 48.1438%;\"\u003eBackward\u003c\/td\u003e\n\u003ctd style=\"width: 48.5617%;\"\u003ePrecision Measurement Range: 0.37-23.4 m\u003cbr\u003eEffective Sensing Speed: ≤12 m\/s\u003cbr\u003eField of View (FOV): 57° (horizontal), 44° (vertical)\u003c\/td\u003e\n\u003c\/tr\u003e\n\u003ctr\u003e\n\u003ctd style=\"width: 48.1438%;\"\u003eDownward\u003c\/td\u003e\n\u003ctd style=\"width: 48.5617%;\"\u003eToF Measurement Range: 0.1-8 m\u003cbr\u003eHovering Range: 0.5-30 m\u003cbr\u003eVision Sensor Hovering Range: 0.5-60 m\u003c\/td\u003e\n\u003c\/tr\u003e\n\u003ctr\u003e\n\u003ctd style=\"width: 48.1438%;\"\u003eLeft\/Right\u003c\/td\u003e\n\u003ctd style=\"width: 48.5617%;\"\u003eN\/A\u003c\/td\u003e\n\u003c\/tr\u003e\n\u003ctr\u003e\n\u003ctd style=\"width: 48.1438%;\"\u003eUpward\u003c\/td\u003e\n\u003ctd style=\"width: 48.5617%;\"\u003ePrecision Measurement Range: 0.34-28.6 m\u003cbr\u003eField of View (FOV): 63° (horizontal), 78° (vertical)\u003c\/td\u003e\n\u003c\/tr\u003e\n\u003ctr\u003e\n\u003ctd style=\"width: 48.1438%;\"\u003eDownward Auxiliary Light\u003c\/td\u003e\n\u003ctd style=\"width: 48.5617%;\"\u003eSingle LED\u003c\/td\u003e\n\u003c\/tr\u003e\n\u003c\/tbody\u003e\n\u003c\/table\u003e\n\u003cp\u003e\u003cbr\u003e\u003c\/p\u003e\n\u003ch3 class=\"group-list-title\"\u003eVideo Transmission\u003c\/h3\u003e\n\u003ctable width=\"100%\"\u003e\n\u003ctbody\u003e\n\u003ctr\u003e\n\u003ctd style=\"width: 47.6063%;\"\u003e Transmission System\u003c\/td\u003e\n\u003ctd style=\"width: 47.3937%;\"\u003e\n\u003cp\u003eO3\u003c\/p\u003e\n\u003cp\u003e2.4 GHz\/5.8 GHz Auto-Switching (compatible with OcuSync 2.0)\u003cbr data-mce-fragment=\"1\"\u003e4-antenna 2T4R\u003c\/p\u003e\n\u003c\/td\u003e\n\u003c\/tr\u003e\n\u003ctr\u003e\n\u003ctd style=\"width: 47.6063%;\"\u003eMax Transmission Distance\u003c\/td\u003e\n\u003ctd style=\"width: 47.3937%;\"\u003e12 km (FCC), 8 km (CE)\u003cbr\u003e8 km (SRRC), 8 km (MIC)\u003c\/td\u003e\n\u003c\/tr\u003e\n\u003ctr\u003e\n\u003ctd style=\"width: 47.6063%;\"\u003eLive View Quality\/Latency\u003c\/td\u003e\n\u003ctd style=\"width: 47.3937%;\"\u003eDrone + Remote Controller: 1080p\/30fps 12 Mbps 120 ms\u003cbr\u003eDrone + DJI Smart Controller: 1080p\/30fps 12Mbps 130 ms\u003c\/td\u003e\n\u003c\/tr\u003e\n\u003ctr\u003e\n\u003ctd style=\"width: 47.6063%;\"\u003eMax Transmission Bitrate\u003c\/td\u003e\n\u003ctd style=\"width: 47.3937%;\"\u003e44 Mbps (download bitrate)\u003cbr\u003e16 Mbps (live video bitrate)\u003c\/td\u003e\n\u003c\/tr\u003e\n\u003ctr\u003e\n\u003ctd style=\"width: 47.6063%;\"\u003eOperating Frequency\u003c\/td\u003e\n\u003ctd style=\"width: 47.3937%;\"\u003e2.4 GHz\u003cbr\u003e5.8 GHz\u003c\/td\u003e\n\u003c\/tr\u003e\n\u003c\/tbody\u003e\n\u003c\/table\u003e\n\u003cp\u003e\u003cbr\u003e\u003c\/p\u003e\n\u003ch3 class=\"group-list-title\"\u003eRemote Controller\u003c\/h3\u003e\n\u003ctable width=\"100%\"\u003e\n\u003ctbody\u003e\n\u003ctr\u003e\n\u003ctd style=\"width: 47.7766%;\"\u003e Multiple Controllers\u003c\/td\u003e\n\u003ctd style=\"width: 47.2234%;\"\u003eN\/A\u003c\/td\u003e\n\u003c\/tr\u003e\n\u003ctr\u003e\n\u003ctd style=\"width: 47.7766%;\"\u003eDJI Smart Controller\u003c\/td\u003e\n\u003ctd style=\"width: 47.2234%;\"\u003eSupported\u003c\/td\u003e\n\u003c\/tr\u003e\n\u003ctr\u003e\n\u003ctd style=\"width: 47.7766%;\"\u003eRemote Controller Transmission System\u003c\/td\u003e\n\u003ctd style=\"width: 47.2234%;\"\u003eOcuSync 2.0\u003c\/td\u003e\n\u003c\/tr\u003e\n\u003ctr\u003e\n\u003ctd style=\"width: 47.7766%;\"\u003eBattery Life\u003c\/td\u003e\n\u003ctd style=\"width: 47.2234%;\"\u003e6 hours (4 hours when charging a mobile device)\u003c\/td\u003e\n\u003c\/tr\u003e\n\u003ctr\u003e\n\u003ctd style=\"width: 47.7766%;\"\u003eSupported Mobile Device Connectors\u003c\/td\u003e\n\u003ctd style=\"width: 47.2234%;\"\u003eLightning, Micro USB, USB-C\u003c\/td\u003e\n\u003c\/tr\u003e\n\u003ctr\u003e\n\u003ctd style=\"width: 47.7766%;\"\u003eMax Supported Mobile Device Size\u003c\/td\u003e\n\u003ctd style=\"width: 47.2234%;\"\u003e180×86×10 mm (length×width×height)\u003c\/td\u003e\n\u003c\/tr\u003e\n\u003ctr\u003e\n\u003ctd style=\"width: 47.7766%;\"\u003eOperating Temperature\u003c\/td\u003e\n\u003ctd style=\"width: 47.2234%;\"\u003e0° to 40°C (14° to 104°F)\u003c\/td\u003e\n\u003c\/tr\u003e\n\u003ctr\u003e\n\u003ctd style=\"width: 47.7766%;\"\u003eTransmitter Power (EIRP)\u003c\/td\u003e\n\u003ctd style=\"width: 47.2234%;\"\u003e2.4 GHz:\u003cbr\u003eFCC: ≤26 dBm\u003cbr\u003eCE: ≤20 dBm\u003cbr\u003eSRRC: ≤20 dBm\u003cbr\u003eMIC: ≤20 dBm\u003cbr\u003e5.8 GHz:\u003cbr\u003eFCC: ≤26 dBm\u003cbr\u003eCE: ≤14 dBm\u003cbr\u003eSRRC: ≤26 dBm\u003c\/td\u003e\n\u003c\/tr\u003e\n\u003c\/tbody\u003e\n\u003c\/table\u003e\n\u003cp\u003e\u003cbr\u003e\u003c\/p\u003e\n\u003ch3 class=\"group-list-title\"\u003eCharger\u003c\/h3\u003e\n\u003ctable width=\"100%\"\u003e\n\u003ctbody\u003e\n\u003ctr\u003e\n\u003ctd style=\"width: 49.888%;\"\u003e Charging Input\u003c\/td\u003e\n\u003ctd style=\"width: 46.8175%;\"\u003e100-240V, 50\/60 Hz, 1.3 A\u003c\/td\u003e\n\u003c\/tr\u003e\n\u003ctr\u003e\n\u003ctd style=\"width: 49.888%;\"\u003eCharging Output\u003c\/td\u003e\n\u003ctd style=\"width: 46.8175%;\"\u003eCharging Port: 13.2 V⎓2.82 A\u003cbr\u003eUSB Port: 5 V⎓2 A\u003c\/td\u003e\n\u003c\/tr\u003e\n\u003ctr\u003e\n\u003ctd style=\"width: 49.888%;\"\u003eVoltage\u003c\/td\u003e\n\u003ctd style=\"width: 46.8175%;\"\u003e13.2 V\u003c\/td\u003e\n\u003c\/tr\u003e\n\u003ctr\u003e\n\u003ctd style=\"width: 49.888%;\"\u003eRated Power\u003c\/td\u003e\n\u003ctd style=\"width: 46.8175%;\"\u003e38 W\u003c\/td\u003e\n\u003c\/tr\u003e\n\u003c\/tbody\u003e\n\u003c\/table\u003e\n\u003cp\u003e\u003cbr\u003e\u003c\/p\u003e\n\u003cdiv\u003e\n\u003cul style=\"text-align: center;\"\u003e\u003c\/ul\u003e\n\u003c\/div\u003e\n\u003cstyle\u003e\u003c!--\n.embed-container { position: relative; padding-bottom: 56.25%; height: 0; overflow: hidden; max-width: 100%; } .embed-container iframe, .embed-container object, .embed-container embed { position: absolute; top: 0; left: 0; width: 100%; height: 100%; }\n--\u003e\u003c\/style\u003e\n\u003c\/div\u003e","published_at":"2022-10-20T06:13:57-04:00","created_at":"2022-10-02T06:34:30-04:00","vendor":"DJI","type":"Drone","tags":["best drone","DJI Drones","DJI Mavic Air 2","drone","drone camera","drone dji","drone with camera","FocusTrack","HDR","mini drone","無人機","無人機套裝","航拍機","遙控航拍機","飛行無人機","高清航拍機"],"price":97800,"price_min":97800,"price_max":97800,"available":true,"price_varies":false,"compare_at_price":null,"compare_at_price_min":0,"compare_at_price_max":0,"compare_at_price_varies":false,"variants":[{"id":39869991747659,"title":"Default Title","option1":"Default Title","option2":null,"option3":null,"sku":"DJI-AIR-2S","requires_shipping":true,"taxable":true,"featured_image":null,"available":true,"name":"DJI Mavic Air 2S - 4 Directions of Obstacle Sensing Drone with 3-Axis Gimbal Camera | 5.4K Video | 1-Inch Sensor | MasterShots","public_title":null,"options":["Default Title"],"price":97800,"weight":4000,"compare_at_price":null,"inventory_management":"shopify","barcode":"","requires_selling_plan":false,"selling_plan_allocations":[]}],"images":["\/\/www.stream-sourcing.com\/cdn\/shop\/products\/DJI-Mavic-Air-2S-Fly-More-Combo_StreamSource_7454d458-c258-4035-9678-bd6f657f6772.jpg?v=1664706876","\/\/www.stream-sourcing.com\/cdn\/shop\/products\/DJI-Mavic-Air-2S-Fly-More-Combo_3_1_StreamSource2_a9eecce2-74f6-4bc1-8da2-a5945c19a54b.jpg?v=1664706877","\/\/www.stream-sourcing.com\/cdn\/shop\/products\/DJI-Mavic-Air-2S-Fly-More-Combo_4_1_StreamSource4_8e3f9619-9040-4888-b00c-fad2e25f5577.jpg?v=1664706877","\/\/www.stream-sourcing.com\/cdn\/shop\/products\/DJI-Mavic-Air-2S-Fly-More-Combo_StreamSource5_0e8ad2cc-6117-42a2-b8bf-64e3376bb619.jpg?v=1664706877","\/\/www.stream-sourcing.com\/cdn\/shop\/products\/DJI-Mavic-Air-2S-Fly-More-Combo_StreamSource6_d4456b92-6f7a-41bf-b1d0-e1adbb3e8cdd.jpg?v=1664706877"],"featured_image":"\/\/www.stream-sourcing.com\/cdn\/shop\/products\/DJI-Mavic-Air-2S-Fly-More-Combo_StreamSource_7454d458-c258-4035-9678-bd6f657f6772.jpg?v=1664706876","options":["Title"],"media":[{"alt":"DJI-Mavic-Air-2S-Fly-More-Combo_StreamSource","id":21590625648715,"position":1,"preview_image":{"aspect_ratio":1.762,"height":681,"width":1200,"src":"\/\/www.stream-sourcing.com\/cdn\/shop\/products\/DJI-Mavic-Air-2S-Fly-More-Combo_StreamSource_7454d458-c258-4035-9678-bd6f657f6772.jpg?v=1664706876"},"aspect_ratio":1.762,"height":681,"media_type":"image","src":"\/\/www.stream-sourcing.com\/cdn\/shop\/products\/DJI-Mavic-Air-2S-Fly-More-Combo_StreamSource_7454d458-c258-4035-9678-bd6f657f6772.jpg?v=1664706876","width":1200},{"alt":"DJI-Mavic-Air-2S-Fly-More-Combo_StreamSource","id":21590625714251,"position":2,"preview_image":{"aspect_ratio":1.762,"height":681,"width":1200,"src":"\/\/www.stream-sourcing.com\/cdn\/shop\/products\/DJI-Mavic-Air-2S-Fly-More-Combo_3_1_StreamSource2_a9eecce2-74f6-4bc1-8da2-a5945c19a54b.jpg?v=1664706877"},"aspect_ratio":1.762,"height":681,"media_type":"image","src":"\/\/www.stream-sourcing.com\/cdn\/shop\/products\/DJI-Mavic-Air-2S-Fly-More-Combo_3_1_StreamSource2_a9eecce2-74f6-4bc1-8da2-a5945c19a54b.jpg?v=1664706877","width":1200},{"alt":"DJI-Mavic-Air-2S-Fly-More-Combo_StreamSource","id":21590625747019,"position":3,"preview_image":{"aspect_ratio":1.762,"height":681,"width":1200,"src":"\/\/www.stream-sourcing.com\/cdn\/shop\/products\/DJI-Mavic-Air-2S-Fly-More-Combo_4_1_StreamSource4_8e3f9619-9040-4888-b00c-fad2e25f5577.jpg?v=1664706877"},"aspect_ratio":1.762,"height":681,"media_type":"image","src":"\/\/www.stream-sourcing.com\/cdn\/shop\/products\/DJI-Mavic-Air-2S-Fly-More-Combo_4_1_StreamSource4_8e3f9619-9040-4888-b00c-fad2e25f5577.jpg?v=1664706877","width":1200},{"alt":"DJI-Mavic-Air-2S-Fly-More-Combo_StreamSource","id":21590625779787,"position":4,"preview_image":{"aspect_ratio":1.762,"height":681,"width":1200,"src":"\/\/www.stream-sourcing.com\/cdn\/shop\/products\/DJI-Mavic-Air-2S-Fly-More-Combo_StreamSource5_0e8ad2cc-6117-42a2-b8bf-64e3376bb619.jpg?v=1664706877"},"aspect_ratio":1.762,"height":681,"media_type":"image","src":"\/\/www.stream-sourcing.com\/cdn\/shop\/products\/DJI-Mavic-Air-2S-Fly-More-Combo_StreamSource5_0e8ad2cc-6117-42a2-b8bf-64e3376bb619.jpg?v=1664706877","width":1200},{"alt":"DJI-Mavic-Air-2S-Fly-More-Combo_StreamSource","id":21590625812555,"position":5,"preview_image":{"aspect_ratio":1.762,"height":681,"width":1200,"src":"\/\/www.stream-sourcing.com\/cdn\/shop\/products\/DJI-Mavic-Air-2S-Fly-More-Combo_StreamSource6_d4456b92-6f7a-41bf-b1d0-e1adbb3e8cdd.jpg?v=1664706877"},"aspect_ratio":1.762,"height":681,"media_type":"image","src":"\/\/www.stream-sourcing.com\/cdn\/shop\/products\/DJI-Mavic-Air-2S-Fly-More-Combo_StreamSource6_d4456b92-6f7a-41bf-b1d0-e1adbb3e8cdd.jpg?v=1664706877","width":1200}],"requires_selling_plan":false,"selling_plan_groups":[],"content":"\u003ch1 style=\"text-align: center;\"\u003e\u003cstrong\u003eDJI Mavic Air 2S\u003c\/strong\u003e\u003c\/h1\u003e\u003cdiv class=\"desc\"\u003e\n\u003ch2 style=\"text-align: center;\"\u003eDJI Air 2S is the ultimate drone for creators on the move, with a 1-inch CMOS sensor, powerful autonomous functions, and a compact body weighing less than 600 g. \u003c\/h2\u003e\n\u003cstyle\u003e\u003c!--\n.embed-container { position: relative; padding-bottom: 56.25%; height: 0; overflow: hidden; max-width: 100%; } .embed-container iframe, .embed-container object, .embed-container embed { position: absolute; top: 0; left: 0; width: 100%; height: 100%; }\n--\u003e\u003c\/style\u003e\n\u003cdiv class=\"embed-container\" style=\"text-align: center;\"\u003e\u003ciframe src=\"https:\/\/www.youtube.com\/embed\/NJ3Z1hSOoMc\" frameborder=\"0\" allowfullscreen=\"\"\u003e\u003c\/iframe\u003e\u003c\/div\u003e\n\u003cdiv style=\"text-align: center;\"\u003e \u003c\/div\u003e\n\u003ch3 style=\"text-align: center;\"\u003e\u003cspan style=\"font-weight: 400;\"\u003eTake this all-in-one aerial powerhouse along anywhere to experience and record your world in stunning detail.\u003c\/span\u003e\u003c\/h3\u003e\n\u003cp\u003e \u003c\/p\u003e\n\u003ch2 style=\"text-align: left;\"\u003e\n\u003cstrong\u003eDifference Between DJI Mavic Air 2S Fly More Combo and DJI Mavic Air 2 Fly More Combo:\u003c\/strong\u003e \u003c\/h2\u003e\n\u003cp\u003e \u003c\/p\u003e\n\u003ch3 style=\"text-align: center;\"\u003e\u003cspan style=\"color: #ff8000;\"\u003e\u003cb\u003eUpgrades\u003c\/b\u003e\u003c\/span\u003e\u003c\/h3\u003e\n\u003cdiv\u003eUpgrades include a 1-inch CMOS sensor, four-antenna low-latency transmission, APAS 4.0, added upward-facing dual-vision sensors, and MasterShots. The camera performance, intelligent features, obstacle sensing system, and transmission system have all improved significantly. \u003c\/div\u003e\n\u003ch2 style=\"text-align: center;\"\u003e\u003cstrong\u003e\u003c\/strong\u003e\u003c\/h2\u003e\n\u003cp\u003e \u003c\/p\u003e\n\u003ch2 style=\"text-align: center;\"\u003e\u003cstrong\u003eHighlights and Features\u003c\/strong\u003e\u003c\/h2\u003e\n\u003ctable data-mce-fragment=\"1\"\u003e\n\u003ctbody data-mce-fragment=\"1\"\u003e\n\u003ctr data-mce-fragment=\"1\"\u003e\n\u003ctd width=\"184\" data-mce-fragment=\"1\"\u003e1-inch CMOS Sensor\u003c\/td\u003e\n\u003ctd width=\"184\" data-mce-fragment=\"1\"\u003eMasterShots\u003c\/td\u003e\n\u003ctd width=\"184\" data-mce-fragment=\"1\"\u003e5.4K Video\u003c\/td\u003e\n\u003c\/tr\u003e\n\u003ctr data-mce-fragment=\"1\"\u003e\n\u003ctd width=\"184\" data-mce-fragment=\"1\"\u003e12km FHD Transmission\u003cspan data-mce-fragment=\"1\"\u003e \u003c\/span\u003e\u003csup data-mce-fragment=\"1\"\u003e[1]\u003c\/sup\u003e\n\u003c\/td\u003e\n\u003ctd width=\"184\" data-mce-fragment=\"1\"\u003eObstacle Sensing in 4 Directions\u003c\/td\u003e\n\u003ctd width=\"184\" data-mce-fragment=\"1\"\u003eADS-B\u003c\/td\u003e\n\u003c\/tr\u003e\n\u003c\/tbody\u003e\n\u003c\/table\u003e\n\u003cbr\u003e\n\u003cdiv style=\"text-align: start;\"\u003e\u003cimg style=\"margin-right: auto; float: none; display: block; margin-left: auto;\" src=\"https:\/\/cdn.shopify.com\/s\/files\/1\/2532\/7020\/files\/Screenshot_2021-08-06_183943.png?v=1628246675\" alt=\"dji-mavic-air-2S-fly-more-combo-drone-content-feature-all\"\u003e\u003c\/div\u003e\n\u003cp\u003e \u003c\/p\u003e\n\u003ch3 style=\"text-align: center;\"\u003e\u003cspan style=\"color: #ff8000;\"\u003e\u003cb\u003e\u003c\/b\u003e\u003c\/span\u003e\u003c\/h3\u003e\n\u003cdiv style=\"text-align: center;\"\u003e\u003c\/div\u003e\n\u003cdiv style=\"text-align: center;\"\u003e\u003c\/div\u003e\n\u003cdiv style=\"text-align: center;\"\u003e\u003c\/div\u003e\n\u003cdiv style=\"text-align: center;\"\u003e\n\u003cp\u003e \u003c\/p\u003e\n\u003ch3\u003e\u003cspan style=\"color: #ff8000;\"\u003e\u003cb\u003eIncredible Image System\u003c\/b\u003e\u003c\/span\u003e\u003c\/h3\u003e\n\u003cdiv style=\"text-align: center;\"\u003e\u003cb\u003eBig World, Big Sensor\u003c\/b\u003e\u003c\/div\u003e\n\u003cdiv style=\"text-align: center;\"\u003e\u003cb\u003e\u003c\/b\u003e\u003c\/div\u003e\n\u003c\/div\u003e\n\u003cdiv style=\"text-align: center;\"\u003e\u003cspan\u003eEquipped with a 1-inch CMOS image sensor and large 2.4μm pixels, DJI Air 2S is capable of 5.4K\/30fps and 4K\/60fps video. Capture any moment with the rich clarity and authentic color tones it deserves.\u003c\/span\u003e\u003c\/div\u003e\n\u003cdiv style=\"text-align: center;\"\u003e\u003cspan\u003e\u003cimg src=\"https:\/\/cdn.shopify.com\/s\/files\/1\/2532\/7020\/files\/DJI_Mavic_Air_2S_Fly_More_Combo_8.jpg?v=1628248569\" style=\"float: none;\" alt=\"dji-mavic-air-2S-fly-more-combo-drone-content-feature-Good-Image-System\"\u003e\u003c\/span\u003e\u003c\/div\u003e\n\u003cdiv style=\"text-align: center;\"\u003e\u003cspan\u003e\u003c\/span\u003e\u003c\/div\u003e\n\u003cdiv style=\"text-align: center;\"\u003e\u003cspan\u003e\u003c\/span\u003e\u003c\/div\u003e\n\u003cdiv style=\"text-align: center;\"\u003e\u003cspan\u003e\u003c\/span\u003e\u003c\/div\u003e\n\u003ch3 style=\"text-align: center;\"\u003e\u003cspan style=\"color: #ff8000;\"\u003e\u003cb\u003e\u003c\/b\u003e\u003c\/span\u003e\u003c\/h3\u003e\n\u003ch3 style=\"text-align: center;\"\u003e\u003cspan style=\"color: #ff8000;\"\u003e\u003cb\u003e\u003c\/b\u003e\u003c\/span\u003e\u003c\/h3\u003e\n\u003ch3 style=\"text-align: center;\"\u003e\u003cspan style=\"color: #ff8000;\"\u003eTurn On the Night\u003c\/span\u003e\u003c\/h3\u003e\n\u003cdiv style=\"text-align: center;\"\u003e\u003cspan style=\"font-weight: 400;\"\u003e\u003cspan data-mce-fragment=\"1\"\u003eCapture the allure of the world, even as it darkens. Thanks to a high dynamic range, high resolution, and accurate color reproduction, even low-light scenes are sharp and vibrant.\u003c\/span\u003e\u003c\/span\u003e\u003c\/div\u003e\n\u003cdiv style=\"text-align: center;\"\u003e\u003cimg style=\"float: none;\" src=\"https:\/\/cdn.shopify.com\/s\/files\/1\/2532\/7020\/files\/DJI_Mavic_Air_2S_Fly_More_Combo_9.jpg?v=1628573124\" alt=\"dji-mavic-air-2S-fly-more-combo-drone-content-feature-Turn-On-the-Night\"\u003e\u003c\/div\u003e\n\u003ch3 style=\"text-align: center;\"\u003e\u003cspan style=\"color: #ff8000;\"\u003e\u003cb\u003e\u003c\/b\u003e\u003c\/span\u003e\u003c\/h3\u003e\n\u003ch3 style=\"text-align: center;\"\u003e\u003cspan style=\"color: #ff8000;\"\u003e\u003cb\u003e\u003cspan data-mce-fragment=\"1\"\u003eOne billion colors\u003c\/span\u003e\u003c\/b\u003e\u003c\/span\u003e\u003c\/h3\u003e\n\u003cdiv style=\"text-align: center;\"\u003e\u003cspan style=\"font-weight: 400;\"\u003e\u003cspan data-mce-fragment=\"1\"\u003eCaptured by the 10-bit Dlog-M color profile of DJI Air 2S let you fully immerse yourself in all the hues of your environment.\u003c\/span\u003e\u003c\/span\u003e\u003c\/div\u003e\n\u003cdiv style=\"text-align: center;\"\u003e\u003cimg style=\"float: none;\" src=\"https:\/\/cdn.shopify.com\/s\/files\/1\/2532\/7020\/files\/DJI_Mavic_Air_2S_Fly_More_Combo_10.jpg?v=1628573285\" alt=\"dji-mavic-air-2S-fly-more-combo-drone-content-feature-One-billion-colors\"\u003e\u003c\/div\u003e\n\u003ch3 style=\"text-align: center;\"\u003e\u003cspan style=\"color: #ff8000;\"\u003e\u003cb\u003e\u003c\/b\u003e\u003c\/span\u003e\u003c\/h3\u003e\n\u003ctable width=\"100%\"\u003e\n\u003ctbody\u003e\n\u003ctr\u003e\n\u003ctd style=\"width: 47.3093%;\"\u003e\n\u003ch3 data-mce-fragment=\"1\"\u003e\u003cspan style=\"color: #ff8000;\" data-mce-fragment=\"1\"\u003e\u003cb data-mce-fragment=\"1\"\u003eShoot RAW\u003c\/b\u003e\u003c\/span\u003e\u003c\/h3\u003e\n\u003cp style=\"text-align: left;\"\u003e\u003cspan\u003eFormat photos with a dynamic \u003c\/span\u003e\u003cspan style=\"font-weight: 400;\" data-mce-fragment=\"1\" data-mce-style=\"font-weight: 400;\"\u003erange of up to 12.6 stops to\u003c\/span\u003e\u003cspan style=\"font-weight: 400;\" data-mce-fragment=\"1\" data-mce-style=\"font-weight: 400;\"\u003e capture more visual information in every scene, even when lighting conditions are bad or complex. This provides more flexibility in post-processing, giving creators more possibilities to get the look they want. \u003c\/span\u003e\u003c\/p\u003e\n\u003c\/td\u003e\n\u003ctd style=\"width: 47.6907%;\"\u003e\n\u003cdiv style=\"text-align: center;\"\u003e\u003cimg src=\"https:\/\/cdn.shopify.com\/s\/files\/1\/2532\/7020\/files\/DJI-Mavic-Air-2S-Fly-More-Combo_600x600.jpg?v=1628577003\" alt=\"dji-mavic-air-2S-fly-more-combo-drone-content-feature-all\" style=\"float: none;\" width=\"600x600\" height=\"600x600\"\u003e\u003c\/div\u003e\n\u003c\/td\u003e\n\u003c\/tr\u003e\n\u003ctr\u003e\n\u003ctd style=\"width: 47.3093%;\"\u003e\n\u003cdiv style=\"text-align: center;\" data-mce-fragment=\"1\" data-mce-style=\"text-align: center;\"\u003e\u003cimg style=\"float: none;\" alt=\"dji-mavic-air-2S-fly-more-combo-drone-content-feature-Shoot-RAW\" src=\"https:\/\/cdn.shopify.com\/s\/files\/1\/2532\/7020\/files\/3b0718d6123b5e2827b85292dc6322fa_600x600.jpg?v=1628577485\" width=\"600x600\" height=\"600x600\" data-mce-fragment=\"1\" data-mce-src=\"https:\/\/cdn.shopify.com\/s\/files\/1\/2532\/7020\/files\/3b0718d6123b5e2827b85292dc6322fa_600x600.jpg?v=1628577485\" data-mce-style=\"float: none;\"\u003e\u003c\/div\u003e\n\u003ch3 style=\"text-align: center;\"\u003e\n\u003cspan style=\"color: #ff8000;\"\u003e\u003cb\u003e\u003c\/b\u003e\u003c\/span\u003e\u003cbr\u003e\n\u003c\/h3\u003e\n\u003c\/td\u003e\n\u003ctd style=\"width: 47.6907%;\"\u003e\n\u003ch3 style=\"text-align: right;\"\u003e\u003cspan style=\"color: #ff8000;\"\u003e\u003cb\u003eIntelligent HDR technology\u003c\/b\u003e\u003c\/span\u003e\u003c\/h3\u003e\n\u003cp style=\"text-align: right;\"\u003e\u003cspan\u003eMerges multiple shots automatically, increasing the dynamic range of images without the need for post-processing. That means more nuanced details in both the highlights and shadows for richer images with greater depth.\u003c\/span\u003e\u003c\/p\u003e\n\u003c\/td\u003e\n\u003c\/tr\u003e\n\u003c\/tbody\u003e\n\u003c\/table\u003e\n\u003ch3 style=\"text-align: center;\"\u003e\u003cspan style=\"color: #ff8000;\"\u003e\u003cb\u003e\u003cspan data-mce-fragment=\"1\"\u003e\u003c\/span\u003e\u003c\/b\u003e\u003c\/span\u003e\u003c\/h3\u003e\n\u003ch3 style=\"text-align: center;\"\u003e\u003cspan style=\"color: #ff8000;\"\u003e\u003cb\u003e\u003cspan data-mce-fragment=\"1\"\u003e\u003c\/span\u003e\u003c\/b\u003e\u003c\/span\u003e\u003c\/h3\u003e\n\u003ch3 style=\"text-align: center;\"\u003e\u003cspan style=\"color: #ff8000;\"\u003e\u003cb\u003e\u003cspan data-mce-fragment=\"1\"\u003e\u003c\/span\u003e\u003c\/b\u003e\u003c\/span\u003e\u003c\/h3\u003e\n\u003ch3 style=\"text-align: center;\"\u003e\u003cspan style=\"font-weight: 400;\"\u003e\u003cspan data-mce-fragment=\"1\"\u003e\u003cbr\u003e\u003c\/span\u003e\u003c\/span\u003e\u003c\/h3\u003e\n\u003cdiv style=\"text-align: center;\"\u003e\n\u003ch3 style=\"text-align: center;\"\u003e\u003cspan style=\"color: #ff8000;\"\u003eHyperlapse and Panorama\u003c\/span\u003e\u003c\/h3\u003e\n\u003c\/div\u003e\n\u003cdiv style=\"text-align: center;\"\u003e\u003cspan style=\"font-weight: 400;\"\u003e\u003cspan data-mce-fragment=\"1\"\u003eSpeed up time and movement with a single tap by creating a striking hyperlapse. You can also capture larger, more detailed shots of your surroundings with panorama.\u003c\/span\u003e\u003c\/span\u003e\u003c\/div\u003e\n\u003cdiv style=\"text-align: center;\"\u003e\u003cimg style=\"float: none;\" src=\"https:\/\/cdn.shopify.com\/s\/files\/1\/2532\/7020\/files\/DJI_Mavic_Air_2S_Fly_More_Combo_12.jpg?v=1628575937\" alt=\"dji-mavic-air-2S-fly-more-combo-drone-content-feature-Hyperlapse-and-Panorama\"\u003e\u003c\/div\u003e\n\u003ch3 style=\"text-align: center;\"\u003e\u003cspan style=\"color: #ff8000;\"\u003e\u003cb\u003e\u003c\/b\u003e\u003c\/span\u003e\u003c\/h3\u003e\n\u003ch2 class=\"text style__eyebrow___2tBWn\" style=\"text-align: center;\"\u003e\u003cspan style=\"color: #ff8000;\"\u003eSmart features, perfect shots\u003c\/span\u003e\u003c\/h2\u003e\n\u003ch3 style=\"text-align: center;\"\u003e\u003cspan style=\"color: #ff8000;\"\u003e\u003cb\u003e\u003c\/b\u003e\u003c\/span\u003e\u003c\/h3\u003e\n\u003ch3 style=\"text-align: center;\"\u003e\u003cspan style=\"color: #ff8000;\"\u003e\u003cb\u003eIntroducing Mastershots\u003c\/b\u003e\u003c\/span\u003e\u003c\/h3\u003e\n\u003cdiv style=\"text-align: center;\"\u003e\u003cspan style=\"font-weight: 400;\"\u003e\u003cspan data-mce-fragment=\"1\"\u003eThe next evolution of QuickShots, MasterShots is an advanced intelligent feature that gives users the best shots in any location with just a tap. Simply select your subject, and the drone will film while executing ten different maneuvers in sequence, keeping your subject center-frame and generating a short cinematic video afterward.\u003c\/span\u003e\u003c\/span\u003e\u003c\/div\u003e\n\u003cdiv style=\"text-align: center;\"\u003e\u003cspan style=\"font-weight: 400;\"\u003e\u003cspan data-mce-fragment=\"1\"\u003e\u003cimg src=\"https:\/\/cdn.shopify.com\/s\/files\/1\/2532\/7020\/files\/DJI_Mavic_Air_2S_Fly_More_Combo_13.jpg?v=1628578139\" style=\"float: none;\" alt=\"dji-mavic-air-2S-fly-more-combo-drone-content-feature-Autonomous-Functions-Matershots\"\u003e\u003c\/span\u003e\u003c\/span\u003e\u003c\/div\u003e\n\u003cdiv style=\"text-align: center;\"\u003e\u003cb\u003e\u003cspan style=\"color: #ff8000;\"\u003e\u003c\/span\u003e\u003c\/b\u003e\u003c\/div\u003e\n\u003cdiv style=\"text-align: center;\"\u003e\u003cb\u003e\u003cspan style=\"color: #ff8000;\"\u003e\u003c\/span\u003e\u003c\/b\u003e\u003c\/div\u003e\n\u003cdiv style=\"text-align: center;\"\u003e\u003cb\u003e\u003cspan style=\"color: #ff8000;\"\u003e\u003c\/span\u003e\u003c\/b\u003e\u003c\/div\u003e\n\u003cdiv style=\"text-align: center;\"\u003e\u003cb\u003e\u003cspan style=\"color: #ff8000;\"\u003e\u003c\/span\u003e\u003c\/b\u003e\u003c\/div\u003e\n\u003cdiv style=\"text-align: center;\"\u003e\n\u003cdiv\u003e\u003cspan style=\"color: #ff8000;\"\u003e\u003cb\u003e\u003c\/b\u003e\u003c\/span\u003e\u003c\/div\u003e\n\u003cdiv\u003e\u003cspan style=\"color: #ff8000;\"\u003e\u003cb\u003e\u003c\/b\u003e\u003c\/span\u003e\u003c\/div\u003e\n\u003cdiv\u003e\u003cspan style=\"color: #ff8000;\"\u003e\u003cb\u003eThe Center of Attention \u003c\/b\u003e\u003c\/span\u003e\u003c\/div\u003e\n\u003cdiv\u003e\n\u003cb\u003e\u003cspan\u003e\u003c\/span\u003e\u003c\/b\u003e\u003cbr\u003e\n\u003c\/div\u003e\n\u003cdiv\u003e\u003cspan\u003eFocusTrack features Spotlight 2.0, ActiveTrack 4.0, and Point of Interest 3.0, making it a breeze for DJI Air 2S to follow or circle your subject.\u003c\/span\u003e\u003c\/div\u003e\n\u003cdiv style=\"text-align: center;\"\u003e\u003cbr\u003e\u003c\/div\u003e\n\u003cdiv style=\"text-align: center;\"\u003e\u003c\/div\u003e\n\u003c\/div\u003e\n\u003cdiv style=\"text-align: center;\"\u003e\n\u003ctable width=\"100%\"\u003e\n\u003ctbody\u003e\n\u003ctr\u003e\n\u003ctd style=\"width: 31%; text-align: center;\"\u003e \u003cstrong\u003e\u003cspan style=\"color: #ff8000;\" data-mce-fragment=\"1\"\u003eSpotlight 2.0 \u003c\/span\u003e\u003c\/strong\u003e\n\u003c\/td\u003e\n\u003ctd style=\"width: 31.7106%;\"\u003e\n\u003cdiv data-ga-label=\"all-1-tab-button\" class=\"style__tab-item___1yKLp\"\u003e\n\u003cdiv style=\"text-align: center;\"\u003e\u003cstrong\u003e\u003cspan style=\"color: #ff8000;\"\u003eActiveTrack 4.0\u003c\/span\u003e\u003c\/strong\u003e\u003c\/div\u003e\n\u003c\/div\u003e\n\u003c\/td\u003e\n\u003ctd style=\"width: 31.2894%; text-align: center;\"\u003e\u003cstrong\u003e\u003cspan style=\"color: #ff8000;\"\u003ePoint of Interest 3.0\u003c\/span\u003e\u003c\/strong\u003e\u003c\/td\u003e\n\u003c\/tr\u003e\n\u003ctr\u003e\n\u003ctd style=\"width: 31%;\"\u003e\n\u003cp\u003e\u003cspan data-mce-fragment=\"1\"\u003eFollow your subject smoothly while autonomously avoiding obstacles. Even if the subject is momentarily lost, you can quickly resume tracking during flight.\u003c\/span\u003e\u003c\/p\u003e\n\u003cp\u003e\u003cspan data-mce-fragment=\"1\"\u003e\u003cimg src=\"https:\/\/cdn.shopify.com\/s\/files\/1\/2532\/7020\/files\/DJI_Mavic_Air_2S_Fly_More_Combo_14_480x480.jpg?v=1628578319\" alt=\"dji-mavic-air-2S-fly-more-combo-drone-content-feature-The-Center-of-Aattention-Spotlight-2.0\" width=\"480x480\" height=\"480x480\" style=\"float: none;\" data-mce-fragment=\"1\" data-mce-src=\"https:\/\/cdn.shopify.com\/s\/files\/1\/2532\/7020\/files\/DJI_Mavic_Air_2S_Fly_More_Combo_14_480x480.jpg?v=1628578319\"\u003e\u003c\/span\u003e\u003c\/p\u003e\n\u003cdiv\u003e\u003cspan style=\"color: #ff8000;\"\u003e\u003cb\u003e\u003c\/b\u003e\u003c\/span\u003e\u003c\/div\u003e\n\u003c\/td\u003e\n\u003ctd style=\"width: 31.7106%;\"\u003e\n\u003cp\u003e\u003cspan\u003eFollow your subject smoothly while autonomously avoiding obstacles. Even if the subject is momentarily lost, you can quickly resume tracking during flight.\u003c\/span\u003e\u003c\/p\u003e\n\u003cp\u003e\u003cimg alt=\"dji-mavic-air-2S-fly-more-combo-drone-content-feature-The-Center-of-Aattention-ActiveTrack-4.0\" src=\"https:\/\/cdn.shopify.com\/s\/files\/1\/2532\/7020\/files\/DJI_Mavic_Air_2S_Fly_More_Combo_15_480x480.jpg?v=1628578617\" width=\"480x480\" height=\"480x480\" style=\"float: none;\"\u003e\u003c\/p\u003e\n\u003c\/td\u003e\n\u003ctd style=\"width: 31.2894%;\"\u003e\n\u003cp\u003e\u003cspan\u003eEasily take a perfect circle shot while keeping your subject centered. \u003c\/span\u003e\u003c\/p\u003e\n\u003cp\u003e \u003c\/p\u003e\n\u003cp\u003e \u003cimg alt=\"dji-mavic-air-2S-fly-more-combo-drone-content-feature-The-Center-of-Aattention-Point-of-Interest-3.0\" src=\"https:\/\/cdn.shopify.com\/s\/files\/1\/2532\/7020\/files\/DJI_Mavic_Air_2S_Fly_More_Combo_16_480x480.jpg?v=1628578705\" width=\"480x480\" height=\"480x480\" style=\"float: none;\" data-mce-fragment=\"1\" data-mce-src=\"https:\/\/cdn.shopify.com\/s\/files\/1\/2532\/7020\/files\/DJI_Mavic_Air_2S_Fly_More_Combo_16_480x480.jpg?v=1628578705\"\u003e\u003c\/p\u003e\n\u003c\/td\u003e\n\u003c\/tr\u003e\n\u003c\/tbody\u003e\n\u003c\/table\u003e\n\u003c\/div\u003e\n\u003cdiv style=\"text-align: center;\"\u003e\u003cb\u003e\u003cspan style=\"color: #ff8000;\"\u003e\u003c\/span\u003e\u003c\/b\u003e\u003c\/div\u003e\n\u003cdiv style=\"text-align: center;\"\u003e\u003cb\u003e\u003cspan style=\"color: #ff8000;\"\u003e\u003c\/span\u003e\u003c\/b\u003e\u003c\/div\u003e\n\u003cdiv style=\"text-align: center;\"\u003e \u003c\/div\u003e\n\u003ch3 style=\"text-align: center;\"\u003e\u003cspan style=\"color: #ff8000;\"\u003eFeel the Flight\u003c\/span\u003e\u003c\/h3\u003e\n\u003cdiv style=\"text-align: center;\"\u003e\u003cb\u003eWorry Less, Discover More \u003c\/b\u003e\u003c\/div\u003e\n\u003cdiv style=\"text-align: center;\"\u003e\u003cspan style=\"font-weight: 400;\"\u003e\u003cspan data-mce-fragment=\"1\"\u003eThe combination of portability, safety, and intelligent technology means you can spend more time enjoying flights and less time worrying about them. Take DJI Air 2S into the sky confidently, every flight.\u003c\/span\u003e\u003c\/span\u003e\u003c\/div\u003e\n\u003ch3 style=\"text-align: center;\"\u003e\u003cspan style=\"color: #ff8000;\"\u003e\u003cb\u003e\u003c\/b\u003e\u003c\/span\u003e\u003c\/h3\u003e\n\u003ch3 style=\"text-align: center;\"\u003e\u003cspan style=\"color: #ff8000;\"\u003eEnvironment Sensing\u003c\/span\u003e\u003c\/h3\u003e\n\u003cdiv style=\"text-align: center;\"\u003e\u003cspan style=\"font-weight: 400;\"\u003e\u003cspan data-mce-fragment=\"1\"\u003eDJI Air 2S has the ability to perceive its environment in four directions: up, down, forward, and backward. The algorithms for Advanced Pilot Assistance Systems (APAS 4.0) have been further improved, allowing DJI Air 2S to actively avoid obstacles in more complex scenarios and at high speeds.\u003c\/span\u003e\u003c\/span\u003e\u003c\/div\u003e\n\u003cdiv style=\"text-align: center;\"\u003e\u003cimg style=\"float: none;\" src=\"https:\/\/cdn.shopify.com\/s\/files\/1\/2532\/7020\/files\/DJI_Mavic_Air_2S_Fly_More_Combo_17.jpg?v=1628579395\" alt=\"dji-mavic-air-2S-fly-more-combo-drone-content-feature-Feel-the-Flight-Environment-Sensing\"\u003e\u003c\/div\u003e\n\u003cdiv style=\"text-align: center;\"\u003e \u003c\/div\u003e\n\u003ch3 style=\"text-align: center;\"\u003e\u003cspan style=\"color: #ff8000;\"\u003e\u003cb\u003eO3 Tranmission\u003c\/b\u003e\u003c\/span\u003e\u003c\/h3\u003e\n\u003cdiv style=\"text-align: center;\"\u003e\u003cspan style=\"font-weight: 400;\"\u003e\u003cspan data-mce-fragment=\"1\"\u003eDJI Air 2S features DJI's most advanced O3 (OcuSync 3.0) image transmission technology, delivering an ultra-smooth, clear, and reliable image feed.\u003c\/span\u003e\u003c\/span\u003e\u003c\/div\u003e\n\u003cdiv style=\"text-align: center;\"\u003e\n\u003ctable width=\"100%\"\u003e\n\u003ctbody\u003e\n\u003ctr\u003e\n\u003ctd style=\"text-align: center;\"\u003e \u003cspan style=\"color: #ff8000;\"\u003e\u003cstrong\u003e\u003cspan class=\"style__icon-number___2OOlV\" data-mce-fragment=\"1\"\u003e12\u003c\/span\u003e\u003cspan class=\"style__icon-unit___2hz_k\" data-mce-fragment=\"1\"\u003eKm\u003c\/span\u003e\u003c\/strong\u003e\u003c\/span\u003e\n\u003cp class=\"style__icon-desc___Otw9j\" data-mce-fragment=\"1\"\u003eMax Video Transmission\u003c\/p\u003e\n\u003c\/td\u003e\n\u003ctd\u003e\n\u003cdiv style=\"text-align: center;\" class=\"style__icon-number-container___2cK9V\"\u003e\u003cspan style=\"color: #ff8000;\"\u003e\u003cstrong\u003e\u003cspan class=\"style__icon-number___2OOlV\"\u003e1080\u003c\/span\u003e\u003cspan class=\"style__icon-unit___2hz_k\"\u003ep\u003c\/span\u003e\u003c\/strong\u003e\u003c\/span\u003e\u003c\/div\u003e\n\u003cp style=\"text-align: center;\" class=\"style__icon-desc___Otw9j\"\u003eTransmission\u003c\/p\u003e\n\u003c\/td\u003e\n\u003ctd\u003e\n\u003cdiv style=\"text-align: center;\" class=\"style__icon-number-container___2cK9V\"\u003e\u003cspan style=\"color: #ff8000;\"\u003e\u003cstrong\u003e\u003cspan class=\"style__icon-number___2OOlV\"\u003e4\u003c\/span\u003e\u003cspan class=\"style__icon-unit___2hz_k\"\u003eAntennas\u003c\/span\u003e\u003c\/strong\u003e\u003c\/span\u003e\u003c\/div\u003e\n\u003cp style=\"text-align: center;\" class=\"style__icon-desc___Otw9j\"\u003e2.4\/5.8GHz Dual Frequency\u003c\/p\u003e\n\u003c\/td\u003e\n\u003c\/tr\u003e\n\u003c\/tbody\u003e\n\u003c\/table\u003e\n\u003c\/div\u003e\n\u003cdiv style=\"text-align: center;\"\u003e\u003cspan style=\"font-weight: 400; color: #ffffff;\"\u003e\u003c\/span\u003e\u003c\/div\u003e\n\u003cdiv style=\"text-align: center;\"\u003e\u003cspan style=\"font-weight: 400; color: #ffffff;\"\u003e\u003cimg style=\"float: none;\" src=\"https:\/\/cdn.shopify.com\/s\/files\/1\/2532\/7020\/files\/DJI_Mavic_Air_2S_Fly_More_Combo_18_480x480.jpg?v=1628579621\" alt=\"dji-mavic-air-2S-fly-more-combo-drone-content-feature-O3-Tranmission\" data-mce-fragment=\"1\" data-mce-src=\"https:\/\/cdn.shopify.com\/s\/files\/1\/2532\/7020\/files\/DJI_Mavic_Air_2S_Fly_More_Combo_18_480x480.jpg?v=1628579621\"\u003e.\u003c\/span\u003e\u003c\/div\u003e\n\u003ch3 style=\"text-align: center;\"\u003e\u003cspan style=\"color: #ff8000;\"\u003e\u003cb\u003e\u003c\/b\u003e\u003c\/span\u003e\u003c\/h3\u003e\n\u003ch3 style=\"text-align: center;\"\u003e\u003cspan style=\"color: #ff8000;\"\u003e\u003cb\u003e\u003c\/b\u003e\u003c\/span\u003e\u003c\/h3\u003e\n\u003ch3 style=\"text-align: center;\"\u003e\u003cspan style=\"color: #ff8000;\"\u003e\u003cb\u003eSafer Skies with ADS-B\u003c\/b\u003e\u003c\/span\u003e\u003c\/h3\u003e\n\u003cdiv style=\"text-align: center;\"\u003e\u003cspan style=\"font-weight: 400;\"\u003e\u003cspan data-mce-fragment=\"1\"\u003eDJI Air 2S provides an added layer of airspace safety with the industry-leading AirSense safety system. This receives Automatic Dependent Surveillance-Broadcast (ADS-B) flight location information from airplanes and helicopters in your area that transmit ADS-B signals, displays those aircraft on a map, and provides audio and visual alerts through the DJI Fly app to help you keep the drone out of the way of those aircraft.\u003c\/span\u003e\u003c\/span\u003e\u003c\/div\u003e\n\u003cdiv style=\"text-align: center;\"\u003e\u003cspan style=\"font-weight: 400;\"\u003e\u003cspan data-mce-fragment=\"1\"\u003e\u003cimg src=\"https:\/\/cdn.shopify.com\/s\/files\/1\/2532\/7020\/files\/DJI_Mavic_Air_2S_Fly_More_Combo_19.jpg?v=1628579892\" style=\"float: none;\" alt=\"dji-mavic-air-2S-fly-more-combo-drone-content-feature-Safer-Skies-with-ADS-B\"\u003e\u003c\/span\u003e\u003c\/span\u003e\u003c\/div\u003e\n\u003cdiv style=\"text-align: center;\"\u003e \u003c\/div\u003e\n\u003cdiv style=\"text-align: center;\"\u003e\u003cbr\u003e\u003c\/div\u003e\n\u003ch3 style=\"text-align: center;\"\u003e\u003cspan style=\"color: #ff8000;\"\u003e\u003cb\u003eExpansive Accessories\u003c\/b\u003e\u003c\/span\u003e\u003c\/h3\u003e\n\u003ch3 style=\"text-align: center;\"\u003e\u003cb\u003eGet the Most Out Of Air 2S\u003c\/b\u003e\u003c\/h3\u003e\n\u003cdiv style=\"text-align: center;\"\u003e\u003cspan style=\"font-weight: 400;\"\u003e\u003cspan data-mce-fragment=\"1\"\u003eWith a diverse range of accessories, the sky is truly the limit.\u003c\/span\u003e\u003c\/span\u003e\u003c\/div\u003e\n\u003cdiv style=\"text-align: center;\"\u003e\u003cspan style=\"font-weight: 400;\"\u003e\u003cspan data-mce-fragment=\"1\"\u003e\u003c\/span\u003e\u003c\/span\u003e\u003c\/div\u003e\n\u003ch3 style=\"text-align: center;\"\u003e\u003cspan style=\"color: #ff8000;\"\u003e\u003cb\u003e\u003c\/b\u003e\u003c\/span\u003e\u003c\/h3\u003e\n\u003cp\u003e \u003c\/p\u003e\n\u003cp\u003e \u003c\/p\u003e\n\u003ch3 style=\"text-align: center;\"\u003e\u003cspan style=\"color: #ff8000;\"\u003e\u003cb\u003e\u003c\/b\u003e\u003c\/span\u003e\u003c\/h3\u003e\n\u003ch3\u003e\u003cspan\u003e\u003cb\u003e\u003c\/b\u003e\u003c\/span\u003e\u003c\/h3\u003e\n\u003ch3 style=\"text-align: center;\"\u003e\u003cspan style=\"color: #ff8000;\"\u003e\u003cb\u003eDJI Smart Controller\u003c\/b\u003e\u003c\/span\u003e\u003c\/h3\u003e\n\u003cdiv\u003e\u003cspan\u003eThis powerful remote controller features a 5.5-inch 1080p high-brightness display for pure performance. Compatible with the DJI GO 4 and DJI Fly apps, it also supports the installation of third-party apps.\u003c\/span\u003e\u003c\/div\u003e\n\u003cdiv\u003e\u003cimg alt=\"dji-mavic-air-2S-fly-more-combo-drone-content-feature-Expansive-Accessories-Fly-More-Combo-DJI Smart Controller\" src=\"https:\/\/cdn.shopify.com\/s\/files\/1\/2532\/7020\/files\/DJI_Mavic_Air_2S_Fly_More_Combo_22.jpg?v=1628580371\"\u003e\u003c\/div\u003e\n\u003ch3 style=\"text-align: center;\"\u003e\u003cspan style=\"color: #ff8000;\"\u003e\u003cb\u003e\u003c\/b\u003e\u003c\/span\u003e\u003c\/h3\u003e\n\u003ch3 style=\"text-align: center;\"\u003e\u003cspan style=\"color: #ff8000;\"\u003e\u003cb\u003e\u003c\/b\u003e\u003c\/span\u003e\u003c\/h3\u003e\n\u003cdiv style=\"text-align: center;\"\u003e \u003c\/div\u003e\n\u003ch2 style=\"text-align: left;\"\u003e\u003cstrong\u003e\u003c\/strong\u003e\u003c\/h2\u003e\n\u003ch2 style=\"text-align: left;\"\u003e\u003cstrong\u003eSpecification\u003c\/strong\u003e\u003c\/h2\u003e\n\u003cp\u003e \u003c\/p\u003e\n\u003cp\u003e \u003c\/p\u003e\n\u003cp\u003e \u003c\/p\u003e\n\u003ch3 class=\"group-list-title\"\u003eAircraft\u003c\/h3\u003e\n\u003ctable width=\"523\"\u003e\n\u003ctbody\u003e\n\u003ctr style=\"height: 19px;\"\u003e\n\u003ctd style=\"width: 245.562px; height: 19px;\"\u003e Takeoff Weight\u003c\/td\u003e\n\u003ctd style=\"width: 254.438px; height: 19px;\"\u003e595 g\u003c\/td\u003e\n\u003c\/tr\u003e\n\u003ctr style=\"height: 76px;\"\u003e\n\u003ctd style=\"width: 245.562px; height: 76px;\"\u003eDimensions\u003c\/td\u003e\n\u003ctd style=\"width: 254.438px; height: 76px;\"\u003eFolded:\u003cbr\u003e180×97×77 mm (length×width×height)\u003cbr\u003eUnfolded:\u003cbr\u003e183×253×77 mm (length×width×height)\u003c\/td\u003e\n\u003c\/tr\u003e\n\u003ctr style=\"height: 19px;\"\u003e\n\u003ctd style=\"width: 245.562px; height: 19px;\"\u003eDiagonal Length\u003c\/td\u003e\n\u003ctd style=\"width: 254.438px; height: 19px;\"\u003e302 mm\u003c\/td\u003e\n\u003c\/tr\u003e\n\u003ctr style=\"height: 38px;\"\u003e\n\u003ctd style=\"width: 245.562px; height: 38px;\"\u003eMax Ascent Speed\u003c\/td\u003e\n\u003ctd style=\"width: 254.438px; height: 38px;\"\u003e6 m\/s (S Mode)\u003cbr\u003e6 m\/s (N Mode)\u003c\/td\u003e\n\u003c\/tr\u003e\n\u003ctr style=\"height: 52px;\"\u003e\n\u003ctd style=\"width: 245.562px; height: 52px;\"\u003eMax Descent Speed\u003c\/td\u003e\n\u003ctd style=\"width: 254.438px; height: 52px;\"\u003e\n\u003cp\u003e6 m\/s (S Mode)\u003cbr\u003e6 m\/s (N Mode)\u003c\/p\u003e\n\u003c\/td\u003e\n\u003c\/tr\u003e\n\u003ctr style=\"height: 27px;\"\u003e\n\u003ctd style=\"width: 245.562px; height: 27px;\"\u003eMax Service Ceiling Above Sea Level\u003c\/td\u003e\n\u003ctd style=\"width: 254.438px; height: 27px;\"\u003e\n\u003cp\u003e5000 m\u003cbr\u003e\u003c\/p\u003e\n\u003c\/td\u003e\n\u003c\/tr\u003e\n\u003ctr style=\"height: 9px;\"\u003e\n\u003ctd style=\"width: 245.562px; height: 9px;\"\u003eMax Flight Time (no wind)\u003c\/td\u003e\n\u003ctd style=\"width: 254.438px; height: 9px;\"\u003e\n\u003cp\u003e31 minutes\u003c\/p\u003e\n\u003c\/td\u003e\n\u003c\/tr\u003e\n\u003ctr style=\"height: 9px;\"\u003e\n\u003ctd style=\"width: 245.562px; height: 9px;\"\u003eMax Hovering Time (no wind)\u003c\/td\u003e\n\u003ctd style=\"width: 254.438px; height: 9px;\"\u003e\n\u003cp\u003e30 minutes\u003c\/p\u003e\n\u003c\/td\u003e\n\u003c\/tr\u003e\n\u003ctr style=\"height: 9px;\"\u003e\n\u003ctd style=\"width: 245.562px; height: 9px;\"\u003eMax Flight Distance (no wind)\u003c\/td\u003e\n\u003ctd style=\"width: 254.438px; height: 9px;\"\u003e\n\u003cp\u003e18.5 km\u003c\/p\u003e\n\u003c\/td\u003e\n\u003c\/tr\u003e\n\u003ctr style=\"height: 9px;\"\u003e\n\u003ctd style=\"width: 245.562px; height: 9px;\"\u003eMax Flight Speed (near sea level, no wind)\u003c\/td\u003e\n\u003ctd style=\"width: 254.438px; height: 9px;\"\u003e19 m\/s (S Mode)\u003cbr\u003e15 m\/s (N Mode)\u003cbr\u003e5 m\/s (C Mode)\u003c\/td\u003e\n\u003c\/tr\u003e\n\u003ctr style=\"height: 9px;\"\u003e\n\u003ctd style=\"width: 245.562px; height: 9px;\"\u003eMax Wind Speed Resistance\u003c\/td\u003e\n\u003ctd style=\"width: 254.438px; height: 9px;\"\u003e10.7 m\/s\u003c\/td\u003e\n\u003c\/tr\u003e\n\u003ctr style=\"height: 9px;\"\u003e\n\u003ctd style=\"width: 245.562px; height: 9px;\"\u003eMax Tilt Angle\u003c\/td\u003e\n\u003ctd style=\"width: 254.438px; height: 9px;\"\u003e35° (S Mode)\u003cbr\u003eFront: 30°, Back: 20°, Left: 35°, Right: 35° (N Mode)\u003c\/td\u003e\n\u003c\/tr\u003e\n\u003ctr style=\"height: 9px;\"\u003e\n\u003ctd style=\"width: 245.562px; height: 9px;\"\u003eMax Angular Velocity\u003c\/td\u003e\n\u003ctd style=\"width: 254.438px; height: 9px;\"\u003e250°\/s (S Mode)\u003cbr\u003e90°\/s (N Mode)\u003cbr\u003e60°\/s (C Mode)\u003c\/td\u003e\n\u003c\/tr\u003e\n\u003ctr style=\"height: 9px;\"\u003e\n\u003ctd style=\"width: 245.562px; height: 9px;\"\u003eOperating Temperature Range\u003c\/td\u003e\n\u003ctd style=\"width: 254.438px; height: 9px;\"\u003e0° to 40°C (32° to 104°F)\u003c\/td\u003e\n\u003c\/tr\u003e\n\u003ctr style=\"height: 9px;\"\u003e\n\u003ctd style=\"width: 245.562px; height: 9px;\"\u003eOperating Frequency\u003c\/td\u003e\n\u003ctd style=\"width: 254.438px; height: 9px;\"\u003e2.4 GHz\u003cbr\u003e5.8 GHz\u003cbr\u003eTransmission Power (EIRP)\u003cbr\u003e2.4 GHz:\u003cbr\u003eFCC: ≤30 dBm\u003cbr\u003eCE: ≤20 dBm\u003cbr\u003eSRRC: ≤20 dBm\u003cbr\u003eMIC: ≤20 dBm\u003cbr\u003e5.8 GHz:\u003cbr\u003eFCC: ≤30 dBm\u003cbr\u003eCE: ≤14 dBm\u003cbr\u003eSRRC: ≤29 dBm\u003c\/td\u003e\n\u003c\/tr\u003e\n\u003ctr style=\"height: 9px;\"\u003e\n\u003ctd style=\"width: 245.562px; height: 9px;\"\u003eHovering Accuracy Range\u003c\/td\u003e\n\u003ctd style=\"width: 254.438px; height: 9px;\"\u003eVertical:\u003cbr\u003e± 0.1 m (with vision positioning)\u003cbr\u003e± 0.5 m (with GNSS positioning)\u003cbr\u003eHorizontal:\u003cbr\u003e± 0.1 m (with vision positioning)\u003cbr\u003e± 1.5 m (with GNSS positioning)\u003c\/td\u003e\n\u003c\/tr\u003e\n\u003ctr style=\"height: 9px;\"\u003e\n\u003ctd style=\"width: 245.562px; height: 9px;\"\u003ePropellers\u003c\/td\u003e\n\u003ctd style=\"width: 254.438px; height: 9px;\"\u003eQuick release, low noise, folding\u003c\/td\u003e\n\u003c\/tr\u003e\n\u003ctr style=\"height: 9px;\"\u003e\n\u003ctd style=\"width: 245.562px; height: 9px;\"\u003eAircraft Arms\u003c\/td\u003e\n\u003ctd style=\"width: 254.438px; height: 9px;\"\u003eFoldable\u003c\/td\u003e\n\u003c\/tr\u003e\n\u003ctr style=\"height: 9px;\"\u003e\n\u003ctd style=\"width: 245.562px; height: 9px;\"\u003eGNSS\u003c\/td\u003e\n\u003ctd style=\"width: 254.438px; height: 9px;\"\u003eGPS+GLONASS+GALILEO\u003c\/td\u003e\n\u003c\/tr\u003e\n\u003ctr style=\"height: 9px;\"\u003e\n\u003ctd style=\"width: 245.562px; height: 9px;\"\u003eCompass\u003c\/td\u003e\n\u003ctd style=\"width: 254.438px; height: 9px;\"\u003eSingle Compass\u003c\/td\u003e\n\u003c\/tr\u003e\n\u003ctr style=\"height: 9px;\"\u003e\n\u003ctd style=\"width: 245.562px; height: 9px;\"\u003eIMU\u003c\/td\u003e\n\u003ctd style=\"width: 254.438px; height: 9px;\"\u003eSingle IMU\u003c\/td\u003e\n\u003c\/tr\u003e\n\u003ctr style=\"height: 9px;\"\u003e\n\u003ctd style=\"width: 245.562px; height: 9px;\"\u003eInternal Storage\u003c\/td\u003e\n\u003ctd style=\"width: 254.438px; height: 9px;\"\u003e8 GB\u003c\/td\u003e\n\u003c\/tr\u003e\n\u003c\/tbody\u003e\n\u003c\/table\u003e\n\u003cp\u003e\u003cbr\u003e\u003cbr\u003e\u003c\/p\u003e\n\u003ch3 class=\"group-list-title\"\u003eIntelligent Flight Battery\u003c\/h3\u003e\n\u003ctable width=\"100%\"\u003e\n\u003ctbody\u003e\n\u003ctr\u003e\n\u003ctd style=\"width: 46.981%;\"\u003e Capacity\u003c\/td\u003e\n\u003ctd style=\"width: 49.7244%;\"\u003e3500 mAh\u003c\/td\u003e\n\u003c\/tr\u003e\n\u003ctr\u003e\n\u003ctd style=\"width: 46.981%;\"\u003eVoltage\u003c\/td\u003e\n\u003ctd style=\"width: 49.7244%;\"\u003e11.55 V\u003c\/td\u003e\n\u003c\/tr\u003e\n\u003ctr\u003e\n\u003ctd style=\"width: 46.981%;\"\u003eMax Charging Voltage\u003c\/td\u003e\n\u003ctd style=\"width: 49.7244%;\"\u003e13.2 V\u003c\/td\u003e\n\u003c\/tr\u003e\n\u003ctr\u003e\n\u003ctd style=\"width: 46.981%;\"\u003eBattery Type\u003c\/td\u003e\n\u003ctd style=\"width: 49.7244%;\"\u003eLiPo 3S\u003c\/td\u003e\n\u003c\/tr\u003e\n\u003ctr\u003e\n\u003ctd style=\"width: 46.981%;\"\u003eEnergy\u003c\/td\u003e\n\u003ctd style=\"width: 49.7244%;\"\u003e40.42 Wh\u003c\/td\u003e\n\u003c\/tr\u003e\n\u003ctr\u003e\n\u003ctd style=\"width: 46.981%;\"\u003eWeight\u003c\/td\u003e\n\u003ctd style=\"width: 49.7244%;\"\u003e198 g\u003c\/td\u003e\n\u003c\/tr\u003e\n\u003ctr\u003e\n\u003ctd style=\"width: 46.981%;\"\u003eCharging Temperature Range\u003c\/td\u003e\n\u003ctd style=\"width: 49.7244%;\"\u003e5° to 40°C (41° to 104°F)\u003c\/td\u003e\n\u003c\/tr\u003e\n\u003ctr\u003e\n\u003ctd style=\"width: 46.981%;\"\u003eMax Charging Power\u003c\/td\u003e\n\u003ctd style=\"width: 49.7244%;\"\u003e38 W\u003c\/td\u003e\n\u003c\/tr\u003e\n\u003ctr\u003e\n\u003ctd style=\"width: 46.981%;\"\u003eBuilt-in Battery\u003c\/td\u003e\n\u003ctd style=\"width: 49.7244%;\"\u003eN\/A\u003c\/td\u003e\n\u003c\/tr\u003e\n\u003c\/tbody\u003e\n\u003c\/table\u003e\n\u003cp\u003e\u003cbr\u003e\u003c\/p\u003e\n\u003ch3 class=\"group-list-title\"\u003eCamera\u003c\/h3\u003e\n\u003ctable width=\"100%\"\u003e\n\u003ctbody\u003e\n\u003ctr\u003e\n\u003ctd style=\"width: 47.0159%;\"\u003e Sensor\u003c\/td\u003e\n\u003ctd style=\"width: 48.9841%;\"\u003e\n\u003cp\u003e1\" CMOS\u003c\/p\u003e\n\u003cp\u003eEffective Pixels: 20 MP; 2.4μm Pixel Size\u003c\/p\u003e\n\u003c\/td\u003e\n\u003c\/tr\u003e\n\u003ctr\u003e\n\u003ctd style=\"width: 47.0159%;\"\u003eLens\u003c\/td\u003e\n\u003ctd style=\"width: 48.9841%;\"\u003eFOV: 88°\u003cbr\u003e35 mm Format Equivalent: 22 mm\u003cbr\u003eAperture: f\/2.8\u003cbr\u003eShooting Range: 0.6 m to ∞\u003c\/td\u003e\n\u003c\/tr\u003e\n\u003ctr\u003e\n\u003ctd style=\"width: 47.0159%;\"\u003eISO Range\u003c\/td\u003e\n\u003ctd style=\"width: 48.9841%;\"\u003eVideo:\u003cbr\u003e100-3200 (Auto)\u003cbr\u003e100-6400 (Manual)\u003cbr\u003e10-Bit Dlog-M Video:\u003cbr\u003e100-800 (Auto)\u003cbr\u003e100-1600 (Manual)\u003cbr\u003ePhoto:\u003cbr\u003e100-3200 (Auto)\u003cbr\u003e100-12800 (Manual)\u003c\/td\u003e\n\u003c\/tr\u003e\n\u003ctr\u003e\n\u003ctd style=\"width: 47.0159%;\"\u003eStill Image Size\u003c\/td\u003e\n\u003ctd style=\"width: 48.9841%;\"\u003e20 MP\u003cbr\u003e5472×3648 (3:2)\u003cbr\u003e5472×3078 (16:9)\u003c\/td\u003e\n\u003c\/tr\u003e\n\u003ctr\u003e\n\u003ctd style=\"width: 47.0159%;\"\u003eStill Photography Modes\u003c\/td\u003e\n\u003ctd style=\"width: 48.9841%;\"\u003eSingle shot: 20 MP\u003cbr\u003eBurst shooting: 20 MP (continuous burst)\u003cbr\u003eAuto Exposure Bracketing (AEB): 20 MP, 3\/5 bracketed frames at 0.7 EV bias\u003cbr\u003eTimed: 20 MP, 2\/3\/5\/7\/10\/15\/20\/30\/60s\u003cbr\u003eSmartPhoto (including HDR and HyperLight): 20 MP\u003cbr\u003eHDR Panorama:\u003cbr\u003eVertical (3×1): 3328×8000 (width×height)\u003cbr\u003eWide-angle (3×3): 8000×6144 (width×height)\u003cbr\u003e180° (3×7): 8192×3500 (width×height)\u003cbr\u003eSphere (3×8+1): 8192×4096 (width×height)\u003cbr\u003eJPEG\/DNG (RAW)\u003c\/td\u003e\n\u003c\/tr\u003e\n\u003ctr\u003e\n\u003ctd style=\"width: 47.0159%;\"\u003eVideo Resolution\u003c\/td\u003e\n\u003ctd style=\"width: 48.9841%;\"\u003e5.4K: 5472×3078 @ 24\/25\/30 fps\u003cbr\u003e4K Ultra HD: 3840×2160 @ 24\/25\/30\/48\/50\/60 fps\u003cbr\u003e2.7K: 2688x1512 @ 24\/25\/30\/48\/50\/60 fps\u003cbr\u003eFHD: 1920×1080 @ 24\/25\/30\/48\/50\/60\/120 fps\u003cbr\u003eMP4\/MOV (H.264\/MPEG-4 AVC, H.265\/HEVC)\u003c\/td\u003e\n\u003c\/tr\u003e\n\u003ctr\u003e\n\u003ctd style=\"width: 47.0159%;\"\u003eMax Video Bitrate\u003c\/td\u003e\n\u003ctd style=\"width: 48.9841%;\"\u003e150 Mbps\u003c\/td\u003e\n\u003c\/tr\u003e\n\u003ctr\u003e\n\u003ctd style=\"width: 47.0159%;\"\u003eSupported File System\u003c\/td\u003e\n\u003ctd style=\"width: 48.9841%;\"\u003e\n\u003cp\u003eFAT32\/exFAT\u003c\/p\u003e\n\u003cp\u003eSupports a microSD card with a capacity of up to 256 GB.\u003c\/p\u003e\n\u003c\/td\u003e\n\u003c\/tr\u003e\n\u003ctr\u003e\n\u003ctd style=\"width: 47.0159%;\"\u003eDigital Zoom\u003c\/td\u003e\n\u003ctd style=\"width: 48.9841%;\"\u003e\n\u003cp\u003eZoom recording is not available while recording 10-bit videos and 120fps videos.\u003c\/p\u003e\n\u003cp\u003e4K\/30fps:\u003cbr\u003e4x;\u003cbr\u003e2.7K\/60fps:\u003cbr\u003e4x;\u003cbr\u003e2.7K\/30fps:\u003cbr\u003e6x;\u003cbr\u003e1080p\/60fps:\u003cbr\u003e6x;\u003cbr\u003e1080p\/30fps:\u003cbr\u003e8x\u003c\/p\u003e\n\u003c\/td\u003e\n\u003c\/tr\u003e\n\u003c\/tbody\u003e\n\u003c\/table\u003e\n\u003cp\u003e \u003c\/p\u003e\n\u003ch3 class=\"group-list-title\"\u003eGimbal\u003c\/h3\u003e\n\u003ctable width=\"100%\"\u003e\n\u003ctbody\u003e\n\u003ctr\u003e\n\u003ctd style=\"width: 46.8312%;\"\u003e Stabilization\u003c\/td\u003e\n\u003ctd style=\"width: 48.1688%;\"\u003e3-axis (tilt, roll, pan)\u003c\/td\u003e\n\u003c\/tr\u003e\n\u003ctr\u003e\n\u003ctd style=\"width: 46.8312%;\"\u003eMechanical Range\u003c\/td\u003e\n\u003ctd style=\"width: 48.1688%;\"\u003eTilt: -135° to 45°\u003cbr\u003eRoll: -45° to 45°\u003cbr\u003ePan: -100° to 100°\u003c\/td\u003e\n\u003c\/tr\u003e\n\u003ctr\u003e\n\u003ctd style=\"width: 46.8312%;\"\u003ePan Axis\u003c\/td\u003e\n\u003ctd style=\"width: 48.1688%;\"\u003eNot Controllable\u003c\/td\u003e\n\u003c\/tr\u003e\n\u003ctr\u003e\n\u003ctd style=\"width: 46.8312%;\"\u003eControllable Range\u003c\/td\u003e\n\u003ctd style=\"width: 48.1688%;\"\u003eTilt: -90° to 0°(default); -90° to 24° (extended)\u003c\/td\u003e\n\u003c\/tr\u003e\n\u003ctr\u003e\n\u003ctd style=\"width: 46.8312%;\"\u003eMax Controllable Speed (tilt)\u003c\/td\u003e\n\u003ctd style=\"width: 48.1688%;\"\u003e100°\/s\u003c\/td\u003e\n\u003c\/tr\u003e\n\u003ctr\u003e\n\u003ctd style=\"width: 46.8312%;\"\u003eAngular Vibration Range\u003c\/td\u003e\n\u003ctd style=\"width: 48.1688%;\"\u003e±0.01°\u003c\/td\u003e\n\u003c\/tr\u003e\n\u003c\/tbody\u003e\n\u003c\/table\u003e\n\u003cp\u003e\u003cbr\u003e\u003c\/p\u003e\n\u003ch3 class=\"group-list-title\"\u003eSensing System\u003c\/h3\u003e\n\u003ctable width=\"100%\"\u003e\n\u003ctbody\u003e\n\u003ctr\u003e\n\u003ctd style=\"width: 48.1438%;\"\u003e Forward\u003c\/td\u003e\n\u003ctd style=\"width: 48.5617%;\"\u003e\n\u003cp\u003ePrecision Measurement Range: 0.38-23.8 m\u003c\/p\u003e\n\u003cp\u003eEffective Sensing Speed: ≤15 m\/s\u003cbr\u003eField of View (FOV): 72° (horizontal), 58° (vertical)\u003c\/p\u003e\n\u003c\/td\u003e\n\u003c\/tr\u003e\n\u003ctr\u003e\n\u003ctd style=\"width: 48.1438%;\"\u003eBackward\u003c\/td\u003e\n\u003ctd style=\"width: 48.5617%;\"\u003ePrecision Measurement Range: 0.37-23.4 m\u003cbr\u003eEffective Sensing Speed: ≤12 m\/s\u003cbr\u003eField of View (FOV): 57° (horizontal), 44° (vertical)\u003c\/td\u003e\n\u003c\/tr\u003e\n\u003ctr\u003e\n\u003ctd style=\"width: 48.1438%;\"\u003eDownward\u003c\/td\u003e\n\u003ctd style=\"width: 48.5617%;\"\u003eToF Measurement Range: 0.1-8 m\u003cbr\u003eHovering Range: 0.5-30 m\u003cbr\u003eVision Sensor Hovering Range: 0.5-60 m\u003c\/td\u003e\n\u003c\/tr\u003e\n\u003ctr\u003e\n\u003ctd style=\"width: 48.1438%;\"\u003eLeft\/Right\u003c\/td\u003e\n\u003ctd style=\"width: 48.5617%;\"\u003eN\/A\u003c\/td\u003e\n\u003c\/tr\u003e\n\u003ctr\u003e\n\u003ctd style=\"width: 48.1438%;\"\u003eUpward\u003c\/td\u003e\n\u003ctd style=\"width: 48.5617%;\"\u003ePrecision Measurement Range: 0.34-28.6 m\u003cbr\u003eField of View (FOV): 63° (horizontal), 78° (vertical)\u003c\/td\u003e\n\u003c\/tr\u003e\n\u003ctr\u003e\n\u003ctd style=\"width: 48.1438%;\"\u003eDownward Auxiliary Light\u003c\/td\u003e\n\u003ctd style=\"width: 48.5617%;\"\u003eSingle LED\u003c\/td\u003e\n\u003c\/tr\u003e\n\u003c\/tbody\u003e\n\u003c\/table\u003e\n\u003cp\u003e\u003cbr\u003e\u003c\/p\u003e\n\u003ch3 class=\"group-list-title\"\u003eVideo Transmission\u003c\/h3\u003e\n\u003ctable width=\"100%\"\u003e\n\u003ctbody\u003e\n\u003ctr\u003e\n\u003ctd style=\"width: 47.6063%;\"\u003e Transmission System\u003c\/td\u003e\n\u003ctd style=\"width: 47.3937%;\"\u003e\n\u003cp\u003eO3\u003c\/p\u003e\n\u003cp\u003e2.4 GHz\/5.8 GHz Auto-Switching (compatible with OcuSync 2.0)\u003cbr data-mce-fragment=\"1\"\u003e4-antenna 2T4R\u003c\/p\u003e\n\u003c\/td\u003e\n\u003c\/tr\u003e\n\u003ctr\u003e\n\u003ctd style=\"width: 47.6063%;\"\u003eMax Transmission Distance\u003c\/td\u003e\n\u003ctd style=\"width: 47.3937%;\"\u003e12 km (FCC), 8 km (CE)\u003cbr\u003e8 km (SRRC), 8 km (MIC)\u003c\/td\u003e\n\u003c\/tr\u003e\n\u003ctr\u003e\n\u003ctd style=\"width: 47.6063%;\"\u003eLive View Quality\/Latency\u003c\/td\u003e\n\u003ctd style=\"width: 47.3937%;\"\u003eDrone + Remote Controller: 1080p\/30fps 12 Mbps 120 ms\u003cbr\u003eDrone + DJI Smart Controller: 1080p\/30fps 12Mbps 130 ms\u003c\/td\u003e\n\u003c\/tr\u003e\n\u003ctr\u003e\n\u003ctd style=\"width: 47.6063%;\"\u003eMax Transmission Bitrate\u003c\/td\u003e\n\u003ctd style=\"width: 47.3937%;\"\u003e44 Mbps (download bitrate)\u003cbr\u003e16 Mbps (live video bitrate)\u003c\/td\u003e\n\u003c\/tr\u003e\n\u003ctr\u003e\n\u003ctd style=\"width: 47.6063%;\"\u003eOperating Frequency\u003c\/td\u003e\n\u003ctd style=\"width: 47.3937%;\"\u003e2.4 GHz\u003cbr\u003e5.8 GHz\u003c\/td\u003e\n\u003c\/tr\u003e\n\u003c\/tbody\u003e\n\u003c\/table\u003e\n\u003cp\u003e\u003cbr\u003e\u003c\/p\u003e\n\u003ch3 class=\"group-list-title\"\u003eRemote Controller\u003c\/h3\u003e\n\u003ctable width=\"100%\"\u003e\n\u003ctbody\u003e\n\u003ctr\u003e\n\u003ctd style=\"width: 47.7766%;\"\u003e Multiple Controllers\u003c\/td\u003e\n\u003ctd style=\"width: 47.2234%;\"\u003eN\/A\u003c\/td\u003e\n\u003c\/tr\u003e\n\u003ctr\u003e\n\u003ctd style=\"width: 47.7766%;\"\u003eDJI Smart Controller\u003c\/td\u003e\n\u003ctd style=\"width: 47.2234%;\"\u003eSupported\u003c\/td\u003e\n\u003c\/tr\u003e\n\u003ctr\u003e\n\u003ctd style=\"width: 47.7766%;\"\u003eRemote Controller Transmission System\u003c\/td\u003e\n\u003ctd style=\"width: 47.2234%;\"\u003eOcuSync 2.0\u003c\/td\u003e\n\u003c\/tr\u003e\n\u003ctr\u003e\n\u003ctd style=\"width: 47.7766%;\"\u003eBattery Life\u003c\/td\u003e\n\u003ctd style=\"width: 47.2234%;\"\u003e6 hours (4 hours when charging a mobile device)\u003c\/td\u003e\n\u003c\/tr\u003e\n\u003ctr\u003e\n\u003ctd style=\"width: 47.7766%;\"\u003eSupported Mobile Device Connectors\u003c\/td\u003e\n\u003ctd style=\"width: 47.2234%;\"\u003eLightning, Micro USB, USB-C\u003c\/td\u003e\n\u003c\/tr\u003e\n\u003ctr\u003e\n\u003ctd style=\"width: 47.7766%;\"\u003eMax Supported Mobile Device Size\u003c\/td\u003e\n\u003ctd style=\"width: 47.2234%;\"\u003e180×86×10 mm (length×width×height)\u003c\/td\u003e\n\u003c\/tr\u003e\n\u003ctr\u003e\n\u003ctd style=\"width: 47.7766%;\"\u003eOperating Temperature\u003c\/td\u003e\n\u003ctd style=\"width: 47.2234%;\"\u003e0° to 40°C (14° to 104°F)\u003c\/td\u003e\n\u003c\/tr\u003e\n\u003ctr\u003e\n\u003ctd style=\"width: 47.7766%;\"\u003eTransmitter Power (EIRP)\u003c\/td\u003e\n\u003ctd style=\"width: 47.2234%;\"\u003e2.4 GHz:\u003cbr\u003eFCC: ≤26 dBm\u003cbr\u003eCE: ≤20 dBm\u003cbr\u003eSRRC: ≤20 dBm\u003cbr\u003eMIC: ≤20 dBm\u003cbr\u003e5.8 GHz:\u003cbr\u003eFCC: ≤26 dBm\u003cbr\u003eCE: ≤14 dBm\u003cbr\u003eSRRC: ≤26 dBm\u003c\/td\u003e\n\u003c\/tr\u003e\n\u003c\/tbody\u003e\n\u003c\/table\u003e\n\u003cp\u003e\u003cbr\u003e\u003c\/p\u003e\n\u003ch3 class=\"group-list-title\"\u003eCharger\u003c\/h3\u003e\n\u003ctable width=\"100%\"\u003e\n\u003ctbody\u003e\n\u003ctr\u003e\n\u003ctd style=\"width: 49.888%;\"\u003e Charging Input\u003c\/td\u003e\n\u003ctd style=\"width: 46.8175%;\"\u003e100-240V, 50\/60 Hz, 1.3 A\u003c\/td\u003e\n\u003c\/tr\u003e\n\u003ctr\u003e\n\u003ctd style=\"width: 49.888%;\"\u003eCharging Output\u003c\/td\u003e\n\u003ctd style=\"width: 46.8175%;\"\u003eCharging Port: 13.2 V⎓2.82 A\u003cbr\u003eUSB Port: 5 V⎓2 A\u003c\/td\u003e\n\u003c\/tr\u003e\n\u003ctr\u003e\n\u003ctd style=\"width: 49.888%;\"\u003eVoltage\u003c\/td\u003e\n\u003ctd style=\"width: 46.8175%;\"\u003e13.2 V\u003c\/td\u003e\n\u003c\/tr\u003e\n\u003ctr\u003e\n\u003ctd style=\"width: 49.888%;\"\u003eRated Power\u003c\/td\u003e\n\u003ctd style=\"width: 46.8175%;\"\u003e38 W\u003c\/td\u003e\n\u003c\/tr\u003e\n\u003c\/tbody\u003e\n\u003c\/table\u003e\n\u003cp\u003e\u003cbr\u003e\u003c\/p\u003e\n\u003cdiv\u003e\n\u003cul style=\"text-align: center;\"\u003e\u003c\/ul\u003e\n\u003c\/div\u003e\n\u003cstyle\u003e\u003c!--\n.embed-container { position: relative; padding-bottom: 56.25%; height: 0; overflow: hidden; max-width: 100%; } .embed-container iframe, .embed-container object, .embed-container embed { position: absolute; top: 0; left: 0; width: 100%; height: 100%; }\n--\u003e\u003c\/style\u003e\n\u003c\/div\u003e"}
Translation missing: en.products.product.regular_price$49.00$44.00 On SaleTranslation missing: en.products.product.regular_price $978.00Insta360 POV Mouth Mount
( GO 2 / ONE X2 / ONE R )Flexible POV bracket
 Free your hands and get the perfect first-person pictureThermoforming, fits the mouth shape, perfect fit.The special design allows you to talk and breathe like normal when in use.Use with safety sling, no fear of lossSpecifications:Dimensions:89.9x87.1x47mm (3.5x3.4x1.9in)Weight:22g (0.8oz)Material: Plastic
Package:
 Important notes
- Don't like the fit? Repeat steps 1-3.
- Do not use spare parts from other accessories together with the POV Mouth Mount.
- Maximum weight supported by the mount is 250 grams.
-
{"id":6773433335883,"title":"DJI Mavic Air 2S - 4 Directions of Obstacle Sensing Drone with 3-Axis Gimbal Camera | 5.4K Video | 1-Inch Sensor | MasterShots","handle":"dji-mavic-air-2s-4-directions-of-obstacle-sensing-drone-with-3-axis-gimbal-camera-5-4k-video-1-inch-sensor-mastershots","description":"\u003ch1 style=\"text-align: center;\"\u003e\u003cstrong\u003eDJI Mavic Air 2S\u003c\/strong\u003e\u003c\/h1\u003e\u003cdiv class=\"desc\"\u003e\n\u003ch2 style=\"text-align: center;\"\u003eDJI Air 2S is the ultimate drone for creators on the move, with a 1-inch CMOS sensor, powerful autonomous functions, and a compact body weighing less than 600 g. \u003c\/h2\u003e\n\u003cstyle\u003e\u003c!--\n.embed-container { position: relative; padding-bottom: 56.25%; height: 0; overflow: hidden; max-width: 100%; } .embed-container iframe, .embed-container object, .embed-container embed { position: absolute; top: 0; left: 0; width: 100%; height: 100%; }\n--\u003e\u003c\/style\u003e\n\u003cdiv class=\"embed-container\" style=\"text-align: center;\"\u003e\u003ciframe src=\"https:\/\/www.youtube.com\/embed\/NJ3Z1hSOoMc\" frameborder=\"0\" allowfullscreen=\"\"\u003e\u003c\/iframe\u003e\u003c\/div\u003e\n\u003cdiv style=\"text-align: center;\"\u003e \u003c\/div\u003e\n\u003ch3 style=\"text-align: center;\"\u003e\u003cspan style=\"font-weight: 400;\"\u003eTake this all-in-one aerial powerhouse along anywhere to experience and record your world in stunning detail.\u003c\/span\u003e\u003c\/h3\u003e\n\u003cp\u003e \u003c\/p\u003e\n\u003ch2 style=\"text-align: left;\"\u003e\n\u003cstrong\u003eDifference Between DJI Mavic Air 2S Fly More Combo and DJI Mavic Air 2 Fly More Combo:\u003c\/strong\u003e \u003c\/h2\u003e\n\u003cp\u003e \u003c\/p\u003e\n\u003ch3 style=\"text-align: center;\"\u003e\u003cspan style=\"color: #ff8000;\"\u003e\u003cb\u003eUpgrades\u003c\/b\u003e\u003c\/span\u003e\u003c\/h3\u003e\n\u003cdiv\u003eUpgrades include a 1-inch CMOS sensor, four-antenna low-latency transmission, APAS 4.0, added upward-facing dual-vision sensors, and MasterShots. The camera performance, intelligent features, obstacle sensing system, and transmission system have all improved significantly. \u003c\/div\u003e\n\u003ch2 style=\"text-align: center;\"\u003e\u003cstrong\u003e\u003c\/strong\u003e\u003c\/h2\u003e\n\u003cp\u003e \u003c\/p\u003e\n\u003ch2 style=\"text-align: center;\"\u003e\u003cstrong\u003eHighlights and Features\u003c\/strong\u003e\u003c\/h2\u003e\n\u003ctable data-mce-fragment=\"1\"\u003e\n\u003ctbody data-mce-fragment=\"1\"\u003e\n\u003ctr data-mce-fragment=\"1\"\u003e\n\u003ctd width=\"184\" data-mce-fragment=\"1\"\u003e1-inch CMOS Sensor\u003c\/td\u003e\n\u003ctd width=\"184\" data-mce-fragment=\"1\"\u003eMasterShots\u003c\/td\u003e\n\u003ctd width=\"184\" data-mce-fragment=\"1\"\u003e5.4K Video\u003c\/td\u003e\n\u003c\/tr\u003e\n\u003ctr data-mce-fragment=\"1\"\u003e\n\u003ctd width=\"184\" data-mce-fragment=\"1\"\u003e12km FHD Transmission\u003cspan data-mce-fragment=\"1\"\u003e \u003c\/span\u003e\u003csup data-mce-fragment=\"1\"\u003e[1]\u003c\/sup\u003e\n\u003c\/td\u003e\n\u003ctd width=\"184\" data-mce-fragment=\"1\"\u003eObstacle Sensing in 4 Directions\u003c\/td\u003e\n\u003ctd width=\"184\" data-mce-fragment=\"1\"\u003eADS-B\u003c\/td\u003e\n\u003c\/tr\u003e\n\u003c\/tbody\u003e\n\u003c\/table\u003e\n\u003cbr\u003e\n\u003cdiv style=\"text-align: start;\"\u003e\u003cimg style=\"margin-right: auto; float: none; display: block; margin-left: auto;\" src=\"https:\/\/cdn.shopify.com\/s\/files\/1\/2532\/7020\/files\/Screenshot_2021-08-06_183943.png?v=1628246675\" alt=\"dji-mavic-air-2S-fly-more-combo-drone-content-feature-all\"\u003e\u003c\/div\u003e\n\u003cp\u003e \u003c\/p\u003e\n\u003ch3 style=\"text-align: center;\"\u003e\u003cspan style=\"color: #ff8000;\"\u003e\u003cb\u003e\u003c\/b\u003e\u003c\/span\u003e\u003c\/h3\u003e\n\u003cdiv style=\"text-align: center;\"\u003e\u003c\/div\u003e\n\u003cdiv style=\"text-align: center;\"\u003e\u003c\/div\u003e\n\u003cdiv style=\"text-align: center;\"\u003e\u003c\/div\u003e\n\u003cdiv style=\"text-align: center;\"\u003e\n\u003cp\u003e \u003c\/p\u003e\n\u003ch3\u003e\u003cspan style=\"color: #ff8000;\"\u003e\u003cb\u003eIncredible Image System\u003c\/b\u003e\u003c\/span\u003e\u003c\/h3\u003e\n\u003cdiv style=\"text-align: center;\"\u003e\u003cb\u003eBig World, Big Sensor\u003c\/b\u003e\u003c\/div\u003e\n\u003cdiv style=\"text-align: center;\"\u003e\u003cb\u003e\u003c\/b\u003e\u003c\/div\u003e\n\u003c\/div\u003e\n\u003cdiv style=\"text-align: center;\"\u003e\u003cspan\u003eEquipped with a 1-inch CMOS image sensor and large 2.4μm pixels, DJI Air 2S is capable of 5.4K\/30fps and 4K\/60fps video. Capture any moment with the rich clarity and authentic color tones it deserves.\u003c\/span\u003e\u003c\/div\u003e\n\u003cdiv style=\"text-align: center;\"\u003e\u003cspan\u003e\u003cimg src=\"https:\/\/cdn.shopify.com\/s\/files\/1\/2532\/7020\/files\/DJI_Mavic_Air_2S_Fly_More_Combo_8.jpg?v=1628248569\" style=\"float: none;\" alt=\"dji-mavic-air-2S-fly-more-combo-drone-content-feature-Good-Image-System\"\u003e\u003c\/span\u003e\u003c\/div\u003e\n\u003cdiv style=\"text-align: center;\"\u003e\u003cspan\u003e\u003c\/span\u003e\u003c\/div\u003e\n\u003cdiv style=\"text-align: center;\"\u003e\u003cspan\u003e\u003c\/span\u003e\u003c\/div\u003e\n\u003cdiv style=\"text-align: center;\"\u003e\u003cspan\u003e\u003c\/span\u003e\u003c\/div\u003e\n\u003ch3 style=\"text-align: center;\"\u003e\u003cspan style=\"color: #ff8000;\"\u003e\u003cb\u003e\u003c\/b\u003e\u003c\/span\u003e\u003c\/h3\u003e\n\u003ch3 style=\"text-align: center;\"\u003e\u003cspan style=\"color: #ff8000;\"\u003e\u003cb\u003e\u003c\/b\u003e\u003c\/span\u003e\u003c\/h3\u003e\n\u003ch3 style=\"text-align: center;\"\u003e\u003cspan style=\"color: #ff8000;\"\u003eTurn On the Night\u003c\/span\u003e\u003c\/h3\u003e\n\u003cdiv style=\"text-align: center;\"\u003e\u003cspan style=\"font-weight: 400;\"\u003e\u003cspan data-mce-fragment=\"1\"\u003eCapture the allure of the world, even as it darkens. Thanks to a high dynamic range, high resolution, and accurate color reproduction, even low-light scenes are sharp and vibrant.\u003c\/span\u003e\u003c\/span\u003e\u003c\/div\u003e\n\u003cdiv style=\"text-align: center;\"\u003e\u003cimg style=\"float: none;\" src=\"https:\/\/cdn.shopify.com\/s\/files\/1\/2532\/7020\/files\/DJI_Mavic_Air_2S_Fly_More_Combo_9.jpg?v=1628573124\" alt=\"dji-mavic-air-2S-fly-more-combo-drone-content-feature-Turn-On-the-Night\"\u003e\u003c\/div\u003e\n\u003ch3 style=\"text-align: center;\"\u003e\u003cspan style=\"color: #ff8000;\"\u003e\u003cb\u003e\u003c\/b\u003e\u003c\/span\u003e\u003c\/h3\u003e\n\u003ch3 style=\"text-align: center;\"\u003e\u003cspan style=\"color: #ff8000;\"\u003e\u003cb\u003e\u003cspan data-mce-fragment=\"1\"\u003eOne billion colors\u003c\/span\u003e\u003c\/b\u003e\u003c\/span\u003e\u003c\/h3\u003e\n\u003cdiv style=\"text-align: center;\"\u003e\u003cspan style=\"font-weight: 400;\"\u003e\u003cspan data-mce-fragment=\"1\"\u003eCaptured by the 10-bit Dlog-M color profile of DJI Air 2S let you fully immerse yourself in all the hues of your environment.\u003c\/span\u003e\u003c\/span\u003e\u003c\/div\u003e\n\u003cdiv style=\"text-align: center;\"\u003e\u003cimg style=\"float: none;\" src=\"https:\/\/cdn.shopify.com\/s\/files\/1\/2532\/7020\/files\/DJI_Mavic_Air_2S_Fly_More_Combo_10.jpg?v=1628573285\" alt=\"dji-mavic-air-2S-fly-more-combo-drone-content-feature-One-billion-colors\"\u003e\u003c\/div\u003e\n\u003ch3 style=\"text-align: center;\"\u003e\u003cspan style=\"color: #ff8000;\"\u003e\u003cb\u003e\u003c\/b\u003e\u003c\/span\u003e\u003c\/h3\u003e\n\u003ctable width=\"100%\"\u003e\n\u003ctbody\u003e\n\u003ctr\u003e\n\u003ctd style=\"width: 47.3093%;\"\u003e\n\u003ch3 data-mce-fragment=\"1\"\u003e\u003cspan style=\"color: #ff8000;\" data-mce-fragment=\"1\"\u003e\u003cb data-mce-fragment=\"1\"\u003eShoot RAW\u003c\/b\u003e\u003c\/span\u003e\u003c\/h3\u003e\n\u003cp style=\"text-align: left;\"\u003e\u003cspan\u003eFormat photos with a dynamic \u003c\/span\u003e\u003cspan style=\"font-weight: 400;\" data-mce-fragment=\"1\" data-mce-style=\"font-weight: 400;\"\u003erange of up to 12.6 stops to\u003c\/span\u003e\u003cspan style=\"font-weight: 400;\" data-mce-fragment=\"1\" data-mce-style=\"font-weight: 400;\"\u003e capture more visual information in every scene, even when lighting conditions are bad or complex. This provides more flexibility in post-processing, giving creators more possibilities to get the look they want. \u003c\/span\u003e\u003c\/p\u003e\n\u003c\/td\u003e\n\u003ctd style=\"width: 47.6907%;\"\u003e\n\u003cdiv style=\"text-align: center;\"\u003e\u003cimg src=\"https:\/\/cdn.shopify.com\/s\/files\/1\/2532\/7020\/files\/DJI-Mavic-Air-2S-Fly-More-Combo_600x600.jpg?v=1628577003\" alt=\"dji-mavic-air-2S-fly-more-combo-drone-content-feature-all\" style=\"float: none;\" width=\"600x600\" height=\"600x600\"\u003e\u003c\/div\u003e\n\u003c\/td\u003e\n\u003c\/tr\u003e\n\u003ctr\u003e\n\u003ctd style=\"width: 47.3093%;\"\u003e\n\u003cdiv style=\"text-align: center;\" data-mce-fragment=\"1\" data-mce-style=\"text-align: center;\"\u003e\u003cimg style=\"float: none;\" alt=\"dji-mavic-air-2S-fly-more-combo-drone-content-feature-Shoot-RAW\" src=\"https:\/\/cdn.shopify.com\/s\/files\/1\/2532\/7020\/files\/3b0718d6123b5e2827b85292dc6322fa_600x600.jpg?v=1628577485\" width=\"600x600\" height=\"600x600\" data-mce-fragment=\"1\" data-mce-src=\"https:\/\/cdn.shopify.com\/s\/files\/1\/2532\/7020\/files\/3b0718d6123b5e2827b85292dc6322fa_600x600.jpg?v=1628577485\" data-mce-style=\"float: none;\"\u003e\u003c\/div\u003e\n\u003ch3 style=\"text-align: center;\"\u003e\n\u003cspan style=\"color: #ff8000;\"\u003e\u003cb\u003e\u003c\/b\u003e\u003c\/span\u003e\u003cbr\u003e\n\u003c\/h3\u003e\n\u003c\/td\u003e\n\u003ctd style=\"width: 47.6907%;\"\u003e\n\u003ch3 style=\"text-align: right;\"\u003e\u003cspan style=\"color: #ff8000;\"\u003e\u003cb\u003eIntelligent HDR technology\u003c\/b\u003e\u003c\/span\u003e\u003c\/h3\u003e\n\u003cp style=\"text-align: right;\"\u003e\u003cspan\u003eMerges multiple shots automatically, increasing the dynamic range of images without the need for post-processing. That means more nuanced details in both the highlights and shadows for richer images with greater depth.\u003c\/span\u003e\u003c\/p\u003e\n\u003c\/td\u003e\n\u003c\/tr\u003e\n\u003c\/tbody\u003e\n\u003c\/table\u003e\n\u003ch3 style=\"text-align: center;\"\u003e\u003cspan style=\"color: #ff8000;\"\u003e\u003cb\u003e\u003cspan data-mce-fragment=\"1\"\u003e\u003c\/span\u003e\u003c\/b\u003e\u003c\/span\u003e\u003c\/h3\u003e\n\u003ch3 style=\"text-align: center;\"\u003e\u003cspan style=\"color: #ff8000;\"\u003e\u003cb\u003e\u003cspan data-mce-fragment=\"1\"\u003e\u003c\/span\u003e\u003c\/b\u003e\u003c\/span\u003e\u003c\/h3\u003e\n\u003ch3 style=\"text-align: center;\"\u003e\u003cspan style=\"color: #ff8000;\"\u003e\u003cb\u003e\u003cspan data-mce-fragment=\"1\"\u003e\u003c\/span\u003e\u003c\/b\u003e\u003c\/span\u003e\u003c\/h3\u003e\n\u003ch3 style=\"text-align: center;\"\u003e\u003cspan style=\"font-weight: 400;\"\u003e\u003cspan data-mce-fragment=\"1\"\u003e\u003cbr\u003e\u003c\/span\u003e\u003c\/span\u003e\u003c\/h3\u003e\n\u003cdiv style=\"text-align: center;\"\u003e\n\u003ch3 style=\"text-align: center;\"\u003e\u003cspan style=\"color: #ff8000;\"\u003eHyperlapse and Panorama\u003c\/span\u003e\u003c\/h3\u003e\n\u003c\/div\u003e\n\u003cdiv style=\"text-align: center;\"\u003e\u003cspan style=\"font-weight: 400;\"\u003e\u003cspan data-mce-fragment=\"1\"\u003eSpeed up time and movement with a single tap by creating a striking hyperlapse. You can also capture larger, more detailed shots of your surroundings with panorama.\u003c\/span\u003e\u003c\/span\u003e\u003c\/div\u003e\n\u003cdiv style=\"text-align: center;\"\u003e\u003cimg style=\"float: none;\" src=\"https:\/\/cdn.shopify.com\/s\/files\/1\/2532\/7020\/files\/DJI_Mavic_Air_2S_Fly_More_Combo_12.jpg?v=1628575937\" alt=\"dji-mavic-air-2S-fly-more-combo-drone-content-feature-Hyperlapse-and-Panorama\"\u003e\u003c\/div\u003e\n\u003ch3 style=\"text-align: center;\"\u003e\u003cspan style=\"color: #ff8000;\"\u003e\u003cb\u003e\u003c\/b\u003e\u003c\/span\u003e\u003c\/h3\u003e\n\u003ch2 class=\"text style__eyebrow___2tBWn\" style=\"text-align: center;\"\u003e\u003cspan style=\"color: #ff8000;\"\u003eSmart features, perfect shots\u003c\/span\u003e\u003c\/h2\u003e\n\u003ch3 style=\"text-align: center;\"\u003e\u003cspan style=\"color: #ff8000;\"\u003e\u003cb\u003e\u003c\/b\u003e\u003c\/span\u003e\u003c\/h3\u003e\n\u003ch3 style=\"text-align: center;\"\u003e\u003cspan style=\"color: #ff8000;\"\u003e\u003cb\u003eIntroducing Mastershots\u003c\/b\u003e\u003c\/span\u003e\u003c\/h3\u003e\n\u003cdiv style=\"text-align: center;\"\u003e\u003cspan style=\"font-weight: 400;\"\u003e\u003cspan data-mce-fragment=\"1\"\u003eThe next evolution of QuickShots, MasterShots is an advanced intelligent feature that gives users the best shots in any location with just a tap. Simply select your subject, and the drone will film while executing ten different maneuvers in sequence, keeping your subject center-frame and generating a short cinematic video afterward.\u003c\/span\u003e\u003c\/span\u003e\u003c\/div\u003e\n\u003cdiv style=\"text-align: center;\"\u003e\u003cspan style=\"font-weight: 400;\"\u003e\u003cspan data-mce-fragment=\"1\"\u003e\u003cimg src=\"https:\/\/cdn.shopify.com\/s\/files\/1\/2532\/7020\/files\/DJI_Mavic_Air_2S_Fly_More_Combo_13.jpg?v=1628578139\" style=\"float: none;\" alt=\"dji-mavic-air-2S-fly-more-combo-drone-content-feature-Autonomous-Functions-Matershots\"\u003e\u003c\/span\u003e\u003c\/span\u003e\u003c\/div\u003e\n\u003cdiv style=\"text-align: center;\"\u003e\u003cb\u003e\u003cspan style=\"color: #ff8000;\"\u003e\u003c\/span\u003e\u003c\/b\u003e\u003c\/div\u003e\n\u003cdiv style=\"text-align: center;\"\u003e\u003cb\u003e\u003cspan style=\"color: #ff8000;\"\u003e\u003c\/span\u003e\u003c\/b\u003e\u003c\/div\u003e\n\u003cdiv style=\"text-align: center;\"\u003e\u003cb\u003e\u003cspan style=\"color: #ff8000;\"\u003e\u003c\/span\u003e\u003c\/b\u003e\u003c\/div\u003e\n\u003cdiv style=\"text-align: center;\"\u003e\u003cb\u003e\u003cspan style=\"color: #ff8000;\"\u003e\u003c\/span\u003e\u003c\/b\u003e\u003c\/div\u003e\n\u003cdiv style=\"text-align: center;\"\u003e\n\u003cdiv\u003e\u003cspan style=\"color: #ff8000;\"\u003e\u003cb\u003e\u003c\/b\u003e\u003c\/span\u003e\u003c\/div\u003e\n\u003cdiv\u003e\u003cspan style=\"color: #ff8000;\"\u003e\u003cb\u003e\u003c\/b\u003e\u003c\/span\u003e\u003c\/div\u003e\n\u003cdiv\u003e\u003cspan style=\"color: #ff8000;\"\u003e\u003cb\u003eThe Center of Attention \u003c\/b\u003e\u003c\/span\u003e\u003c\/div\u003e\n\u003cdiv\u003e\n\u003cb\u003e\u003cspan\u003e\u003c\/span\u003e\u003c\/b\u003e\u003cbr\u003e\n\u003c\/div\u003e\n\u003cdiv\u003e\u003cspan\u003eFocusTrack features Spotlight 2.0, ActiveTrack 4.0, and Point of Interest 3.0, making it a breeze for DJI Air 2S to follow or circle your subject.\u003c\/span\u003e\u003c\/div\u003e\n\u003cdiv style=\"text-align: center;\"\u003e\u003cbr\u003e\u003c\/div\u003e\n\u003cdiv style=\"text-align: center;\"\u003e\u003c\/div\u003e\n\u003c\/div\u003e\n\u003cdiv style=\"text-align: center;\"\u003e\n\u003ctable width=\"100%\"\u003e\n\u003ctbody\u003e\n\u003ctr\u003e\n\u003ctd style=\"width: 31%; text-align: center;\"\u003e \u003cstrong\u003e\u003cspan style=\"color: #ff8000;\" data-mce-fragment=\"1\"\u003eSpotlight 2.0 \u003c\/span\u003e\u003c\/strong\u003e\n\u003c\/td\u003e\n\u003ctd style=\"width: 31.7106%;\"\u003e\n\u003cdiv data-ga-label=\"all-1-tab-button\" class=\"style__tab-item___1yKLp\"\u003e\n\u003cdiv style=\"text-align: center;\"\u003e\u003cstrong\u003e\u003cspan style=\"color: #ff8000;\"\u003eActiveTrack 4.0\u003c\/span\u003e\u003c\/strong\u003e\u003c\/div\u003e\n\u003c\/div\u003e\n\u003c\/td\u003e\n\u003ctd style=\"width: 31.2894%; text-align: center;\"\u003e\u003cstrong\u003e\u003cspan style=\"color: #ff8000;\"\u003ePoint of Interest 3.0\u003c\/span\u003e\u003c\/strong\u003e\u003c\/td\u003e\n\u003c\/tr\u003e\n\u003ctr\u003e\n\u003ctd style=\"width: 31%;\"\u003e\n\u003cp\u003e\u003cspan data-mce-fragment=\"1\"\u003eFollow your subject smoothly while autonomously avoiding obstacles. Even if the subject is momentarily lost, you can quickly resume tracking during flight.\u003c\/span\u003e\u003c\/p\u003e\n\u003cp\u003e\u003cspan data-mce-fragment=\"1\"\u003e\u003cimg src=\"https:\/\/cdn.shopify.com\/s\/files\/1\/2532\/7020\/files\/DJI_Mavic_Air_2S_Fly_More_Combo_14_480x480.jpg?v=1628578319\" alt=\"dji-mavic-air-2S-fly-more-combo-drone-content-feature-The-Center-of-Aattention-Spotlight-2.0\" width=\"480x480\" height=\"480x480\" style=\"float: none;\" data-mce-fragment=\"1\" data-mce-src=\"https:\/\/cdn.shopify.com\/s\/files\/1\/2532\/7020\/files\/DJI_Mavic_Air_2S_Fly_More_Combo_14_480x480.jpg?v=1628578319\"\u003e\u003c\/span\u003e\u003c\/p\u003e\n\u003cdiv\u003e\u003cspan style=\"color: #ff8000;\"\u003e\u003cb\u003e\u003c\/b\u003e\u003c\/span\u003e\u003c\/div\u003e\n\u003c\/td\u003e\n\u003ctd style=\"width: 31.7106%;\"\u003e\n\u003cp\u003e\u003cspan\u003eFollow your subject smoothly while autonomously avoiding obstacles. Even if the subject is momentarily lost, you can quickly resume tracking during flight.\u003c\/span\u003e\u003c\/p\u003e\n\u003cp\u003e\u003cimg alt=\"dji-mavic-air-2S-fly-more-combo-drone-content-feature-The-Center-of-Aattention-ActiveTrack-4.0\" src=\"https:\/\/cdn.shopify.com\/s\/files\/1\/2532\/7020\/files\/DJI_Mavic_Air_2S_Fly_More_Combo_15_480x480.jpg?v=1628578617\" width=\"480x480\" height=\"480x480\" style=\"float: none;\"\u003e\u003c\/p\u003e\n\u003c\/td\u003e\n\u003ctd style=\"width: 31.2894%;\"\u003e\n\u003cp\u003e\u003cspan\u003eEasily take a perfect circle shot while keeping your subject centered. \u003c\/span\u003e\u003c\/p\u003e\n\u003cp\u003e \u003c\/p\u003e\n\u003cp\u003e \u003cimg alt=\"dji-mavic-air-2S-fly-more-combo-drone-content-feature-The-Center-of-Aattention-Point-of-Interest-3.0\" src=\"https:\/\/cdn.shopify.com\/s\/files\/1\/2532\/7020\/files\/DJI_Mavic_Air_2S_Fly_More_Combo_16_480x480.jpg?v=1628578705\" width=\"480x480\" height=\"480x480\" style=\"float: none;\" data-mce-fragment=\"1\" data-mce-src=\"https:\/\/cdn.shopify.com\/s\/files\/1\/2532\/7020\/files\/DJI_Mavic_Air_2S_Fly_More_Combo_16_480x480.jpg?v=1628578705\"\u003e\u003c\/p\u003e\n\u003c\/td\u003e\n\u003c\/tr\u003e\n\u003c\/tbody\u003e\n\u003c\/table\u003e\n\u003c\/div\u003e\n\u003cdiv style=\"text-align: center;\"\u003e\u003cb\u003e\u003cspan style=\"color: #ff8000;\"\u003e\u003c\/span\u003e\u003c\/b\u003e\u003c\/div\u003e\n\u003cdiv style=\"text-align: center;\"\u003e\u003cb\u003e\u003cspan style=\"color: #ff8000;\"\u003e\u003c\/span\u003e\u003c\/b\u003e\u003c\/div\u003e\n\u003cdiv style=\"text-align: center;\"\u003e \u003c\/div\u003e\n\u003ch3 style=\"text-align: center;\"\u003e\u003cspan style=\"color: #ff8000;\"\u003eFeel the Flight\u003c\/span\u003e\u003c\/h3\u003e\n\u003cdiv style=\"text-align: center;\"\u003e\u003cb\u003eWorry Less, Discover More \u003c\/b\u003e\u003c\/div\u003e\n\u003cdiv style=\"text-align: center;\"\u003e\u003cspan style=\"font-weight: 400;\"\u003e\u003cspan data-mce-fragment=\"1\"\u003eThe combination of portability, safety, and intelligent technology means you can spend more time enjoying flights and less time worrying about them. Take DJI Air 2S into the sky confidently, every flight.\u003c\/span\u003e\u003c\/span\u003e\u003c\/div\u003e\n\u003ch3 style=\"text-align: center;\"\u003e\u003cspan style=\"color: #ff8000;\"\u003e\u003cb\u003e\u003c\/b\u003e\u003c\/span\u003e\u003c\/h3\u003e\n\u003ch3 style=\"text-align: center;\"\u003e\u003cspan style=\"color: #ff8000;\"\u003eEnvironment Sensing\u003c\/span\u003e\u003c\/h3\u003e\n\u003cdiv style=\"text-align: center;\"\u003e\u003cspan style=\"font-weight: 400;\"\u003e\u003cspan data-mce-fragment=\"1\"\u003eDJI Air 2S has the ability to perceive its environment in four directions: up, down, forward, and backward. The algorithms for Advanced Pilot Assistance Systems (APAS 4.0) have been further improved, allowing DJI Air 2S to actively avoid obstacles in more complex scenarios and at high speeds.\u003c\/span\u003e\u003c\/span\u003e\u003c\/div\u003e\n\u003cdiv style=\"text-align: center;\"\u003e\u003cimg style=\"float: none;\" src=\"https:\/\/cdn.shopify.com\/s\/files\/1\/2532\/7020\/files\/DJI_Mavic_Air_2S_Fly_More_Combo_17.jpg?v=1628579395\" alt=\"dji-mavic-air-2S-fly-more-combo-drone-content-feature-Feel-the-Flight-Environment-Sensing\"\u003e\u003c\/div\u003e\n\u003cdiv style=\"text-align: center;\"\u003e \u003c\/div\u003e\n\u003ch3 style=\"text-align: center;\"\u003e\u003cspan style=\"color: #ff8000;\"\u003e\u003cb\u003eO3 Tranmission\u003c\/b\u003e\u003c\/span\u003e\u003c\/h3\u003e\n\u003cdiv style=\"text-align: center;\"\u003e\u003cspan style=\"font-weight: 400;\"\u003e\u003cspan data-mce-fragment=\"1\"\u003eDJI Air 2S features DJI's most advanced O3 (OcuSync 3.0) image transmission technology, delivering an ultra-smooth, clear, and reliable image feed.\u003c\/span\u003e\u003c\/span\u003e\u003c\/div\u003e\n\u003cdiv style=\"text-align: center;\"\u003e\n\u003ctable width=\"100%\"\u003e\n\u003ctbody\u003e\n\u003ctr\u003e\n\u003ctd style=\"text-align: center;\"\u003e \u003cspan style=\"color: #ff8000;\"\u003e\u003cstrong\u003e\u003cspan class=\"style__icon-number___2OOlV\" data-mce-fragment=\"1\"\u003e12\u003c\/span\u003e\u003cspan class=\"style__icon-unit___2hz_k\" data-mce-fragment=\"1\"\u003eKm\u003c\/span\u003e\u003c\/strong\u003e\u003c\/span\u003e\n\u003cp class=\"style__icon-desc___Otw9j\" data-mce-fragment=\"1\"\u003eMax Video Transmission\u003c\/p\u003e\n\u003c\/td\u003e\n\u003ctd\u003e\n\u003cdiv style=\"text-align: center;\" class=\"style__icon-number-container___2cK9V\"\u003e\u003cspan style=\"color: #ff8000;\"\u003e\u003cstrong\u003e\u003cspan class=\"style__icon-number___2OOlV\"\u003e1080\u003c\/span\u003e\u003cspan class=\"style__icon-unit___2hz_k\"\u003ep\u003c\/span\u003e\u003c\/strong\u003e\u003c\/span\u003e\u003c\/div\u003e\n\u003cp style=\"text-align: center;\" class=\"style__icon-desc___Otw9j\"\u003eTransmission\u003c\/p\u003e\n\u003c\/td\u003e\n\u003ctd\u003e\n\u003cdiv style=\"text-align: center;\" class=\"style__icon-number-container___2cK9V\"\u003e\u003cspan style=\"color: #ff8000;\"\u003e\u003cstrong\u003e\u003cspan class=\"style__icon-number___2OOlV\"\u003e4\u003c\/span\u003e\u003cspan class=\"style__icon-unit___2hz_k\"\u003eAntennas\u003c\/span\u003e\u003c\/strong\u003e\u003c\/span\u003e\u003c\/div\u003e\n\u003cp style=\"text-align: center;\" class=\"style__icon-desc___Otw9j\"\u003e2.4\/5.8GHz Dual Frequency\u003c\/p\u003e\n\u003c\/td\u003e\n\u003c\/tr\u003e\n\u003c\/tbody\u003e\n\u003c\/table\u003e\n\u003c\/div\u003e\n\u003cdiv style=\"text-align: center;\"\u003e\u003cspan style=\"font-weight: 400; color: #ffffff;\"\u003e\u003c\/span\u003e\u003c\/div\u003e\n\u003cdiv style=\"text-align: center;\"\u003e\u003cspan style=\"font-weight: 400; color: #ffffff;\"\u003e\u003cimg style=\"float: none;\" src=\"https:\/\/cdn.shopify.com\/s\/files\/1\/2532\/7020\/files\/DJI_Mavic_Air_2S_Fly_More_Combo_18_480x480.jpg?v=1628579621\" alt=\"dji-mavic-air-2S-fly-more-combo-drone-content-feature-O3-Tranmission\" data-mce-fragment=\"1\" data-mce-src=\"https:\/\/cdn.shopify.com\/s\/files\/1\/2532\/7020\/files\/DJI_Mavic_Air_2S_Fly_More_Combo_18_480x480.jpg?v=1628579621\"\u003e.\u003c\/span\u003e\u003c\/div\u003e\n\u003ch3 style=\"text-align: center;\"\u003e\u003cspan style=\"color: #ff8000;\"\u003e\u003cb\u003e\u003c\/b\u003e\u003c\/span\u003e\u003c\/h3\u003e\n\u003ch3 style=\"text-align: center;\"\u003e\u003cspan style=\"color: #ff8000;\"\u003e\u003cb\u003e\u003c\/b\u003e\u003c\/span\u003e\u003c\/h3\u003e\n\u003ch3 style=\"text-align: center;\"\u003e\u003cspan style=\"color: #ff8000;\"\u003e\u003cb\u003eSafer Skies with ADS-B\u003c\/b\u003e\u003c\/span\u003e\u003c\/h3\u003e\n\u003cdiv style=\"text-align: center;\"\u003e\u003cspan style=\"font-weight: 400;\"\u003e\u003cspan data-mce-fragment=\"1\"\u003eDJI Air 2S provides an added layer of airspace safety with the industry-leading AirSense safety system. This receives Automatic Dependent Surveillance-Broadcast (ADS-B) flight location information from airplanes and helicopters in your area that transmit ADS-B signals, displays those aircraft on a map, and provides audio and visual alerts through the DJI Fly app to help you keep the drone out of the way of those aircraft.\u003c\/span\u003e\u003c\/span\u003e\u003c\/div\u003e\n\u003cdiv style=\"text-align: center;\"\u003e\u003cspan style=\"font-weight: 400;\"\u003e\u003cspan data-mce-fragment=\"1\"\u003e\u003cimg src=\"https:\/\/cdn.shopify.com\/s\/files\/1\/2532\/7020\/files\/DJI_Mavic_Air_2S_Fly_More_Combo_19.jpg?v=1628579892\" style=\"float: none;\" alt=\"dji-mavic-air-2S-fly-more-combo-drone-content-feature-Safer-Skies-with-ADS-B\"\u003e\u003c\/span\u003e\u003c\/span\u003e\u003c\/div\u003e\n\u003cdiv style=\"text-align: center;\"\u003e \u003c\/div\u003e\n\u003cdiv style=\"text-align: center;\"\u003e\u003cbr\u003e\u003c\/div\u003e\n\u003ch3 style=\"text-align: center;\"\u003e\u003cspan style=\"color: #ff8000;\"\u003e\u003cb\u003eExpansive Accessories\u003c\/b\u003e\u003c\/span\u003e\u003c\/h3\u003e\n\u003ch3 style=\"text-align: center;\"\u003e\u003cb\u003eGet the Most Out Of Air 2S\u003c\/b\u003e\u003c\/h3\u003e\n\u003cdiv style=\"text-align: center;\"\u003e\u003cspan style=\"font-weight: 400;\"\u003e\u003cspan data-mce-fragment=\"1\"\u003eWith a diverse range of accessories, the sky is truly the limit.\u003c\/span\u003e\u003c\/span\u003e\u003c\/div\u003e\n\u003cdiv style=\"text-align: center;\"\u003e\u003cspan style=\"font-weight: 400;\"\u003e\u003cspan data-mce-fragment=\"1\"\u003e\u003c\/span\u003e\u003c\/span\u003e\u003c\/div\u003e\n\u003ch3 style=\"text-align: center;\"\u003e\u003cspan style=\"color: #ff8000;\"\u003e\u003cb\u003e\u003c\/b\u003e\u003c\/span\u003e\u003c\/h3\u003e\n\u003cp\u003e \u003c\/p\u003e\n\u003cp\u003e \u003c\/p\u003e\n\u003ch3 style=\"text-align: center;\"\u003e\u003cspan style=\"color: #ff8000;\"\u003e\u003cb\u003e\u003c\/b\u003e\u003c\/span\u003e\u003c\/h3\u003e\n\u003ch3\u003e\u003cspan\u003e\u003cb\u003e\u003c\/b\u003e\u003c\/span\u003e\u003c\/h3\u003e\n\u003ch3 style=\"text-align: center;\"\u003e\u003cspan style=\"color: #ff8000;\"\u003e\u003cb\u003eDJI Smart Controller\u003c\/b\u003e\u003c\/span\u003e\u003c\/h3\u003e\n\u003cdiv\u003e\u003cspan\u003eThis powerful remote controller features a 5.5-inch 1080p high-brightness display for pure performance. Compatible with the DJI GO 4 and DJI Fly apps, it also supports the installation of third-party apps.\u003c\/span\u003e\u003c\/div\u003e\n\u003cdiv\u003e\u003cimg alt=\"dji-mavic-air-2S-fly-more-combo-drone-content-feature-Expansive-Accessories-Fly-More-Combo-DJI Smart Controller\" src=\"https:\/\/cdn.shopify.com\/s\/files\/1\/2532\/7020\/files\/DJI_Mavic_Air_2S_Fly_More_Combo_22.jpg?v=1628580371\"\u003e\u003c\/div\u003e\n\u003ch3 style=\"text-align: center;\"\u003e\u003cspan style=\"color: #ff8000;\"\u003e\u003cb\u003e\u003c\/b\u003e\u003c\/span\u003e\u003c\/h3\u003e\n\u003ch3 style=\"text-align: center;\"\u003e\u003cspan style=\"color: #ff8000;\"\u003e\u003cb\u003e\u003c\/b\u003e\u003c\/span\u003e\u003c\/h3\u003e\n\u003cdiv style=\"text-align: center;\"\u003e \u003c\/div\u003e\n\u003ch2 style=\"text-align: left;\"\u003e\u003cstrong\u003e\u003c\/strong\u003e\u003c\/h2\u003e\n\u003ch2 style=\"text-align: left;\"\u003e\u003cstrong\u003eSpecification\u003c\/strong\u003e\u003c\/h2\u003e\n\u003cp\u003e \u003c\/p\u003e\n\u003cp\u003e \u003c\/p\u003e\n\u003cp\u003e \u003c\/p\u003e\n\u003ch3 class=\"group-list-title\"\u003eAircraft\u003c\/h3\u003e\n\u003ctable width=\"523\"\u003e\n\u003ctbody\u003e\n\u003ctr style=\"height: 19px;\"\u003e\n\u003ctd style=\"width: 245.562px; height: 19px;\"\u003e Takeoff Weight\u003c\/td\u003e\n\u003ctd style=\"width: 254.438px; height: 19px;\"\u003e595 g\u003c\/td\u003e\n\u003c\/tr\u003e\n\u003ctr style=\"height: 76px;\"\u003e\n\u003ctd style=\"width: 245.562px; height: 76px;\"\u003eDimensions\u003c\/td\u003e\n\u003ctd style=\"width: 254.438px; height: 76px;\"\u003eFolded:\u003cbr\u003e180×97×77 mm (length×width×height)\u003cbr\u003eUnfolded:\u003cbr\u003e183×253×77 mm (length×width×height)\u003c\/td\u003e\n\u003c\/tr\u003e\n\u003ctr style=\"height: 19px;\"\u003e\n\u003ctd style=\"width: 245.562px; height: 19px;\"\u003eDiagonal Length\u003c\/td\u003e\n\u003ctd style=\"width: 254.438px; height: 19px;\"\u003e302 mm\u003c\/td\u003e\n\u003c\/tr\u003e\n\u003ctr style=\"height: 38px;\"\u003e\n\u003ctd style=\"width: 245.562px; height: 38px;\"\u003eMax Ascent Speed\u003c\/td\u003e\n\u003ctd style=\"width: 254.438px; height: 38px;\"\u003e6 m\/s (S Mode)\u003cbr\u003e6 m\/s (N Mode)\u003c\/td\u003e\n\u003c\/tr\u003e\n\u003ctr style=\"height: 52px;\"\u003e\n\u003ctd style=\"width: 245.562px; height: 52px;\"\u003eMax Descent Speed\u003c\/td\u003e\n\u003ctd style=\"width: 254.438px; height: 52px;\"\u003e\n\u003cp\u003e6 m\/s (S Mode)\u003cbr\u003e6 m\/s (N Mode)\u003c\/p\u003e\n\u003c\/td\u003e\n\u003c\/tr\u003e\n\u003ctr style=\"height: 27px;\"\u003e\n\u003ctd style=\"width: 245.562px; height: 27px;\"\u003eMax Service Ceiling Above Sea Level\u003c\/td\u003e\n\u003ctd style=\"width: 254.438px; height: 27px;\"\u003e\n\u003cp\u003e5000 m\u003cbr\u003e\u003c\/p\u003e\n\u003c\/td\u003e\n\u003c\/tr\u003e\n\u003ctr style=\"height: 9px;\"\u003e\n\u003ctd style=\"width: 245.562px; height: 9px;\"\u003eMax Flight Time (no wind)\u003c\/td\u003e\n\u003ctd style=\"width: 254.438px; height: 9px;\"\u003e\n\u003cp\u003e31 minutes\u003c\/p\u003e\n\u003c\/td\u003e\n\u003c\/tr\u003e\n\u003ctr style=\"height: 9px;\"\u003e\n\u003ctd style=\"width: 245.562px; height: 9px;\"\u003eMax Hovering Time (no wind)\u003c\/td\u003e\n\u003ctd style=\"width: 254.438px; height: 9px;\"\u003e\n\u003cp\u003e30 minutes\u003c\/p\u003e\n\u003c\/td\u003e\n\u003c\/tr\u003e\n\u003ctr style=\"height: 9px;\"\u003e\n\u003ctd style=\"width: 245.562px; height: 9px;\"\u003eMax Flight Distance (no wind)\u003c\/td\u003e\n\u003ctd style=\"width: 254.438px; height: 9px;\"\u003e\n\u003cp\u003e18.5 km\u003c\/p\u003e\n\u003c\/td\u003e\n\u003c\/tr\u003e\n\u003ctr style=\"height: 9px;\"\u003e\n\u003ctd style=\"width: 245.562px; height: 9px;\"\u003eMax Flight Speed (near sea level, no wind)\u003c\/td\u003e\n\u003ctd style=\"width: 254.438px; height: 9px;\"\u003e19 m\/s (S Mode)\u003cbr\u003e15 m\/s (N Mode)\u003cbr\u003e5 m\/s (C Mode)\u003c\/td\u003e\n\u003c\/tr\u003e\n\u003ctr style=\"height: 9px;\"\u003e\n\u003ctd style=\"width: 245.562px; height: 9px;\"\u003eMax Wind Speed Resistance\u003c\/td\u003e\n\u003ctd style=\"width: 254.438px; height: 9px;\"\u003e10.7 m\/s\u003c\/td\u003e\n\u003c\/tr\u003e\n\u003ctr style=\"height: 9px;\"\u003e\n\u003ctd style=\"width: 245.562px; height: 9px;\"\u003eMax Tilt Angle\u003c\/td\u003e\n\u003ctd style=\"width: 254.438px; height: 9px;\"\u003e35° (S Mode)\u003cbr\u003eFront: 30°, Back: 20°, Left: 35°, Right: 35° (N Mode)\u003c\/td\u003e\n\u003c\/tr\u003e\n\u003ctr style=\"height: 9px;\"\u003e\n\u003ctd style=\"width: 245.562px; height: 9px;\"\u003eMax Angular Velocity\u003c\/td\u003e\n\u003ctd style=\"width: 254.438px; height: 9px;\"\u003e250°\/s (S Mode)\u003cbr\u003e90°\/s (N Mode)\u003cbr\u003e60°\/s (C Mode)\u003c\/td\u003e\n\u003c\/tr\u003e\n\u003ctr style=\"height: 9px;\"\u003e\n\u003ctd style=\"width: 245.562px; height: 9px;\"\u003eOperating Temperature Range\u003c\/td\u003e\n\u003ctd style=\"width: 254.438px; height: 9px;\"\u003e0° to 40°C (32° to 104°F)\u003c\/td\u003e\n\u003c\/tr\u003e\n\u003ctr style=\"height: 9px;\"\u003e\n\u003ctd style=\"width: 245.562px; height: 9px;\"\u003eOperating Frequency\u003c\/td\u003e\n\u003ctd style=\"width: 254.438px; height: 9px;\"\u003e2.4 GHz\u003cbr\u003e5.8 GHz\u003cbr\u003eTransmission Power (EIRP)\u003cbr\u003e2.4 GHz:\u003cbr\u003eFCC: ≤30 dBm\u003cbr\u003eCE: ≤20 dBm\u003cbr\u003eSRRC: ≤20 dBm\u003cbr\u003eMIC: ≤20 dBm\u003cbr\u003e5.8 GHz:\u003cbr\u003eFCC: ≤30 dBm\u003cbr\u003eCE: ≤14 dBm\u003cbr\u003eSRRC: ≤29 dBm\u003c\/td\u003e\n\u003c\/tr\u003e\n\u003ctr style=\"height: 9px;\"\u003e\n\u003ctd style=\"width: 245.562px; height: 9px;\"\u003eHovering Accuracy Range\u003c\/td\u003e\n\u003ctd style=\"width: 254.438px; height: 9px;\"\u003eVertical:\u003cbr\u003e± 0.1 m (with vision positioning)\u003cbr\u003e± 0.5 m (with GNSS positioning)\u003cbr\u003eHorizontal:\u003cbr\u003e± 0.1 m (with vision positioning)\u003cbr\u003e± 1.5 m (with GNSS positioning)\u003c\/td\u003e\n\u003c\/tr\u003e\n\u003ctr style=\"height: 9px;\"\u003e\n\u003ctd style=\"width: 245.562px; height: 9px;\"\u003ePropellers\u003c\/td\u003e\n\u003ctd style=\"width: 254.438px; height: 9px;\"\u003eQuick release, low noise, folding\u003c\/td\u003e\n\u003c\/tr\u003e\n\u003ctr style=\"height: 9px;\"\u003e\n\u003ctd style=\"width: 245.562px; height: 9px;\"\u003eAircraft Arms\u003c\/td\u003e\n\u003ctd style=\"width: 254.438px; height: 9px;\"\u003eFoldable\u003c\/td\u003e\n\u003c\/tr\u003e\n\u003ctr style=\"height: 9px;\"\u003e\n\u003ctd style=\"width: 245.562px; height: 9px;\"\u003eGNSS\u003c\/td\u003e\n\u003ctd style=\"width: 254.438px; height: 9px;\"\u003eGPS+GLONASS+GALILEO\u003c\/td\u003e\n\u003c\/tr\u003e\n\u003ctr style=\"height: 9px;\"\u003e\n\u003ctd style=\"width: 245.562px; height: 9px;\"\u003eCompass\u003c\/td\u003e\n\u003ctd style=\"width: 254.438px; height: 9px;\"\u003eSingle Compass\u003c\/td\u003e\n\u003c\/tr\u003e\n\u003ctr style=\"height: 9px;\"\u003e\n\u003ctd style=\"width: 245.562px; height: 9px;\"\u003eIMU\u003c\/td\u003e\n\u003ctd style=\"width: 254.438px; height: 9px;\"\u003eSingle IMU\u003c\/td\u003e\n\u003c\/tr\u003e\n\u003ctr style=\"height: 9px;\"\u003e\n\u003ctd style=\"width: 245.562px; height: 9px;\"\u003eInternal Storage\u003c\/td\u003e\n\u003ctd style=\"width: 254.438px; height: 9px;\"\u003e8 GB\u003c\/td\u003e\n\u003c\/tr\u003e\n\u003c\/tbody\u003e\n\u003c\/table\u003e\n\u003cp\u003e\u003cbr\u003e\u003cbr\u003e\u003c\/p\u003e\n\u003ch3 class=\"group-list-title\"\u003eIntelligent Flight Battery\u003c\/h3\u003e\n\u003ctable width=\"100%\"\u003e\n\u003ctbody\u003e\n\u003ctr\u003e\n\u003ctd style=\"width: 46.981%;\"\u003e Capacity\u003c\/td\u003e\n\u003ctd style=\"width: 49.7244%;\"\u003e3500 mAh\u003c\/td\u003e\n\u003c\/tr\u003e\n\u003ctr\u003e\n\u003ctd style=\"width: 46.981%;\"\u003eVoltage\u003c\/td\u003e\n\u003ctd style=\"width: 49.7244%;\"\u003e11.55 V\u003c\/td\u003e\n\u003c\/tr\u003e\n\u003ctr\u003e\n\u003ctd style=\"width: 46.981%;\"\u003eMax Charging Voltage\u003c\/td\u003e\n\u003ctd style=\"width: 49.7244%;\"\u003e13.2 V\u003c\/td\u003e\n\u003c\/tr\u003e\n\u003ctr\u003e\n\u003ctd style=\"width: 46.981%;\"\u003eBattery Type\u003c\/td\u003e\n\u003ctd style=\"width: 49.7244%;\"\u003eLiPo 3S\u003c\/td\u003e\n\u003c\/tr\u003e\n\u003ctr\u003e\n\u003ctd style=\"width: 46.981%;\"\u003eEnergy\u003c\/td\u003e\n\u003ctd style=\"width: 49.7244%;\"\u003e40.42 Wh\u003c\/td\u003e\n\u003c\/tr\u003e\n\u003ctr\u003e\n\u003ctd style=\"width: 46.981%;\"\u003eWeight\u003c\/td\u003e\n\u003ctd style=\"width: 49.7244%;\"\u003e198 g\u003c\/td\u003e\n\u003c\/tr\u003e\n\u003ctr\u003e\n\u003ctd style=\"width: 46.981%;\"\u003eCharging Temperature Range\u003c\/td\u003e\n\u003ctd style=\"width: 49.7244%;\"\u003e5° to 40°C (41° to 104°F)\u003c\/td\u003e\n\u003c\/tr\u003e\n\u003ctr\u003e\n\u003ctd style=\"width: 46.981%;\"\u003eMax Charging Power\u003c\/td\u003e\n\u003ctd style=\"width: 49.7244%;\"\u003e38 W\u003c\/td\u003e\n\u003c\/tr\u003e\n\u003ctr\u003e\n\u003ctd style=\"width: 46.981%;\"\u003eBuilt-in Battery\u003c\/td\u003e\n\u003ctd style=\"width: 49.7244%;\"\u003eN\/A\u003c\/td\u003e\n\u003c\/tr\u003e\n\u003c\/tbody\u003e\n\u003c\/table\u003e\n\u003cp\u003e\u003cbr\u003e\u003c\/p\u003e\n\u003ch3 class=\"group-list-title\"\u003eCamera\u003c\/h3\u003e\n\u003ctable width=\"100%\"\u003e\n\u003ctbody\u003e\n\u003ctr\u003e\n\u003ctd style=\"width: 47.0159%;\"\u003e Sensor\u003c\/td\u003e\n\u003ctd style=\"width: 48.9841%;\"\u003e\n\u003cp\u003e1\" CMOS\u003c\/p\u003e\n\u003cp\u003eEffective Pixels: 20 MP; 2.4μm Pixel Size\u003c\/p\u003e\n\u003c\/td\u003e\n\u003c\/tr\u003e\n\u003ctr\u003e\n\u003ctd style=\"width: 47.0159%;\"\u003eLens\u003c\/td\u003e\n\u003ctd style=\"width: 48.9841%;\"\u003eFOV: 88°\u003cbr\u003e35 mm Format Equivalent: 22 mm\u003cbr\u003eAperture: f\/2.8\u003cbr\u003eShooting Range: 0.6 m to ∞\u003c\/td\u003e\n\u003c\/tr\u003e\n\u003ctr\u003e\n\u003ctd style=\"width: 47.0159%;\"\u003eISO Range\u003c\/td\u003e\n\u003ctd style=\"width: 48.9841%;\"\u003eVideo:\u003cbr\u003e100-3200 (Auto)\u003cbr\u003e100-6400 (Manual)\u003cbr\u003e10-Bit Dlog-M Video:\u003cbr\u003e100-800 (Auto)\u003cbr\u003e100-1600 (Manual)\u003cbr\u003ePhoto:\u003cbr\u003e100-3200 (Auto)\u003cbr\u003e100-12800 (Manual)\u003c\/td\u003e\n\u003c\/tr\u003e\n\u003ctr\u003e\n\u003ctd style=\"width: 47.0159%;\"\u003eStill Image Size\u003c\/td\u003e\n\u003ctd style=\"width: 48.9841%;\"\u003e20 MP\u003cbr\u003e5472×3648 (3:2)\u003cbr\u003e5472×3078 (16:9)\u003c\/td\u003e\n\u003c\/tr\u003e\n\u003ctr\u003e\n\u003ctd style=\"width: 47.0159%;\"\u003eStill Photography Modes\u003c\/td\u003e\n\u003ctd style=\"width: 48.9841%;\"\u003eSingle shot: 20 MP\u003cbr\u003eBurst shooting: 20 MP (continuous burst)\u003cbr\u003eAuto Exposure Bracketing (AEB): 20 MP, 3\/5 bracketed frames at 0.7 EV bias\u003cbr\u003eTimed: 20 MP, 2\/3\/5\/7\/10\/15\/20\/30\/60s\u003cbr\u003eSmartPhoto (including HDR and HyperLight): 20 MP\u003cbr\u003eHDR Panorama:\u003cbr\u003eVertical (3×1): 3328×8000 (width×height)\u003cbr\u003eWide-angle (3×3): 8000×6144 (width×height)\u003cbr\u003e180° (3×7): 8192×3500 (width×height)\u003cbr\u003eSphere (3×8+1): 8192×4096 (width×height)\u003cbr\u003eJPEG\/DNG (RAW)\u003c\/td\u003e\n\u003c\/tr\u003e\n\u003ctr\u003e\n\u003ctd style=\"width: 47.0159%;\"\u003eVideo Resolution\u003c\/td\u003e\n\u003ctd style=\"width: 48.9841%;\"\u003e5.4K: 5472×3078 @ 24\/25\/30 fps\u003cbr\u003e4K Ultra HD: 3840×2160 @ 24\/25\/30\/48\/50\/60 fps\u003cbr\u003e2.7K: 2688x1512 @ 24\/25\/30\/48\/50\/60 fps\u003cbr\u003eFHD: 1920×1080 @ 24\/25\/30\/48\/50\/60\/120 fps\u003cbr\u003eMP4\/MOV (H.264\/MPEG-4 AVC, H.265\/HEVC)\u003c\/td\u003e\n\u003c\/tr\u003e\n\u003ctr\u003e\n\u003ctd style=\"width: 47.0159%;\"\u003eMax Video Bitrate\u003c\/td\u003e\n\u003ctd style=\"width: 48.9841%;\"\u003e150 Mbps\u003c\/td\u003e\n\u003c\/tr\u003e\n\u003ctr\u003e\n\u003ctd style=\"width: 47.0159%;\"\u003eSupported File System\u003c\/td\u003e\n\u003ctd style=\"width: 48.9841%;\"\u003e\n\u003cp\u003eFAT32\/exFAT\u003c\/p\u003e\n\u003cp\u003eSupports a microSD card with a capacity of up to 256 GB.\u003c\/p\u003e\n\u003c\/td\u003e\n\u003c\/tr\u003e\n\u003ctr\u003e\n\u003ctd style=\"width: 47.0159%;\"\u003eDigital Zoom\u003c\/td\u003e\n\u003ctd style=\"width: 48.9841%;\"\u003e\n\u003cp\u003eZoom recording is not available while recording 10-bit videos and 120fps videos.\u003c\/p\u003e\n\u003cp\u003e4K\/30fps:\u003cbr\u003e4x;\u003cbr\u003e2.7K\/60fps:\u003cbr\u003e4x;\u003cbr\u003e2.7K\/30fps:\u003cbr\u003e6x;\u003cbr\u003e1080p\/60fps:\u003cbr\u003e6x;\u003cbr\u003e1080p\/30fps:\u003cbr\u003e8x\u003c\/p\u003e\n\u003c\/td\u003e\n\u003c\/tr\u003e\n\u003c\/tbody\u003e\n\u003c\/table\u003e\n\u003cp\u003e \u003c\/p\u003e\n\u003ch3 class=\"group-list-title\"\u003eGimbal\u003c\/h3\u003e\n\u003ctable width=\"100%\"\u003e\n\u003ctbody\u003e\n\u003ctr\u003e\n\u003ctd style=\"width: 46.8312%;\"\u003e Stabilization\u003c\/td\u003e\n\u003ctd style=\"width: 48.1688%;\"\u003e3-axis (tilt, roll, pan)\u003c\/td\u003e\n\u003c\/tr\u003e\n\u003ctr\u003e\n\u003ctd style=\"width: 46.8312%;\"\u003eMechanical Range\u003c\/td\u003e\n\u003ctd style=\"width: 48.1688%;\"\u003eTilt: -135° to 45°\u003cbr\u003eRoll: -45° to 45°\u003cbr\u003ePan: -100° to 100°\u003c\/td\u003e\n\u003c\/tr\u003e\n\u003ctr\u003e\n\u003ctd style=\"width: 46.8312%;\"\u003ePan Axis\u003c\/td\u003e\n\u003ctd style=\"width: 48.1688%;\"\u003eNot Controllable\u003c\/td\u003e\n\u003c\/tr\u003e\n\u003ctr\u003e\n\u003ctd style=\"width: 46.8312%;\"\u003eControllable Range\u003c\/td\u003e\n\u003ctd style=\"width: 48.1688%;\"\u003eTilt: -90° to 0°(default); -90° to 24° (extended)\u003c\/td\u003e\n\u003c\/tr\u003e\n\u003ctr\u003e\n\u003ctd style=\"width: 46.8312%;\"\u003eMax Controllable Speed (tilt)\u003c\/td\u003e\n\u003ctd style=\"width: 48.1688%;\"\u003e100°\/s\u003c\/td\u003e\n\u003c\/tr\u003e\n\u003ctr\u003e\n\u003ctd style=\"width: 46.8312%;\"\u003eAngular Vibration Range\u003c\/td\u003e\n\u003ctd style=\"width: 48.1688%;\"\u003e±0.01°\u003c\/td\u003e\n\u003c\/tr\u003e\n\u003c\/tbody\u003e\n\u003c\/table\u003e\n\u003cp\u003e\u003cbr\u003e\u003c\/p\u003e\n\u003ch3 class=\"group-list-title\"\u003eSensing System\u003c\/h3\u003e\n\u003ctable width=\"100%\"\u003e\n\u003ctbody\u003e\n\u003ctr\u003e\n\u003ctd style=\"width: 48.1438%;\"\u003e Forward\u003c\/td\u003e\n\u003ctd style=\"width: 48.5617%;\"\u003e\n\u003cp\u003ePrecision Measurement Range: 0.38-23.8 m\u003c\/p\u003e\n\u003cp\u003eEffective Sensing Speed: ≤15 m\/s\u003cbr\u003eField of View (FOV): 72° (horizontal), 58° (vertical)\u003c\/p\u003e\n\u003c\/td\u003e\n\u003c\/tr\u003e\n\u003ctr\u003e\n\u003ctd style=\"width: 48.1438%;\"\u003eBackward\u003c\/td\u003e\n\u003ctd style=\"width: 48.5617%;\"\u003ePrecision Measurement Range: 0.37-23.4 m\u003cbr\u003eEffective Sensing Speed: ≤12 m\/s\u003cbr\u003eField of View (FOV): 57° (horizontal), 44° (vertical)\u003c\/td\u003e\n\u003c\/tr\u003e\n\u003ctr\u003e\n\u003ctd style=\"width: 48.1438%;\"\u003eDownward\u003c\/td\u003e\n\u003ctd style=\"width: 48.5617%;\"\u003eToF Measurement Range: 0.1-8 m\u003cbr\u003eHovering Range: 0.5-30 m\u003cbr\u003eVision Sensor Hovering Range: 0.5-60 m\u003c\/td\u003e\n\u003c\/tr\u003e\n\u003ctr\u003e\n\u003ctd style=\"width: 48.1438%;\"\u003eLeft\/Right\u003c\/td\u003e\n\u003ctd style=\"width: 48.5617%;\"\u003eN\/A\u003c\/td\u003e\n\u003c\/tr\u003e\n\u003ctr\u003e\n\u003ctd style=\"width: 48.1438%;\"\u003eUpward\u003c\/td\u003e\n\u003ctd style=\"width: 48.5617%;\"\u003ePrecision Measurement Range: 0.34-28.6 m\u003cbr\u003eField of View (FOV): 63° (horizontal), 78° (vertical)\u003c\/td\u003e\n\u003c\/tr\u003e\n\u003ctr\u003e\n\u003ctd style=\"width: 48.1438%;\"\u003eDownward Auxiliary Light\u003c\/td\u003e\n\u003ctd style=\"width: 48.5617%;\"\u003eSingle LED\u003c\/td\u003e\n\u003c\/tr\u003e\n\u003c\/tbody\u003e\n\u003c\/table\u003e\n\u003cp\u003e\u003cbr\u003e\u003c\/p\u003e\n\u003ch3 class=\"group-list-title\"\u003eVideo Transmission\u003c\/h3\u003e\n\u003ctable width=\"100%\"\u003e\n\u003ctbody\u003e\n\u003ctr\u003e\n\u003ctd style=\"width: 47.6063%;\"\u003e Transmission System\u003c\/td\u003e\n\u003ctd style=\"width: 47.3937%;\"\u003e\n\u003cp\u003eO3\u003c\/p\u003e\n\u003cp\u003e2.4 GHz\/5.8 GHz Auto-Switching (compatible with OcuSync 2.0)\u003cbr data-mce-fragment=\"1\"\u003e4-antenna 2T4R\u003c\/p\u003e\n\u003c\/td\u003e\n\u003c\/tr\u003e\n\u003ctr\u003e\n\u003ctd style=\"width: 47.6063%;\"\u003eMax Transmission Distance\u003c\/td\u003e\n\u003ctd style=\"width: 47.3937%;\"\u003e12 km (FCC), 8 km (CE)\u003cbr\u003e8 km (SRRC), 8 km (MIC)\u003c\/td\u003e\n\u003c\/tr\u003e\n\u003ctr\u003e\n\u003ctd style=\"width: 47.6063%;\"\u003eLive View Quality\/Latency\u003c\/td\u003e\n\u003ctd style=\"width: 47.3937%;\"\u003eDrone + Remote Controller: 1080p\/30fps 12 Mbps 120 ms\u003cbr\u003eDrone + DJI Smart Controller: 1080p\/30fps 12Mbps 130 ms\u003c\/td\u003e\n\u003c\/tr\u003e\n\u003ctr\u003e\n\u003ctd style=\"width: 47.6063%;\"\u003eMax Transmission Bitrate\u003c\/td\u003e\n\u003ctd style=\"width: 47.3937%;\"\u003e44 Mbps (download bitrate)\u003cbr\u003e16 Mbps (live video bitrate)\u003c\/td\u003e\n\u003c\/tr\u003e\n\u003ctr\u003e\n\u003ctd style=\"width: 47.6063%;\"\u003eOperating Frequency\u003c\/td\u003e\n\u003ctd style=\"width: 47.3937%;\"\u003e2.4 GHz\u003cbr\u003e5.8 GHz\u003c\/td\u003e\n\u003c\/tr\u003e\n\u003c\/tbody\u003e\n\u003c\/table\u003e\n\u003cp\u003e\u003cbr\u003e\u003c\/p\u003e\n\u003ch3 class=\"group-list-title\"\u003eRemote Controller\u003c\/h3\u003e\n\u003ctable width=\"100%\"\u003e\n\u003ctbody\u003e\n\u003ctr\u003e\n\u003ctd style=\"width: 47.7766%;\"\u003e Multiple Controllers\u003c\/td\u003e\n\u003ctd style=\"width: 47.2234%;\"\u003eN\/A\u003c\/td\u003e\n\u003c\/tr\u003e\n\u003ctr\u003e\n\u003ctd style=\"width: 47.7766%;\"\u003eDJI Smart Controller\u003c\/td\u003e\n\u003ctd style=\"width: 47.2234%;\"\u003eSupported\u003c\/td\u003e\n\u003c\/tr\u003e\n\u003ctr\u003e\n\u003ctd style=\"width: 47.7766%;\"\u003eRemote Controller Transmission System\u003c\/td\u003e\n\u003ctd style=\"width: 47.2234%;\"\u003eOcuSync 2.0\u003c\/td\u003e\n\u003c\/tr\u003e\n\u003ctr\u003e\n\u003ctd style=\"width: 47.7766%;\"\u003eBattery Life\u003c\/td\u003e\n\u003ctd style=\"width: 47.2234%;\"\u003e6 hours (4 hours when charging a mobile device)\u003c\/td\u003e\n\u003c\/tr\u003e\n\u003ctr\u003e\n\u003ctd style=\"width: 47.7766%;\"\u003eSupported Mobile Device Connectors\u003c\/td\u003e\n\u003ctd style=\"width: 47.2234%;\"\u003eLightning, Micro USB, USB-C\u003c\/td\u003e\n\u003c\/tr\u003e\n\u003ctr\u003e\n\u003ctd style=\"width: 47.7766%;\"\u003eMax Supported Mobile Device Size\u003c\/td\u003e\n\u003ctd style=\"width: 47.2234%;\"\u003e180×86×10 mm (length×width×height)\u003c\/td\u003e\n\u003c\/tr\u003e\n\u003ctr\u003e\n\u003ctd style=\"width: 47.7766%;\"\u003eOperating Temperature\u003c\/td\u003e\n\u003ctd style=\"width: 47.2234%;\"\u003e0° to 40°C (14° to 104°F)\u003c\/td\u003e\n\u003c\/tr\u003e\n\u003ctr\u003e\n\u003ctd style=\"width: 47.7766%;\"\u003eTransmitter Power (EIRP)\u003c\/td\u003e\n\u003ctd style=\"width: 47.2234%;\"\u003e2.4 GHz:\u003cbr\u003eFCC: ≤26 dBm\u003cbr\u003eCE: ≤20 dBm\u003cbr\u003eSRRC: ≤20 dBm\u003cbr\u003eMIC: ≤20 dBm\u003cbr\u003e5.8 GHz:\u003cbr\u003eFCC: ≤26 dBm\u003cbr\u003eCE: ≤14 dBm\u003cbr\u003eSRRC: ≤26 dBm\u003c\/td\u003e\n\u003c\/tr\u003e\n\u003c\/tbody\u003e\n\u003c\/table\u003e\n\u003cp\u003e\u003cbr\u003e\u003c\/p\u003e\n\u003ch3 class=\"group-list-title\"\u003eCharger\u003c\/h3\u003e\n\u003ctable width=\"100%\"\u003e\n\u003ctbody\u003e\n\u003ctr\u003e\n\u003ctd style=\"width: 49.888%;\"\u003e Charging Input\u003c\/td\u003e\n\u003ctd style=\"width: 46.8175%;\"\u003e100-240V, 50\/60 Hz, 1.3 A\u003c\/td\u003e\n\u003c\/tr\u003e\n\u003ctr\u003e\n\u003ctd style=\"width: 49.888%;\"\u003eCharging Output\u003c\/td\u003e\n\u003ctd style=\"width: 46.8175%;\"\u003eCharging Port: 13.2 V⎓2.82 A\u003cbr\u003eUSB Port: 5 V⎓2 A\u003c\/td\u003e\n\u003c\/tr\u003e\n\u003ctr\u003e\n\u003ctd style=\"width: 49.888%;\"\u003eVoltage\u003c\/td\u003e\n\u003ctd style=\"width: 46.8175%;\"\u003e13.2 V\u003c\/td\u003e\n\u003c\/tr\u003e\n\u003ctr\u003e\n\u003ctd style=\"width: 49.888%;\"\u003eRated Power\u003c\/td\u003e\n\u003ctd style=\"width: 46.8175%;\"\u003e38 W\u003c\/td\u003e\n\u003c\/tr\u003e\n\u003c\/tbody\u003e\n\u003c\/table\u003e\n\u003cp\u003e\u003cbr\u003e\u003c\/p\u003e\n\u003cdiv\u003e\n\u003cul style=\"text-align: center;\"\u003e\u003c\/ul\u003e\n\u003c\/div\u003e\n\u003cstyle\u003e\u003c!--\n.embed-container { position: relative; padding-bottom: 56.25%; height: 0; overflow: hidden; max-width: 100%; } .embed-container iframe, .embed-container object, .embed-container embed { position: absolute; top: 0; left: 0; width: 100%; height: 100%; }\n--\u003e\u003c\/style\u003e\n\u003c\/div\u003e","published_at":"2022-10-20T06:13:57-04:00","created_at":"2022-10-02T06:34:30-04:00","vendor":"DJI","type":"Drone","tags":["best drone","DJI Drones","DJI Mavic Air 2","drone","drone camera","drone dji","drone with camera","FocusTrack","HDR","mini drone","無人機","無人機套裝","航拍機","遙控航拍機","飛行無人機","高清航拍機"],"price":97800,"price_min":97800,"price_max":97800,"available":true,"price_varies":false,"compare_at_price":null,"compare_at_price_min":0,"compare_at_price_max":0,"compare_at_price_varies":false,"variants":[{"id":39869991747659,"title":"Default Title","option1":"Default Title","option2":null,"option3":null,"sku":"DJI-AIR-2S","requires_shipping":true,"taxable":true,"featured_image":null,"available":true,"name":"DJI Mavic Air 2S - 4 Directions of Obstacle Sensing Drone with 3-Axis Gimbal Camera | 5.4K Video | 1-Inch Sensor | MasterShots","public_title":null,"options":["Default Title"],"price":97800,"weight":4000,"compare_at_price":null,"inventory_management":"shopify","barcode":"","requires_selling_plan":false,"selling_plan_allocations":[]}],"images":["\/\/www.stream-sourcing.com\/cdn\/shop\/products\/DJI-Mavic-Air-2S-Fly-More-Combo_StreamSource_7454d458-c258-4035-9678-bd6f657f6772.jpg?v=1664706876","\/\/www.stream-sourcing.com\/cdn\/shop\/products\/DJI-Mavic-Air-2S-Fly-More-Combo_3_1_StreamSource2_a9eecce2-74f6-4bc1-8da2-a5945c19a54b.jpg?v=1664706877","\/\/www.stream-sourcing.com\/cdn\/shop\/products\/DJI-Mavic-Air-2S-Fly-More-Combo_4_1_StreamSource4_8e3f9619-9040-4888-b00c-fad2e25f5577.jpg?v=1664706877","\/\/www.stream-sourcing.com\/cdn\/shop\/products\/DJI-Mavic-Air-2S-Fly-More-Combo_StreamSource5_0e8ad2cc-6117-42a2-b8bf-64e3376bb619.jpg?v=1664706877","\/\/www.stream-sourcing.com\/cdn\/shop\/products\/DJI-Mavic-Air-2S-Fly-More-Combo_StreamSource6_d4456b92-6f7a-41bf-b1d0-e1adbb3e8cdd.jpg?v=1664706877"],"featured_image":"\/\/www.stream-sourcing.com\/cdn\/shop\/products\/DJI-Mavic-Air-2S-Fly-More-Combo_StreamSource_7454d458-c258-4035-9678-bd6f657f6772.jpg?v=1664706876","options":["Title"],"media":[{"alt":"DJI-Mavic-Air-2S-Fly-More-Combo_StreamSource","id":21590625648715,"position":1,"preview_image":{"aspect_ratio":1.762,"height":681,"width":1200,"src":"\/\/www.stream-sourcing.com\/cdn\/shop\/products\/DJI-Mavic-Air-2S-Fly-More-Combo_StreamSource_7454d458-c258-4035-9678-bd6f657f6772.jpg?v=1664706876"},"aspect_ratio":1.762,"height":681,"media_type":"image","src":"\/\/www.stream-sourcing.com\/cdn\/shop\/products\/DJI-Mavic-Air-2S-Fly-More-Combo_StreamSource_7454d458-c258-4035-9678-bd6f657f6772.jpg?v=1664706876","width":1200},{"alt":"DJI-Mavic-Air-2S-Fly-More-Combo_StreamSource","id":21590625714251,"position":2,"preview_image":{"aspect_ratio":1.762,"height":681,"width":1200,"src":"\/\/www.stream-sourcing.com\/cdn\/shop\/products\/DJI-Mavic-Air-2S-Fly-More-Combo_3_1_StreamSource2_a9eecce2-74f6-4bc1-8da2-a5945c19a54b.jpg?v=1664706877"},"aspect_ratio":1.762,"height":681,"media_type":"image","src":"\/\/www.stream-sourcing.com\/cdn\/shop\/products\/DJI-Mavic-Air-2S-Fly-More-Combo_3_1_StreamSource2_a9eecce2-74f6-4bc1-8da2-a5945c19a54b.jpg?v=1664706877","width":1200},{"alt":"DJI-Mavic-Air-2S-Fly-More-Combo_StreamSource","id":21590625747019,"position":3,"preview_image":{"aspect_ratio":1.762,"height":681,"width":1200,"src":"\/\/www.stream-sourcing.com\/cdn\/shop\/products\/DJI-Mavic-Air-2S-Fly-More-Combo_4_1_StreamSource4_8e3f9619-9040-4888-b00c-fad2e25f5577.jpg?v=1664706877"},"aspect_ratio":1.762,"height":681,"media_type":"image","src":"\/\/www.stream-sourcing.com\/cdn\/shop\/products\/DJI-Mavic-Air-2S-Fly-More-Combo_4_1_StreamSource4_8e3f9619-9040-4888-b00c-fad2e25f5577.jpg?v=1664706877","width":1200},{"alt":"DJI-Mavic-Air-2S-Fly-More-Combo_StreamSource","id":21590625779787,"position":4,"preview_image":{"aspect_ratio":1.762,"height":681,"width":1200,"src":"\/\/www.stream-sourcing.com\/cdn\/shop\/products\/DJI-Mavic-Air-2S-Fly-More-Combo_StreamSource5_0e8ad2cc-6117-42a2-b8bf-64e3376bb619.jpg?v=1664706877"},"aspect_ratio":1.762,"height":681,"media_type":"image","src":"\/\/www.stream-sourcing.com\/cdn\/shop\/products\/DJI-Mavic-Air-2S-Fly-More-Combo_StreamSource5_0e8ad2cc-6117-42a2-b8bf-64e3376bb619.jpg?v=1664706877","width":1200},{"alt":"DJI-Mavic-Air-2S-Fly-More-Combo_StreamSource","id":21590625812555,"position":5,"preview_image":{"aspect_ratio":1.762,"height":681,"width":1200,"src":"\/\/www.stream-sourcing.com\/cdn\/shop\/products\/DJI-Mavic-Air-2S-Fly-More-Combo_StreamSource6_d4456b92-6f7a-41bf-b1d0-e1adbb3e8cdd.jpg?v=1664706877"},"aspect_ratio":1.762,"height":681,"media_type":"image","src":"\/\/www.stream-sourcing.com\/cdn\/shop\/products\/DJI-Mavic-Air-2S-Fly-More-Combo_StreamSource6_d4456b92-6f7a-41bf-b1d0-e1adbb3e8cdd.jpg?v=1664706877","width":1200}],"requires_selling_plan":false,"selling_plan_groups":[],"content":"\u003ch1 style=\"text-align: center;\"\u003e\u003cstrong\u003eDJI Mavic Air 2S\u003c\/strong\u003e\u003c\/h1\u003e\u003cdiv class=\"desc\"\u003e\n\u003ch2 style=\"text-align: center;\"\u003eDJI Air 2S is the ultimate drone for creators on the move, with a 1-inch CMOS sensor, powerful autonomous functions, and a compact body weighing less than 600 g. \u003c\/h2\u003e\n\u003cstyle\u003e\u003c!--\n.embed-container { position: relative; padding-bottom: 56.25%; height: 0; overflow: hidden; max-width: 100%; } .embed-container iframe, .embed-container object, .embed-container embed { position: absolute; top: 0; left: 0; width: 100%; height: 100%; }\n--\u003e\u003c\/style\u003e\n\u003cdiv class=\"embed-container\" style=\"text-align: center;\"\u003e\u003ciframe src=\"https:\/\/www.youtube.com\/embed\/NJ3Z1hSOoMc\" frameborder=\"0\" allowfullscreen=\"\"\u003e\u003c\/iframe\u003e\u003c\/div\u003e\n\u003cdiv style=\"text-align: center;\"\u003e \u003c\/div\u003e\n\u003ch3 style=\"text-align: center;\"\u003e\u003cspan style=\"font-weight: 400;\"\u003eTake this all-in-one aerial powerhouse along anywhere to experience and record your world in stunning detail.\u003c\/span\u003e\u003c\/h3\u003e\n\u003cp\u003e \u003c\/p\u003e\n\u003ch2 style=\"text-align: left;\"\u003e\n\u003cstrong\u003eDifference Between DJI Mavic Air 2S Fly More Combo and DJI Mavic Air 2 Fly More Combo:\u003c\/strong\u003e \u003c\/h2\u003e\n\u003cp\u003e \u003c\/p\u003e\n\u003ch3 style=\"text-align: center;\"\u003e\u003cspan style=\"color: #ff8000;\"\u003e\u003cb\u003eUpgrades\u003c\/b\u003e\u003c\/span\u003e\u003c\/h3\u003e\n\u003cdiv\u003eUpgrades include a 1-inch CMOS sensor, four-antenna low-latency transmission, APAS 4.0, added upward-facing dual-vision sensors, and MasterShots. The camera performance, intelligent features, obstacle sensing system, and transmission system have all improved significantly. \u003c\/div\u003e\n\u003ch2 style=\"text-align: center;\"\u003e\u003cstrong\u003e\u003c\/strong\u003e\u003c\/h2\u003e\n\u003cp\u003e \u003c\/p\u003e\n\u003ch2 style=\"text-align: center;\"\u003e\u003cstrong\u003eHighlights and Features\u003c\/strong\u003e\u003c\/h2\u003e\n\u003ctable data-mce-fragment=\"1\"\u003e\n\u003ctbody data-mce-fragment=\"1\"\u003e\n\u003ctr data-mce-fragment=\"1\"\u003e\n\u003ctd width=\"184\" data-mce-fragment=\"1\"\u003e1-inch CMOS Sensor\u003c\/td\u003e\n\u003ctd width=\"184\" data-mce-fragment=\"1\"\u003eMasterShots\u003c\/td\u003e\n\u003ctd width=\"184\" data-mce-fragment=\"1\"\u003e5.4K Video\u003c\/td\u003e\n\u003c\/tr\u003e\n\u003ctr data-mce-fragment=\"1\"\u003e\n\u003ctd width=\"184\" data-mce-fragment=\"1\"\u003e12km FHD Transmission\u003cspan data-mce-fragment=\"1\"\u003e \u003c\/span\u003e\u003csup data-mce-fragment=\"1\"\u003e[1]\u003c\/sup\u003e\n\u003c\/td\u003e\n\u003ctd width=\"184\" data-mce-fragment=\"1\"\u003eObstacle Sensing in 4 Directions\u003c\/td\u003e\n\u003ctd width=\"184\" data-mce-fragment=\"1\"\u003eADS-B\u003c\/td\u003e\n\u003c\/tr\u003e\n\u003c\/tbody\u003e\n\u003c\/table\u003e\n\u003cbr\u003e\n\u003cdiv style=\"text-align: start;\"\u003e\u003cimg style=\"margin-right: auto; float: none; display: block; margin-left: auto;\" src=\"https:\/\/cdn.shopify.com\/s\/files\/1\/2532\/7020\/files\/Screenshot_2021-08-06_183943.png?v=1628246675\" alt=\"dji-mavic-air-2S-fly-more-combo-drone-content-feature-all\"\u003e\u003c\/div\u003e\n\u003cp\u003e \u003c\/p\u003e\n\u003ch3 style=\"text-align: center;\"\u003e\u003cspan style=\"color: #ff8000;\"\u003e\u003cb\u003e\u003c\/b\u003e\u003c\/span\u003e\u003c\/h3\u003e\n\u003cdiv style=\"text-align: center;\"\u003e\u003c\/div\u003e\n\u003cdiv style=\"text-align: center;\"\u003e\u003c\/div\u003e\n\u003cdiv style=\"text-align: center;\"\u003e\u003c\/div\u003e\n\u003cdiv style=\"text-align: center;\"\u003e\n\u003cp\u003e \u003c\/p\u003e\n\u003ch3\u003e\u003cspan style=\"color: #ff8000;\"\u003e\u003cb\u003eIncredible Image System\u003c\/b\u003e\u003c\/span\u003e\u003c\/h3\u003e\n\u003cdiv style=\"text-align: center;\"\u003e\u003cb\u003eBig World, Big Sensor\u003c\/b\u003e\u003c\/div\u003e\n\u003cdiv style=\"text-align: center;\"\u003e\u003cb\u003e\u003c\/b\u003e\u003c\/div\u003e\n\u003c\/div\u003e\n\u003cdiv style=\"text-align: center;\"\u003e\u003cspan\u003eEquipped with a 1-inch CMOS image sensor and large 2.4μm pixels, DJI Air 2S is capable of 5.4K\/30fps and 4K\/60fps video. Capture any moment with the rich clarity and authentic color tones it deserves.\u003c\/span\u003e\u003c\/div\u003e\n\u003cdiv style=\"text-align: center;\"\u003e\u003cspan\u003e\u003cimg src=\"https:\/\/cdn.shopify.com\/s\/files\/1\/2532\/7020\/files\/DJI_Mavic_Air_2S_Fly_More_Combo_8.jpg?v=1628248569\" style=\"float: none;\" alt=\"dji-mavic-air-2S-fly-more-combo-drone-content-feature-Good-Image-System\"\u003e\u003c\/span\u003e\u003c\/div\u003e\n\u003cdiv style=\"text-align: center;\"\u003e\u003cspan\u003e\u003c\/span\u003e\u003c\/div\u003e\n\u003cdiv style=\"text-align: center;\"\u003e\u003cspan\u003e\u003c\/span\u003e\u003c\/div\u003e\n\u003cdiv style=\"text-align: center;\"\u003e\u003cspan\u003e\u003c\/span\u003e\u003c\/div\u003e\n\u003ch3 style=\"text-align: center;\"\u003e\u003cspan style=\"color: #ff8000;\"\u003e\u003cb\u003e\u003c\/b\u003e\u003c\/span\u003e\u003c\/h3\u003e\n\u003ch3 style=\"text-align: center;\"\u003e\u003cspan style=\"color: #ff8000;\"\u003e\u003cb\u003e\u003c\/b\u003e\u003c\/span\u003e\u003c\/h3\u003e\n\u003ch3 style=\"text-align: center;\"\u003e\u003cspan style=\"color: #ff8000;\"\u003eTurn On the Night\u003c\/span\u003e\u003c\/h3\u003e\n\u003cdiv style=\"text-align: center;\"\u003e\u003cspan style=\"font-weight: 400;\"\u003e\u003cspan data-mce-fragment=\"1\"\u003eCapture the allure of the world, even as it darkens. Thanks to a high dynamic range, high resolution, and accurate color reproduction, even low-light scenes are sharp and vibrant.\u003c\/span\u003e\u003c\/span\u003e\u003c\/div\u003e\n\u003cdiv style=\"text-align: center;\"\u003e\u003cimg style=\"float: none;\" src=\"https:\/\/cdn.shopify.com\/s\/files\/1\/2532\/7020\/files\/DJI_Mavic_Air_2S_Fly_More_Combo_9.jpg?v=1628573124\" alt=\"dji-mavic-air-2S-fly-more-combo-drone-content-feature-Turn-On-the-Night\"\u003e\u003c\/div\u003e\n\u003ch3 style=\"text-align: center;\"\u003e\u003cspan style=\"color: #ff8000;\"\u003e\u003cb\u003e\u003c\/b\u003e\u003c\/span\u003e\u003c\/h3\u003e\n\u003ch3 style=\"text-align: center;\"\u003e\u003cspan style=\"color: #ff8000;\"\u003e\u003cb\u003e\u003cspan data-mce-fragment=\"1\"\u003eOne billion colors\u003c\/span\u003e\u003c\/b\u003e\u003c\/span\u003e\u003c\/h3\u003e\n\u003cdiv style=\"text-align: center;\"\u003e\u003cspan style=\"font-weight: 400;\"\u003e\u003cspan data-mce-fragment=\"1\"\u003eCaptured by the 10-bit Dlog-M color profile of DJI Air 2S let you fully immerse yourself in all the hues of your environment.\u003c\/span\u003e\u003c\/span\u003e\u003c\/div\u003e\n\u003cdiv style=\"text-align: center;\"\u003e\u003cimg style=\"float: none;\" src=\"https:\/\/cdn.shopify.com\/s\/files\/1\/2532\/7020\/files\/DJI_Mavic_Air_2S_Fly_More_Combo_10.jpg?v=1628573285\" alt=\"dji-mavic-air-2S-fly-more-combo-drone-content-feature-One-billion-colors\"\u003e\u003c\/div\u003e\n\u003ch3 style=\"text-align: center;\"\u003e\u003cspan style=\"color: #ff8000;\"\u003e\u003cb\u003e\u003c\/b\u003e\u003c\/span\u003e\u003c\/h3\u003e\n\u003ctable width=\"100%\"\u003e\n\u003ctbody\u003e\n\u003ctr\u003e\n\u003ctd style=\"width: 47.3093%;\"\u003e\n\u003ch3 data-mce-fragment=\"1\"\u003e\u003cspan style=\"color: #ff8000;\" data-mce-fragment=\"1\"\u003e\u003cb data-mce-fragment=\"1\"\u003eShoot RAW\u003c\/b\u003e\u003c\/span\u003e\u003c\/h3\u003e\n\u003cp style=\"text-align: left;\"\u003e\u003cspan\u003eFormat photos with a dynamic \u003c\/span\u003e\u003cspan style=\"font-weight: 400;\" data-mce-fragment=\"1\" data-mce-style=\"font-weight: 400;\"\u003erange of up to 12.6 stops to\u003c\/span\u003e\u003cspan style=\"font-weight: 400;\" data-mce-fragment=\"1\" data-mce-style=\"font-weight: 400;\"\u003e capture more visual information in every scene, even when lighting conditions are bad or complex. This provides more flexibility in post-processing, giving creators more possibilities to get the look they want. \u003c\/span\u003e\u003c\/p\u003e\n\u003c\/td\u003e\n\u003ctd style=\"width: 47.6907%;\"\u003e\n\u003cdiv style=\"text-align: center;\"\u003e\u003cimg src=\"https:\/\/cdn.shopify.com\/s\/files\/1\/2532\/7020\/files\/DJI-Mavic-Air-2S-Fly-More-Combo_600x600.jpg?v=1628577003\" alt=\"dji-mavic-air-2S-fly-more-combo-drone-content-feature-all\" style=\"float: none;\" width=\"600x600\" height=\"600x600\"\u003e\u003c\/div\u003e\n\u003c\/td\u003e\n\u003c\/tr\u003e\n\u003ctr\u003e\n\u003ctd style=\"width: 47.3093%;\"\u003e\n\u003cdiv style=\"text-align: center;\" data-mce-fragment=\"1\" data-mce-style=\"text-align: center;\"\u003e\u003cimg style=\"float: none;\" alt=\"dji-mavic-air-2S-fly-more-combo-drone-content-feature-Shoot-RAW\" src=\"https:\/\/cdn.shopify.com\/s\/files\/1\/2532\/7020\/files\/3b0718d6123b5e2827b85292dc6322fa_600x600.jpg?v=1628577485\" width=\"600x600\" height=\"600x600\" data-mce-fragment=\"1\" data-mce-src=\"https:\/\/cdn.shopify.com\/s\/files\/1\/2532\/7020\/files\/3b0718d6123b5e2827b85292dc6322fa_600x600.jpg?v=1628577485\" data-mce-style=\"float: none;\"\u003e\u003c\/div\u003e\n\u003ch3 style=\"text-align: center;\"\u003e\n\u003cspan style=\"color: #ff8000;\"\u003e\u003cb\u003e\u003c\/b\u003e\u003c\/span\u003e\u003cbr\u003e\n\u003c\/h3\u003e\n\u003c\/td\u003e\n\u003ctd style=\"width: 47.6907%;\"\u003e\n\u003ch3 style=\"text-align: right;\"\u003e\u003cspan style=\"color: #ff8000;\"\u003e\u003cb\u003eIntelligent HDR technology\u003c\/b\u003e\u003c\/span\u003e\u003c\/h3\u003e\n\u003cp style=\"text-align: right;\"\u003e\u003cspan\u003eMerges multiple shots automatically, increasing the dynamic range of images without the need for post-processing. That means more nuanced details in both the highlights and shadows for richer images with greater depth.\u003c\/span\u003e\u003c\/p\u003e\n\u003c\/td\u003e\n\u003c\/tr\u003e\n\u003c\/tbody\u003e\n\u003c\/table\u003e\n\u003ch3 style=\"text-align: center;\"\u003e\u003cspan style=\"color: #ff8000;\"\u003e\u003cb\u003e\u003cspan data-mce-fragment=\"1\"\u003e\u003c\/span\u003e\u003c\/b\u003e\u003c\/span\u003e\u003c\/h3\u003e\n\u003ch3 style=\"text-align: center;\"\u003e\u003cspan style=\"color: #ff8000;\"\u003e\u003cb\u003e\u003cspan data-mce-fragment=\"1\"\u003e\u003c\/span\u003e\u003c\/b\u003e\u003c\/span\u003e\u003c\/h3\u003e\n\u003ch3 style=\"text-align: center;\"\u003e\u003cspan style=\"color: #ff8000;\"\u003e\u003cb\u003e\u003cspan data-mce-fragment=\"1\"\u003e\u003c\/span\u003e\u003c\/b\u003e\u003c\/span\u003e\u003c\/h3\u003e\n\u003ch3 style=\"text-align: center;\"\u003e\u003cspan style=\"font-weight: 400;\"\u003e\u003cspan data-mce-fragment=\"1\"\u003e\u003cbr\u003e\u003c\/span\u003e\u003c\/span\u003e\u003c\/h3\u003e\n\u003cdiv style=\"text-align: center;\"\u003e\n\u003ch3 style=\"text-align: center;\"\u003e\u003cspan style=\"color: #ff8000;\"\u003eHyperlapse and Panorama\u003c\/span\u003e\u003c\/h3\u003e\n\u003c\/div\u003e\n\u003cdiv style=\"text-align: center;\"\u003e\u003cspan style=\"font-weight: 400;\"\u003e\u003cspan data-mce-fragment=\"1\"\u003eSpeed up time and movement with a single tap by creating a striking hyperlapse. You can also capture larger, more detailed shots of your surroundings with panorama.\u003c\/span\u003e\u003c\/span\u003e\u003c\/div\u003e\n\u003cdiv style=\"text-align: center;\"\u003e\u003cimg style=\"float: none;\" src=\"https:\/\/cdn.shopify.com\/s\/files\/1\/2532\/7020\/files\/DJI_Mavic_Air_2S_Fly_More_Combo_12.jpg?v=1628575937\" alt=\"dji-mavic-air-2S-fly-more-combo-drone-content-feature-Hyperlapse-and-Panorama\"\u003e\u003c\/div\u003e\n\u003ch3 style=\"text-align: center;\"\u003e\u003cspan style=\"color: #ff8000;\"\u003e\u003cb\u003e\u003c\/b\u003e\u003c\/span\u003e\u003c\/h3\u003e\n\u003ch2 class=\"text style__eyebrow___2tBWn\" style=\"text-align: center;\"\u003e\u003cspan style=\"color: #ff8000;\"\u003eSmart features, perfect shots\u003c\/span\u003e\u003c\/h2\u003e\n\u003ch3 style=\"text-align: center;\"\u003e\u003cspan style=\"color: #ff8000;\"\u003e\u003cb\u003e\u003c\/b\u003e\u003c\/span\u003e\u003c\/h3\u003e\n\u003ch3 style=\"text-align: center;\"\u003e\u003cspan style=\"color: #ff8000;\"\u003e\u003cb\u003eIntroducing Mastershots\u003c\/b\u003e\u003c\/span\u003e\u003c\/h3\u003e\n\u003cdiv style=\"text-align: center;\"\u003e\u003cspan style=\"font-weight: 400;\"\u003e\u003cspan data-mce-fragment=\"1\"\u003eThe next evolution of QuickShots, MasterShots is an advanced intelligent feature that gives users the best shots in any location with just a tap. Simply select your subject, and the drone will film while executing ten different maneuvers in sequence, keeping your subject center-frame and generating a short cinematic video afterward.\u003c\/span\u003e\u003c\/span\u003e\u003c\/div\u003e\n\u003cdiv style=\"text-align: center;\"\u003e\u003cspan style=\"font-weight: 400;\"\u003e\u003cspan data-mce-fragment=\"1\"\u003e\u003cimg src=\"https:\/\/cdn.shopify.com\/s\/files\/1\/2532\/7020\/files\/DJI_Mavic_Air_2S_Fly_More_Combo_13.jpg?v=1628578139\" style=\"float: none;\" alt=\"dji-mavic-air-2S-fly-more-combo-drone-content-feature-Autonomous-Functions-Matershots\"\u003e\u003c\/span\u003e\u003c\/span\u003e\u003c\/div\u003e\n\u003cdiv style=\"text-align: center;\"\u003e\u003cb\u003e\u003cspan style=\"color: #ff8000;\"\u003e\u003c\/span\u003e\u003c\/b\u003e\u003c\/div\u003e\n\u003cdiv style=\"text-align: center;\"\u003e\u003cb\u003e\u003cspan style=\"color: #ff8000;\"\u003e\u003c\/span\u003e\u003c\/b\u003e\u003c\/div\u003e\n\u003cdiv style=\"text-align: center;\"\u003e\u003cb\u003e\u003cspan style=\"color: #ff8000;\"\u003e\u003c\/span\u003e\u003c\/b\u003e\u003c\/div\u003e\n\u003cdiv style=\"text-align: center;\"\u003e\u003cb\u003e\u003cspan style=\"color: #ff8000;\"\u003e\u003c\/span\u003e\u003c\/b\u003e\u003c\/div\u003e\n\u003cdiv style=\"text-align: center;\"\u003e\n\u003cdiv\u003e\u003cspan style=\"color: #ff8000;\"\u003e\u003cb\u003e\u003c\/b\u003e\u003c\/span\u003e\u003c\/div\u003e\n\u003cdiv\u003e\u003cspan style=\"color: #ff8000;\"\u003e\u003cb\u003e\u003c\/b\u003e\u003c\/span\u003e\u003c\/div\u003e\n\u003cdiv\u003e\u003cspan style=\"color: #ff8000;\"\u003e\u003cb\u003eThe Center of Attention \u003c\/b\u003e\u003c\/span\u003e\u003c\/div\u003e\n\u003cdiv\u003e\n\u003cb\u003e\u003cspan\u003e\u003c\/span\u003e\u003c\/b\u003e\u003cbr\u003e\n\u003c\/div\u003e\n\u003cdiv\u003e\u003cspan\u003eFocusTrack features Spotlight 2.0, ActiveTrack 4.0, and Point of Interest 3.0, making it a breeze for DJI Air 2S to follow or circle your subject.\u003c\/span\u003e\u003c\/div\u003e\n\u003cdiv style=\"text-align: center;\"\u003e\u003cbr\u003e\u003c\/div\u003e\n\u003cdiv style=\"text-align: center;\"\u003e\u003c\/div\u003e\n\u003c\/div\u003e\n\u003cdiv style=\"text-align: center;\"\u003e\n\u003ctable width=\"100%\"\u003e\n\u003ctbody\u003e\n\u003ctr\u003e\n\u003ctd style=\"width: 31%; text-align: center;\"\u003e \u003cstrong\u003e\u003cspan style=\"color: #ff8000;\" data-mce-fragment=\"1\"\u003eSpotlight 2.0 \u003c\/span\u003e\u003c\/strong\u003e\n\u003c\/td\u003e\n\u003ctd style=\"width: 31.7106%;\"\u003e\n\u003cdiv data-ga-label=\"all-1-tab-button\" class=\"style__tab-item___1yKLp\"\u003e\n\u003cdiv style=\"text-align: center;\"\u003e\u003cstrong\u003e\u003cspan style=\"color: #ff8000;\"\u003eActiveTrack 4.0\u003c\/span\u003e\u003c\/strong\u003e\u003c\/div\u003e\n\u003c\/div\u003e\n\u003c\/td\u003e\n\u003ctd style=\"width: 31.2894%; text-align: center;\"\u003e\u003cstrong\u003e\u003cspan style=\"color: #ff8000;\"\u003ePoint of Interest 3.0\u003c\/span\u003e\u003c\/strong\u003e\u003c\/td\u003e\n\u003c\/tr\u003e\n\u003ctr\u003e\n\u003ctd style=\"width: 31%;\"\u003e\n\u003cp\u003e\u003cspan data-mce-fragment=\"1\"\u003eFollow your subject smoothly while autonomously avoiding obstacles. Even if the subject is momentarily lost, you can quickly resume tracking during flight.\u003c\/span\u003e\u003c\/p\u003e\n\u003cp\u003e\u003cspan data-mce-fragment=\"1\"\u003e\u003cimg src=\"https:\/\/cdn.shopify.com\/s\/files\/1\/2532\/7020\/files\/DJI_Mavic_Air_2S_Fly_More_Combo_14_480x480.jpg?v=1628578319\" alt=\"dji-mavic-air-2S-fly-more-combo-drone-content-feature-The-Center-of-Aattention-Spotlight-2.0\" width=\"480x480\" height=\"480x480\" style=\"float: none;\" data-mce-fragment=\"1\" data-mce-src=\"https:\/\/cdn.shopify.com\/s\/files\/1\/2532\/7020\/files\/DJI_Mavic_Air_2S_Fly_More_Combo_14_480x480.jpg?v=1628578319\"\u003e\u003c\/span\u003e\u003c\/p\u003e\n\u003cdiv\u003e\u003cspan style=\"color: #ff8000;\"\u003e\u003cb\u003e\u003c\/b\u003e\u003c\/span\u003e\u003c\/div\u003e\n\u003c\/td\u003e\n\u003ctd style=\"width: 31.7106%;\"\u003e\n\u003cp\u003e\u003cspan\u003eFollow your subject smoothly while autonomously avoiding obstacles. Even if the subject is momentarily lost, you can quickly resume tracking during flight.\u003c\/span\u003e\u003c\/p\u003e\n\u003cp\u003e\u003cimg alt=\"dji-mavic-air-2S-fly-more-combo-drone-content-feature-The-Center-of-Aattention-ActiveTrack-4.0\" src=\"https:\/\/cdn.shopify.com\/s\/files\/1\/2532\/7020\/files\/DJI_Mavic_Air_2S_Fly_More_Combo_15_480x480.jpg?v=1628578617\" width=\"480x480\" height=\"480x480\" style=\"float: none;\"\u003e\u003c\/p\u003e\n\u003c\/td\u003e\n\u003ctd style=\"width: 31.2894%;\"\u003e\n\u003cp\u003e\u003cspan\u003eEasily take a perfect circle shot while keeping your subject centered. \u003c\/span\u003e\u003c\/p\u003e\n\u003cp\u003e \u003c\/p\u003e\n\u003cp\u003e \u003cimg alt=\"dji-mavic-air-2S-fly-more-combo-drone-content-feature-The-Center-of-Aattention-Point-of-Interest-3.0\" src=\"https:\/\/cdn.shopify.com\/s\/files\/1\/2532\/7020\/files\/DJI_Mavic_Air_2S_Fly_More_Combo_16_480x480.jpg?v=1628578705\" width=\"480x480\" height=\"480x480\" style=\"float: none;\" data-mce-fragment=\"1\" data-mce-src=\"https:\/\/cdn.shopify.com\/s\/files\/1\/2532\/7020\/files\/DJI_Mavic_Air_2S_Fly_More_Combo_16_480x480.jpg?v=1628578705\"\u003e\u003c\/p\u003e\n\u003c\/td\u003e\n\u003c\/tr\u003e\n\u003c\/tbody\u003e\n\u003c\/table\u003e\n\u003c\/div\u003e\n\u003cdiv style=\"text-align: center;\"\u003e\u003cb\u003e\u003cspan style=\"color: #ff8000;\"\u003e\u003c\/span\u003e\u003c\/b\u003e\u003c\/div\u003e\n\u003cdiv style=\"text-align: center;\"\u003e\u003cb\u003e\u003cspan style=\"color: #ff8000;\"\u003e\u003c\/span\u003e\u003c\/b\u003e\u003c\/div\u003e\n\u003cdiv style=\"text-align: center;\"\u003e \u003c\/div\u003e\n\u003ch3 style=\"text-align: center;\"\u003e\u003cspan style=\"color: #ff8000;\"\u003eFeel the Flight\u003c\/span\u003e\u003c\/h3\u003e\n\u003cdiv style=\"text-align: center;\"\u003e\u003cb\u003eWorry Less, Discover More \u003c\/b\u003e\u003c\/div\u003e\n\u003cdiv style=\"text-align: center;\"\u003e\u003cspan style=\"font-weight: 400;\"\u003e\u003cspan data-mce-fragment=\"1\"\u003eThe combination of portability, safety, and intelligent technology means you can spend more time enjoying flights and less time worrying about them. Take DJI Air 2S into the sky confidently, every flight.\u003c\/span\u003e\u003c\/span\u003e\u003c\/div\u003e\n\u003ch3 style=\"text-align: center;\"\u003e\u003cspan style=\"color: #ff8000;\"\u003e\u003cb\u003e\u003c\/b\u003e\u003c\/span\u003e\u003c\/h3\u003e\n\u003ch3 style=\"text-align: center;\"\u003e\u003cspan style=\"color: #ff8000;\"\u003eEnvironment Sensing\u003c\/span\u003e\u003c\/h3\u003e\n\u003cdiv style=\"text-align: center;\"\u003e\u003cspan style=\"font-weight: 400;\"\u003e\u003cspan data-mce-fragment=\"1\"\u003eDJI Air 2S has the ability to perceive its environment in four directions: up, down, forward, and backward. The algorithms for Advanced Pilot Assistance Systems (APAS 4.0) have been further improved, allowing DJI Air 2S to actively avoid obstacles in more complex scenarios and at high speeds.\u003c\/span\u003e\u003c\/span\u003e\u003c\/div\u003e\n\u003cdiv style=\"text-align: center;\"\u003e\u003cimg style=\"float: none;\" src=\"https:\/\/cdn.shopify.com\/s\/files\/1\/2532\/7020\/files\/DJI_Mavic_Air_2S_Fly_More_Combo_17.jpg?v=1628579395\" alt=\"dji-mavic-air-2S-fly-more-combo-drone-content-feature-Feel-the-Flight-Environment-Sensing\"\u003e\u003c\/div\u003e\n\u003cdiv style=\"text-align: center;\"\u003e \u003c\/div\u003e\n\u003ch3 style=\"text-align: center;\"\u003e\u003cspan style=\"color: #ff8000;\"\u003e\u003cb\u003eO3 Tranmission\u003c\/b\u003e\u003c\/span\u003e\u003c\/h3\u003e\n\u003cdiv style=\"text-align: center;\"\u003e\u003cspan style=\"font-weight: 400;\"\u003e\u003cspan data-mce-fragment=\"1\"\u003eDJI Air 2S features DJI's most advanced O3 (OcuSync 3.0) image transmission technology, delivering an ultra-smooth, clear, and reliable image feed.\u003c\/span\u003e\u003c\/span\u003e\u003c\/div\u003e\n\u003cdiv style=\"text-align: center;\"\u003e\n\u003ctable width=\"100%\"\u003e\n\u003ctbody\u003e\n\u003ctr\u003e\n\u003ctd style=\"text-align: center;\"\u003e \u003cspan style=\"color: #ff8000;\"\u003e\u003cstrong\u003e\u003cspan class=\"style__icon-number___2OOlV\" data-mce-fragment=\"1\"\u003e12\u003c\/span\u003e\u003cspan class=\"style__icon-unit___2hz_k\" data-mce-fragment=\"1\"\u003eKm\u003c\/span\u003e\u003c\/strong\u003e\u003c\/span\u003e\n\u003cp class=\"style__icon-desc___Otw9j\" data-mce-fragment=\"1\"\u003eMax Video Transmission\u003c\/p\u003e\n\u003c\/td\u003e\n\u003ctd\u003e\n\u003cdiv style=\"text-align: center;\" class=\"style__icon-number-container___2cK9V\"\u003e\u003cspan style=\"color: #ff8000;\"\u003e\u003cstrong\u003e\u003cspan class=\"style__icon-number___2OOlV\"\u003e1080\u003c\/span\u003e\u003cspan class=\"style__icon-unit___2hz_k\"\u003ep\u003c\/span\u003e\u003c\/strong\u003e\u003c\/span\u003e\u003c\/div\u003e\n\u003cp style=\"text-align: center;\" class=\"style__icon-desc___Otw9j\"\u003eTransmission\u003c\/p\u003e\n\u003c\/td\u003e\n\u003ctd\u003e\n\u003cdiv style=\"text-align: center;\" class=\"style__icon-number-container___2cK9V\"\u003e\u003cspan style=\"color: #ff8000;\"\u003e\u003cstrong\u003e\u003cspan class=\"style__icon-number___2OOlV\"\u003e4\u003c\/span\u003e\u003cspan class=\"style__icon-unit___2hz_k\"\u003eAntennas\u003c\/span\u003e\u003c\/strong\u003e\u003c\/span\u003e\u003c\/div\u003e\n\u003cp style=\"text-align: center;\" class=\"style__icon-desc___Otw9j\"\u003e2.4\/5.8GHz Dual Frequency\u003c\/p\u003e\n\u003c\/td\u003e\n\u003c\/tr\u003e\n\u003c\/tbody\u003e\n\u003c\/table\u003e\n\u003c\/div\u003e\n\u003cdiv style=\"text-align: center;\"\u003e\u003cspan style=\"font-weight: 400; color: #ffffff;\"\u003e\u003c\/span\u003e\u003c\/div\u003e\n\u003cdiv style=\"text-align: center;\"\u003e\u003cspan style=\"font-weight: 400; color: #ffffff;\"\u003e\u003cimg style=\"float: none;\" src=\"https:\/\/cdn.shopify.com\/s\/files\/1\/2532\/7020\/files\/DJI_Mavic_Air_2S_Fly_More_Combo_18_480x480.jpg?v=1628579621\" alt=\"dji-mavic-air-2S-fly-more-combo-drone-content-feature-O3-Tranmission\" data-mce-fragment=\"1\" data-mce-src=\"https:\/\/cdn.shopify.com\/s\/files\/1\/2532\/7020\/files\/DJI_Mavic_Air_2S_Fly_More_Combo_18_480x480.jpg?v=1628579621\"\u003e.\u003c\/span\u003e\u003c\/div\u003e\n\u003ch3 style=\"text-align: center;\"\u003e\u003cspan style=\"color: #ff8000;\"\u003e\u003cb\u003e\u003c\/b\u003e\u003c\/span\u003e\u003c\/h3\u003e\n\u003ch3 style=\"text-align: center;\"\u003e\u003cspan style=\"color: #ff8000;\"\u003e\u003cb\u003e\u003c\/b\u003e\u003c\/span\u003e\u003c\/h3\u003e\n\u003ch3 style=\"text-align: center;\"\u003e\u003cspan style=\"color: #ff8000;\"\u003e\u003cb\u003eSafer Skies with ADS-B\u003c\/b\u003e\u003c\/span\u003e\u003c\/h3\u003e\n\u003cdiv style=\"text-align: center;\"\u003e\u003cspan style=\"font-weight: 400;\"\u003e\u003cspan data-mce-fragment=\"1\"\u003eDJI Air 2S provides an added layer of airspace safety with the industry-leading AirSense safety system. This receives Automatic Dependent Surveillance-Broadcast (ADS-B) flight location information from airplanes and helicopters in your area that transmit ADS-B signals, displays those aircraft on a map, and provides audio and visual alerts through the DJI Fly app to help you keep the drone out of the way of those aircraft.\u003c\/span\u003e\u003c\/span\u003e\u003c\/div\u003e\n\u003cdiv style=\"text-align: center;\"\u003e\u003cspan style=\"font-weight: 400;\"\u003e\u003cspan data-mce-fragment=\"1\"\u003e\u003cimg src=\"https:\/\/cdn.shopify.com\/s\/files\/1\/2532\/7020\/files\/DJI_Mavic_Air_2S_Fly_More_Combo_19.jpg?v=1628579892\" style=\"float: none;\" alt=\"dji-mavic-air-2S-fly-more-combo-drone-content-feature-Safer-Skies-with-ADS-B\"\u003e\u003c\/span\u003e\u003c\/span\u003e\u003c\/div\u003e\n\u003cdiv style=\"text-align: center;\"\u003e \u003c\/div\u003e\n\u003cdiv style=\"text-align: center;\"\u003e\u003cbr\u003e\u003c\/div\u003e\n\u003ch3 style=\"text-align: center;\"\u003e\u003cspan style=\"color: #ff8000;\"\u003e\u003cb\u003eExpansive Accessories\u003c\/b\u003e\u003c\/span\u003e\u003c\/h3\u003e\n\u003ch3 style=\"text-align: center;\"\u003e\u003cb\u003eGet the Most Out Of Air 2S\u003c\/b\u003e\u003c\/h3\u003e\n\u003cdiv style=\"text-align: center;\"\u003e\u003cspan style=\"font-weight: 400;\"\u003e\u003cspan data-mce-fragment=\"1\"\u003eWith a diverse range of accessories, the sky is truly the limit.\u003c\/span\u003e\u003c\/span\u003e\u003c\/div\u003e\n\u003cdiv style=\"text-align: center;\"\u003e\u003cspan style=\"font-weight: 400;\"\u003e\u003cspan data-mce-fragment=\"1\"\u003e\u003c\/span\u003e\u003c\/span\u003e\u003c\/div\u003e\n\u003ch3 style=\"text-align: center;\"\u003e\u003cspan style=\"color: #ff8000;\"\u003e\u003cb\u003e\u003c\/b\u003e\u003c\/span\u003e\u003c\/h3\u003e\n\u003cp\u003e \u003c\/p\u003e\n\u003cp\u003e \u003c\/p\u003e\n\u003ch3 style=\"text-align: center;\"\u003e\u003cspan style=\"color: #ff8000;\"\u003e\u003cb\u003e\u003c\/b\u003e\u003c\/span\u003e\u003c\/h3\u003e\n\u003ch3\u003e\u003cspan\u003e\u003cb\u003e\u003c\/b\u003e\u003c\/span\u003e\u003c\/h3\u003e\n\u003ch3 style=\"text-align: center;\"\u003e\u003cspan style=\"color: #ff8000;\"\u003e\u003cb\u003eDJI Smart Controller\u003c\/b\u003e\u003c\/span\u003e\u003c\/h3\u003e\n\u003cdiv\u003e\u003cspan\u003eThis powerful remote controller features a 5.5-inch 1080p high-brightness display for pure performance. Compatible with the DJI GO 4 and DJI Fly apps, it also supports the installation of third-party apps.\u003c\/span\u003e\u003c\/div\u003e\n\u003cdiv\u003e\u003cimg alt=\"dji-mavic-air-2S-fly-more-combo-drone-content-feature-Expansive-Accessories-Fly-More-Combo-DJI Smart Controller\" src=\"https:\/\/cdn.shopify.com\/s\/files\/1\/2532\/7020\/files\/DJI_Mavic_Air_2S_Fly_More_Combo_22.jpg?v=1628580371\"\u003e\u003c\/div\u003e\n\u003ch3 style=\"text-align: center;\"\u003e\u003cspan style=\"color: #ff8000;\"\u003e\u003cb\u003e\u003c\/b\u003e\u003c\/span\u003e\u003c\/h3\u003e\n\u003ch3 style=\"text-align: center;\"\u003e\u003cspan style=\"color: #ff8000;\"\u003e\u003cb\u003e\u003c\/b\u003e\u003c\/span\u003e\u003c\/h3\u003e\n\u003cdiv style=\"text-align: center;\"\u003e \u003c\/div\u003e\n\u003ch2 style=\"text-align: left;\"\u003e\u003cstrong\u003e\u003c\/strong\u003e\u003c\/h2\u003e\n\u003ch2 style=\"text-align: left;\"\u003e\u003cstrong\u003eSpecification\u003c\/strong\u003e\u003c\/h2\u003e\n\u003cp\u003e \u003c\/p\u003e\n\u003cp\u003e \u003c\/p\u003e\n\u003cp\u003e \u003c\/p\u003e\n\u003ch3 class=\"group-list-title\"\u003eAircraft\u003c\/h3\u003e\n\u003ctable width=\"523\"\u003e\n\u003ctbody\u003e\n\u003ctr style=\"height: 19px;\"\u003e\n\u003ctd style=\"width: 245.562px; height: 19px;\"\u003e Takeoff Weight\u003c\/td\u003e\n\u003ctd style=\"width: 254.438px; height: 19px;\"\u003e595 g\u003c\/td\u003e\n\u003c\/tr\u003e\n\u003ctr style=\"height: 76px;\"\u003e\n\u003ctd style=\"width: 245.562px; height: 76px;\"\u003eDimensions\u003c\/td\u003e\n\u003ctd style=\"width: 254.438px; height: 76px;\"\u003eFolded:\u003cbr\u003e180×97×77 mm (length×width×height)\u003cbr\u003eUnfolded:\u003cbr\u003e183×253×77 mm (length×width×height)\u003c\/td\u003e\n\u003c\/tr\u003e\n\u003ctr style=\"height: 19px;\"\u003e\n\u003ctd style=\"width: 245.562px; height: 19px;\"\u003eDiagonal Length\u003c\/td\u003e\n\u003ctd style=\"width: 254.438px; height: 19px;\"\u003e302 mm\u003c\/td\u003e\n\u003c\/tr\u003e\n\u003ctr style=\"height: 38px;\"\u003e\n\u003ctd style=\"width: 245.562px; height: 38px;\"\u003eMax Ascent Speed\u003c\/td\u003e\n\u003ctd style=\"width: 254.438px; height: 38px;\"\u003e6 m\/s (S Mode)\u003cbr\u003e6 m\/s (N Mode)\u003c\/td\u003e\n\u003c\/tr\u003e\n\u003ctr style=\"height: 52px;\"\u003e\n\u003ctd style=\"width: 245.562px; height: 52px;\"\u003eMax Descent Speed\u003c\/td\u003e\n\u003ctd style=\"width: 254.438px; height: 52px;\"\u003e\n\u003cp\u003e6 m\/s (S Mode)\u003cbr\u003e6 m\/s (N Mode)\u003c\/p\u003e\n\u003c\/td\u003e\n\u003c\/tr\u003e\n\u003ctr style=\"height: 27px;\"\u003e\n\u003ctd style=\"width: 245.562px; height: 27px;\"\u003eMax Service Ceiling Above Sea Level\u003c\/td\u003e\n\u003ctd style=\"width: 254.438px; height: 27px;\"\u003e\n\u003cp\u003e5000 m\u003cbr\u003e\u003c\/p\u003e\n\u003c\/td\u003e\n\u003c\/tr\u003e\n\u003ctr style=\"height: 9px;\"\u003e\n\u003ctd style=\"width: 245.562px; height: 9px;\"\u003eMax Flight Time (no wind)\u003c\/td\u003e\n\u003ctd style=\"width: 254.438px; height: 9px;\"\u003e\n\u003cp\u003e31 minutes\u003c\/p\u003e\n\u003c\/td\u003e\n\u003c\/tr\u003e\n\u003ctr style=\"height: 9px;\"\u003e\n\u003ctd style=\"width: 245.562px; height: 9px;\"\u003eMax Hovering Time (no wind)\u003c\/td\u003e\n\u003ctd style=\"width: 254.438px; height: 9px;\"\u003e\n\u003cp\u003e30 minutes\u003c\/p\u003e\n\u003c\/td\u003e\n\u003c\/tr\u003e\n\u003ctr style=\"height: 9px;\"\u003e\n\u003ctd style=\"width: 245.562px; height: 9px;\"\u003eMax Flight Distance (no wind)\u003c\/td\u003e\n\u003ctd style=\"width: 254.438px; height: 9px;\"\u003e\n\u003cp\u003e18.5 km\u003c\/p\u003e\n\u003c\/td\u003e\n\u003c\/tr\u003e\n\u003ctr style=\"height: 9px;\"\u003e\n\u003ctd style=\"width: 245.562px; height: 9px;\"\u003eMax Flight Speed (near sea level, no wind)\u003c\/td\u003e\n\u003ctd style=\"width: 254.438px; height: 9px;\"\u003e19 m\/s (S Mode)\u003cbr\u003e15 m\/s (N Mode)\u003cbr\u003e5 m\/s (C Mode)\u003c\/td\u003e\n\u003c\/tr\u003e\n\u003ctr style=\"height: 9px;\"\u003e\n\u003ctd style=\"width: 245.562px; height: 9px;\"\u003eMax Wind Speed Resistance\u003c\/td\u003e\n\u003ctd style=\"width: 254.438px; height: 9px;\"\u003e10.7 m\/s\u003c\/td\u003e\n\u003c\/tr\u003e\n\u003ctr style=\"height: 9px;\"\u003e\n\u003ctd style=\"width: 245.562px; height: 9px;\"\u003eMax Tilt Angle\u003c\/td\u003e\n\u003ctd style=\"width: 254.438px; height: 9px;\"\u003e35° (S Mode)\u003cbr\u003eFront: 30°, Back: 20°, Left: 35°, Right: 35° (N Mode)\u003c\/td\u003e\n\u003c\/tr\u003e\n\u003ctr style=\"height: 9px;\"\u003e\n\u003ctd style=\"width: 245.562px; height: 9px;\"\u003eMax Angular Velocity\u003c\/td\u003e\n\u003ctd style=\"width: 254.438px; height: 9px;\"\u003e250°\/s (S Mode)\u003cbr\u003e90°\/s (N Mode)\u003cbr\u003e60°\/s (C Mode)\u003c\/td\u003e\n\u003c\/tr\u003e\n\u003ctr style=\"height: 9px;\"\u003e\n\u003ctd style=\"width: 245.562px; height: 9px;\"\u003eOperating Temperature Range\u003c\/td\u003e\n\u003ctd style=\"width: 254.438px; height: 9px;\"\u003e0° to 40°C (32° to 104°F)\u003c\/td\u003e\n\u003c\/tr\u003e\n\u003ctr style=\"height: 9px;\"\u003e\n\u003ctd style=\"width: 245.562px; height: 9px;\"\u003eOperating Frequency\u003c\/td\u003e\n\u003ctd style=\"width: 254.438px; height: 9px;\"\u003e2.4 GHz\u003cbr\u003e5.8 GHz\u003cbr\u003eTransmission Power (EIRP)\u003cbr\u003e2.4 GHz:\u003cbr\u003eFCC: ≤30 dBm\u003cbr\u003eCE: ≤20 dBm\u003cbr\u003eSRRC: ≤20 dBm\u003cbr\u003eMIC: ≤20 dBm\u003cbr\u003e5.8 GHz:\u003cbr\u003eFCC: ≤30 dBm\u003cbr\u003eCE: ≤14 dBm\u003cbr\u003eSRRC: ≤29 dBm\u003c\/td\u003e\n\u003c\/tr\u003e\n\u003ctr style=\"height: 9px;\"\u003e\n\u003ctd style=\"width: 245.562px; height: 9px;\"\u003eHovering Accuracy Range\u003c\/td\u003e\n\u003ctd style=\"width: 254.438px; height: 9px;\"\u003eVertical:\u003cbr\u003e± 0.1 m (with vision positioning)\u003cbr\u003e± 0.5 m (with GNSS positioning)\u003cbr\u003eHorizontal:\u003cbr\u003e± 0.1 m (with vision positioning)\u003cbr\u003e± 1.5 m (with GNSS positioning)\u003c\/td\u003e\n\u003c\/tr\u003e\n\u003ctr style=\"height: 9px;\"\u003e\n\u003ctd style=\"width: 245.562px; height: 9px;\"\u003ePropellers\u003c\/td\u003e\n\u003ctd style=\"width: 254.438px; height: 9px;\"\u003eQuick release, low noise, folding\u003c\/td\u003e\n\u003c\/tr\u003e\n\u003ctr style=\"height: 9px;\"\u003e\n\u003ctd style=\"width: 245.562px; height: 9px;\"\u003eAircraft Arms\u003c\/td\u003e\n\u003ctd style=\"width: 254.438px; height: 9px;\"\u003eFoldable\u003c\/td\u003e\n\u003c\/tr\u003e\n\u003ctr style=\"height: 9px;\"\u003e\n\u003ctd style=\"width: 245.562px; height: 9px;\"\u003eGNSS\u003c\/td\u003e\n\u003ctd style=\"width: 254.438px; height: 9px;\"\u003eGPS+GLONASS+GALILEO\u003c\/td\u003e\n\u003c\/tr\u003e\n\u003ctr style=\"height: 9px;\"\u003e\n\u003ctd style=\"width: 245.562px; height: 9px;\"\u003eCompass\u003c\/td\u003e\n\u003ctd style=\"width: 254.438px; height: 9px;\"\u003eSingle Compass\u003c\/td\u003e\n\u003c\/tr\u003e\n\u003ctr style=\"height: 9px;\"\u003e\n\u003ctd style=\"width: 245.562px; height: 9px;\"\u003eIMU\u003c\/td\u003e\n\u003ctd style=\"width: 254.438px; height: 9px;\"\u003eSingle IMU\u003c\/td\u003e\n\u003c\/tr\u003e\n\u003ctr style=\"height: 9px;\"\u003e\n\u003ctd style=\"width: 245.562px; height: 9px;\"\u003eInternal Storage\u003c\/td\u003e\n\u003ctd style=\"width: 254.438px; height: 9px;\"\u003e8 GB\u003c\/td\u003e\n\u003c\/tr\u003e\n\u003c\/tbody\u003e\n\u003c\/table\u003e\n\u003cp\u003e\u003cbr\u003e\u003cbr\u003e\u003c\/p\u003e\n\u003ch3 class=\"group-list-title\"\u003eIntelligent Flight Battery\u003c\/h3\u003e\n\u003ctable width=\"100%\"\u003e\n\u003ctbody\u003e\n\u003ctr\u003e\n\u003ctd style=\"width: 46.981%;\"\u003e Capacity\u003c\/td\u003e\n\u003ctd style=\"width: 49.7244%;\"\u003e3500 mAh\u003c\/td\u003e\n\u003c\/tr\u003e\n\u003ctr\u003e\n\u003ctd style=\"width: 46.981%;\"\u003eVoltage\u003c\/td\u003e\n\u003ctd style=\"width: 49.7244%;\"\u003e11.55 V\u003c\/td\u003e\n\u003c\/tr\u003e\n\u003ctr\u003e\n\u003ctd style=\"width: 46.981%;\"\u003eMax Charging Voltage\u003c\/td\u003e\n\u003ctd style=\"width: 49.7244%;\"\u003e13.2 V\u003c\/td\u003e\n\u003c\/tr\u003e\n\u003ctr\u003e\n\u003ctd style=\"width: 46.981%;\"\u003eBattery Type\u003c\/td\u003e\n\u003ctd style=\"width: 49.7244%;\"\u003eLiPo 3S\u003c\/td\u003e\n\u003c\/tr\u003e\n\u003ctr\u003e\n\u003ctd style=\"width: 46.981%;\"\u003eEnergy\u003c\/td\u003e\n\u003ctd style=\"width: 49.7244%;\"\u003e40.42 Wh\u003c\/td\u003e\n\u003c\/tr\u003e\n\u003ctr\u003e\n\u003ctd style=\"width: 46.981%;\"\u003eWeight\u003c\/td\u003e\n\u003ctd style=\"width: 49.7244%;\"\u003e198 g\u003c\/td\u003e\n\u003c\/tr\u003e\n\u003ctr\u003e\n\u003ctd style=\"width: 46.981%;\"\u003eCharging Temperature Range\u003c\/td\u003e\n\u003ctd style=\"width: 49.7244%;\"\u003e5° to 40°C (41° to 104°F)\u003c\/td\u003e\n\u003c\/tr\u003e\n\u003ctr\u003e\n\u003ctd style=\"width: 46.981%;\"\u003eMax Charging Power\u003c\/td\u003e\n\u003ctd style=\"width: 49.7244%;\"\u003e38 W\u003c\/td\u003e\n\u003c\/tr\u003e\n\u003ctr\u003e\n\u003ctd style=\"width: 46.981%;\"\u003eBuilt-in Battery\u003c\/td\u003e\n\u003ctd style=\"width: 49.7244%;\"\u003eN\/A\u003c\/td\u003e\n\u003c\/tr\u003e\n\u003c\/tbody\u003e\n\u003c\/table\u003e\n\u003cp\u003e\u003cbr\u003e\u003c\/p\u003e\n\u003ch3 class=\"group-list-title\"\u003eCamera\u003c\/h3\u003e\n\u003ctable width=\"100%\"\u003e\n\u003ctbody\u003e\n\u003ctr\u003e\n\u003ctd style=\"width: 47.0159%;\"\u003e Sensor\u003c\/td\u003e\n\u003ctd style=\"width: 48.9841%;\"\u003e\n\u003cp\u003e1\" CMOS\u003c\/p\u003e\n\u003cp\u003eEffective Pixels: 20 MP; 2.4μm Pixel Size\u003c\/p\u003e\n\u003c\/td\u003e\n\u003c\/tr\u003e\n\u003ctr\u003e\n\u003ctd style=\"width: 47.0159%;\"\u003eLens\u003c\/td\u003e\n\u003ctd style=\"width: 48.9841%;\"\u003eFOV: 88°\u003cbr\u003e35 mm Format Equivalent: 22 mm\u003cbr\u003eAperture: f\/2.8\u003cbr\u003eShooting Range: 0.6 m to ∞\u003c\/td\u003e\n\u003c\/tr\u003e\n\u003ctr\u003e\n\u003ctd style=\"width: 47.0159%;\"\u003eISO Range\u003c\/td\u003e\n\u003ctd style=\"width: 48.9841%;\"\u003eVideo:\u003cbr\u003e100-3200 (Auto)\u003cbr\u003e100-6400 (Manual)\u003cbr\u003e10-Bit Dlog-M Video:\u003cbr\u003e100-800 (Auto)\u003cbr\u003e100-1600 (Manual)\u003cbr\u003ePhoto:\u003cbr\u003e100-3200 (Auto)\u003cbr\u003e100-12800 (Manual)\u003c\/td\u003e\n\u003c\/tr\u003e\n\u003ctr\u003e\n\u003ctd style=\"width: 47.0159%;\"\u003eStill Image Size\u003c\/td\u003e\n\u003ctd style=\"width: 48.9841%;\"\u003e20 MP\u003cbr\u003e5472×3648 (3:2)\u003cbr\u003e5472×3078 (16:9)\u003c\/td\u003e\n\u003c\/tr\u003e\n\u003ctr\u003e\n\u003ctd style=\"width: 47.0159%;\"\u003eStill Photography Modes\u003c\/td\u003e\n\u003ctd style=\"width: 48.9841%;\"\u003eSingle shot: 20 MP\u003cbr\u003eBurst shooting: 20 MP (continuous burst)\u003cbr\u003eAuto Exposure Bracketing (AEB): 20 MP, 3\/5 bracketed frames at 0.7 EV bias\u003cbr\u003eTimed: 20 MP, 2\/3\/5\/7\/10\/15\/20\/30\/60s\u003cbr\u003eSmartPhoto (including HDR and HyperLight): 20 MP\u003cbr\u003eHDR Panorama:\u003cbr\u003eVertical (3×1): 3328×8000 (width×height)\u003cbr\u003eWide-angle (3×3): 8000×6144 (width×height)\u003cbr\u003e180° (3×7): 8192×3500 (width×height)\u003cbr\u003eSphere (3×8+1): 8192×4096 (width×height)\u003cbr\u003eJPEG\/DNG (RAW)\u003c\/td\u003e\n\u003c\/tr\u003e\n\u003ctr\u003e\n\u003ctd style=\"width: 47.0159%;\"\u003eVideo Resolution\u003c\/td\u003e\n\u003ctd style=\"width: 48.9841%;\"\u003e5.4K: 5472×3078 @ 24\/25\/30 fps\u003cbr\u003e4K Ultra HD: 3840×2160 @ 24\/25\/30\/48\/50\/60 fps\u003cbr\u003e2.7K: 2688x1512 @ 24\/25\/30\/48\/50\/60 fps\u003cbr\u003eFHD: 1920×1080 @ 24\/25\/30\/48\/50\/60\/120 fps\u003cbr\u003eMP4\/MOV (H.264\/MPEG-4 AVC, H.265\/HEVC)\u003c\/td\u003e\n\u003c\/tr\u003e\n\u003ctr\u003e\n\u003ctd style=\"width: 47.0159%;\"\u003eMax Video Bitrate\u003c\/td\u003e\n\u003ctd style=\"width: 48.9841%;\"\u003e150 Mbps\u003c\/td\u003e\n\u003c\/tr\u003e\n\u003ctr\u003e\n\u003ctd style=\"width: 47.0159%;\"\u003eSupported File System\u003c\/td\u003e\n\u003ctd style=\"width: 48.9841%;\"\u003e\n\u003cp\u003eFAT32\/exFAT\u003c\/p\u003e\n\u003cp\u003eSupports a microSD card with a capacity of up to 256 GB.\u003c\/p\u003e\n\u003c\/td\u003e\n\u003c\/tr\u003e\n\u003ctr\u003e\n\u003ctd style=\"width: 47.0159%;\"\u003eDigital Zoom\u003c\/td\u003e\n\u003ctd style=\"width: 48.9841%;\"\u003e\n\u003cp\u003eZoom recording is not available while recording 10-bit videos and 120fps videos.\u003c\/p\u003e\n\u003cp\u003e4K\/30fps:\u003cbr\u003e4x;\u003cbr\u003e2.7K\/60fps:\u003cbr\u003e4x;\u003cbr\u003e2.7K\/30fps:\u003cbr\u003e6x;\u003cbr\u003e1080p\/60fps:\u003cbr\u003e6x;\u003cbr\u003e1080p\/30fps:\u003cbr\u003e8x\u003c\/p\u003e\n\u003c\/td\u003e\n\u003c\/tr\u003e\n\u003c\/tbody\u003e\n\u003c\/table\u003e\n\u003cp\u003e \u003c\/p\u003e\n\u003ch3 class=\"group-list-title\"\u003eGimbal\u003c\/h3\u003e\n\u003ctable width=\"100%\"\u003e\n\u003ctbody\u003e\n\u003ctr\u003e\n\u003ctd style=\"width: 46.8312%;\"\u003e Stabilization\u003c\/td\u003e\n\u003ctd style=\"width: 48.1688%;\"\u003e3-axis (tilt, roll, pan)\u003c\/td\u003e\n\u003c\/tr\u003e\n\u003ctr\u003e\n\u003ctd style=\"width: 46.8312%;\"\u003eMechanical Range\u003c\/td\u003e\n\u003ctd style=\"width: 48.1688%;\"\u003eTilt: -135° to 45°\u003cbr\u003eRoll: -45° to 45°\u003cbr\u003ePan: -100° to 100°\u003c\/td\u003e\n\u003c\/tr\u003e\n\u003ctr\u003e\n\u003ctd style=\"width: 46.8312%;\"\u003ePan Axis\u003c\/td\u003e\n\u003ctd style=\"width: 48.1688%;\"\u003eNot Controllable\u003c\/td\u003e\n\u003c\/tr\u003e\n\u003ctr\u003e\n\u003ctd style=\"width: 46.8312%;\"\u003eControllable Range\u003c\/td\u003e\n\u003ctd style=\"width: 48.1688%;\"\u003eTilt: -90° to 0°(default); -90° to 24° (extended)\u003c\/td\u003e\n\u003c\/tr\u003e\n\u003ctr\u003e\n\u003ctd style=\"width: 46.8312%;\"\u003eMax Controllable Speed (tilt)\u003c\/td\u003e\n\u003ctd style=\"width: 48.1688%;\"\u003e100°\/s\u003c\/td\u003e\n\u003c\/tr\u003e\n\u003ctr\u003e\n\u003ctd style=\"width: 46.8312%;\"\u003eAngular Vibration Range\u003c\/td\u003e\n\u003ctd style=\"width: 48.1688%;\"\u003e±0.01°\u003c\/td\u003e\n\u003c\/tr\u003e\n\u003c\/tbody\u003e\n\u003c\/table\u003e\n\u003cp\u003e\u003cbr\u003e\u003c\/p\u003e\n\u003ch3 class=\"group-list-title\"\u003eSensing System\u003c\/h3\u003e\n\u003ctable width=\"100%\"\u003e\n\u003ctbody\u003e\n\u003ctr\u003e\n\u003ctd style=\"width: 48.1438%;\"\u003e Forward\u003c\/td\u003e\n\u003ctd style=\"width: 48.5617%;\"\u003e\n\u003cp\u003ePrecision Measurement Range: 0.38-23.8 m\u003c\/p\u003e\n\u003cp\u003eEffective Sensing Speed: ≤15 m\/s\u003cbr\u003eField of View (FOV): 72° (horizontal), 58° (vertical)\u003c\/p\u003e\n\u003c\/td\u003e\n\u003c\/tr\u003e\n\u003ctr\u003e\n\u003ctd style=\"width: 48.1438%;\"\u003eBackward\u003c\/td\u003e\n\u003ctd style=\"width: 48.5617%;\"\u003ePrecision Measurement Range: 0.37-23.4 m\u003cbr\u003eEffective Sensing Speed: ≤12 m\/s\u003cbr\u003eField of View (FOV): 57° (horizontal), 44° (vertical)\u003c\/td\u003e\n\u003c\/tr\u003e\n\u003ctr\u003e\n\u003ctd style=\"width: 48.1438%;\"\u003eDownward\u003c\/td\u003e\n\u003ctd style=\"width: 48.5617%;\"\u003eToF Measurement Range: 0.1-8 m\u003cbr\u003eHovering Range: 0.5-30 m\u003cbr\u003eVision Sensor Hovering Range: 0.5-60 m\u003c\/td\u003e\n\u003c\/tr\u003e\n\u003ctr\u003e\n\u003ctd style=\"width: 48.1438%;\"\u003eLeft\/Right\u003c\/td\u003e\n\u003ctd style=\"width: 48.5617%;\"\u003eN\/A\u003c\/td\u003e\n\u003c\/tr\u003e\n\u003ctr\u003e\n\u003ctd style=\"width: 48.1438%;\"\u003eUpward\u003c\/td\u003e\n\u003ctd style=\"width: 48.5617%;\"\u003ePrecision Measurement Range: 0.34-28.6 m\u003cbr\u003eField of View (FOV): 63° (horizontal), 78° (vertical)\u003c\/td\u003e\n\u003c\/tr\u003e\n\u003ctr\u003e\n\u003ctd style=\"width: 48.1438%;\"\u003eDownward Auxiliary Light\u003c\/td\u003e\n\u003ctd style=\"width: 48.5617%;\"\u003eSingle LED\u003c\/td\u003e\n\u003c\/tr\u003e\n\u003c\/tbody\u003e\n\u003c\/table\u003e\n\u003cp\u003e\u003cbr\u003e\u003c\/p\u003e\n\u003ch3 class=\"group-list-title\"\u003eVideo Transmission\u003c\/h3\u003e\n\u003ctable width=\"100%\"\u003e\n\u003ctbody\u003e\n\u003ctr\u003e\n\u003ctd style=\"width: 47.6063%;\"\u003e Transmission System\u003c\/td\u003e\n\u003ctd style=\"width: 47.3937%;\"\u003e\n\u003cp\u003eO3\u003c\/p\u003e\n\u003cp\u003e2.4 GHz\/5.8 GHz Auto-Switching (compatible with OcuSync 2.0)\u003cbr data-mce-fragment=\"1\"\u003e4-antenna 2T4R\u003c\/p\u003e\n\u003c\/td\u003e\n\u003c\/tr\u003e\n\u003ctr\u003e\n\u003ctd style=\"width: 47.6063%;\"\u003eMax Transmission Distance\u003c\/td\u003e\n\u003ctd style=\"width: 47.3937%;\"\u003e12 km (FCC), 8 km (CE)\u003cbr\u003e8 km (SRRC), 8 km (MIC)\u003c\/td\u003e\n\u003c\/tr\u003e\n\u003ctr\u003e\n\u003ctd style=\"width: 47.6063%;\"\u003eLive View Quality\/Latency\u003c\/td\u003e\n\u003ctd style=\"width: 47.3937%;\"\u003eDrone + Remote Controller: 1080p\/30fps 12 Mbps 120 ms\u003cbr\u003eDrone + DJI Smart Controller: 1080p\/30fps 12Mbps 130 ms\u003c\/td\u003e\n\u003c\/tr\u003e\n\u003ctr\u003e\n\u003ctd style=\"width: 47.6063%;\"\u003eMax Transmission Bitrate\u003c\/td\u003e\n\u003ctd style=\"width: 47.3937%;\"\u003e44 Mbps (download bitrate)\u003cbr\u003e16 Mbps (live video bitrate)\u003c\/td\u003e\n\u003c\/tr\u003e\n\u003ctr\u003e\n\u003ctd style=\"width: 47.6063%;\"\u003eOperating Frequency\u003c\/td\u003e\n\u003ctd style=\"width: 47.3937%;\"\u003e2.4 GHz\u003cbr\u003e5.8 GHz\u003c\/td\u003e\n\u003c\/tr\u003e\n\u003c\/tbody\u003e\n\u003c\/table\u003e\n\u003cp\u003e\u003cbr\u003e\u003c\/p\u003e\n\u003ch3 class=\"group-list-title\"\u003eRemote Controller\u003c\/h3\u003e\n\u003ctable width=\"100%\"\u003e\n\u003ctbody\u003e\n\u003ctr\u003e\n\u003ctd style=\"width: 47.7766%;\"\u003e Multiple Controllers\u003c\/td\u003e\n\u003ctd style=\"width: 47.2234%;\"\u003eN\/A\u003c\/td\u003e\n\u003c\/tr\u003e\n\u003ctr\u003e\n\u003ctd style=\"width: 47.7766%;\"\u003eDJI Smart Controller\u003c\/td\u003e\n\u003ctd style=\"width: 47.2234%;\"\u003eSupported\u003c\/td\u003e\n\u003c\/tr\u003e\n\u003ctr\u003e\n\u003ctd style=\"width: 47.7766%;\"\u003eRemote Controller Transmission System\u003c\/td\u003e\n\u003ctd style=\"width: 47.2234%;\"\u003eOcuSync 2.0\u003c\/td\u003e\n\u003c\/tr\u003e\n\u003ctr\u003e\n\u003ctd style=\"width: 47.7766%;\"\u003eBattery Life\u003c\/td\u003e\n\u003ctd style=\"width: 47.2234%;\"\u003e6 hours (4 hours when charging a mobile device)\u003c\/td\u003e\n\u003c\/tr\u003e\n\u003ctr\u003e\n\u003ctd style=\"width: 47.7766%;\"\u003eSupported Mobile Device Connectors\u003c\/td\u003e\n\u003ctd style=\"width: 47.2234%;\"\u003eLightning, Micro USB, USB-C\u003c\/td\u003e\n\u003c\/tr\u003e\n\u003ctr\u003e\n\u003ctd style=\"width: 47.7766%;\"\u003eMax Supported Mobile Device Size\u003c\/td\u003e\n\u003ctd style=\"width: 47.2234%;\"\u003e180×86×10 mm (length×width×height)\u003c\/td\u003e\n\u003c\/tr\u003e\n\u003ctr\u003e\n\u003ctd style=\"width: 47.7766%;\"\u003eOperating Temperature\u003c\/td\u003e\n\u003ctd style=\"width: 47.2234%;\"\u003e0° to 40°C (14° to 104°F)\u003c\/td\u003e\n\u003c\/tr\u003e\n\u003ctr\u003e\n\u003ctd style=\"width: 47.7766%;\"\u003eTransmitter Power (EIRP)\u003c\/td\u003e\n\u003ctd style=\"width: 47.2234%;\"\u003e2.4 GHz:\u003cbr\u003eFCC: ≤26 dBm\u003cbr\u003eCE: ≤20 dBm\u003cbr\u003eSRRC: ≤20 dBm\u003cbr\u003eMIC: ≤20 dBm\u003cbr\u003e5.8 GHz:\u003cbr\u003eFCC: ≤26 dBm\u003cbr\u003eCE: ≤14 dBm\u003cbr\u003eSRRC: ≤26 dBm\u003c\/td\u003e\n\u003c\/tr\u003e\n\u003c\/tbody\u003e\n\u003c\/table\u003e\n\u003cp\u003e\u003cbr\u003e\u003c\/p\u003e\n\u003ch3 class=\"group-list-title\"\u003eCharger\u003c\/h3\u003e\n\u003ctable width=\"100%\"\u003e\n\u003ctbody\u003e\n\u003ctr\u003e\n\u003ctd style=\"width: 49.888%;\"\u003e Charging Input\u003c\/td\u003e\n\u003ctd style=\"width: 46.8175%;\"\u003e100-240V, 50\/60 Hz, 1.3 A\u003c\/td\u003e\n\u003c\/tr\u003e\n\u003ctr\u003e\n\u003ctd style=\"width: 49.888%;\"\u003eCharging Output\u003c\/td\u003e\n\u003ctd style=\"width: 46.8175%;\"\u003eCharging Port: 13.2 V⎓2.82 A\u003cbr\u003eUSB Port: 5 V⎓2 A\u003c\/td\u003e\n\u003c\/tr\u003e\n\u003ctr\u003e\n\u003ctd style=\"width: 49.888%;\"\u003eVoltage\u003c\/td\u003e\n\u003ctd style=\"width: 46.8175%;\"\u003e13.2 V\u003c\/td\u003e\n\u003c\/tr\u003e\n\u003ctr\u003e\n\u003ctd style=\"width: 49.888%;\"\u003eRated Power\u003c\/td\u003e\n\u003ctd style=\"width: 46.8175%;\"\u003e38 W\u003c\/td\u003e\n\u003c\/tr\u003e\n\u003c\/tbody\u003e\n\u003c\/table\u003e\n\u003cp\u003e\u003cbr\u003e\u003c\/p\u003e\n\u003cdiv\u003e\n\u003cul style=\"text-align: center;\"\u003e\u003c\/ul\u003e\n\u003c\/div\u003e\n\u003cstyle\u003e\u003c!--\n.embed-container { position: relative; padding-bottom: 56.25%; height: 0; overflow: hidden; max-width: 100%; } .embed-container iframe, .embed-container object, .embed-container embed { position: absolute; top: 0; left: 0; width: 100%; height: 100%; }\n--\u003e\u003c\/style\u003e\n\u003c\/div\u003e"}
-
-
{"id":6773433335883,"title":"DJI Mavic Air 2S - 4 Directions of Obstacle Sensing Drone with 3-Axis Gimbal Camera | 5.4K Video | 1-Inch Sensor | MasterShots","handle":"dji-mavic-air-2s-4-directions-of-obstacle-sensing-drone-with-3-axis-gimbal-camera-5-4k-video-1-inch-sensor-mastershots","description":"\u003ch1 style=\"text-align: center;\"\u003e\u003cstrong\u003eDJI Mavic Air 2S\u003c\/strong\u003e\u003c\/h1\u003e\u003cdiv class=\"desc\"\u003e\n\u003ch2 style=\"text-align: center;\"\u003eDJI Air 2S is the ultimate drone for creators on the move, with a 1-inch CMOS sensor, powerful autonomous functions, and a compact body weighing less than 600 g. \u003c\/h2\u003e\n\u003cstyle\u003e\u003c!--\n.embed-container { position: relative; padding-bottom: 56.25%; height: 0; overflow: hidden; max-width: 100%; } .embed-container iframe, .embed-container object, .embed-container embed { position: absolute; top: 0; left: 0; width: 100%; height: 100%; }\n--\u003e\u003c\/style\u003e\n\u003cdiv class=\"embed-container\" style=\"text-align: center;\"\u003e\u003ciframe src=\"https:\/\/www.youtube.com\/embed\/NJ3Z1hSOoMc\" frameborder=\"0\" allowfullscreen=\"\"\u003e\u003c\/iframe\u003e\u003c\/div\u003e\n\u003cdiv style=\"text-align: center;\"\u003e \u003c\/div\u003e\n\u003ch3 style=\"text-align: center;\"\u003e\u003cspan style=\"font-weight: 400;\"\u003eTake this all-in-one aerial powerhouse along anywhere to experience and record your world in stunning detail.\u003c\/span\u003e\u003c\/h3\u003e\n\u003cp\u003e \u003c\/p\u003e\n\u003ch2 style=\"text-align: left;\"\u003e\n\u003cstrong\u003eDifference Between DJI Mavic Air 2S Fly More Combo and DJI Mavic Air 2 Fly More Combo:\u003c\/strong\u003e \u003c\/h2\u003e\n\u003cp\u003e \u003c\/p\u003e\n\u003ch3 style=\"text-align: center;\"\u003e\u003cspan style=\"color: #ff8000;\"\u003e\u003cb\u003eUpgrades\u003c\/b\u003e\u003c\/span\u003e\u003c\/h3\u003e\n\u003cdiv\u003eUpgrades include a 1-inch CMOS sensor, four-antenna low-latency transmission, APAS 4.0, added upward-facing dual-vision sensors, and MasterShots. The camera performance, intelligent features, obstacle sensing system, and transmission system have all improved significantly. \u003c\/div\u003e\n\u003ch2 style=\"text-align: center;\"\u003e\u003cstrong\u003e\u003c\/strong\u003e\u003c\/h2\u003e\n\u003cp\u003e \u003c\/p\u003e\n\u003ch2 style=\"text-align: center;\"\u003e\u003cstrong\u003eHighlights and Features\u003c\/strong\u003e\u003c\/h2\u003e\n\u003ctable data-mce-fragment=\"1\"\u003e\n\u003ctbody data-mce-fragment=\"1\"\u003e\n\u003ctr data-mce-fragment=\"1\"\u003e\n\u003ctd width=\"184\" data-mce-fragment=\"1\"\u003e1-inch CMOS Sensor\u003c\/td\u003e\n\u003ctd width=\"184\" data-mce-fragment=\"1\"\u003eMasterShots\u003c\/td\u003e\n\u003ctd width=\"184\" data-mce-fragment=\"1\"\u003e5.4K Video\u003c\/td\u003e\n\u003c\/tr\u003e\n\u003ctr data-mce-fragment=\"1\"\u003e\n\u003ctd width=\"184\" data-mce-fragment=\"1\"\u003e12km FHD Transmission\u003cspan data-mce-fragment=\"1\"\u003e \u003c\/span\u003e\u003csup data-mce-fragment=\"1\"\u003e[1]\u003c\/sup\u003e\n\u003c\/td\u003e\n\u003ctd width=\"184\" data-mce-fragment=\"1\"\u003eObstacle Sensing in 4 Directions\u003c\/td\u003e\n\u003ctd width=\"184\" data-mce-fragment=\"1\"\u003eADS-B\u003c\/td\u003e\n\u003c\/tr\u003e\n\u003c\/tbody\u003e\n\u003c\/table\u003e\n\u003cbr\u003e\n\u003cdiv style=\"text-align: start;\"\u003e\u003cimg style=\"margin-right: auto; float: none; display: block; margin-left: auto;\" src=\"https:\/\/cdn.shopify.com\/s\/files\/1\/2532\/7020\/files\/Screenshot_2021-08-06_183943.png?v=1628246675\" alt=\"dji-mavic-air-2S-fly-more-combo-drone-content-feature-all\"\u003e\u003c\/div\u003e\n\u003cp\u003e \u003c\/p\u003e\n\u003ch3 style=\"text-align: center;\"\u003e\u003cspan style=\"color: #ff8000;\"\u003e\u003cb\u003e\u003c\/b\u003e\u003c\/span\u003e\u003c\/h3\u003e\n\u003cdiv style=\"text-align: center;\"\u003e\u003c\/div\u003e\n\u003cdiv style=\"text-align: center;\"\u003e\u003c\/div\u003e\n\u003cdiv style=\"text-align: center;\"\u003e\u003c\/div\u003e\n\u003cdiv style=\"text-align: center;\"\u003e\n\u003cp\u003e \u003c\/p\u003e\n\u003ch3\u003e\u003cspan style=\"color: #ff8000;\"\u003e\u003cb\u003eIncredible Image System\u003c\/b\u003e\u003c\/span\u003e\u003c\/h3\u003e\n\u003cdiv style=\"text-align: center;\"\u003e\u003cb\u003eBig World, Big Sensor\u003c\/b\u003e\u003c\/div\u003e\n\u003cdiv style=\"text-align: center;\"\u003e\u003cb\u003e\u003c\/b\u003e\u003c\/div\u003e\n\u003c\/div\u003e\n\u003cdiv style=\"text-align: center;\"\u003e\u003cspan\u003eEquipped with a 1-inch CMOS image sensor and large 2.4μm pixels, DJI Air 2S is capable of 5.4K\/30fps and 4K\/60fps video. Capture any moment with the rich clarity and authentic color tones it deserves.\u003c\/span\u003e\u003c\/div\u003e\n\u003cdiv style=\"text-align: center;\"\u003e\u003cspan\u003e\u003cimg src=\"https:\/\/cdn.shopify.com\/s\/files\/1\/2532\/7020\/files\/DJI_Mavic_Air_2S_Fly_More_Combo_8.jpg?v=1628248569\" style=\"float: none;\" alt=\"dji-mavic-air-2S-fly-more-combo-drone-content-feature-Good-Image-System\"\u003e\u003c\/span\u003e\u003c\/div\u003e\n\u003cdiv style=\"text-align: center;\"\u003e\u003cspan\u003e\u003c\/span\u003e\u003c\/div\u003e\n\u003cdiv style=\"text-align: center;\"\u003e\u003cspan\u003e\u003c\/span\u003e\u003c\/div\u003e\n\u003cdiv style=\"text-align: center;\"\u003e\u003cspan\u003e\u003c\/span\u003e\u003c\/div\u003e\n\u003ch3 style=\"text-align: center;\"\u003e\u003cspan style=\"color: #ff8000;\"\u003e\u003cb\u003e\u003c\/b\u003e\u003c\/span\u003e\u003c\/h3\u003e\n\u003ch3 style=\"text-align: center;\"\u003e\u003cspan style=\"color: #ff8000;\"\u003e\u003cb\u003e\u003c\/b\u003e\u003c\/span\u003e\u003c\/h3\u003e\n\u003ch3 style=\"text-align: center;\"\u003e\u003cspan style=\"color: #ff8000;\"\u003eTurn On the Night\u003c\/span\u003e\u003c\/h3\u003e\n\u003cdiv style=\"text-align: center;\"\u003e\u003cspan style=\"font-weight: 400;\"\u003e\u003cspan data-mce-fragment=\"1\"\u003eCapture the allure of the world, even as it darkens. Thanks to a high dynamic range, high resolution, and accurate color reproduction, even low-light scenes are sharp and vibrant.\u003c\/span\u003e\u003c\/span\u003e\u003c\/div\u003e\n\u003cdiv style=\"text-align: center;\"\u003e\u003cimg style=\"float: none;\" src=\"https:\/\/cdn.shopify.com\/s\/files\/1\/2532\/7020\/files\/DJI_Mavic_Air_2S_Fly_More_Combo_9.jpg?v=1628573124\" alt=\"dji-mavic-air-2S-fly-more-combo-drone-content-feature-Turn-On-the-Night\"\u003e\u003c\/div\u003e\n\u003ch3 style=\"text-align: center;\"\u003e\u003cspan style=\"color: #ff8000;\"\u003e\u003cb\u003e\u003c\/b\u003e\u003c\/span\u003e\u003c\/h3\u003e\n\u003ch3 style=\"text-align: center;\"\u003e\u003cspan style=\"color: #ff8000;\"\u003e\u003cb\u003e\u003cspan data-mce-fragment=\"1\"\u003eOne billion colors\u003c\/span\u003e\u003c\/b\u003e\u003c\/span\u003e\u003c\/h3\u003e\n\u003cdiv style=\"text-align: center;\"\u003e\u003cspan style=\"font-weight: 400;\"\u003e\u003cspan data-mce-fragment=\"1\"\u003eCaptured by the 10-bit Dlog-M color profile of DJI Air 2S let you fully immerse yourself in all the hues of your environment.\u003c\/span\u003e\u003c\/span\u003e\u003c\/div\u003e\n\u003cdiv style=\"text-align: center;\"\u003e\u003cimg style=\"float: none;\" src=\"https:\/\/cdn.shopify.com\/s\/files\/1\/2532\/7020\/files\/DJI_Mavic_Air_2S_Fly_More_Combo_10.jpg?v=1628573285\" alt=\"dji-mavic-air-2S-fly-more-combo-drone-content-feature-One-billion-colors\"\u003e\u003c\/div\u003e\n\u003ch3 style=\"text-align: center;\"\u003e\u003cspan style=\"color: #ff8000;\"\u003e\u003cb\u003e\u003c\/b\u003e\u003c\/span\u003e\u003c\/h3\u003e\n\u003ctable width=\"100%\"\u003e\n\u003ctbody\u003e\n\u003ctr\u003e\n\u003ctd style=\"width: 47.3093%;\"\u003e\n\u003ch3 data-mce-fragment=\"1\"\u003e\u003cspan style=\"color: #ff8000;\" data-mce-fragment=\"1\"\u003e\u003cb data-mce-fragment=\"1\"\u003eShoot RAW\u003c\/b\u003e\u003c\/span\u003e\u003c\/h3\u003e\n\u003cp style=\"text-align: left;\"\u003e\u003cspan\u003eFormat photos with a dynamic \u003c\/span\u003e\u003cspan style=\"font-weight: 400;\" data-mce-fragment=\"1\" data-mce-style=\"font-weight: 400;\"\u003erange of up to 12.6 stops to\u003c\/span\u003e\u003cspan style=\"font-weight: 400;\" data-mce-fragment=\"1\" data-mce-style=\"font-weight: 400;\"\u003e capture more visual information in every scene, even when lighting conditions are bad or complex. This provides more flexibility in post-processing, giving creators more possibilities to get the look they want. \u003c\/span\u003e\u003c\/p\u003e\n\u003c\/td\u003e\n\u003ctd style=\"width: 47.6907%;\"\u003e\n\u003cdiv style=\"text-align: center;\"\u003e\u003cimg src=\"https:\/\/cdn.shopify.com\/s\/files\/1\/2532\/7020\/files\/DJI-Mavic-Air-2S-Fly-More-Combo_600x600.jpg?v=1628577003\" alt=\"dji-mavic-air-2S-fly-more-combo-drone-content-feature-all\" style=\"float: none;\" width=\"600x600\" height=\"600x600\"\u003e\u003c\/div\u003e\n\u003c\/td\u003e\n\u003c\/tr\u003e\n\u003ctr\u003e\n\u003ctd style=\"width: 47.3093%;\"\u003e\n\u003cdiv style=\"text-align: center;\" data-mce-fragment=\"1\" data-mce-style=\"text-align: center;\"\u003e\u003cimg style=\"float: none;\" alt=\"dji-mavic-air-2S-fly-more-combo-drone-content-feature-Shoot-RAW\" src=\"https:\/\/cdn.shopify.com\/s\/files\/1\/2532\/7020\/files\/3b0718d6123b5e2827b85292dc6322fa_600x600.jpg?v=1628577485\" width=\"600x600\" height=\"600x600\" data-mce-fragment=\"1\" data-mce-src=\"https:\/\/cdn.shopify.com\/s\/files\/1\/2532\/7020\/files\/3b0718d6123b5e2827b85292dc6322fa_600x600.jpg?v=1628577485\" data-mce-style=\"float: none;\"\u003e\u003c\/div\u003e\n\u003ch3 style=\"text-align: center;\"\u003e\n\u003cspan style=\"color: #ff8000;\"\u003e\u003cb\u003e\u003c\/b\u003e\u003c\/span\u003e\u003cbr\u003e\n\u003c\/h3\u003e\n\u003c\/td\u003e\n\u003ctd style=\"width: 47.6907%;\"\u003e\n\u003ch3 style=\"text-align: right;\"\u003e\u003cspan style=\"color: #ff8000;\"\u003e\u003cb\u003eIntelligent HDR technology\u003c\/b\u003e\u003c\/span\u003e\u003c\/h3\u003e\n\u003cp style=\"text-align: right;\"\u003e\u003cspan\u003eMerges multiple shots automatically, increasing the dynamic range of images without the need for post-processing. That means more nuanced details in both the highlights and shadows for richer images with greater depth.\u003c\/span\u003e\u003c\/p\u003e\n\u003c\/td\u003e\n\u003c\/tr\u003e\n\u003c\/tbody\u003e\n\u003c\/table\u003e\n\u003ch3 style=\"text-align: center;\"\u003e\u003cspan style=\"color: #ff8000;\"\u003e\u003cb\u003e\u003cspan data-mce-fragment=\"1\"\u003e\u003c\/span\u003e\u003c\/b\u003e\u003c\/span\u003e\u003c\/h3\u003e\n\u003ch3 style=\"text-align: center;\"\u003e\u003cspan style=\"color: #ff8000;\"\u003e\u003cb\u003e\u003cspan data-mce-fragment=\"1\"\u003e\u003c\/span\u003e\u003c\/b\u003e\u003c\/span\u003e\u003c\/h3\u003e\n\u003ch3 style=\"text-align: center;\"\u003e\u003cspan style=\"color: #ff8000;\"\u003e\u003cb\u003e\u003cspan data-mce-fragment=\"1\"\u003e\u003c\/span\u003e\u003c\/b\u003e\u003c\/span\u003e\u003c\/h3\u003e\n\u003ch3 style=\"text-align: center;\"\u003e\u003cspan style=\"font-weight: 400;\"\u003e\u003cspan data-mce-fragment=\"1\"\u003e\u003cbr\u003e\u003c\/span\u003e\u003c\/span\u003e\u003c\/h3\u003e\n\u003cdiv style=\"text-align: center;\"\u003e\n\u003ch3 style=\"text-align: center;\"\u003e\u003cspan style=\"color: #ff8000;\"\u003eHyperlapse and Panorama\u003c\/span\u003e\u003c\/h3\u003e\n\u003c\/div\u003e\n\u003cdiv style=\"text-align: center;\"\u003e\u003cspan style=\"font-weight: 400;\"\u003e\u003cspan data-mce-fragment=\"1\"\u003eSpeed up time and movement with a single tap by creating a striking hyperlapse. You can also capture larger, more detailed shots of your surroundings with panorama.\u003c\/span\u003e\u003c\/span\u003e\u003c\/div\u003e\n\u003cdiv style=\"text-align: center;\"\u003e\u003cimg style=\"float: none;\" src=\"https:\/\/cdn.shopify.com\/s\/files\/1\/2532\/7020\/files\/DJI_Mavic_Air_2S_Fly_More_Combo_12.jpg?v=1628575937\" alt=\"dji-mavic-air-2S-fly-more-combo-drone-content-feature-Hyperlapse-and-Panorama\"\u003e\u003c\/div\u003e\n\u003ch3 style=\"text-align: center;\"\u003e\u003cspan style=\"color: #ff8000;\"\u003e\u003cb\u003e\u003c\/b\u003e\u003c\/span\u003e\u003c\/h3\u003e\n\u003ch2 class=\"text style__eyebrow___2tBWn\" style=\"text-align: center;\"\u003e\u003cspan style=\"color: #ff8000;\"\u003eSmart features, perfect shots\u003c\/span\u003e\u003c\/h2\u003e\n\u003ch3 style=\"text-align: center;\"\u003e\u003cspan style=\"color: #ff8000;\"\u003e\u003cb\u003e\u003c\/b\u003e\u003c\/span\u003e\u003c\/h3\u003e\n\u003ch3 style=\"text-align: center;\"\u003e\u003cspan style=\"color: #ff8000;\"\u003e\u003cb\u003eIntroducing Mastershots\u003c\/b\u003e\u003c\/span\u003e\u003c\/h3\u003e\n\u003cdiv style=\"text-align: center;\"\u003e\u003cspan style=\"font-weight: 400;\"\u003e\u003cspan data-mce-fragment=\"1\"\u003eThe next evolution of QuickShots, MasterShots is an advanced intelligent feature that gives users the best shots in any location with just a tap. Simply select your subject, and the drone will film while executing ten different maneuvers in sequence, keeping your subject center-frame and generating a short cinematic video afterward.\u003c\/span\u003e\u003c\/span\u003e\u003c\/div\u003e\n\u003cdiv style=\"text-align: center;\"\u003e\u003cspan style=\"font-weight: 400;\"\u003e\u003cspan data-mce-fragment=\"1\"\u003e\u003cimg src=\"https:\/\/cdn.shopify.com\/s\/files\/1\/2532\/7020\/files\/DJI_Mavic_Air_2S_Fly_More_Combo_13.jpg?v=1628578139\" style=\"float: none;\" alt=\"dji-mavic-air-2S-fly-more-combo-drone-content-feature-Autonomous-Functions-Matershots\"\u003e\u003c\/span\u003e\u003c\/span\u003e\u003c\/div\u003e\n\u003cdiv style=\"text-align: center;\"\u003e\u003cb\u003e\u003cspan style=\"color: #ff8000;\"\u003e\u003c\/span\u003e\u003c\/b\u003e\u003c\/div\u003e\n\u003cdiv style=\"text-align: center;\"\u003e\u003cb\u003e\u003cspan style=\"color: #ff8000;\"\u003e\u003c\/span\u003e\u003c\/b\u003e\u003c\/div\u003e\n\u003cdiv style=\"text-align: center;\"\u003e\u003cb\u003e\u003cspan style=\"color: #ff8000;\"\u003e\u003c\/span\u003e\u003c\/b\u003e\u003c\/div\u003e\n\u003cdiv style=\"text-align: center;\"\u003e\u003cb\u003e\u003cspan style=\"color: #ff8000;\"\u003e\u003c\/span\u003e\u003c\/b\u003e\u003c\/div\u003e\n\u003cdiv style=\"text-align: center;\"\u003e\n\u003cdiv\u003e\u003cspan style=\"color: #ff8000;\"\u003e\u003cb\u003e\u003c\/b\u003e\u003c\/span\u003e\u003c\/div\u003e\n\u003cdiv\u003e\u003cspan style=\"color: #ff8000;\"\u003e\u003cb\u003e\u003c\/b\u003e\u003c\/span\u003e\u003c\/div\u003e\n\u003cdiv\u003e\u003cspan style=\"color: #ff8000;\"\u003e\u003cb\u003eThe Center of Attention \u003c\/b\u003e\u003c\/span\u003e\u003c\/div\u003e\n\u003cdiv\u003e\n\u003cb\u003e\u003cspan\u003e\u003c\/span\u003e\u003c\/b\u003e\u003cbr\u003e\n\u003c\/div\u003e\n\u003cdiv\u003e\u003cspan\u003eFocusTrack features Spotlight 2.0, ActiveTrack 4.0, and Point of Interest 3.0, making it a breeze for DJI Air 2S to follow or circle your subject.\u003c\/span\u003e\u003c\/div\u003e\n\u003cdiv style=\"text-align: center;\"\u003e\u003cbr\u003e\u003c\/div\u003e\n\u003cdiv style=\"text-align: center;\"\u003e\u003c\/div\u003e\n\u003c\/div\u003e\n\u003cdiv style=\"text-align: center;\"\u003e\n\u003ctable width=\"100%\"\u003e\n\u003ctbody\u003e\n\u003ctr\u003e\n\u003ctd style=\"width: 31%; text-align: center;\"\u003e \u003cstrong\u003e\u003cspan style=\"color: #ff8000;\" data-mce-fragment=\"1\"\u003eSpotlight 2.0 \u003c\/span\u003e\u003c\/strong\u003e\n\u003c\/td\u003e\n\u003ctd style=\"width: 31.7106%;\"\u003e\n\u003cdiv data-ga-label=\"all-1-tab-button\" class=\"style__tab-item___1yKLp\"\u003e\n\u003cdiv style=\"text-align: center;\"\u003e\u003cstrong\u003e\u003cspan style=\"color: #ff8000;\"\u003eActiveTrack 4.0\u003c\/span\u003e\u003c\/strong\u003e\u003c\/div\u003e\n\u003c\/div\u003e\n\u003c\/td\u003e\n\u003ctd style=\"width: 31.2894%; text-align: center;\"\u003e\u003cstrong\u003e\u003cspan style=\"color: #ff8000;\"\u003ePoint of Interest 3.0\u003c\/span\u003e\u003c\/strong\u003e\u003c\/td\u003e\n\u003c\/tr\u003e\n\u003ctr\u003e\n\u003ctd style=\"width: 31%;\"\u003e\n\u003cp\u003e\u003cspan data-mce-fragment=\"1\"\u003eFollow your subject smoothly while autonomously avoiding obstacles. Even if the subject is momentarily lost, you can quickly resume tracking during flight.\u003c\/span\u003e\u003c\/p\u003e\n\u003cp\u003e\u003cspan data-mce-fragment=\"1\"\u003e\u003cimg src=\"https:\/\/cdn.shopify.com\/s\/files\/1\/2532\/7020\/files\/DJI_Mavic_Air_2S_Fly_More_Combo_14_480x480.jpg?v=1628578319\" alt=\"dji-mavic-air-2S-fly-more-combo-drone-content-feature-The-Center-of-Aattention-Spotlight-2.0\" width=\"480x480\" height=\"480x480\" style=\"float: none;\" data-mce-fragment=\"1\" data-mce-src=\"https:\/\/cdn.shopify.com\/s\/files\/1\/2532\/7020\/files\/DJI_Mavic_Air_2S_Fly_More_Combo_14_480x480.jpg?v=1628578319\"\u003e\u003c\/span\u003e\u003c\/p\u003e\n\u003cdiv\u003e\u003cspan style=\"color: #ff8000;\"\u003e\u003cb\u003e\u003c\/b\u003e\u003c\/span\u003e\u003c\/div\u003e\n\u003c\/td\u003e\n\u003ctd style=\"width: 31.7106%;\"\u003e\n\u003cp\u003e\u003cspan\u003eFollow your subject smoothly while autonomously avoiding obstacles. Even if the subject is momentarily lost, you can quickly resume tracking during flight.\u003c\/span\u003e\u003c\/p\u003e\n\u003cp\u003e\u003cimg alt=\"dji-mavic-air-2S-fly-more-combo-drone-content-feature-The-Center-of-Aattention-ActiveTrack-4.0\" src=\"https:\/\/cdn.shopify.com\/s\/files\/1\/2532\/7020\/files\/DJI_Mavic_Air_2S_Fly_More_Combo_15_480x480.jpg?v=1628578617\" width=\"480x480\" height=\"480x480\" style=\"float: none;\"\u003e\u003c\/p\u003e\n\u003c\/td\u003e\n\u003ctd style=\"width: 31.2894%;\"\u003e\n\u003cp\u003e\u003cspan\u003eEasily take a perfect circle shot while keeping your subject centered. \u003c\/span\u003e\u003c\/p\u003e\n\u003cp\u003e \u003c\/p\u003e\n\u003cp\u003e \u003cimg alt=\"dji-mavic-air-2S-fly-more-combo-drone-content-feature-The-Center-of-Aattention-Point-of-Interest-3.0\" src=\"https:\/\/cdn.shopify.com\/s\/files\/1\/2532\/7020\/files\/DJI_Mavic_Air_2S_Fly_More_Combo_16_480x480.jpg?v=1628578705\" width=\"480x480\" height=\"480x480\" style=\"float: none;\" data-mce-fragment=\"1\" data-mce-src=\"https:\/\/cdn.shopify.com\/s\/files\/1\/2532\/7020\/files\/DJI_Mavic_Air_2S_Fly_More_Combo_16_480x480.jpg?v=1628578705\"\u003e\u003c\/p\u003e\n\u003c\/td\u003e\n\u003c\/tr\u003e\n\u003c\/tbody\u003e\n\u003c\/table\u003e\n\u003c\/div\u003e\n\u003cdiv style=\"text-align: center;\"\u003e\u003cb\u003e\u003cspan style=\"color: #ff8000;\"\u003e\u003c\/span\u003e\u003c\/b\u003e\u003c\/div\u003e\n\u003cdiv style=\"text-align: center;\"\u003e\u003cb\u003e\u003cspan style=\"color: #ff8000;\"\u003e\u003c\/span\u003e\u003c\/b\u003e\u003c\/div\u003e\n\u003cdiv style=\"text-align: center;\"\u003e \u003c\/div\u003e\n\u003ch3 style=\"text-align: center;\"\u003e\u003cspan style=\"color: #ff8000;\"\u003eFeel the Flight\u003c\/span\u003e\u003c\/h3\u003e\n\u003cdiv style=\"text-align: center;\"\u003e\u003cb\u003eWorry Less, Discover More \u003c\/b\u003e\u003c\/div\u003e\n\u003cdiv style=\"text-align: center;\"\u003e\u003cspan style=\"font-weight: 400;\"\u003e\u003cspan data-mce-fragment=\"1\"\u003eThe combination of portability, safety, and intelligent technology means you can spend more time enjoying flights and less time worrying about them. Take DJI Air 2S into the sky confidently, every flight.\u003c\/span\u003e\u003c\/span\u003e\u003c\/div\u003e\n\u003ch3 style=\"text-align: center;\"\u003e\u003cspan style=\"color: #ff8000;\"\u003e\u003cb\u003e\u003c\/b\u003e\u003c\/span\u003e\u003c\/h3\u003e\n\u003ch3 style=\"text-align: center;\"\u003e\u003cspan style=\"color: #ff8000;\"\u003eEnvironment Sensing\u003c\/span\u003e\u003c\/h3\u003e\n\u003cdiv style=\"text-align: center;\"\u003e\u003cspan style=\"font-weight: 400;\"\u003e\u003cspan data-mce-fragment=\"1\"\u003eDJI Air 2S has the ability to perceive its environment in four directions: up, down, forward, and backward. The algorithms for Advanced Pilot Assistance Systems (APAS 4.0) have been further improved, allowing DJI Air 2S to actively avoid obstacles in more complex scenarios and at high speeds.\u003c\/span\u003e\u003c\/span\u003e\u003c\/div\u003e\n\u003cdiv style=\"text-align: center;\"\u003e\u003cimg style=\"float: none;\" src=\"https:\/\/cdn.shopify.com\/s\/files\/1\/2532\/7020\/files\/DJI_Mavic_Air_2S_Fly_More_Combo_17.jpg?v=1628579395\" alt=\"dji-mavic-air-2S-fly-more-combo-drone-content-feature-Feel-the-Flight-Environment-Sensing\"\u003e\u003c\/div\u003e\n\u003cdiv style=\"text-align: center;\"\u003e \u003c\/div\u003e\n\u003ch3 style=\"text-align: center;\"\u003e\u003cspan style=\"color: #ff8000;\"\u003e\u003cb\u003eO3 Tranmission\u003c\/b\u003e\u003c\/span\u003e\u003c\/h3\u003e\n\u003cdiv style=\"text-align: center;\"\u003e\u003cspan style=\"font-weight: 400;\"\u003e\u003cspan data-mce-fragment=\"1\"\u003eDJI Air 2S features DJI's most advanced O3 (OcuSync 3.0) image transmission technology, delivering an ultra-smooth, clear, and reliable image feed.\u003c\/span\u003e\u003c\/span\u003e\u003c\/div\u003e\n\u003cdiv style=\"text-align: center;\"\u003e\n\u003ctable width=\"100%\"\u003e\n\u003ctbody\u003e\n\u003ctr\u003e\n\u003ctd style=\"text-align: center;\"\u003e \u003cspan style=\"color: #ff8000;\"\u003e\u003cstrong\u003e\u003cspan class=\"style__icon-number___2OOlV\" data-mce-fragment=\"1\"\u003e12\u003c\/span\u003e\u003cspan class=\"style__icon-unit___2hz_k\" data-mce-fragment=\"1\"\u003eKm\u003c\/span\u003e\u003c\/strong\u003e\u003c\/span\u003e\n\u003cp class=\"style__icon-desc___Otw9j\" data-mce-fragment=\"1\"\u003eMax Video Transmission\u003c\/p\u003e\n\u003c\/td\u003e\n\u003ctd\u003e\n\u003cdiv style=\"text-align: center;\" class=\"style__icon-number-container___2cK9V\"\u003e\u003cspan style=\"color: #ff8000;\"\u003e\u003cstrong\u003e\u003cspan class=\"style__icon-number___2OOlV\"\u003e1080\u003c\/span\u003e\u003cspan class=\"style__icon-unit___2hz_k\"\u003ep\u003c\/span\u003e\u003c\/strong\u003e\u003c\/span\u003e\u003c\/div\u003e\n\u003cp style=\"text-align: center;\" class=\"style__icon-desc___Otw9j\"\u003eTransmission\u003c\/p\u003e\n\u003c\/td\u003e\n\u003ctd\u003e\n\u003cdiv style=\"text-align: center;\" class=\"style__icon-number-container___2cK9V\"\u003e\u003cspan style=\"color: #ff8000;\"\u003e\u003cstrong\u003e\u003cspan class=\"style__icon-number___2OOlV\"\u003e4\u003c\/span\u003e\u003cspan class=\"style__icon-unit___2hz_k\"\u003eAntennas\u003c\/span\u003e\u003c\/strong\u003e\u003c\/span\u003e\u003c\/div\u003e\n\u003cp style=\"text-align: center;\" class=\"style__icon-desc___Otw9j\"\u003e2.4\/5.8GHz Dual Frequency\u003c\/p\u003e\n\u003c\/td\u003e\n\u003c\/tr\u003e\n\u003c\/tbody\u003e\n\u003c\/table\u003e\n\u003c\/div\u003e\n\u003cdiv style=\"text-align: center;\"\u003e\u003cspan style=\"font-weight: 400; color: #ffffff;\"\u003e\u003c\/span\u003e\u003c\/div\u003e\n\u003cdiv style=\"text-align: center;\"\u003e\u003cspan style=\"font-weight: 400; color: #ffffff;\"\u003e\u003cimg style=\"float: none;\" src=\"https:\/\/cdn.shopify.com\/s\/files\/1\/2532\/7020\/files\/DJI_Mavic_Air_2S_Fly_More_Combo_18_480x480.jpg?v=1628579621\" alt=\"dji-mavic-air-2S-fly-more-combo-drone-content-feature-O3-Tranmission\" data-mce-fragment=\"1\" data-mce-src=\"https:\/\/cdn.shopify.com\/s\/files\/1\/2532\/7020\/files\/DJI_Mavic_Air_2S_Fly_More_Combo_18_480x480.jpg?v=1628579621\"\u003e.\u003c\/span\u003e\u003c\/div\u003e\n\u003ch3 style=\"text-align: center;\"\u003e\u003cspan style=\"color: #ff8000;\"\u003e\u003cb\u003e\u003c\/b\u003e\u003c\/span\u003e\u003c\/h3\u003e\n\u003ch3 style=\"text-align: center;\"\u003e\u003cspan style=\"color: #ff8000;\"\u003e\u003cb\u003e\u003c\/b\u003e\u003c\/span\u003e\u003c\/h3\u003e\n\u003ch3 style=\"text-align: center;\"\u003e\u003cspan style=\"color: #ff8000;\"\u003e\u003cb\u003eSafer Skies with ADS-B\u003c\/b\u003e\u003c\/span\u003e\u003c\/h3\u003e\n\u003cdiv style=\"text-align: center;\"\u003e\u003cspan style=\"font-weight: 400;\"\u003e\u003cspan data-mce-fragment=\"1\"\u003eDJI Air 2S provides an added layer of airspace safety with the industry-leading AirSense safety system. This receives Automatic Dependent Surveillance-Broadcast (ADS-B) flight location information from airplanes and helicopters in your area that transmit ADS-B signals, displays those aircraft on a map, and provides audio and visual alerts through the DJI Fly app to help you keep the drone out of the way of those aircraft.\u003c\/span\u003e\u003c\/span\u003e\u003c\/div\u003e\n\u003cdiv style=\"text-align: center;\"\u003e\u003cspan style=\"font-weight: 400;\"\u003e\u003cspan data-mce-fragment=\"1\"\u003e\u003cimg src=\"https:\/\/cdn.shopify.com\/s\/files\/1\/2532\/7020\/files\/DJI_Mavic_Air_2S_Fly_More_Combo_19.jpg?v=1628579892\" style=\"float: none;\" alt=\"dji-mavic-air-2S-fly-more-combo-drone-content-feature-Safer-Skies-with-ADS-B\"\u003e\u003c\/span\u003e\u003c\/span\u003e\u003c\/div\u003e\n\u003cdiv style=\"text-align: center;\"\u003e \u003c\/div\u003e\n\u003cdiv style=\"text-align: center;\"\u003e\u003cbr\u003e\u003c\/div\u003e\n\u003ch3 style=\"text-align: center;\"\u003e\u003cspan style=\"color: #ff8000;\"\u003e\u003cb\u003eExpansive Accessories\u003c\/b\u003e\u003c\/span\u003e\u003c\/h3\u003e\n\u003ch3 style=\"text-align: center;\"\u003e\u003cb\u003eGet the Most Out Of Air 2S\u003c\/b\u003e\u003c\/h3\u003e\n\u003cdiv style=\"text-align: center;\"\u003e\u003cspan style=\"font-weight: 400;\"\u003e\u003cspan data-mce-fragment=\"1\"\u003eWith a diverse range of accessories, the sky is truly the limit.\u003c\/span\u003e\u003c\/span\u003e\u003c\/div\u003e\n\u003cdiv style=\"text-align: center;\"\u003e\u003cspan style=\"font-weight: 400;\"\u003e\u003cspan data-mce-fragment=\"1\"\u003e\u003c\/span\u003e\u003c\/span\u003e\u003c\/div\u003e\n\u003ch3 style=\"text-align: center;\"\u003e\u003cspan style=\"color: #ff8000;\"\u003e\u003cb\u003e\u003c\/b\u003e\u003c\/span\u003e\u003c\/h3\u003e\n\u003cp\u003e \u003c\/p\u003e\n\u003cp\u003e \u003c\/p\u003e\n\u003ch3 style=\"text-align: center;\"\u003e\u003cspan style=\"color: #ff8000;\"\u003e\u003cb\u003e\u003c\/b\u003e\u003c\/span\u003e\u003c\/h3\u003e\n\u003ch3\u003e\u003cspan\u003e\u003cb\u003e\u003c\/b\u003e\u003c\/span\u003e\u003c\/h3\u003e\n\u003ch3 style=\"text-align: center;\"\u003e\u003cspan style=\"color: #ff8000;\"\u003e\u003cb\u003eDJI Smart Controller\u003c\/b\u003e\u003c\/span\u003e\u003c\/h3\u003e\n\u003cdiv\u003e\u003cspan\u003eThis powerful remote controller features a 5.5-inch 1080p high-brightness display for pure performance. Compatible with the DJI GO 4 and DJI Fly apps, it also supports the installation of third-party apps.\u003c\/span\u003e\u003c\/div\u003e\n\u003cdiv\u003e\u003cimg alt=\"dji-mavic-air-2S-fly-more-combo-drone-content-feature-Expansive-Accessories-Fly-More-Combo-DJI Smart Controller\" src=\"https:\/\/cdn.shopify.com\/s\/files\/1\/2532\/7020\/files\/DJI_Mavic_Air_2S_Fly_More_Combo_22.jpg?v=1628580371\"\u003e\u003c\/div\u003e\n\u003ch3 style=\"text-align: center;\"\u003e\u003cspan style=\"color: #ff8000;\"\u003e\u003cb\u003e\u003c\/b\u003e\u003c\/span\u003e\u003c\/h3\u003e\n\u003ch3 style=\"text-align: center;\"\u003e\u003cspan style=\"color: #ff8000;\"\u003e\u003cb\u003e\u003c\/b\u003e\u003c\/span\u003e\u003c\/h3\u003e\n\u003cdiv style=\"text-align: center;\"\u003e \u003c\/div\u003e\n\u003ch2 style=\"text-align: left;\"\u003e\u003cstrong\u003e\u003c\/strong\u003e\u003c\/h2\u003e\n\u003ch2 style=\"text-align: left;\"\u003e\u003cstrong\u003eSpecification\u003c\/strong\u003e\u003c\/h2\u003e\n\u003cp\u003e \u003c\/p\u003e\n\u003cp\u003e \u003c\/p\u003e\n\u003cp\u003e \u003c\/p\u003e\n\u003ch3 class=\"group-list-title\"\u003eAircraft\u003c\/h3\u003e\n\u003ctable width=\"523\"\u003e\n\u003ctbody\u003e\n\u003ctr style=\"height: 19px;\"\u003e\n\u003ctd style=\"width: 245.562px; height: 19px;\"\u003e Takeoff Weight\u003c\/td\u003e\n\u003ctd style=\"width: 254.438px; height: 19px;\"\u003e595 g\u003c\/td\u003e\n\u003c\/tr\u003e\n\u003ctr style=\"height: 76px;\"\u003e\n\u003ctd style=\"width: 245.562px; height: 76px;\"\u003eDimensions\u003c\/td\u003e\n\u003ctd style=\"width: 254.438px; height: 76px;\"\u003eFolded:\u003cbr\u003e180×97×77 mm (length×width×height)\u003cbr\u003eUnfolded:\u003cbr\u003e183×253×77 mm (length×width×height)\u003c\/td\u003e\n\u003c\/tr\u003e\n\u003ctr style=\"height: 19px;\"\u003e\n\u003ctd style=\"width: 245.562px; height: 19px;\"\u003eDiagonal Length\u003c\/td\u003e\n\u003ctd style=\"width: 254.438px; height: 19px;\"\u003e302 mm\u003c\/td\u003e\n\u003c\/tr\u003e\n\u003ctr style=\"height: 38px;\"\u003e\n\u003ctd style=\"width: 245.562px; height: 38px;\"\u003eMax Ascent Speed\u003c\/td\u003e\n\u003ctd style=\"width: 254.438px; height: 38px;\"\u003e6 m\/s (S Mode)\u003cbr\u003e6 m\/s (N Mode)\u003c\/td\u003e\n\u003c\/tr\u003e\n\u003ctr style=\"height: 52px;\"\u003e\n\u003ctd style=\"width: 245.562px; height: 52px;\"\u003eMax Descent Speed\u003c\/td\u003e\n\u003ctd style=\"width: 254.438px; height: 52px;\"\u003e\n\u003cp\u003e6 m\/s (S Mode)\u003cbr\u003e6 m\/s (N Mode)\u003c\/p\u003e\n\u003c\/td\u003e\n\u003c\/tr\u003e\n\u003ctr style=\"height: 27px;\"\u003e\n\u003ctd style=\"width: 245.562px; height: 27px;\"\u003eMax Service Ceiling Above Sea Level\u003c\/td\u003e\n\u003ctd style=\"width: 254.438px; height: 27px;\"\u003e\n\u003cp\u003e5000 m\u003cbr\u003e\u003c\/p\u003e\n\u003c\/td\u003e\n\u003c\/tr\u003e\n\u003ctr style=\"height: 9px;\"\u003e\n\u003ctd style=\"width: 245.562px; height: 9px;\"\u003eMax Flight Time (no wind)\u003c\/td\u003e\n\u003ctd style=\"width: 254.438px; height: 9px;\"\u003e\n\u003cp\u003e31 minutes\u003c\/p\u003e\n\u003c\/td\u003e\n\u003c\/tr\u003e\n\u003ctr style=\"height: 9px;\"\u003e\n\u003ctd style=\"width: 245.562px; height: 9px;\"\u003eMax Hovering Time (no wind)\u003c\/td\u003e\n\u003ctd style=\"width: 254.438px; height: 9px;\"\u003e\n\u003cp\u003e30 minutes\u003c\/p\u003e\n\u003c\/td\u003e\n\u003c\/tr\u003e\n\u003ctr style=\"height: 9px;\"\u003e\n\u003ctd style=\"width: 245.562px; height: 9px;\"\u003eMax Flight Distance (no wind)\u003c\/td\u003e\n\u003ctd style=\"width: 254.438px; height: 9px;\"\u003e\n\u003cp\u003e18.5 km\u003c\/p\u003e\n\u003c\/td\u003e\n\u003c\/tr\u003e\n\u003ctr style=\"height: 9px;\"\u003e\n\u003ctd style=\"width: 245.562px; height: 9px;\"\u003eMax Flight Speed (near sea level, no wind)\u003c\/td\u003e\n\u003ctd style=\"width: 254.438px; height: 9px;\"\u003e19 m\/s (S Mode)\u003cbr\u003e15 m\/s (N Mode)\u003cbr\u003e5 m\/s (C Mode)\u003c\/td\u003e\n\u003c\/tr\u003e\n\u003ctr style=\"height: 9px;\"\u003e\n\u003ctd style=\"width: 245.562px; height: 9px;\"\u003eMax Wind Speed Resistance\u003c\/td\u003e\n\u003ctd style=\"width: 254.438px; height: 9px;\"\u003e10.7 m\/s\u003c\/td\u003e\n\u003c\/tr\u003e\n\u003ctr style=\"height: 9px;\"\u003e\n\u003ctd style=\"width: 245.562px; height: 9px;\"\u003eMax Tilt Angle\u003c\/td\u003e\n\u003ctd style=\"width: 254.438px; height: 9px;\"\u003e35° (S Mode)\u003cbr\u003eFront: 30°, Back: 20°, Left: 35°, Right: 35° (N Mode)\u003c\/td\u003e\n\u003c\/tr\u003e\n\u003ctr style=\"height: 9px;\"\u003e\n\u003ctd style=\"width: 245.562px; height: 9px;\"\u003eMax Angular Velocity\u003c\/td\u003e\n\u003ctd style=\"width: 254.438px; height: 9px;\"\u003e250°\/s (S Mode)\u003cbr\u003e90°\/s (N Mode)\u003cbr\u003e60°\/s (C Mode)\u003c\/td\u003e\n\u003c\/tr\u003e\n\u003ctr style=\"height: 9px;\"\u003e\n\u003ctd style=\"width: 245.562px; height: 9px;\"\u003eOperating Temperature Range\u003c\/td\u003e\n\u003ctd style=\"width: 254.438px; height: 9px;\"\u003e0° to 40°C (32° to 104°F)\u003c\/td\u003e\n\u003c\/tr\u003e\n\u003ctr style=\"height: 9px;\"\u003e\n\u003ctd style=\"width: 245.562px; height: 9px;\"\u003eOperating Frequency\u003c\/td\u003e\n\u003ctd style=\"width: 254.438px; height: 9px;\"\u003e2.4 GHz\u003cbr\u003e5.8 GHz\u003cbr\u003eTransmission Power (EIRP)\u003cbr\u003e2.4 GHz:\u003cbr\u003eFCC: ≤30 dBm\u003cbr\u003eCE: ≤20 dBm\u003cbr\u003eSRRC: ≤20 dBm\u003cbr\u003eMIC: ≤20 dBm\u003cbr\u003e5.8 GHz:\u003cbr\u003eFCC: ≤30 dBm\u003cbr\u003eCE: ≤14 dBm\u003cbr\u003eSRRC: ≤29 dBm\u003c\/td\u003e\n\u003c\/tr\u003e\n\u003ctr style=\"height: 9px;\"\u003e\n\u003ctd style=\"width: 245.562px; height: 9px;\"\u003eHovering Accuracy Range\u003c\/td\u003e\n\u003ctd style=\"width: 254.438px; height: 9px;\"\u003eVertical:\u003cbr\u003e± 0.1 m (with vision positioning)\u003cbr\u003e± 0.5 m (with GNSS positioning)\u003cbr\u003eHorizontal:\u003cbr\u003e± 0.1 m (with vision positioning)\u003cbr\u003e± 1.5 m (with GNSS positioning)\u003c\/td\u003e\n\u003c\/tr\u003e\n\u003ctr style=\"height: 9px;\"\u003e\n\u003ctd style=\"width: 245.562px; height: 9px;\"\u003ePropellers\u003c\/td\u003e\n\u003ctd style=\"width: 254.438px; height: 9px;\"\u003eQuick release, low noise, folding\u003c\/td\u003e\n\u003c\/tr\u003e\n\u003ctr style=\"height: 9px;\"\u003e\n\u003ctd style=\"width: 245.562px; height: 9px;\"\u003eAircraft Arms\u003c\/td\u003e\n\u003ctd style=\"width: 254.438px; height: 9px;\"\u003eFoldable\u003c\/td\u003e\n\u003c\/tr\u003e\n\u003ctr style=\"height: 9px;\"\u003e\n\u003ctd style=\"width: 245.562px; height: 9px;\"\u003eGNSS\u003c\/td\u003e\n\u003ctd style=\"width: 254.438px; height: 9px;\"\u003eGPS+GLONASS+GALILEO\u003c\/td\u003e\n\u003c\/tr\u003e\n\u003ctr style=\"height: 9px;\"\u003e\n\u003ctd style=\"width: 245.562px; height: 9px;\"\u003eCompass\u003c\/td\u003e\n\u003ctd style=\"width: 254.438px; height: 9px;\"\u003eSingle Compass\u003c\/td\u003e\n\u003c\/tr\u003e\n\u003ctr style=\"height: 9px;\"\u003e\n\u003ctd style=\"width: 245.562px; height: 9px;\"\u003eIMU\u003c\/td\u003e\n\u003ctd style=\"width: 254.438px; height: 9px;\"\u003eSingle IMU\u003c\/td\u003e\n\u003c\/tr\u003e\n\u003ctr style=\"height: 9px;\"\u003e\n\u003ctd style=\"width: 245.562px; height: 9px;\"\u003eInternal Storage\u003c\/td\u003e\n\u003ctd style=\"width: 254.438px; height: 9px;\"\u003e8 GB\u003c\/td\u003e\n\u003c\/tr\u003e\n\u003c\/tbody\u003e\n\u003c\/table\u003e\n\u003cp\u003e\u003cbr\u003e\u003cbr\u003e\u003c\/p\u003e\n\u003ch3 class=\"group-list-title\"\u003eIntelligent Flight Battery\u003c\/h3\u003e\n\u003ctable width=\"100%\"\u003e\n\u003ctbody\u003e\n\u003ctr\u003e\n\u003ctd style=\"width: 46.981%;\"\u003e Capacity\u003c\/td\u003e\n\u003ctd style=\"width: 49.7244%;\"\u003e3500 mAh\u003c\/td\u003e\n\u003c\/tr\u003e\n\u003ctr\u003e\n\u003ctd style=\"width: 46.981%;\"\u003eVoltage\u003c\/td\u003e\n\u003ctd style=\"width: 49.7244%;\"\u003e11.55 V\u003c\/td\u003e\n\u003c\/tr\u003e\n\u003ctr\u003e\n\u003ctd style=\"width: 46.981%;\"\u003eMax Charging Voltage\u003c\/td\u003e\n\u003ctd style=\"width: 49.7244%;\"\u003e13.2 V\u003c\/td\u003e\n\u003c\/tr\u003e\n\u003ctr\u003e\n\u003ctd style=\"width: 46.981%;\"\u003eBattery Type\u003c\/td\u003e\n\u003ctd style=\"width: 49.7244%;\"\u003eLiPo 3S\u003c\/td\u003e\n\u003c\/tr\u003e\n\u003ctr\u003e\n\u003ctd style=\"width: 46.981%;\"\u003eEnergy\u003c\/td\u003e\n\u003ctd style=\"width: 49.7244%;\"\u003e40.42 Wh\u003c\/td\u003e\n\u003c\/tr\u003e\n\u003ctr\u003e\n\u003ctd style=\"width: 46.981%;\"\u003eWeight\u003c\/td\u003e\n\u003ctd style=\"width: 49.7244%;\"\u003e198 g\u003c\/td\u003e\n\u003c\/tr\u003e\n\u003ctr\u003e\n\u003ctd style=\"width: 46.981%;\"\u003eCharging Temperature Range\u003c\/td\u003e\n\u003ctd style=\"width: 49.7244%;\"\u003e5° to 40°C (41° to 104°F)\u003c\/td\u003e\n\u003c\/tr\u003e\n\u003ctr\u003e\n\u003ctd style=\"width: 46.981%;\"\u003eMax Charging Power\u003c\/td\u003e\n\u003ctd style=\"width: 49.7244%;\"\u003e38 W\u003c\/td\u003e\n\u003c\/tr\u003e\n\u003ctr\u003e\n\u003ctd style=\"width: 46.981%;\"\u003eBuilt-in Battery\u003c\/td\u003e\n\u003ctd style=\"width: 49.7244%;\"\u003eN\/A\u003c\/td\u003e\n\u003c\/tr\u003e\n\u003c\/tbody\u003e\n\u003c\/table\u003e\n\u003cp\u003e\u003cbr\u003e\u003c\/p\u003e\n\u003ch3 class=\"group-list-title\"\u003eCamera\u003c\/h3\u003e\n\u003ctable width=\"100%\"\u003e\n\u003ctbody\u003e\n\u003ctr\u003e\n\u003ctd style=\"width: 47.0159%;\"\u003e Sensor\u003c\/td\u003e\n\u003ctd style=\"width: 48.9841%;\"\u003e\n\u003cp\u003e1\" CMOS\u003c\/p\u003e\n\u003cp\u003eEffective Pixels: 20 MP; 2.4μm Pixel Size\u003c\/p\u003e\n\u003c\/td\u003e\n\u003c\/tr\u003e\n\u003ctr\u003e\n\u003ctd style=\"width: 47.0159%;\"\u003eLens\u003c\/td\u003e\n\u003ctd style=\"width: 48.9841%;\"\u003eFOV: 88°\u003cbr\u003e35 mm Format Equivalent: 22 mm\u003cbr\u003eAperture: f\/2.8\u003cbr\u003eShooting Range: 0.6 m to ∞\u003c\/td\u003e\n\u003c\/tr\u003e\n\u003ctr\u003e\n\u003ctd style=\"width: 47.0159%;\"\u003eISO Range\u003c\/td\u003e\n\u003ctd style=\"width: 48.9841%;\"\u003eVideo:\u003cbr\u003e100-3200 (Auto)\u003cbr\u003e100-6400 (Manual)\u003cbr\u003e10-Bit Dlog-M Video:\u003cbr\u003e100-800 (Auto)\u003cbr\u003e100-1600 (Manual)\u003cbr\u003ePhoto:\u003cbr\u003e100-3200 (Auto)\u003cbr\u003e100-12800 (Manual)\u003c\/td\u003e\n\u003c\/tr\u003e\n\u003ctr\u003e\n\u003ctd style=\"width: 47.0159%;\"\u003eStill Image Size\u003c\/td\u003e\n\u003ctd style=\"width: 48.9841%;\"\u003e20 MP\u003cbr\u003e5472×3648 (3:2)\u003cbr\u003e5472×3078 (16:9)\u003c\/td\u003e\n\u003c\/tr\u003e\n\u003ctr\u003e\n\u003ctd style=\"width: 47.0159%;\"\u003eStill Photography Modes\u003c\/td\u003e\n\u003ctd style=\"width: 48.9841%;\"\u003eSingle shot: 20 MP\u003cbr\u003eBurst shooting: 20 MP (continuous burst)\u003cbr\u003eAuto Exposure Bracketing (AEB): 20 MP, 3\/5 bracketed frames at 0.7 EV bias\u003cbr\u003eTimed: 20 MP, 2\/3\/5\/7\/10\/15\/20\/30\/60s\u003cbr\u003eSmartPhoto (including HDR and HyperLight): 20 MP\u003cbr\u003eHDR Panorama:\u003cbr\u003eVertical (3×1): 3328×8000 (width×height)\u003cbr\u003eWide-angle (3×3): 8000×6144 (width×height)\u003cbr\u003e180° (3×7): 8192×3500 (width×height)\u003cbr\u003eSphere (3×8+1): 8192×4096 (width×height)\u003cbr\u003eJPEG\/DNG (RAW)\u003c\/td\u003e\n\u003c\/tr\u003e\n\u003ctr\u003e\n\u003ctd style=\"width: 47.0159%;\"\u003eVideo Resolution\u003c\/td\u003e\n\u003ctd style=\"width: 48.9841%;\"\u003e5.4K: 5472×3078 @ 24\/25\/30 fps\u003cbr\u003e4K Ultra HD: 3840×2160 @ 24\/25\/30\/48\/50\/60 fps\u003cbr\u003e2.7K: 2688x1512 @ 24\/25\/30\/48\/50\/60 fps\u003cbr\u003eFHD: 1920×1080 @ 24\/25\/30\/48\/50\/60\/120 fps\u003cbr\u003eMP4\/MOV (H.264\/MPEG-4 AVC, H.265\/HEVC)\u003c\/td\u003e\n\u003c\/tr\u003e\n\u003ctr\u003e\n\u003ctd style=\"width: 47.0159%;\"\u003eMax Video Bitrate\u003c\/td\u003e\n\u003ctd style=\"width: 48.9841%;\"\u003e150 Mbps\u003c\/td\u003e\n\u003c\/tr\u003e\n\u003ctr\u003e\n\u003ctd style=\"width: 47.0159%;\"\u003eSupported File System\u003c\/td\u003e\n\u003ctd style=\"width: 48.9841%;\"\u003e\n\u003cp\u003eFAT32\/exFAT\u003c\/p\u003e\n\u003cp\u003eSupports a microSD card with a capacity of up to 256 GB.\u003c\/p\u003e\n\u003c\/td\u003e\n\u003c\/tr\u003e\n\u003ctr\u003e\n\u003ctd style=\"width: 47.0159%;\"\u003eDigital Zoom\u003c\/td\u003e\n\u003ctd style=\"width: 48.9841%;\"\u003e\n\u003cp\u003eZoom recording is not available while recording 10-bit videos and 120fps videos.\u003c\/p\u003e\n\u003cp\u003e4K\/30fps:\u003cbr\u003e4x;\u003cbr\u003e2.7K\/60fps:\u003cbr\u003e4x;\u003cbr\u003e2.7K\/30fps:\u003cbr\u003e6x;\u003cbr\u003e1080p\/60fps:\u003cbr\u003e6x;\u003cbr\u003e1080p\/30fps:\u003cbr\u003e8x\u003c\/p\u003e\n\u003c\/td\u003e\n\u003c\/tr\u003e\n\u003c\/tbody\u003e\n\u003c\/table\u003e\n\u003cp\u003e \u003c\/p\u003e\n\u003ch3 class=\"group-list-title\"\u003eGimbal\u003c\/h3\u003e\n\u003ctable width=\"100%\"\u003e\n\u003ctbody\u003e\n\u003ctr\u003e\n\u003ctd style=\"width: 46.8312%;\"\u003e Stabilization\u003c\/td\u003e\n\u003ctd style=\"width: 48.1688%;\"\u003e3-axis (tilt, roll, pan)\u003c\/td\u003e\n\u003c\/tr\u003e\n\u003ctr\u003e\n\u003ctd style=\"width: 46.8312%;\"\u003eMechanical Range\u003c\/td\u003e\n\u003ctd style=\"width: 48.1688%;\"\u003eTilt: -135° to 45°\u003cbr\u003eRoll: -45° to 45°\u003cbr\u003ePan: -100° to 100°\u003c\/td\u003e\n\u003c\/tr\u003e\n\u003ctr\u003e\n\u003ctd style=\"width: 46.8312%;\"\u003ePan Axis\u003c\/td\u003e\n\u003ctd style=\"width: 48.1688%;\"\u003eNot Controllable\u003c\/td\u003e\n\u003c\/tr\u003e\n\u003ctr\u003e\n\u003ctd style=\"width: 46.8312%;\"\u003eControllable Range\u003c\/td\u003e\n\u003ctd style=\"width: 48.1688%;\"\u003eTilt: -90° to 0°(default); -90° to 24° (extended)\u003c\/td\u003e\n\u003c\/tr\u003e\n\u003ctr\u003e\n\u003ctd style=\"width: 46.8312%;\"\u003eMax Controllable Speed (tilt)\u003c\/td\u003e\n\u003ctd style=\"width: 48.1688%;\"\u003e100°\/s\u003c\/td\u003e\n\u003c\/tr\u003e\n\u003ctr\u003e\n\u003ctd style=\"width: 46.8312%;\"\u003eAngular Vibration Range\u003c\/td\u003e\n\u003ctd style=\"width: 48.1688%;\"\u003e±0.01°\u003c\/td\u003e\n\u003c\/tr\u003e\n\u003c\/tbody\u003e\n\u003c\/table\u003e\n\u003cp\u003e\u003cbr\u003e\u003c\/p\u003e\n\u003ch3 class=\"group-list-title\"\u003eSensing System\u003c\/h3\u003e\n\u003ctable width=\"100%\"\u003e\n\u003ctbody\u003e\n\u003ctr\u003e\n\u003ctd style=\"width: 48.1438%;\"\u003e Forward\u003c\/td\u003e\n\u003ctd style=\"width: 48.5617%;\"\u003e\n\u003cp\u003ePrecision Measurement Range: 0.38-23.8 m\u003c\/p\u003e\n\u003cp\u003eEffective Sensing Speed: ≤15 m\/s\u003cbr\u003eField of View (FOV): 72° (horizontal), 58° (vertical)\u003c\/p\u003e\n\u003c\/td\u003e\n\u003c\/tr\u003e\n\u003ctr\u003e\n\u003ctd style=\"width: 48.1438%;\"\u003eBackward\u003c\/td\u003e\n\u003ctd style=\"width: 48.5617%;\"\u003ePrecision Measurement Range: 0.37-23.4 m\u003cbr\u003eEffective Sensing Speed: ≤12 m\/s\u003cbr\u003eField of View (FOV): 57° (horizontal), 44° (vertical)\u003c\/td\u003e\n\u003c\/tr\u003e\n\u003ctr\u003e\n\u003ctd style=\"width: 48.1438%;\"\u003eDownward\u003c\/td\u003e\n\u003ctd style=\"width: 48.5617%;\"\u003eToF Measurement Range: 0.1-8 m\u003cbr\u003eHovering Range: 0.5-30 m\u003cbr\u003eVision Sensor Hovering Range: 0.5-60 m\u003c\/td\u003e\n\u003c\/tr\u003e\n\u003ctr\u003e\n\u003ctd style=\"width: 48.1438%;\"\u003eLeft\/Right\u003c\/td\u003e\n\u003ctd style=\"width: 48.5617%;\"\u003eN\/A\u003c\/td\u003e\n\u003c\/tr\u003e\n\u003ctr\u003e\n\u003ctd style=\"width: 48.1438%;\"\u003eUpward\u003c\/td\u003e\n\u003ctd style=\"width: 48.5617%;\"\u003ePrecision Measurement Range: 0.34-28.6 m\u003cbr\u003eField of View (FOV): 63° (horizontal), 78° (vertical)\u003c\/td\u003e\n\u003c\/tr\u003e\n\u003ctr\u003e\n\u003ctd style=\"width: 48.1438%;\"\u003eDownward Auxiliary Light\u003c\/td\u003e\n\u003ctd style=\"width: 48.5617%;\"\u003eSingle LED\u003c\/td\u003e\n\u003c\/tr\u003e\n\u003c\/tbody\u003e\n\u003c\/table\u003e\n\u003cp\u003e\u003cbr\u003e\u003c\/p\u003e\n\u003ch3 class=\"group-list-title\"\u003eVideo Transmission\u003c\/h3\u003e\n\u003ctable width=\"100%\"\u003e\n\u003ctbody\u003e\n\u003ctr\u003e\n\u003ctd style=\"width: 47.6063%;\"\u003e Transmission System\u003c\/td\u003e\n\u003ctd style=\"width: 47.3937%;\"\u003e\n\u003cp\u003eO3\u003c\/p\u003e\n\u003cp\u003e2.4 GHz\/5.8 GHz Auto-Switching (compatible with OcuSync 2.0)\u003cbr data-mce-fragment=\"1\"\u003e4-antenna 2T4R\u003c\/p\u003e\n\u003c\/td\u003e\n\u003c\/tr\u003e\n\u003ctr\u003e\n\u003ctd style=\"width: 47.6063%;\"\u003eMax Transmission Distance\u003c\/td\u003e\n\u003ctd style=\"width: 47.3937%;\"\u003e12 km (FCC), 8 km (CE)\u003cbr\u003e8 km (SRRC), 8 km (MIC)\u003c\/td\u003e\n\u003c\/tr\u003e\n\u003ctr\u003e\n\u003ctd style=\"width: 47.6063%;\"\u003eLive View Quality\/Latency\u003c\/td\u003e\n\u003ctd style=\"width: 47.3937%;\"\u003eDrone + Remote Controller: 1080p\/30fps 12 Mbps 120 ms\u003cbr\u003eDrone + DJI Smart Controller: 1080p\/30fps 12Mbps 130 ms\u003c\/td\u003e\n\u003c\/tr\u003e\n\u003ctr\u003e\n\u003ctd style=\"width: 47.6063%;\"\u003eMax Transmission Bitrate\u003c\/td\u003e\n\u003ctd style=\"width: 47.3937%;\"\u003e44 Mbps (download bitrate)\u003cbr\u003e16 Mbps (live video bitrate)\u003c\/td\u003e\n\u003c\/tr\u003e\n\u003ctr\u003e\n\u003ctd style=\"width: 47.6063%;\"\u003eOperating Frequency\u003c\/td\u003e\n\u003ctd style=\"width: 47.3937%;\"\u003e2.4 GHz\u003cbr\u003e5.8 GHz\u003c\/td\u003e\n\u003c\/tr\u003e\n\u003c\/tbody\u003e\n\u003c\/table\u003e\n\u003cp\u003e\u003cbr\u003e\u003c\/p\u003e\n\u003ch3 class=\"group-list-title\"\u003eRemote Controller\u003c\/h3\u003e\n\u003ctable width=\"100%\"\u003e\n\u003ctbody\u003e\n\u003ctr\u003e\n\u003ctd style=\"width: 47.7766%;\"\u003e Multiple Controllers\u003c\/td\u003e\n\u003ctd style=\"width: 47.2234%;\"\u003eN\/A\u003c\/td\u003e\n\u003c\/tr\u003e\n\u003ctr\u003e\n\u003ctd style=\"width: 47.7766%;\"\u003eDJI Smart Controller\u003c\/td\u003e\n\u003ctd style=\"width: 47.2234%;\"\u003eSupported\u003c\/td\u003e\n\u003c\/tr\u003e\n\u003ctr\u003e\n\u003ctd style=\"width: 47.7766%;\"\u003eRemote Controller Transmission System\u003c\/td\u003e\n\u003ctd style=\"width: 47.2234%;\"\u003eOcuSync 2.0\u003c\/td\u003e\n\u003c\/tr\u003e\n\u003ctr\u003e\n\u003ctd style=\"width: 47.7766%;\"\u003eBattery Life\u003c\/td\u003e\n\u003ctd style=\"width: 47.2234%;\"\u003e6 hours (4 hours when charging a mobile device)\u003c\/td\u003e\n\u003c\/tr\u003e\n\u003ctr\u003e\n\u003ctd style=\"width: 47.7766%;\"\u003eSupported Mobile Device Connectors\u003c\/td\u003e\n\u003ctd style=\"width: 47.2234%;\"\u003eLightning, Micro USB, USB-C\u003c\/td\u003e\n\u003c\/tr\u003e\n\u003ctr\u003e\n\u003ctd style=\"width: 47.7766%;\"\u003eMax Supported Mobile Device Size\u003c\/td\u003e\n\u003ctd style=\"width: 47.2234%;\"\u003e180×86×10 mm (length×width×height)\u003c\/td\u003e\n\u003c\/tr\u003e\n\u003ctr\u003e\n\u003ctd style=\"width: 47.7766%;\"\u003eOperating Temperature\u003c\/td\u003e\n\u003ctd style=\"width: 47.2234%;\"\u003e0° to 40°C (14° to 104°F)\u003c\/td\u003e\n\u003c\/tr\u003e\n\u003ctr\u003e\n\u003ctd style=\"width: 47.7766%;\"\u003eTransmitter Power (EIRP)\u003c\/td\u003e\n\u003ctd style=\"width: 47.2234%;\"\u003e2.4 GHz:\u003cbr\u003eFCC: ≤26 dBm\u003cbr\u003eCE: ≤20 dBm\u003cbr\u003eSRRC: ≤20 dBm\u003cbr\u003eMIC: ≤20 dBm\u003cbr\u003e5.8 GHz:\u003cbr\u003eFCC: ≤26 dBm\u003cbr\u003eCE: ≤14 dBm\u003cbr\u003eSRRC: ≤26 dBm\u003c\/td\u003e\n\u003c\/tr\u003e\n\u003c\/tbody\u003e\n\u003c\/table\u003e\n\u003cp\u003e\u003cbr\u003e\u003c\/p\u003e\n\u003ch3 class=\"group-list-title\"\u003eCharger\u003c\/h3\u003e\n\u003ctable width=\"100%\"\u003e\n\u003ctbody\u003e\n\u003ctr\u003e\n\u003ctd style=\"width: 49.888%;\"\u003e Charging Input\u003c\/td\u003e\n\u003ctd style=\"width: 46.8175%;\"\u003e100-240V, 50\/60 Hz, 1.3 A\u003c\/td\u003e\n\u003c\/tr\u003e\n\u003ctr\u003e\n\u003ctd style=\"width: 49.888%;\"\u003eCharging Output\u003c\/td\u003e\n\u003ctd style=\"width: 46.8175%;\"\u003eCharging Port: 13.2 V⎓2.82 A\u003cbr\u003eUSB Port: 5 V⎓2 A\u003c\/td\u003e\n\u003c\/tr\u003e\n\u003ctr\u003e\n\u003ctd style=\"width: 49.888%;\"\u003eVoltage\u003c\/td\u003e\n\u003ctd style=\"width: 46.8175%;\"\u003e13.2 V\u003c\/td\u003e\n\u003c\/tr\u003e\n\u003ctr\u003e\n\u003ctd style=\"width: 49.888%;\"\u003eRated Power\u003c\/td\u003e\n\u003ctd style=\"width: 46.8175%;\"\u003e38 W\u003c\/td\u003e\n\u003c\/tr\u003e\n\u003c\/tbody\u003e\n\u003c\/table\u003e\n\u003cp\u003e\u003cbr\u003e\u003c\/p\u003e\n\u003cdiv\u003e\n\u003cul style=\"text-align: center;\"\u003e\u003c\/ul\u003e\n\u003c\/div\u003e\n\u003cstyle\u003e\u003c!--\n.embed-container { position: relative; padding-bottom: 56.25%; height: 0; overflow: hidden; max-width: 100%; } .embed-container iframe, .embed-container object, .embed-container embed { position: absolute; top: 0; left: 0; width: 100%; height: 100%; }\n--\u003e\u003c\/style\u003e\n\u003c\/div\u003e","published_at":"2022-10-20T06:13:57-04:00","created_at":"2022-10-02T06:34:30-04:00","vendor":"DJI","type":"Drone","tags":["best drone","DJI Drones","DJI Mavic Air 2","drone","drone camera","drone dji","drone with camera","FocusTrack","HDR","mini drone","無人機","無人機套裝","航拍機","遙控航拍機","飛行無人機","高清航拍機"],"price":97800,"price_min":97800,"price_max":97800,"available":true,"price_varies":false,"compare_at_price":null,"compare_at_price_min":0,"compare_at_price_max":0,"compare_at_price_varies":false,"variants":[{"id":39869991747659,"title":"Default Title","option1":"Default Title","option2":null,"option3":null,"sku":"DJI-AIR-2S","requires_shipping":true,"taxable":true,"featured_image":null,"available":true,"name":"DJI Mavic Air 2S - 4 Directions of Obstacle Sensing Drone with 3-Axis Gimbal Camera | 5.4K Video | 1-Inch Sensor | MasterShots","public_title":null,"options":["Default Title"],"price":97800,"weight":4000,"compare_at_price":null,"inventory_management":"shopify","barcode":"","requires_selling_plan":false,"selling_plan_allocations":[]}],"images":["\/\/www.stream-sourcing.com\/cdn\/shop\/products\/DJI-Mavic-Air-2S-Fly-More-Combo_StreamSource_7454d458-c258-4035-9678-bd6f657f6772.jpg?v=1664706876","\/\/www.stream-sourcing.com\/cdn\/shop\/products\/DJI-Mavic-Air-2S-Fly-More-Combo_3_1_StreamSource2_a9eecce2-74f6-4bc1-8da2-a5945c19a54b.jpg?v=1664706877","\/\/www.stream-sourcing.com\/cdn\/shop\/products\/DJI-Mavic-Air-2S-Fly-More-Combo_4_1_StreamSource4_8e3f9619-9040-4888-b00c-fad2e25f5577.jpg?v=1664706877","\/\/www.stream-sourcing.com\/cdn\/shop\/products\/DJI-Mavic-Air-2S-Fly-More-Combo_StreamSource5_0e8ad2cc-6117-42a2-b8bf-64e3376bb619.jpg?v=1664706877","\/\/www.stream-sourcing.com\/cdn\/shop\/products\/DJI-Mavic-Air-2S-Fly-More-Combo_StreamSource6_d4456b92-6f7a-41bf-b1d0-e1adbb3e8cdd.jpg?v=1664706877"],"featured_image":"\/\/www.stream-sourcing.com\/cdn\/shop\/products\/DJI-Mavic-Air-2S-Fly-More-Combo_StreamSource_7454d458-c258-4035-9678-bd6f657f6772.jpg?v=1664706876","options":["Title"],"media":[{"alt":"DJI-Mavic-Air-2S-Fly-More-Combo_StreamSource","id":21590625648715,"position":1,"preview_image":{"aspect_ratio":1.762,"height":681,"width":1200,"src":"\/\/www.stream-sourcing.com\/cdn\/shop\/products\/DJI-Mavic-Air-2S-Fly-More-Combo_StreamSource_7454d458-c258-4035-9678-bd6f657f6772.jpg?v=1664706876"},"aspect_ratio":1.762,"height":681,"media_type":"image","src":"\/\/www.stream-sourcing.com\/cdn\/shop\/products\/DJI-Mavic-Air-2S-Fly-More-Combo_StreamSource_7454d458-c258-4035-9678-bd6f657f6772.jpg?v=1664706876","width":1200},{"alt":"DJI-Mavic-Air-2S-Fly-More-Combo_StreamSource","id":21590625714251,"position":2,"preview_image":{"aspect_ratio":1.762,"height":681,"width":1200,"src":"\/\/www.stream-sourcing.com\/cdn\/shop\/products\/DJI-Mavic-Air-2S-Fly-More-Combo_3_1_StreamSource2_a9eecce2-74f6-4bc1-8da2-a5945c19a54b.jpg?v=1664706877"},"aspect_ratio":1.762,"height":681,"media_type":"image","src":"\/\/www.stream-sourcing.com\/cdn\/shop\/products\/DJI-Mavic-Air-2S-Fly-More-Combo_3_1_StreamSource2_a9eecce2-74f6-4bc1-8da2-a5945c19a54b.jpg?v=1664706877","width":1200},{"alt":"DJI-Mavic-Air-2S-Fly-More-Combo_StreamSource","id":21590625747019,"position":3,"preview_image":{"aspect_ratio":1.762,"height":681,"width":1200,"src":"\/\/www.stream-sourcing.com\/cdn\/shop\/products\/DJI-Mavic-Air-2S-Fly-More-Combo_4_1_StreamSource4_8e3f9619-9040-4888-b00c-fad2e25f5577.jpg?v=1664706877"},"aspect_ratio":1.762,"height":681,"media_type":"image","src":"\/\/www.stream-sourcing.com\/cdn\/shop\/products\/DJI-Mavic-Air-2S-Fly-More-Combo_4_1_StreamSource4_8e3f9619-9040-4888-b00c-fad2e25f5577.jpg?v=1664706877","width":1200},{"alt":"DJI-Mavic-Air-2S-Fly-More-Combo_StreamSource","id":21590625779787,"position":4,"preview_image":{"aspect_ratio":1.762,"height":681,"width":1200,"src":"\/\/www.stream-sourcing.com\/cdn\/shop\/products\/DJI-Mavic-Air-2S-Fly-More-Combo_StreamSource5_0e8ad2cc-6117-42a2-b8bf-64e3376bb619.jpg?v=1664706877"},"aspect_ratio":1.762,"height":681,"media_type":"image","src":"\/\/www.stream-sourcing.com\/cdn\/shop\/products\/DJI-Mavic-Air-2S-Fly-More-Combo_StreamSource5_0e8ad2cc-6117-42a2-b8bf-64e3376bb619.jpg?v=1664706877","width":1200},{"alt":"DJI-Mavic-Air-2S-Fly-More-Combo_StreamSource","id":21590625812555,"position":5,"preview_image":{"aspect_ratio":1.762,"height":681,"width":1200,"src":"\/\/www.stream-sourcing.com\/cdn\/shop\/products\/DJI-Mavic-Air-2S-Fly-More-Combo_StreamSource6_d4456b92-6f7a-41bf-b1d0-e1adbb3e8cdd.jpg?v=1664706877"},"aspect_ratio":1.762,"height":681,"media_type":"image","src":"\/\/www.stream-sourcing.com\/cdn\/shop\/products\/DJI-Mavic-Air-2S-Fly-More-Combo_StreamSource6_d4456b92-6f7a-41bf-b1d0-e1adbb3e8cdd.jpg?v=1664706877","width":1200}],"requires_selling_plan":false,"selling_plan_groups":[],"content":"\u003ch1 style=\"text-align: center;\"\u003e\u003cstrong\u003eDJI Mavic Air 2S\u003c\/strong\u003e\u003c\/h1\u003e\u003cdiv class=\"desc\"\u003e\n\u003ch2 style=\"text-align: center;\"\u003eDJI Air 2S is the ultimate drone for creators on the move, with a 1-inch CMOS sensor, powerful autonomous functions, and a compact body weighing less than 600 g. \u003c\/h2\u003e\n\u003cstyle\u003e\u003c!--\n.embed-container { position: relative; padding-bottom: 56.25%; height: 0; overflow: hidden; max-width: 100%; } .embed-container iframe, .embed-container object, .embed-container embed { position: absolute; top: 0; left: 0; width: 100%; height: 100%; }\n--\u003e\u003c\/style\u003e\n\u003cdiv class=\"embed-container\" style=\"text-align: center;\"\u003e\u003ciframe src=\"https:\/\/www.youtube.com\/embed\/NJ3Z1hSOoMc\" frameborder=\"0\" allowfullscreen=\"\"\u003e\u003c\/iframe\u003e\u003c\/div\u003e\n\u003cdiv style=\"text-align: center;\"\u003e \u003c\/div\u003e\n\u003ch3 style=\"text-align: center;\"\u003e\u003cspan style=\"font-weight: 400;\"\u003eTake this all-in-one aerial powerhouse along anywhere to experience and record your world in stunning detail.\u003c\/span\u003e\u003c\/h3\u003e\n\u003cp\u003e \u003c\/p\u003e\n\u003ch2 style=\"text-align: left;\"\u003e\n\u003cstrong\u003eDifference Between DJI Mavic Air 2S Fly More Combo and DJI Mavic Air 2 Fly More Combo:\u003c\/strong\u003e \u003c\/h2\u003e\n\u003cp\u003e \u003c\/p\u003e\n\u003ch3 style=\"text-align: center;\"\u003e\u003cspan style=\"color: #ff8000;\"\u003e\u003cb\u003eUpgrades\u003c\/b\u003e\u003c\/span\u003e\u003c\/h3\u003e\n\u003cdiv\u003eUpgrades include a 1-inch CMOS sensor, four-antenna low-latency transmission, APAS 4.0, added upward-facing dual-vision sensors, and MasterShots. The camera performance, intelligent features, obstacle sensing system, and transmission system have all improved significantly. \u003c\/div\u003e\n\u003ch2 style=\"text-align: center;\"\u003e\u003cstrong\u003e\u003c\/strong\u003e\u003c\/h2\u003e\n\u003cp\u003e \u003c\/p\u003e\n\u003ch2 style=\"text-align: center;\"\u003e\u003cstrong\u003eHighlights and Features\u003c\/strong\u003e\u003c\/h2\u003e\n\u003ctable data-mce-fragment=\"1\"\u003e\n\u003ctbody data-mce-fragment=\"1\"\u003e\n\u003ctr data-mce-fragment=\"1\"\u003e\n\u003ctd width=\"184\" data-mce-fragment=\"1\"\u003e1-inch CMOS Sensor\u003c\/td\u003e\n\u003ctd width=\"184\" data-mce-fragment=\"1\"\u003eMasterShots\u003c\/td\u003e\n\u003ctd width=\"184\" data-mce-fragment=\"1\"\u003e5.4K Video\u003c\/td\u003e\n\u003c\/tr\u003e\n\u003ctr data-mce-fragment=\"1\"\u003e\n\u003ctd width=\"184\" data-mce-fragment=\"1\"\u003e12km FHD Transmission\u003cspan data-mce-fragment=\"1\"\u003e \u003c\/span\u003e\u003csup data-mce-fragment=\"1\"\u003e[1]\u003c\/sup\u003e\n\u003c\/td\u003e\n\u003ctd width=\"184\" data-mce-fragment=\"1\"\u003eObstacle Sensing in 4 Directions\u003c\/td\u003e\n\u003ctd width=\"184\" data-mce-fragment=\"1\"\u003eADS-B\u003c\/td\u003e\n\u003c\/tr\u003e\n\u003c\/tbody\u003e\n\u003c\/table\u003e\n\u003cbr\u003e\n\u003cdiv style=\"text-align: start;\"\u003e\u003cimg style=\"margin-right: auto; float: none; display: block; margin-left: auto;\" src=\"https:\/\/cdn.shopify.com\/s\/files\/1\/2532\/7020\/files\/Screenshot_2021-08-06_183943.png?v=1628246675\" alt=\"dji-mavic-air-2S-fly-more-combo-drone-content-feature-all\"\u003e\u003c\/div\u003e\n\u003cp\u003e \u003c\/p\u003e\n\u003ch3 style=\"text-align: center;\"\u003e\u003cspan style=\"color: #ff8000;\"\u003e\u003cb\u003e\u003c\/b\u003e\u003c\/span\u003e\u003c\/h3\u003e\n\u003cdiv style=\"text-align: center;\"\u003e\u003c\/div\u003e\n\u003cdiv style=\"text-align: center;\"\u003e\u003c\/div\u003e\n\u003cdiv style=\"text-align: center;\"\u003e\u003c\/div\u003e\n\u003cdiv style=\"text-align: center;\"\u003e\n\u003cp\u003e \u003c\/p\u003e\n\u003ch3\u003e\u003cspan style=\"color: #ff8000;\"\u003e\u003cb\u003eIncredible Image System\u003c\/b\u003e\u003c\/span\u003e\u003c\/h3\u003e\n\u003cdiv style=\"text-align: center;\"\u003e\u003cb\u003eBig World, Big Sensor\u003c\/b\u003e\u003c\/div\u003e\n\u003cdiv style=\"text-align: center;\"\u003e\u003cb\u003e\u003c\/b\u003e\u003c\/div\u003e\n\u003c\/div\u003e\n\u003cdiv style=\"text-align: center;\"\u003e\u003cspan\u003eEquipped with a 1-inch CMOS image sensor and large 2.4μm pixels, DJI Air 2S is capable of 5.4K\/30fps and 4K\/60fps video. Capture any moment with the rich clarity and authentic color tones it deserves.\u003c\/span\u003e\u003c\/div\u003e\n\u003cdiv style=\"text-align: center;\"\u003e\u003cspan\u003e\u003cimg src=\"https:\/\/cdn.shopify.com\/s\/files\/1\/2532\/7020\/files\/DJI_Mavic_Air_2S_Fly_More_Combo_8.jpg?v=1628248569\" style=\"float: none;\" alt=\"dji-mavic-air-2S-fly-more-combo-drone-content-feature-Good-Image-System\"\u003e\u003c\/span\u003e\u003c\/div\u003e\n\u003cdiv style=\"text-align: center;\"\u003e\u003cspan\u003e\u003c\/span\u003e\u003c\/div\u003e\n\u003cdiv style=\"text-align: center;\"\u003e\u003cspan\u003e\u003c\/span\u003e\u003c\/div\u003e\n\u003cdiv style=\"text-align: center;\"\u003e\u003cspan\u003e\u003c\/span\u003e\u003c\/div\u003e\n\u003ch3 style=\"text-align: center;\"\u003e\u003cspan style=\"color: #ff8000;\"\u003e\u003cb\u003e\u003c\/b\u003e\u003c\/span\u003e\u003c\/h3\u003e\n\u003ch3 style=\"text-align: center;\"\u003e\u003cspan style=\"color: #ff8000;\"\u003e\u003cb\u003e\u003c\/b\u003e\u003c\/span\u003e\u003c\/h3\u003e\n\u003ch3 style=\"text-align: center;\"\u003e\u003cspan style=\"color: #ff8000;\"\u003eTurn On the Night\u003c\/span\u003e\u003c\/h3\u003e\n\u003cdiv style=\"text-align: center;\"\u003e\u003cspan style=\"font-weight: 400;\"\u003e\u003cspan data-mce-fragment=\"1\"\u003eCapture the allure of the world, even as it darkens. Thanks to a high dynamic range, high resolution, and accurate color reproduction, even low-light scenes are sharp and vibrant.\u003c\/span\u003e\u003c\/span\u003e\u003c\/div\u003e\n\u003cdiv style=\"text-align: center;\"\u003e\u003cimg style=\"float: none;\" src=\"https:\/\/cdn.shopify.com\/s\/files\/1\/2532\/7020\/files\/DJI_Mavic_Air_2S_Fly_More_Combo_9.jpg?v=1628573124\" alt=\"dji-mavic-air-2S-fly-more-combo-drone-content-feature-Turn-On-the-Night\"\u003e\u003c\/div\u003e\n\u003ch3 style=\"text-align: center;\"\u003e\u003cspan style=\"color: #ff8000;\"\u003e\u003cb\u003e\u003c\/b\u003e\u003c\/span\u003e\u003c\/h3\u003e\n\u003ch3 style=\"text-align: center;\"\u003e\u003cspan style=\"color: #ff8000;\"\u003e\u003cb\u003e\u003cspan data-mce-fragment=\"1\"\u003eOne billion colors\u003c\/span\u003e\u003c\/b\u003e\u003c\/span\u003e\u003c\/h3\u003e\n\u003cdiv style=\"text-align: center;\"\u003e\u003cspan style=\"font-weight: 400;\"\u003e\u003cspan data-mce-fragment=\"1\"\u003eCaptured by the 10-bit Dlog-M color profile of DJI Air 2S let you fully immerse yourself in all the hues of your environment.\u003c\/span\u003e\u003c\/span\u003e\u003c\/div\u003e\n\u003cdiv style=\"text-align: center;\"\u003e\u003cimg style=\"float: none;\" src=\"https:\/\/cdn.shopify.com\/s\/files\/1\/2532\/7020\/files\/DJI_Mavic_Air_2S_Fly_More_Combo_10.jpg?v=1628573285\" alt=\"dji-mavic-air-2S-fly-more-combo-drone-content-feature-One-billion-colors\"\u003e\u003c\/div\u003e\n\u003ch3 style=\"text-align: center;\"\u003e\u003cspan style=\"color: #ff8000;\"\u003e\u003cb\u003e\u003c\/b\u003e\u003c\/span\u003e\u003c\/h3\u003e\n\u003ctable width=\"100%\"\u003e\n\u003ctbody\u003e\n\u003ctr\u003e\n\u003ctd style=\"width: 47.3093%;\"\u003e\n\u003ch3 data-mce-fragment=\"1\"\u003e\u003cspan style=\"color: #ff8000;\" data-mce-fragment=\"1\"\u003e\u003cb data-mce-fragment=\"1\"\u003eShoot RAW\u003c\/b\u003e\u003c\/span\u003e\u003c\/h3\u003e\n\u003cp style=\"text-align: left;\"\u003e\u003cspan\u003eFormat photos with a dynamic \u003c\/span\u003e\u003cspan style=\"font-weight: 400;\" data-mce-fragment=\"1\" data-mce-style=\"font-weight: 400;\"\u003erange of up to 12.6 stops to\u003c\/span\u003e\u003cspan style=\"font-weight: 400;\" data-mce-fragment=\"1\" data-mce-style=\"font-weight: 400;\"\u003e capture more visual information in every scene, even when lighting conditions are bad or complex. This provides more flexibility in post-processing, giving creators more possibilities to get the look they want. \u003c\/span\u003e\u003c\/p\u003e\n\u003c\/td\u003e\n\u003ctd style=\"width: 47.6907%;\"\u003e\n\u003cdiv style=\"text-align: center;\"\u003e\u003cimg src=\"https:\/\/cdn.shopify.com\/s\/files\/1\/2532\/7020\/files\/DJI-Mavic-Air-2S-Fly-More-Combo_600x600.jpg?v=1628577003\" alt=\"dji-mavic-air-2S-fly-more-combo-drone-content-feature-all\" style=\"float: none;\" width=\"600x600\" height=\"600x600\"\u003e\u003c\/div\u003e\n\u003c\/td\u003e\n\u003c\/tr\u003e\n\u003ctr\u003e\n\u003ctd style=\"width: 47.3093%;\"\u003e\n\u003cdiv style=\"text-align: center;\" data-mce-fragment=\"1\" data-mce-style=\"text-align: center;\"\u003e\u003cimg style=\"float: none;\" alt=\"dji-mavic-air-2S-fly-more-combo-drone-content-feature-Shoot-RAW\" src=\"https:\/\/cdn.shopify.com\/s\/files\/1\/2532\/7020\/files\/3b0718d6123b5e2827b85292dc6322fa_600x600.jpg?v=1628577485\" width=\"600x600\" height=\"600x600\" data-mce-fragment=\"1\" data-mce-src=\"https:\/\/cdn.shopify.com\/s\/files\/1\/2532\/7020\/files\/3b0718d6123b5e2827b85292dc6322fa_600x600.jpg?v=1628577485\" data-mce-style=\"float: none;\"\u003e\u003c\/div\u003e\n\u003ch3 style=\"text-align: center;\"\u003e\n\u003cspan style=\"color: #ff8000;\"\u003e\u003cb\u003e\u003c\/b\u003e\u003c\/span\u003e\u003cbr\u003e\n\u003c\/h3\u003e\n\u003c\/td\u003e\n\u003ctd style=\"width: 47.6907%;\"\u003e\n\u003ch3 style=\"text-align: right;\"\u003e\u003cspan style=\"color: #ff8000;\"\u003e\u003cb\u003eIntelligent HDR technology\u003c\/b\u003e\u003c\/span\u003e\u003c\/h3\u003e\n\u003cp style=\"text-align: right;\"\u003e\u003cspan\u003eMerges multiple shots automatically, increasing the dynamic range of images without the need for post-processing. That means more nuanced details in both the highlights and shadows for richer images with greater depth.\u003c\/span\u003e\u003c\/p\u003e\n\u003c\/td\u003e\n\u003c\/tr\u003e\n\u003c\/tbody\u003e\n\u003c\/table\u003e\n\u003ch3 style=\"text-align: center;\"\u003e\u003cspan style=\"color: #ff8000;\"\u003e\u003cb\u003e\u003cspan data-mce-fragment=\"1\"\u003e\u003c\/span\u003e\u003c\/b\u003e\u003c\/span\u003e\u003c\/h3\u003e\n\u003ch3 style=\"text-align: center;\"\u003e\u003cspan style=\"color: #ff8000;\"\u003e\u003cb\u003e\u003cspan data-mce-fragment=\"1\"\u003e\u003c\/span\u003e\u003c\/b\u003e\u003c\/span\u003e\u003c\/h3\u003e\n\u003ch3 style=\"text-align: center;\"\u003e\u003cspan style=\"color: #ff8000;\"\u003e\u003cb\u003e\u003cspan data-mce-fragment=\"1\"\u003e\u003c\/span\u003e\u003c\/b\u003e\u003c\/span\u003e\u003c\/h3\u003e\n\u003ch3 style=\"text-align: center;\"\u003e\u003cspan style=\"font-weight: 400;\"\u003e\u003cspan data-mce-fragment=\"1\"\u003e\u003cbr\u003e\u003c\/span\u003e\u003c\/span\u003e\u003c\/h3\u003e\n\u003cdiv style=\"text-align: center;\"\u003e\n\u003ch3 style=\"text-align: center;\"\u003e\u003cspan style=\"color: #ff8000;\"\u003eHyperlapse and Panorama\u003c\/span\u003e\u003c\/h3\u003e\n\u003c\/div\u003e\n\u003cdiv style=\"text-align: center;\"\u003e\u003cspan style=\"font-weight: 400;\"\u003e\u003cspan data-mce-fragment=\"1\"\u003eSpeed up time and movement with a single tap by creating a striking hyperlapse. You can also capture larger, more detailed shots of your surroundings with panorama.\u003c\/span\u003e\u003c\/span\u003e\u003c\/div\u003e\n\u003cdiv style=\"text-align: center;\"\u003e\u003cimg style=\"float: none;\" src=\"https:\/\/cdn.shopify.com\/s\/files\/1\/2532\/7020\/files\/DJI_Mavic_Air_2S_Fly_More_Combo_12.jpg?v=1628575937\" alt=\"dji-mavic-air-2S-fly-more-combo-drone-content-feature-Hyperlapse-and-Panorama\"\u003e\u003c\/div\u003e\n\u003ch3 style=\"text-align: center;\"\u003e\u003cspan style=\"color: #ff8000;\"\u003e\u003cb\u003e\u003c\/b\u003e\u003c\/span\u003e\u003c\/h3\u003e\n\u003ch2 class=\"text style__eyebrow___2tBWn\" style=\"text-align: center;\"\u003e\u003cspan style=\"color: #ff8000;\"\u003eSmart features, perfect shots\u003c\/span\u003e\u003c\/h2\u003e\n\u003ch3 style=\"text-align: center;\"\u003e\u003cspan style=\"color: #ff8000;\"\u003e\u003cb\u003e\u003c\/b\u003e\u003c\/span\u003e\u003c\/h3\u003e\n\u003ch3 style=\"text-align: center;\"\u003e\u003cspan style=\"color: #ff8000;\"\u003e\u003cb\u003eIntroducing Mastershots\u003c\/b\u003e\u003c\/span\u003e\u003c\/h3\u003e\n\u003cdiv style=\"text-align: center;\"\u003e\u003cspan style=\"font-weight: 400;\"\u003e\u003cspan data-mce-fragment=\"1\"\u003eThe next evolution of QuickShots, MasterShots is an advanced intelligent feature that gives users the best shots in any location with just a tap. Simply select your subject, and the drone will film while executing ten different maneuvers in sequence, keeping your subject center-frame and generating a short cinematic video afterward.\u003c\/span\u003e\u003c\/span\u003e\u003c\/div\u003e\n\u003cdiv style=\"text-align: center;\"\u003e\u003cspan style=\"font-weight: 400;\"\u003e\u003cspan data-mce-fragment=\"1\"\u003e\u003cimg src=\"https:\/\/cdn.shopify.com\/s\/files\/1\/2532\/7020\/files\/DJI_Mavic_Air_2S_Fly_More_Combo_13.jpg?v=1628578139\" style=\"float: none;\" alt=\"dji-mavic-air-2S-fly-more-combo-drone-content-feature-Autonomous-Functions-Matershots\"\u003e\u003c\/span\u003e\u003c\/span\u003e\u003c\/div\u003e\n\u003cdiv style=\"text-align: center;\"\u003e\u003cb\u003e\u003cspan style=\"color: #ff8000;\"\u003e\u003c\/span\u003e\u003c\/b\u003e\u003c\/div\u003e\n\u003cdiv style=\"text-align: center;\"\u003e\u003cb\u003e\u003cspan style=\"color: #ff8000;\"\u003e\u003c\/span\u003e\u003c\/b\u003e\u003c\/div\u003e\n\u003cdiv style=\"text-align: center;\"\u003e\u003cb\u003e\u003cspan style=\"color: #ff8000;\"\u003e\u003c\/span\u003e\u003c\/b\u003e\u003c\/div\u003e\n\u003cdiv style=\"text-align: center;\"\u003e\u003cb\u003e\u003cspan style=\"color: #ff8000;\"\u003e\u003c\/span\u003e\u003c\/b\u003e\u003c\/div\u003e\n\u003cdiv style=\"text-align: center;\"\u003e\n\u003cdiv\u003e\u003cspan style=\"color: #ff8000;\"\u003e\u003cb\u003e\u003c\/b\u003e\u003c\/span\u003e\u003c\/div\u003e\n\u003cdiv\u003e\u003cspan style=\"color: #ff8000;\"\u003e\u003cb\u003e\u003c\/b\u003e\u003c\/span\u003e\u003c\/div\u003e\n\u003cdiv\u003e\u003cspan style=\"color: #ff8000;\"\u003e\u003cb\u003eThe Center of Attention \u003c\/b\u003e\u003c\/span\u003e\u003c\/div\u003e\n\u003cdiv\u003e\n\u003cb\u003e\u003cspan\u003e\u003c\/span\u003e\u003c\/b\u003e\u003cbr\u003e\n\u003c\/div\u003e\n\u003cdiv\u003e\u003cspan\u003eFocusTrack features Spotlight 2.0, ActiveTrack 4.0, and Point of Interest 3.0, making it a breeze for DJI Air 2S to follow or circle your subject.\u003c\/span\u003e\u003c\/div\u003e\n\u003cdiv style=\"text-align: center;\"\u003e\u003cbr\u003e\u003c\/div\u003e\n\u003cdiv style=\"text-align: center;\"\u003e\u003c\/div\u003e\n\u003c\/div\u003e\n\u003cdiv style=\"text-align: center;\"\u003e\n\u003ctable width=\"100%\"\u003e\n\u003ctbody\u003e\n\u003ctr\u003e\n\u003ctd style=\"width: 31%; text-align: center;\"\u003e \u003cstrong\u003e\u003cspan style=\"color: #ff8000;\" data-mce-fragment=\"1\"\u003eSpotlight 2.0 \u003c\/span\u003e\u003c\/strong\u003e\n\u003c\/td\u003e\n\u003ctd style=\"width: 31.7106%;\"\u003e\n\u003cdiv data-ga-label=\"all-1-tab-button\" class=\"style__tab-item___1yKLp\"\u003e\n\u003cdiv style=\"text-align: center;\"\u003e\u003cstrong\u003e\u003cspan style=\"color: #ff8000;\"\u003eActiveTrack 4.0\u003c\/span\u003e\u003c\/strong\u003e\u003c\/div\u003e\n\u003c\/div\u003e\n\u003c\/td\u003e\n\u003ctd style=\"width: 31.2894%; text-align: center;\"\u003e\u003cstrong\u003e\u003cspan style=\"color: #ff8000;\"\u003ePoint of Interest 3.0\u003c\/span\u003e\u003c\/strong\u003e\u003c\/td\u003e\n\u003c\/tr\u003e\n\u003ctr\u003e\n\u003ctd style=\"width: 31%;\"\u003e\n\u003cp\u003e\u003cspan data-mce-fragment=\"1\"\u003eFollow your subject smoothly while autonomously avoiding obstacles. Even if the subject is momentarily lost, you can quickly resume tracking during flight.\u003c\/span\u003e\u003c\/p\u003e\n\u003cp\u003e\u003cspan data-mce-fragment=\"1\"\u003e\u003cimg src=\"https:\/\/cdn.shopify.com\/s\/files\/1\/2532\/7020\/files\/DJI_Mavic_Air_2S_Fly_More_Combo_14_480x480.jpg?v=1628578319\" alt=\"dji-mavic-air-2S-fly-more-combo-drone-content-feature-The-Center-of-Aattention-Spotlight-2.0\" width=\"480x480\" height=\"480x480\" style=\"float: none;\" data-mce-fragment=\"1\" data-mce-src=\"https:\/\/cdn.shopify.com\/s\/files\/1\/2532\/7020\/files\/DJI_Mavic_Air_2S_Fly_More_Combo_14_480x480.jpg?v=1628578319\"\u003e\u003c\/span\u003e\u003c\/p\u003e\n\u003cdiv\u003e\u003cspan style=\"color: #ff8000;\"\u003e\u003cb\u003e\u003c\/b\u003e\u003c\/span\u003e\u003c\/div\u003e\n\u003c\/td\u003e\n\u003ctd style=\"width: 31.7106%;\"\u003e\n\u003cp\u003e\u003cspan\u003eFollow your subject smoothly while autonomously avoiding obstacles. Even if the subject is momentarily lost, you can quickly resume tracking during flight.\u003c\/span\u003e\u003c\/p\u003e\n\u003cp\u003e\u003cimg alt=\"dji-mavic-air-2S-fly-more-combo-drone-content-feature-The-Center-of-Aattention-ActiveTrack-4.0\" src=\"https:\/\/cdn.shopify.com\/s\/files\/1\/2532\/7020\/files\/DJI_Mavic_Air_2S_Fly_More_Combo_15_480x480.jpg?v=1628578617\" width=\"480x480\" height=\"480x480\" style=\"float: none;\"\u003e\u003c\/p\u003e\n\u003c\/td\u003e\n\u003ctd style=\"width: 31.2894%;\"\u003e\n\u003cp\u003e\u003cspan\u003eEasily take a perfect circle shot while keeping your subject centered. \u003c\/span\u003e\u003c\/p\u003e\n\u003cp\u003e \u003c\/p\u003e\n\u003cp\u003e \u003cimg alt=\"dji-mavic-air-2S-fly-more-combo-drone-content-feature-The-Center-of-Aattention-Point-of-Interest-3.0\" src=\"https:\/\/cdn.shopify.com\/s\/files\/1\/2532\/7020\/files\/DJI_Mavic_Air_2S_Fly_More_Combo_16_480x480.jpg?v=1628578705\" width=\"480x480\" height=\"480x480\" style=\"float: none;\" data-mce-fragment=\"1\" data-mce-src=\"https:\/\/cdn.shopify.com\/s\/files\/1\/2532\/7020\/files\/DJI_Mavic_Air_2S_Fly_More_Combo_16_480x480.jpg?v=1628578705\"\u003e\u003c\/p\u003e\n\u003c\/td\u003e\n\u003c\/tr\u003e\n\u003c\/tbody\u003e\n\u003c\/table\u003e\n\u003c\/div\u003e\n\u003cdiv style=\"text-align: center;\"\u003e\u003cb\u003e\u003cspan style=\"color: #ff8000;\"\u003e\u003c\/span\u003e\u003c\/b\u003e\u003c\/div\u003e\n\u003cdiv style=\"text-align: center;\"\u003e\u003cb\u003e\u003cspan style=\"color: #ff8000;\"\u003e\u003c\/span\u003e\u003c\/b\u003e\u003c\/div\u003e\n\u003cdiv style=\"text-align: center;\"\u003e \u003c\/div\u003e\n\u003ch3 style=\"text-align: center;\"\u003e\u003cspan style=\"color: #ff8000;\"\u003eFeel the Flight\u003c\/span\u003e\u003c\/h3\u003e\n\u003cdiv style=\"text-align: center;\"\u003e\u003cb\u003eWorry Less, Discover More \u003c\/b\u003e\u003c\/div\u003e\n\u003cdiv style=\"text-align: center;\"\u003e\u003cspan style=\"font-weight: 400;\"\u003e\u003cspan data-mce-fragment=\"1\"\u003eThe combination of portability, safety, and intelligent technology means you can spend more time enjoying flights and less time worrying about them. Take DJI Air 2S into the sky confidently, every flight.\u003c\/span\u003e\u003c\/span\u003e\u003c\/div\u003e\n\u003ch3 style=\"text-align: center;\"\u003e\u003cspan style=\"color: #ff8000;\"\u003e\u003cb\u003e\u003c\/b\u003e\u003c\/span\u003e\u003c\/h3\u003e\n\u003ch3 style=\"text-align: center;\"\u003e\u003cspan style=\"color: #ff8000;\"\u003eEnvironment Sensing\u003c\/span\u003e\u003c\/h3\u003e\n\u003cdiv style=\"text-align: center;\"\u003e\u003cspan style=\"font-weight: 400;\"\u003e\u003cspan data-mce-fragment=\"1\"\u003eDJI Air 2S has the ability to perceive its environment in four directions: up, down, forward, and backward. The algorithms for Advanced Pilot Assistance Systems (APAS 4.0) have been further improved, allowing DJI Air 2S to actively avoid obstacles in more complex scenarios and at high speeds.\u003c\/span\u003e\u003c\/span\u003e\u003c\/div\u003e\n\u003cdiv style=\"text-align: center;\"\u003e\u003cimg style=\"float: none;\" src=\"https:\/\/cdn.shopify.com\/s\/files\/1\/2532\/7020\/files\/DJI_Mavic_Air_2S_Fly_More_Combo_17.jpg?v=1628579395\" alt=\"dji-mavic-air-2S-fly-more-combo-drone-content-feature-Feel-the-Flight-Environment-Sensing\"\u003e\u003c\/div\u003e\n\u003cdiv style=\"text-align: center;\"\u003e \u003c\/div\u003e\n\u003ch3 style=\"text-align: center;\"\u003e\u003cspan style=\"color: #ff8000;\"\u003e\u003cb\u003eO3 Tranmission\u003c\/b\u003e\u003c\/span\u003e\u003c\/h3\u003e\n\u003cdiv style=\"text-align: center;\"\u003e\u003cspan style=\"font-weight: 400;\"\u003e\u003cspan data-mce-fragment=\"1\"\u003eDJI Air 2S features DJI's most advanced O3 (OcuSync 3.0) image transmission technology, delivering an ultra-smooth, clear, and reliable image feed.\u003c\/span\u003e\u003c\/span\u003e\u003c\/div\u003e\n\u003cdiv style=\"text-align: center;\"\u003e\n\u003ctable width=\"100%\"\u003e\n\u003ctbody\u003e\n\u003ctr\u003e\n\u003ctd style=\"text-align: center;\"\u003e \u003cspan style=\"color: #ff8000;\"\u003e\u003cstrong\u003e\u003cspan class=\"style__icon-number___2OOlV\" data-mce-fragment=\"1\"\u003e12\u003c\/span\u003e\u003cspan class=\"style__icon-unit___2hz_k\" data-mce-fragment=\"1\"\u003eKm\u003c\/span\u003e\u003c\/strong\u003e\u003c\/span\u003e\n\u003cp class=\"style__icon-desc___Otw9j\" data-mce-fragment=\"1\"\u003eMax Video Transmission\u003c\/p\u003e\n\u003c\/td\u003e\n\u003ctd\u003e\n\u003cdiv style=\"text-align: center;\" class=\"style__icon-number-container___2cK9V\"\u003e\u003cspan style=\"color: #ff8000;\"\u003e\u003cstrong\u003e\u003cspan class=\"style__icon-number___2OOlV\"\u003e1080\u003c\/span\u003e\u003cspan class=\"style__icon-unit___2hz_k\"\u003ep\u003c\/span\u003e\u003c\/strong\u003e\u003c\/span\u003e\u003c\/div\u003e\n\u003cp style=\"text-align: center;\" class=\"style__icon-desc___Otw9j\"\u003eTransmission\u003c\/p\u003e\n\u003c\/td\u003e\n\u003ctd\u003e\n\u003cdiv style=\"text-align: center;\" class=\"style__icon-number-container___2cK9V\"\u003e\u003cspan style=\"color: #ff8000;\"\u003e\u003cstrong\u003e\u003cspan class=\"style__icon-number___2OOlV\"\u003e4\u003c\/span\u003e\u003cspan class=\"style__icon-unit___2hz_k\"\u003eAntennas\u003c\/span\u003e\u003c\/strong\u003e\u003c\/span\u003e\u003c\/div\u003e\n\u003cp style=\"text-align: center;\" class=\"style__icon-desc___Otw9j\"\u003e2.4\/5.8GHz Dual Frequency\u003c\/p\u003e\n\u003c\/td\u003e\n\u003c\/tr\u003e\n\u003c\/tbody\u003e\n\u003c\/table\u003e\n\u003c\/div\u003e\n\u003cdiv style=\"text-align: center;\"\u003e\u003cspan style=\"font-weight: 400; color: #ffffff;\"\u003e\u003c\/span\u003e\u003c\/div\u003e\n\u003cdiv style=\"text-align: center;\"\u003e\u003cspan style=\"font-weight: 400; color: #ffffff;\"\u003e\u003cimg style=\"float: none;\" src=\"https:\/\/cdn.shopify.com\/s\/files\/1\/2532\/7020\/files\/DJI_Mavic_Air_2S_Fly_More_Combo_18_480x480.jpg?v=1628579621\" alt=\"dji-mavic-air-2S-fly-more-combo-drone-content-feature-O3-Tranmission\" data-mce-fragment=\"1\" data-mce-src=\"https:\/\/cdn.shopify.com\/s\/files\/1\/2532\/7020\/files\/DJI_Mavic_Air_2S_Fly_More_Combo_18_480x480.jpg?v=1628579621\"\u003e.\u003c\/span\u003e\u003c\/div\u003e\n\u003ch3 style=\"text-align: center;\"\u003e\u003cspan style=\"color: #ff8000;\"\u003e\u003cb\u003e\u003c\/b\u003e\u003c\/span\u003e\u003c\/h3\u003e\n\u003ch3 style=\"text-align: center;\"\u003e\u003cspan style=\"color: #ff8000;\"\u003e\u003cb\u003e\u003c\/b\u003e\u003c\/span\u003e\u003c\/h3\u003e\n\u003ch3 style=\"text-align: center;\"\u003e\u003cspan style=\"color: #ff8000;\"\u003e\u003cb\u003eSafer Skies with ADS-B\u003c\/b\u003e\u003c\/span\u003e\u003c\/h3\u003e\n\u003cdiv style=\"text-align: center;\"\u003e\u003cspan style=\"font-weight: 400;\"\u003e\u003cspan data-mce-fragment=\"1\"\u003eDJI Air 2S provides an added layer of airspace safety with the industry-leading AirSense safety system. This receives Automatic Dependent Surveillance-Broadcast (ADS-B) flight location information from airplanes and helicopters in your area that transmit ADS-B signals, displays those aircraft on a map, and provides audio and visual alerts through the DJI Fly app to help you keep the drone out of the way of those aircraft.\u003c\/span\u003e\u003c\/span\u003e\u003c\/div\u003e\n\u003cdiv style=\"text-align: center;\"\u003e\u003cspan style=\"font-weight: 400;\"\u003e\u003cspan data-mce-fragment=\"1\"\u003e\u003cimg src=\"https:\/\/cdn.shopify.com\/s\/files\/1\/2532\/7020\/files\/DJI_Mavic_Air_2S_Fly_More_Combo_19.jpg?v=1628579892\" style=\"float: none;\" alt=\"dji-mavic-air-2S-fly-more-combo-drone-content-feature-Safer-Skies-with-ADS-B\"\u003e\u003c\/span\u003e\u003c\/span\u003e\u003c\/div\u003e\n\u003cdiv style=\"text-align: center;\"\u003e \u003c\/div\u003e\n\u003cdiv style=\"text-align: center;\"\u003e\u003cbr\u003e\u003c\/div\u003e\n\u003ch3 style=\"text-align: center;\"\u003e\u003cspan style=\"color: #ff8000;\"\u003e\u003cb\u003eExpansive Accessories\u003c\/b\u003e\u003c\/span\u003e\u003c\/h3\u003e\n\u003ch3 style=\"text-align: center;\"\u003e\u003cb\u003eGet the Most Out Of Air 2S\u003c\/b\u003e\u003c\/h3\u003e\n\u003cdiv style=\"text-align: center;\"\u003e\u003cspan style=\"font-weight: 400;\"\u003e\u003cspan data-mce-fragment=\"1\"\u003eWith a diverse range of accessories, the sky is truly the limit.\u003c\/span\u003e\u003c\/span\u003e\u003c\/div\u003e\n\u003cdiv style=\"text-align: center;\"\u003e\u003cspan style=\"font-weight: 400;\"\u003e\u003cspan data-mce-fragment=\"1\"\u003e\u003c\/span\u003e\u003c\/span\u003e\u003c\/div\u003e\n\u003ch3 style=\"text-align: center;\"\u003e\u003cspan style=\"color: #ff8000;\"\u003e\u003cb\u003e\u003c\/b\u003e\u003c\/span\u003e\u003c\/h3\u003e\n\u003cp\u003e \u003c\/p\u003e\n\u003cp\u003e \u003c\/p\u003e\n\u003ch3 style=\"text-align: center;\"\u003e\u003cspan style=\"color: #ff8000;\"\u003e\u003cb\u003e\u003c\/b\u003e\u003c\/span\u003e\u003c\/h3\u003e\n\u003ch3\u003e\u003cspan\u003e\u003cb\u003e\u003c\/b\u003e\u003c\/span\u003e\u003c\/h3\u003e\n\u003ch3 style=\"text-align: center;\"\u003e\u003cspan style=\"color: #ff8000;\"\u003e\u003cb\u003eDJI Smart Controller\u003c\/b\u003e\u003c\/span\u003e\u003c\/h3\u003e\n\u003cdiv\u003e\u003cspan\u003eThis powerful remote controller features a 5.5-inch 1080p high-brightness display for pure performance. Compatible with the DJI GO 4 and DJI Fly apps, it also supports the installation of third-party apps.\u003c\/span\u003e\u003c\/div\u003e\n\u003cdiv\u003e\u003cimg alt=\"dji-mavic-air-2S-fly-more-combo-drone-content-feature-Expansive-Accessories-Fly-More-Combo-DJI Smart Controller\" src=\"https:\/\/cdn.shopify.com\/s\/files\/1\/2532\/7020\/files\/DJI_Mavic_Air_2S_Fly_More_Combo_22.jpg?v=1628580371\"\u003e\u003c\/div\u003e\n\u003ch3 style=\"text-align: center;\"\u003e\u003cspan style=\"color: #ff8000;\"\u003e\u003cb\u003e\u003c\/b\u003e\u003c\/span\u003e\u003c\/h3\u003e\n\u003ch3 style=\"text-align: center;\"\u003e\u003cspan style=\"color: #ff8000;\"\u003e\u003cb\u003e\u003c\/b\u003e\u003c\/span\u003e\u003c\/h3\u003e\n\u003cdiv style=\"text-align: center;\"\u003e \u003c\/div\u003e\n\u003ch2 style=\"text-align: left;\"\u003e\u003cstrong\u003e\u003c\/strong\u003e\u003c\/h2\u003e\n\u003ch2 style=\"text-align: left;\"\u003e\u003cstrong\u003eSpecification\u003c\/strong\u003e\u003c\/h2\u003e\n\u003cp\u003e \u003c\/p\u003e\n\u003cp\u003e \u003c\/p\u003e\n\u003cp\u003e \u003c\/p\u003e\n\u003ch3 class=\"group-list-title\"\u003eAircraft\u003c\/h3\u003e\n\u003ctable width=\"523\"\u003e\n\u003ctbody\u003e\n\u003ctr style=\"height: 19px;\"\u003e\n\u003ctd style=\"width: 245.562px; height: 19px;\"\u003e Takeoff Weight\u003c\/td\u003e\n\u003ctd style=\"width: 254.438px; height: 19px;\"\u003e595 g\u003c\/td\u003e\n\u003c\/tr\u003e\n\u003ctr style=\"height: 76px;\"\u003e\n\u003ctd style=\"width: 245.562px; height: 76px;\"\u003eDimensions\u003c\/td\u003e\n\u003ctd style=\"width: 254.438px; height: 76px;\"\u003eFolded:\u003cbr\u003e180×97×77 mm (length×width×height)\u003cbr\u003eUnfolded:\u003cbr\u003e183×253×77 mm (length×width×height)\u003c\/td\u003e\n\u003c\/tr\u003e\n\u003ctr style=\"height: 19px;\"\u003e\n\u003ctd style=\"width: 245.562px; height: 19px;\"\u003eDiagonal Length\u003c\/td\u003e\n\u003ctd style=\"width: 254.438px; height: 19px;\"\u003e302 mm\u003c\/td\u003e\n\u003c\/tr\u003e\n\u003ctr style=\"height: 38px;\"\u003e\n\u003ctd style=\"width: 245.562px; height: 38px;\"\u003eMax Ascent Speed\u003c\/td\u003e\n\u003ctd style=\"width: 254.438px; height: 38px;\"\u003e6 m\/s (S Mode)\u003cbr\u003e6 m\/s (N Mode)\u003c\/td\u003e\n\u003c\/tr\u003e\n\u003ctr style=\"height: 52px;\"\u003e\n\u003ctd style=\"width: 245.562px; height: 52px;\"\u003eMax Descent Speed\u003c\/td\u003e\n\u003ctd style=\"width: 254.438px; height: 52px;\"\u003e\n\u003cp\u003e6 m\/s (S Mode)\u003cbr\u003e6 m\/s (N Mode)\u003c\/p\u003e\n\u003c\/td\u003e\n\u003c\/tr\u003e\n\u003ctr style=\"height: 27px;\"\u003e\n\u003ctd style=\"width: 245.562px; height: 27px;\"\u003eMax Service Ceiling Above Sea Level\u003c\/td\u003e\n\u003ctd style=\"width: 254.438px; height: 27px;\"\u003e\n\u003cp\u003e5000 m\u003cbr\u003e\u003c\/p\u003e\n\u003c\/td\u003e\n\u003c\/tr\u003e\n\u003ctr style=\"height: 9px;\"\u003e\n\u003ctd style=\"width: 245.562px; height: 9px;\"\u003eMax Flight Time (no wind)\u003c\/td\u003e\n\u003ctd style=\"width: 254.438px; height: 9px;\"\u003e\n\u003cp\u003e31 minutes\u003c\/p\u003e\n\u003c\/td\u003e\n\u003c\/tr\u003e\n\u003ctr style=\"height: 9px;\"\u003e\n\u003ctd style=\"width: 245.562px; height: 9px;\"\u003eMax Hovering Time (no wind)\u003c\/td\u003e\n\u003ctd style=\"width: 254.438px; height: 9px;\"\u003e\n\u003cp\u003e30 minutes\u003c\/p\u003e\n\u003c\/td\u003e\n\u003c\/tr\u003e\n\u003ctr style=\"height: 9px;\"\u003e\n\u003ctd style=\"width: 245.562px; height: 9px;\"\u003eMax Flight Distance (no wind)\u003c\/td\u003e\n\u003ctd style=\"width: 254.438px; height: 9px;\"\u003e\n\u003cp\u003e18.5 km\u003c\/p\u003e\n\u003c\/td\u003e\n\u003c\/tr\u003e\n\u003ctr style=\"height: 9px;\"\u003e\n\u003ctd style=\"width: 245.562px; height: 9px;\"\u003eMax Flight Speed (near sea level, no wind)\u003c\/td\u003e\n\u003ctd style=\"width: 254.438px; height: 9px;\"\u003e19 m\/s (S Mode)\u003cbr\u003e15 m\/s (N Mode)\u003cbr\u003e5 m\/s (C Mode)\u003c\/td\u003e\n\u003c\/tr\u003e\n\u003ctr style=\"height: 9px;\"\u003e\n\u003ctd style=\"width: 245.562px; height: 9px;\"\u003eMax Wind Speed Resistance\u003c\/td\u003e\n\u003ctd style=\"width: 254.438px; height: 9px;\"\u003e10.7 m\/s\u003c\/td\u003e\n\u003c\/tr\u003e\n\u003ctr style=\"height: 9px;\"\u003e\n\u003ctd style=\"width: 245.562px; height: 9px;\"\u003eMax Tilt Angle\u003c\/td\u003e\n\u003ctd style=\"width: 254.438px; height: 9px;\"\u003e35° (S Mode)\u003cbr\u003eFront: 30°, Back: 20°, Left: 35°, Right: 35° (N Mode)\u003c\/td\u003e\n\u003c\/tr\u003e\n\u003ctr style=\"height: 9px;\"\u003e\n\u003ctd style=\"width: 245.562px; height: 9px;\"\u003eMax Angular Velocity\u003c\/td\u003e\n\u003ctd style=\"width: 254.438px; height: 9px;\"\u003e250°\/s (S Mode)\u003cbr\u003e90°\/s (N Mode)\u003cbr\u003e60°\/s (C Mode)\u003c\/td\u003e\n\u003c\/tr\u003e\n\u003ctr style=\"height: 9px;\"\u003e\n\u003ctd style=\"width: 245.562px; height: 9px;\"\u003eOperating Temperature Range\u003c\/td\u003e\n\u003ctd style=\"width: 254.438px; height: 9px;\"\u003e0° to 40°C (32° to 104°F)\u003c\/td\u003e\n\u003c\/tr\u003e\n\u003ctr style=\"height: 9px;\"\u003e\n\u003ctd style=\"width: 245.562px; height: 9px;\"\u003eOperating Frequency\u003c\/td\u003e\n\u003ctd style=\"width: 254.438px; height: 9px;\"\u003e2.4 GHz\u003cbr\u003e5.8 GHz\u003cbr\u003eTransmission Power (EIRP)\u003cbr\u003e2.4 GHz:\u003cbr\u003eFCC: ≤30 dBm\u003cbr\u003eCE: ≤20 dBm\u003cbr\u003eSRRC: ≤20 dBm\u003cbr\u003eMIC: ≤20 dBm\u003cbr\u003e5.8 GHz:\u003cbr\u003eFCC: ≤30 dBm\u003cbr\u003eCE: ≤14 dBm\u003cbr\u003eSRRC: ≤29 dBm\u003c\/td\u003e\n\u003c\/tr\u003e\n\u003ctr style=\"height: 9px;\"\u003e\n\u003ctd style=\"width: 245.562px; height: 9px;\"\u003eHovering Accuracy Range\u003c\/td\u003e\n\u003ctd style=\"width: 254.438px; height: 9px;\"\u003eVertical:\u003cbr\u003e± 0.1 m (with vision positioning)\u003cbr\u003e± 0.5 m (with GNSS positioning)\u003cbr\u003eHorizontal:\u003cbr\u003e± 0.1 m (with vision positioning)\u003cbr\u003e± 1.5 m (with GNSS positioning)\u003c\/td\u003e\n\u003c\/tr\u003e\n\u003ctr style=\"height: 9px;\"\u003e\n\u003ctd style=\"width: 245.562px; height: 9px;\"\u003ePropellers\u003c\/td\u003e\n\u003ctd style=\"width: 254.438px; height: 9px;\"\u003eQuick release, low noise, folding\u003c\/td\u003e\n\u003c\/tr\u003e\n\u003ctr style=\"height: 9px;\"\u003e\n\u003ctd style=\"width: 245.562px; height: 9px;\"\u003eAircraft Arms\u003c\/td\u003e\n\u003ctd style=\"width: 254.438px; height: 9px;\"\u003eFoldable\u003c\/td\u003e\n\u003c\/tr\u003e\n\u003ctr style=\"height: 9px;\"\u003e\n\u003ctd style=\"width: 245.562px; height: 9px;\"\u003eGNSS\u003c\/td\u003e\n\u003ctd style=\"width: 254.438px; height: 9px;\"\u003eGPS+GLONASS+GALILEO\u003c\/td\u003e\n\u003c\/tr\u003e\n\u003ctr style=\"height: 9px;\"\u003e\n\u003ctd style=\"width: 245.562px; height: 9px;\"\u003eCompass\u003c\/td\u003e\n\u003ctd style=\"width: 254.438px; height: 9px;\"\u003eSingle Compass\u003c\/td\u003e\n\u003c\/tr\u003e\n\u003ctr style=\"height: 9px;\"\u003e\n\u003ctd style=\"width: 245.562px; height: 9px;\"\u003eIMU\u003c\/td\u003e\n\u003ctd style=\"width: 254.438px; height: 9px;\"\u003eSingle IMU\u003c\/td\u003e\n\u003c\/tr\u003e\n\u003ctr style=\"height: 9px;\"\u003e\n\u003ctd style=\"width: 245.562px; height: 9px;\"\u003eInternal Storage\u003c\/td\u003e\n\u003ctd style=\"width: 254.438px; height: 9px;\"\u003e8 GB\u003c\/td\u003e\n\u003c\/tr\u003e\n\u003c\/tbody\u003e\n\u003c\/table\u003e\n\u003cp\u003e\u003cbr\u003e\u003cbr\u003e\u003c\/p\u003e\n\u003ch3 class=\"group-list-title\"\u003eIntelligent Flight Battery\u003c\/h3\u003e\n\u003ctable width=\"100%\"\u003e\n\u003ctbody\u003e\n\u003ctr\u003e\n\u003ctd style=\"width: 46.981%;\"\u003e Capacity\u003c\/td\u003e\n\u003ctd style=\"width: 49.7244%;\"\u003e3500 mAh\u003c\/td\u003e\n\u003c\/tr\u003e\n\u003ctr\u003e\n\u003ctd style=\"width: 46.981%;\"\u003eVoltage\u003c\/td\u003e\n\u003ctd style=\"width: 49.7244%;\"\u003e11.55 V\u003c\/td\u003e\n\u003c\/tr\u003e\n\u003ctr\u003e\n\u003ctd style=\"width: 46.981%;\"\u003eMax Charging Voltage\u003c\/td\u003e\n\u003ctd style=\"width: 49.7244%;\"\u003e13.2 V\u003c\/td\u003e\n\u003c\/tr\u003e\n\u003ctr\u003e\n\u003ctd style=\"width: 46.981%;\"\u003eBattery Type\u003c\/td\u003e\n\u003ctd style=\"width: 49.7244%;\"\u003eLiPo 3S\u003c\/td\u003e\n\u003c\/tr\u003e\n\u003ctr\u003e\n\u003ctd style=\"width: 46.981%;\"\u003eEnergy\u003c\/td\u003e\n\u003ctd style=\"width: 49.7244%;\"\u003e40.42 Wh\u003c\/td\u003e\n\u003c\/tr\u003e\n\u003ctr\u003e\n\u003ctd style=\"width: 46.981%;\"\u003eWeight\u003c\/td\u003e\n\u003ctd style=\"width: 49.7244%;\"\u003e198 g\u003c\/td\u003e\n\u003c\/tr\u003e\n\u003ctr\u003e\n\u003ctd style=\"width: 46.981%;\"\u003eCharging Temperature Range\u003c\/td\u003e\n\u003ctd style=\"width: 49.7244%;\"\u003e5° to 40°C (41° to 104°F)\u003c\/td\u003e\n\u003c\/tr\u003e\n\u003ctr\u003e\n\u003ctd style=\"width: 46.981%;\"\u003eMax Charging Power\u003c\/td\u003e\n\u003ctd style=\"width: 49.7244%;\"\u003e38 W\u003c\/td\u003e\n\u003c\/tr\u003e\n\u003ctr\u003e\n\u003ctd style=\"width: 46.981%;\"\u003eBuilt-in Battery\u003c\/td\u003e\n\u003ctd style=\"width: 49.7244%;\"\u003eN\/A\u003c\/td\u003e\n\u003c\/tr\u003e\n\u003c\/tbody\u003e\n\u003c\/table\u003e\n\u003cp\u003e\u003cbr\u003e\u003c\/p\u003e\n\u003ch3 class=\"group-list-title\"\u003eCamera\u003c\/h3\u003e\n\u003ctable width=\"100%\"\u003e\n\u003ctbody\u003e\n\u003ctr\u003e\n\u003ctd style=\"width: 47.0159%;\"\u003e Sensor\u003c\/td\u003e\n\u003ctd style=\"width: 48.9841%;\"\u003e\n\u003cp\u003e1\" CMOS\u003c\/p\u003e\n\u003cp\u003eEffective Pixels: 20 MP; 2.4μm Pixel Size\u003c\/p\u003e\n\u003c\/td\u003e\n\u003c\/tr\u003e\n\u003ctr\u003e\n\u003ctd style=\"width: 47.0159%;\"\u003eLens\u003c\/td\u003e\n\u003ctd style=\"width: 48.9841%;\"\u003eFOV: 88°\u003cbr\u003e35 mm Format Equivalent: 22 mm\u003cbr\u003eAperture: f\/2.8\u003cbr\u003eShooting Range: 0.6 m to ∞\u003c\/td\u003e\n\u003c\/tr\u003e\n\u003ctr\u003e\n\u003ctd style=\"width: 47.0159%;\"\u003eISO Range\u003c\/td\u003e\n\u003ctd style=\"width: 48.9841%;\"\u003eVideo:\u003cbr\u003e100-3200 (Auto)\u003cbr\u003e100-6400 (Manual)\u003cbr\u003e10-Bit Dlog-M Video:\u003cbr\u003e100-800 (Auto)\u003cbr\u003e100-1600 (Manual)\u003cbr\u003ePhoto:\u003cbr\u003e100-3200 (Auto)\u003cbr\u003e100-12800 (Manual)\u003c\/td\u003e\n\u003c\/tr\u003e\n\u003ctr\u003e\n\u003ctd style=\"width: 47.0159%;\"\u003eStill Image Size\u003c\/td\u003e\n\u003ctd style=\"width: 48.9841%;\"\u003e20 MP\u003cbr\u003e5472×3648 (3:2)\u003cbr\u003e5472×3078 (16:9)\u003c\/td\u003e\n\u003c\/tr\u003e\n\u003ctr\u003e\n\u003ctd style=\"width: 47.0159%;\"\u003eStill Photography Modes\u003c\/td\u003e\n\u003ctd style=\"width: 48.9841%;\"\u003eSingle shot: 20 MP\u003cbr\u003eBurst shooting: 20 MP (continuous burst)\u003cbr\u003eAuto Exposure Bracketing (AEB): 20 MP, 3\/5 bracketed frames at 0.7 EV bias\u003cbr\u003eTimed: 20 MP, 2\/3\/5\/7\/10\/15\/20\/30\/60s\u003cbr\u003eSmartPhoto (including HDR and HyperLight): 20 MP\u003cbr\u003eHDR Panorama:\u003cbr\u003eVertical (3×1): 3328×8000 (width×height)\u003cbr\u003eWide-angle (3×3): 8000×6144 (width×height)\u003cbr\u003e180° (3×7): 8192×3500 (width×height)\u003cbr\u003eSphere (3×8+1): 8192×4096 (width×height)\u003cbr\u003eJPEG\/DNG (RAW)\u003c\/td\u003e\n\u003c\/tr\u003e\n\u003ctr\u003e\n\u003ctd style=\"width: 47.0159%;\"\u003eVideo Resolution\u003c\/td\u003e\n\u003ctd style=\"width: 48.9841%;\"\u003e5.4K: 5472×3078 @ 24\/25\/30 fps\u003cbr\u003e4K Ultra HD: 3840×2160 @ 24\/25\/30\/48\/50\/60 fps\u003cbr\u003e2.7K: 2688x1512 @ 24\/25\/30\/48\/50\/60 fps\u003cbr\u003eFHD: 1920×1080 @ 24\/25\/30\/48\/50\/60\/120 fps\u003cbr\u003eMP4\/MOV (H.264\/MPEG-4 AVC, H.265\/HEVC)\u003c\/td\u003e\n\u003c\/tr\u003e\n\u003ctr\u003e\n\u003ctd style=\"width: 47.0159%;\"\u003eMax Video Bitrate\u003c\/td\u003e\n\u003ctd style=\"width: 48.9841%;\"\u003e150 Mbps\u003c\/td\u003e\n\u003c\/tr\u003e\n\u003ctr\u003e\n\u003ctd style=\"width: 47.0159%;\"\u003eSupported File System\u003c\/td\u003e\n\u003ctd style=\"width: 48.9841%;\"\u003e\n\u003cp\u003eFAT32\/exFAT\u003c\/p\u003e\n\u003cp\u003eSupports a microSD card with a capacity of up to 256 GB.\u003c\/p\u003e\n\u003c\/td\u003e\n\u003c\/tr\u003e\n\u003ctr\u003e\n\u003ctd style=\"width: 47.0159%;\"\u003eDigital Zoom\u003c\/td\u003e\n\u003ctd style=\"width: 48.9841%;\"\u003e\n\u003cp\u003eZoom recording is not available while recording 10-bit videos and 120fps videos.\u003c\/p\u003e\n\u003cp\u003e4K\/30fps:\u003cbr\u003e4x;\u003cbr\u003e2.7K\/60fps:\u003cbr\u003e4x;\u003cbr\u003e2.7K\/30fps:\u003cbr\u003e6x;\u003cbr\u003e1080p\/60fps:\u003cbr\u003e6x;\u003cbr\u003e1080p\/30fps:\u003cbr\u003e8x\u003c\/p\u003e\n\u003c\/td\u003e\n\u003c\/tr\u003e\n\u003c\/tbody\u003e\n\u003c\/table\u003e\n\u003cp\u003e \u003c\/p\u003e\n\u003ch3 class=\"group-list-title\"\u003eGimbal\u003c\/h3\u003e\n\u003ctable width=\"100%\"\u003e\n\u003ctbody\u003e\n\u003ctr\u003e\n\u003ctd style=\"width: 46.8312%;\"\u003e Stabilization\u003c\/td\u003e\n\u003ctd style=\"width: 48.1688%;\"\u003e3-axis (tilt, roll, pan)\u003c\/td\u003e\n\u003c\/tr\u003e\n\u003ctr\u003e\n\u003ctd style=\"width: 46.8312%;\"\u003eMechanical Range\u003c\/td\u003e\n\u003ctd style=\"width: 48.1688%;\"\u003eTilt: -135° to 45°\u003cbr\u003eRoll: -45° to 45°\u003cbr\u003ePan: -100° to 100°\u003c\/td\u003e\n\u003c\/tr\u003e\n\u003ctr\u003e\n\u003ctd style=\"width: 46.8312%;\"\u003ePan Axis\u003c\/td\u003e\n\u003ctd style=\"width: 48.1688%;\"\u003eNot Controllable\u003c\/td\u003e\n\u003c\/tr\u003e\n\u003ctr\u003e\n\u003ctd style=\"width: 46.8312%;\"\u003eControllable Range\u003c\/td\u003e\n\u003ctd style=\"width: 48.1688%;\"\u003eTilt: -90° to 0°(default); -90° to 24° (extended)\u003c\/td\u003e\n\u003c\/tr\u003e\n\u003ctr\u003e\n\u003ctd style=\"width: 46.8312%;\"\u003eMax Controllable Speed (tilt)\u003c\/td\u003e\n\u003ctd style=\"width: 48.1688%;\"\u003e100°\/s\u003c\/td\u003e\n\u003c\/tr\u003e\n\u003ctr\u003e\n\u003ctd style=\"width: 46.8312%;\"\u003eAngular Vibration Range\u003c\/td\u003e\n\u003ctd style=\"width: 48.1688%;\"\u003e±0.01°\u003c\/td\u003e\n\u003c\/tr\u003e\n\u003c\/tbody\u003e\n\u003c\/table\u003e\n\u003cp\u003e\u003cbr\u003e\u003c\/p\u003e\n\u003ch3 class=\"group-list-title\"\u003eSensing System\u003c\/h3\u003e\n\u003ctable width=\"100%\"\u003e\n\u003ctbody\u003e\n\u003ctr\u003e\n\u003ctd style=\"width: 48.1438%;\"\u003e Forward\u003c\/td\u003e\n\u003ctd style=\"width: 48.5617%;\"\u003e\n\u003cp\u003ePrecision Measurement Range: 0.38-23.8 m\u003c\/p\u003e\n\u003cp\u003eEffective Sensing Speed: ≤15 m\/s\u003cbr\u003eField of View (FOV): 72° (horizontal), 58° (vertical)\u003c\/p\u003e\n\u003c\/td\u003e\n\u003c\/tr\u003e\n\u003ctr\u003e\n\u003ctd style=\"width: 48.1438%;\"\u003eBackward\u003c\/td\u003e\n\u003ctd style=\"width: 48.5617%;\"\u003ePrecision Measurement Range: 0.37-23.4 m\u003cbr\u003eEffective Sensing Speed: ≤12 m\/s\u003cbr\u003eField of View (FOV): 57° (horizontal), 44° (vertical)\u003c\/td\u003e\n\u003c\/tr\u003e\n\u003ctr\u003e\n\u003ctd style=\"width: 48.1438%;\"\u003eDownward\u003c\/td\u003e\n\u003ctd style=\"width: 48.5617%;\"\u003eToF Measurement Range: 0.1-8 m\u003cbr\u003eHovering Range: 0.5-30 m\u003cbr\u003eVision Sensor Hovering Range: 0.5-60 m\u003c\/td\u003e\n\u003c\/tr\u003e\n\u003ctr\u003e\n\u003ctd style=\"width: 48.1438%;\"\u003eLeft\/Right\u003c\/td\u003e\n\u003ctd style=\"width: 48.5617%;\"\u003eN\/A\u003c\/td\u003e\n\u003c\/tr\u003e\n\u003ctr\u003e\n\u003ctd style=\"width: 48.1438%;\"\u003eUpward\u003c\/td\u003e\n\u003ctd style=\"width: 48.5617%;\"\u003ePrecision Measurement Range: 0.34-28.6 m\u003cbr\u003eField of View (FOV): 63° (horizontal), 78° (vertical)\u003c\/td\u003e\n\u003c\/tr\u003e\n\u003ctr\u003e\n\u003ctd style=\"width: 48.1438%;\"\u003eDownward Auxiliary Light\u003c\/td\u003e\n\u003ctd style=\"width: 48.5617%;\"\u003eSingle LED\u003c\/td\u003e\n\u003c\/tr\u003e\n\u003c\/tbody\u003e\n\u003c\/table\u003e\n\u003cp\u003e\u003cbr\u003e\u003c\/p\u003e\n\u003ch3 class=\"group-list-title\"\u003eVideo Transmission\u003c\/h3\u003e\n\u003ctable width=\"100%\"\u003e\n\u003ctbody\u003e\n\u003ctr\u003e\n\u003ctd style=\"width: 47.6063%;\"\u003e Transmission System\u003c\/td\u003e\n\u003ctd style=\"width: 47.3937%;\"\u003e\n\u003cp\u003eO3\u003c\/p\u003e\n\u003cp\u003e2.4 GHz\/5.8 GHz Auto-Switching (compatible with OcuSync 2.0)\u003cbr data-mce-fragment=\"1\"\u003e4-antenna 2T4R\u003c\/p\u003e\n\u003c\/td\u003e\n\u003c\/tr\u003e\n\u003ctr\u003e\n\u003ctd style=\"width: 47.6063%;\"\u003eMax Transmission Distance\u003c\/td\u003e\n\u003ctd style=\"width: 47.3937%;\"\u003e12 km (FCC), 8 km (CE)\u003cbr\u003e8 km (SRRC), 8 km (MIC)\u003c\/td\u003e\n\u003c\/tr\u003e\n\u003ctr\u003e\n\u003ctd style=\"width: 47.6063%;\"\u003eLive View Quality\/Latency\u003c\/td\u003e\n\u003ctd style=\"width: 47.3937%;\"\u003eDrone + Remote Controller: 1080p\/30fps 12 Mbps 120 ms\u003cbr\u003eDrone + DJI Smart Controller: 1080p\/30fps 12Mbps 130 ms\u003c\/td\u003e\n\u003c\/tr\u003e\n\u003ctr\u003e\n\u003ctd style=\"width: 47.6063%;\"\u003eMax Transmission Bitrate\u003c\/td\u003e\n\u003ctd style=\"width: 47.3937%;\"\u003e44 Mbps (download bitrate)\u003cbr\u003e16 Mbps (live video bitrate)\u003c\/td\u003e\n\u003c\/tr\u003e\n\u003ctr\u003e\n\u003ctd style=\"width: 47.6063%;\"\u003eOperating Frequency\u003c\/td\u003e\n\u003ctd style=\"width: 47.3937%;\"\u003e2.4 GHz\u003cbr\u003e5.8 GHz\u003c\/td\u003e\n\u003c\/tr\u003e\n\u003c\/tbody\u003e\n\u003c\/table\u003e\n\u003cp\u003e\u003cbr\u003e\u003c\/p\u003e\n\u003ch3 class=\"group-list-title\"\u003eRemote Controller\u003c\/h3\u003e\n\u003ctable width=\"100%\"\u003e\n\u003ctbody\u003e\n\u003ctr\u003e\n\u003ctd style=\"width: 47.7766%;\"\u003e Multiple Controllers\u003c\/td\u003e\n\u003ctd style=\"width: 47.2234%;\"\u003eN\/A\u003c\/td\u003e\n\u003c\/tr\u003e\n\u003ctr\u003e\n\u003ctd style=\"width: 47.7766%;\"\u003eDJI Smart Controller\u003c\/td\u003e\n\u003ctd style=\"width: 47.2234%;\"\u003eSupported\u003c\/td\u003e\n\u003c\/tr\u003e\n\u003ctr\u003e\n\u003ctd style=\"width: 47.7766%;\"\u003eRemote Controller Transmission System\u003c\/td\u003e\n\u003ctd style=\"width: 47.2234%;\"\u003eOcuSync 2.0\u003c\/td\u003e\n\u003c\/tr\u003e\n\u003ctr\u003e\n\u003ctd style=\"width: 47.7766%;\"\u003eBattery Life\u003c\/td\u003e\n\u003ctd style=\"width: 47.2234%;\"\u003e6 hours (4 hours when charging a mobile device)\u003c\/td\u003e\n\u003c\/tr\u003e\n\u003ctr\u003e\n\u003ctd style=\"width: 47.7766%;\"\u003eSupported Mobile Device Connectors\u003c\/td\u003e\n\u003ctd style=\"width: 47.2234%;\"\u003eLightning, Micro USB, USB-C\u003c\/td\u003e\n\u003c\/tr\u003e\n\u003ctr\u003e\n\u003ctd style=\"width: 47.7766%;\"\u003eMax Supported Mobile Device Size\u003c\/td\u003e\n\u003ctd style=\"width: 47.2234%;\"\u003e180×86×10 mm (length×width×height)\u003c\/td\u003e\n\u003c\/tr\u003e\n\u003ctr\u003e\n\u003ctd style=\"width: 47.7766%;\"\u003eOperating Temperature\u003c\/td\u003e\n\u003ctd style=\"width: 47.2234%;\"\u003e0° to 40°C (14° to 104°F)\u003c\/td\u003e\n\u003c\/tr\u003e\n\u003ctr\u003e\n\u003ctd style=\"width: 47.7766%;\"\u003eTransmitter Power (EIRP)\u003c\/td\u003e\n\u003ctd style=\"width: 47.2234%;\"\u003e2.4 GHz:\u003cbr\u003eFCC: ≤26 dBm\u003cbr\u003eCE: ≤20 dBm\u003cbr\u003eSRRC: ≤20 dBm\u003cbr\u003eMIC: ≤20 dBm\u003cbr\u003e5.8 GHz:\u003cbr\u003eFCC: ≤26 dBm\u003cbr\u003eCE: ≤14 dBm\u003cbr\u003eSRRC: ≤26 dBm\u003c\/td\u003e\n\u003c\/tr\u003e\n\u003c\/tbody\u003e\n\u003c\/table\u003e\n\u003cp\u003e\u003cbr\u003e\u003c\/p\u003e\n\u003ch3 class=\"group-list-title\"\u003eCharger\u003c\/h3\u003e\n\u003ctable width=\"100%\"\u003e\n\u003ctbody\u003e\n\u003ctr\u003e\n\u003ctd style=\"width: 49.888%;\"\u003e Charging Input\u003c\/td\u003e\n\u003ctd style=\"width: 46.8175%;\"\u003e100-240V, 50\/60 Hz, 1.3 A\u003c\/td\u003e\n\u003c\/tr\u003e\n\u003ctr\u003e\n\u003ctd style=\"width: 49.888%;\"\u003eCharging Output\u003c\/td\u003e\n\u003ctd style=\"width: 46.8175%;\"\u003eCharging Port: 13.2 V⎓2.82 A\u003cbr\u003eUSB Port: 5 V⎓2 A\u003c\/td\u003e\n\u003c\/tr\u003e\n\u003ctr\u003e\n\u003ctd style=\"width: 49.888%;\"\u003eVoltage\u003c\/td\u003e\n\u003ctd style=\"width: 46.8175%;\"\u003e13.2 V\u003c\/td\u003e\n\u003c\/tr\u003e\n\u003ctr\u003e\n\u003ctd style=\"width: 49.888%;\"\u003eRated Power\u003c\/td\u003e\n\u003ctd style=\"width: 46.8175%;\"\u003e38 W\u003c\/td\u003e\n\u003c\/tr\u003e\n\u003c\/tbody\u003e\n\u003c\/table\u003e\n\u003cp\u003e\u003cbr\u003e\u003c\/p\u003e\n\u003cdiv\u003e\n\u003cul style=\"text-align: center;\"\u003e\u003c\/ul\u003e\n\u003c\/div\u003e\n\u003cstyle\u003e\u003c!--\n.embed-container { position: relative; padding-bottom: 56.25%; height: 0; overflow: hidden; max-width: 100%; } .embed-container iframe, .embed-container object, .embed-container embed { position: absolute; top: 0; left: 0; width: 100%; height: 100%; }\n--\u003e\u003c\/style\u003e\n\u003c\/div\u003e"}
Translation missing: en.products.product.regular_price$10.00$9.00 On SaleTranslation missing: en.products.product.regular_price $978.00Insta360 GO 2 Lens Guard
Insta360 GO 2 Action camera accessories | Lens Guard
Specially designed for Insta360 GO 2 sports camera accessories
 Screw-on replaceable lens protector.
Designed with hardened glass and an anti-fogging protective coating.
High definition and light transmittance, showing real camera lens color and image quality.
Insta360 GO 2 camera fits accurately and fully covers the camera lens to prevent scratches, dust, oil, and fingerprints on the camera lens.
2.5D curved rounded edges. Easy to install and no air bubbles.
Guidelines for replacing the lens protector

1. Twist the lens guard counterclockwise to remove it.
2. Twist the lens guard clockwise to secure onto the lens.
Note
- Before use, please make sure that the rubber ring of the lens protection lens and the lens are clean and dry. Be sure to install the lens protector in a clean and dry environment. Any dust or dirt on the lens or lens protector may affect the shooting effect.
- Before using it underwater, be sure to install the GO 2 lens protector. Without the lens protector, GO 2 is not waterproof. Please securely tighten the lens protector to prevent image quality problems.
Size: 3.86 x 2.52 x 0.55 inches-
{"id":6773433335883,"title":"DJI Mavic Air 2S - 4 Directions of Obstacle Sensing Drone with 3-Axis Gimbal Camera | 5.4K Video | 1-Inch Sensor | MasterShots","handle":"dji-mavic-air-2s-4-directions-of-obstacle-sensing-drone-with-3-axis-gimbal-camera-5-4k-video-1-inch-sensor-mastershots","description":"\u003ch1 style=\"text-align: center;\"\u003e\u003cstrong\u003eDJI Mavic Air 2S\u003c\/strong\u003e\u003c\/h1\u003e\u003cdiv class=\"desc\"\u003e\n\u003ch2 style=\"text-align: center;\"\u003eDJI Air 2S is the ultimate drone for creators on the move, with a 1-inch CMOS sensor, powerful autonomous functions, and a compact body weighing less than 600 g. \u003c\/h2\u003e\n\u003cstyle\u003e\u003c!--\n.embed-container { position: relative; padding-bottom: 56.25%; height: 0; overflow: hidden; max-width: 100%; } .embed-container iframe, .embed-container object, .embed-container embed { position: absolute; top: 0; left: 0; width: 100%; height: 100%; }\n--\u003e\u003c\/style\u003e\n\u003cdiv class=\"embed-container\" style=\"text-align: center;\"\u003e\u003ciframe src=\"https:\/\/www.youtube.com\/embed\/NJ3Z1hSOoMc\" frameborder=\"0\" allowfullscreen=\"\"\u003e\u003c\/iframe\u003e\u003c\/div\u003e\n\u003cdiv style=\"text-align: center;\"\u003e \u003c\/div\u003e\n\u003ch3 style=\"text-align: center;\"\u003e\u003cspan style=\"font-weight: 400;\"\u003eTake this all-in-one aerial powerhouse along anywhere to experience and record your world in stunning detail.\u003c\/span\u003e\u003c\/h3\u003e\n\u003cp\u003e \u003c\/p\u003e\n\u003ch2 style=\"text-align: left;\"\u003e\n\u003cstrong\u003eDifference Between DJI Mavic Air 2S Fly More Combo and DJI Mavic Air 2 Fly More Combo:\u003c\/strong\u003e \u003c\/h2\u003e\n\u003cp\u003e \u003c\/p\u003e\n\u003ch3 style=\"text-align: center;\"\u003e\u003cspan style=\"color: #ff8000;\"\u003e\u003cb\u003eUpgrades\u003c\/b\u003e\u003c\/span\u003e\u003c\/h3\u003e\n\u003cdiv\u003eUpgrades include a 1-inch CMOS sensor, four-antenna low-latency transmission, APAS 4.0, added upward-facing dual-vision sensors, and MasterShots. The camera performance, intelligent features, obstacle sensing system, and transmission system have all improved significantly. \u003c\/div\u003e\n\u003ch2 style=\"text-align: center;\"\u003e\u003cstrong\u003e\u003c\/strong\u003e\u003c\/h2\u003e\n\u003cp\u003e \u003c\/p\u003e\n\u003ch2 style=\"text-align: center;\"\u003e\u003cstrong\u003eHighlights and Features\u003c\/strong\u003e\u003c\/h2\u003e\n\u003ctable data-mce-fragment=\"1\"\u003e\n\u003ctbody data-mce-fragment=\"1\"\u003e\n\u003ctr data-mce-fragment=\"1\"\u003e\n\u003ctd width=\"184\" data-mce-fragment=\"1\"\u003e1-inch CMOS Sensor\u003c\/td\u003e\n\u003ctd width=\"184\" data-mce-fragment=\"1\"\u003eMasterShots\u003c\/td\u003e\n\u003ctd width=\"184\" data-mce-fragment=\"1\"\u003e5.4K Video\u003c\/td\u003e\n\u003c\/tr\u003e\n\u003ctr data-mce-fragment=\"1\"\u003e\n\u003ctd width=\"184\" data-mce-fragment=\"1\"\u003e12km FHD Transmission\u003cspan data-mce-fragment=\"1\"\u003e \u003c\/span\u003e\u003csup data-mce-fragment=\"1\"\u003e[1]\u003c\/sup\u003e\n\u003c\/td\u003e\n\u003ctd width=\"184\" data-mce-fragment=\"1\"\u003eObstacle Sensing in 4 Directions\u003c\/td\u003e\n\u003ctd width=\"184\" data-mce-fragment=\"1\"\u003eADS-B\u003c\/td\u003e\n\u003c\/tr\u003e\n\u003c\/tbody\u003e\n\u003c\/table\u003e\n\u003cbr\u003e\n\u003cdiv style=\"text-align: start;\"\u003e\u003cimg style=\"margin-right: auto; float: none; display: block; margin-left: auto;\" src=\"https:\/\/cdn.shopify.com\/s\/files\/1\/2532\/7020\/files\/Screenshot_2021-08-06_183943.png?v=1628246675\" alt=\"dji-mavic-air-2S-fly-more-combo-drone-content-feature-all\"\u003e\u003c\/div\u003e\n\u003cp\u003e \u003c\/p\u003e\n\u003ch3 style=\"text-align: center;\"\u003e\u003cspan style=\"color: #ff8000;\"\u003e\u003cb\u003e\u003c\/b\u003e\u003c\/span\u003e\u003c\/h3\u003e\n\u003cdiv style=\"text-align: center;\"\u003e\u003c\/div\u003e\n\u003cdiv style=\"text-align: center;\"\u003e\u003c\/div\u003e\n\u003cdiv style=\"text-align: center;\"\u003e\u003c\/div\u003e\n\u003cdiv style=\"text-align: center;\"\u003e\n\u003cp\u003e \u003c\/p\u003e\n\u003ch3\u003e\u003cspan style=\"color: #ff8000;\"\u003e\u003cb\u003eIncredible Image System\u003c\/b\u003e\u003c\/span\u003e\u003c\/h3\u003e\n\u003cdiv style=\"text-align: center;\"\u003e\u003cb\u003eBig World, Big Sensor\u003c\/b\u003e\u003c\/div\u003e\n\u003cdiv style=\"text-align: center;\"\u003e\u003cb\u003e\u003c\/b\u003e\u003c\/div\u003e\n\u003c\/div\u003e\n\u003cdiv style=\"text-align: center;\"\u003e\u003cspan\u003eEquipped with a 1-inch CMOS image sensor and large 2.4μm pixels, DJI Air 2S is capable of 5.4K\/30fps and 4K\/60fps video. Capture any moment with the rich clarity and authentic color tones it deserves.\u003c\/span\u003e\u003c\/div\u003e\n\u003cdiv style=\"text-align: center;\"\u003e\u003cspan\u003e\u003cimg src=\"https:\/\/cdn.shopify.com\/s\/files\/1\/2532\/7020\/files\/DJI_Mavic_Air_2S_Fly_More_Combo_8.jpg?v=1628248569\" style=\"float: none;\" alt=\"dji-mavic-air-2S-fly-more-combo-drone-content-feature-Good-Image-System\"\u003e\u003c\/span\u003e\u003c\/div\u003e\n\u003cdiv style=\"text-align: center;\"\u003e\u003cspan\u003e\u003c\/span\u003e\u003c\/div\u003e\n\u003cdiv style=\"text-align: center;\"\u003e\u003cspan\u003e\u003c\/span\u003e\u003c\/div\u003e\n\u003cdiv style=\"text-align: center;\"\u003e\u003cspan\u003e\u003c\/span\u003e\u003c\/div\u003e\n\u003ch3 style=\"text-align: center;\"\u003e\u003cspan style=\"color: #ff8000;\"\u003e\u003cb\u003e\u003c\/b\u003e\u003c\/span\u003e\u003c\/h3\u003e\n\u003ch3 style=\"text-align: center;\"\u003e\u003cspan style=\"color: #ff8000;\"\u003e\u003cb\u003e\u003c\/b\u003e\u003c\/span\u003e\u003c\/h3\u003e\n\u003ch3 style=\"text-align: center;\"\u003e\u003cspan style=\"color: #ff8000;\"\u003eTurn On the Night\u003c\/span\u003e\u003c\/h3\u003e\n\u003cdiv style=\"text-align: center;\"\u003e\u003cspan style=\"font-weight: 400;\"\u003e\u003cspan data-mce-fragment=\"1\"\u003eCapture the allure of the world, even as it darkens. Thanks to a high dynamic range, high resolution, and accurate color reproduction, even low-light scenes are sharp and vibrant.\u003c\/span\u003e\u003c\/span\u003e\u003c\/div\u003e\n\u003cdiv style=\"text-align: center;\"\u003e\u003cimg style=\"float: none;\" src=\"https:\/\/cdn.shopify.com\/s\/files\/1\/2532\/7020\/files\/DJI_Mavic_Air_2S_Fly_More_Combo_9.jpg?v=1628573124\" alt=\"dji-mavic-air-2S-fly-more-combo-drone-content-feature-Turn-On-the-Night\"\u003e\u003c\/div\u003e\n\u003ch3 style=\"text-align: center;\"\u003e\u003cspan style=\"color: #ff8000;\"\u003e\u003cb\u003e\u003c\/b\u003e\u003c\/span\u003e\u003c\/h3\u003e\n\u003ch3 style=\"text-align: center;\"\u003e\u003cspan style=\"color: #ff8000;\"\u003e\u003cb\u003e\u003cspan data-mce-fragment=\"1\"\u003eOne billion colors\u003c\/span\u003e\u003c\/b\u003e\u003c\/span\u003e\u003c\/h3\u003e\n\u003cdiv style=\"text-align: center;\"\u003e\u003cspan style=\"font-weight: 400;\"\u003e\u003cspan data-mce-fragment=\"1\"\u003eCaptured by the 10-bit Dlog-M color profile of DJI Air 2S let you fully immerse yourself in all the hues of your environment.\u003c\/span\u003e\u003c\/span\u003e\u003c\/div\u003e\n\u003cdiv style=\"text-align: center;\"\u003e\u003cimg style=\"float: none;\" src=\"https:\/\/cdn.shopify.com\/s\/files\/1\/2532\/7020\/files\/DJI_Mavic_Air_2S_Fly_More_Combo_10.jpg?v=1628573285\" alt=\"dji-mavic-air-2S-fly-more-combo-drone-content-feature-One-billion-colors\"\u003e\u003c\/div\u003e\n\u003ch3 style=\"text-align: center;\"\u003e\u003cspan style=\"color: #ff8000;\"\u003e\u003cb\u003e\u003c\/b\u003e\u003c\/span\u003e\u003c\/h3\u003e\n\u003ctable width=\"100%\"\u003e\n\u003ctbody\u003e\n\u003ctr\u003e\n\u003ctd style=\"width: 47.3093%;\"\u003e\n\u003ch3 data-mce-fragment=\"1\"\u003e\u003cspan style=\"color: #ff8000;\" data-mce-fragment=\"1\"\u003e\u003cb data-mce-fragment=\"1\"\u003eShoot RAW\u003c\/b\u003e\u003c\/span\u003e\u003c\/h3\u003e\n\u003cp style=\"text-align: left;\"\u003e\u003cspan\u003eFormat photos with a dynamic \u003c\/span\u003e\u003cspan style=\"font-weight: 400;\" data-mce-fragment=\"1\" data-mce-style=\"font-weight: 400;\"\u003erange of up to 12.6 stops to\u003c\/span\u003e\u003cspan style=\"font-weight: 400;\" data-mce-fragment=\"1\" data-mce-style=\"font-weight: 400;\"\u003e capture more visual information in every scene, even when lighting conditions are bad or complex. This provides more flexibility in post-processing, giving creators more possibilities to get the look they want. \u003c\/span\u003e\u003c\/p\u003e\n\u003c\/td\u003e\n\u003ctd style=\"width: 47.6907%;\"\u003e\n\u003cdiv style=\"text-align: center;\"\u003e\u003cimg src=\"https:\/\/cdn.shopify.com\/s\/files\/1\/2532\/7020\/files\/DJI-Mavic-Air-2S-Fly-More-Combo_600x600.jpg?v=1628577003\" alt=\"dji-mavic-air-2S-fly-more-combo-drone-content-feature-all\" style=\"float: none;\" width=\"600x600\" height=\"600x600\"\u003e\u003c\/div\u003e\n\u003c\/td\u003e\n\u003c\/tr\u003e\n\u003ctr\u003e\n\u003ctd style=\"width: 47.3093%;\"\u003e\n\u003cdiv style=\"text-align: center;\" data-mce-fragment=\"1\" data-mce-style=\"text-align: center;\"\u003e\u003cimg style=\"float: none;\" alt=\"dji-mavic-air-2S-fly-more-combo-drone-content-feature-Shoot-RAW\" src=\"https:\/\/cdn.shopify.com\/s\/files\/1\/2532\/7020\/files\/3b0718d6123b5e2827b85292dc6322fa_600x600.jpg?v=1628577485\" width=\"600x600\" height=\"600x600\" data-mce-fragment=\"1\" data-mce-src=\"https:\/\/cdn.shopify.com\/s\/files\/1\/2532\/7020\/files\/3b0718d6123b5e2827b85292dc6322fa_600x600.jpg?v=1628577485\" data-mce-style=\"float: none;\"\u003e\u003c\/div\u003e\n\u003ch3 style=\"text-align: center;\"\u003e\n\u003cspan style=\"color: #ff8000;\"\u003e\u003cb\u003e\u003c\/b\u003e\u003c\/span\u003e\u003cbr\u003e\n\u003c\/h3\u003e\n\u003c\/td\u003e\n\u003ctd style=\"width: 47.6907%;\"\u003e\n\u003ch3 style=\"text-align: right;\"\u003e\u003cspan style=\"color: #ff8000;\"\u003e\u003cb\u003eIntelligent HDR technology\u003c\/b\u003e\u003c\/span\u003e\u003c\/h3\u003e\n\u003cp style=\"text-align: right;\"\u003e\u003cspan\u003eMerges multiple shots automatically, increasing the dynamic range of images without the need for post-processing. That means more nuanced details in both the highlights and shadows for richer images with greater depth.\u003c\/span\u003e\u003c\/p\u003e\n\u003c\/td\u003e\n\u003c\/tr\u003e\n\u003c\/tbody\u003e\n\u003c\/table\u003e\n\u003ch3 style=\"text-align: center;\"\u003e\u003cspan style=\"color: #ff8000;\"\u003e\u003cb\u003e\u003cspan data-mce-fragment=\"1\"\u003e\u003c\/span\u003e\u003c\/b\u003e\u003c\/span\u003e\u003c\/h3\u003e\n\u003ch3 style=\"text-align: center;\"\u003e\u003cspan style=\"color: #ff8000;\"\u003e\u003cb\u003e\u003cspan data-mce-fragment=\"1\"\u003e\u003c\/span\u003e\u003c\/b\u003e\u003c\/span\u003e\u003c\/h3\u003e\n\u003ch3 style=\"text-align: center;\"\u003e\u003cspan style=\"color: #ff8000;\"\u003e\u003cb\u003e\u003cspan data-mce-fragment=\"1\"\u003e\u003c\/span\u003e\u003c\/b\u003e\u003c\/span\u003e\u003c\/h3\u003e\n\u003ch3 style=\"text-align: center;\"\u003e\u003cspan style=\"font-weight: 400;\"\u003e\u003cspan data-mce-fragment=\"1\"\u003e\u003cbr\u003e\u003c\/span\u003e\u003c\/span\u003e\u003c\/h3\u003e\n\u003cdiv style=\"text-align: center;\"\u003e\n\u003ch3 style=\"text-align: center;\"\u003e\u003cspan style=\"color: #ff8000;\"\u003eHyperlapse and Panorama\u003c\/span\u003e\u003c\/h3\u003e\n\u003c\/div\u003e\n\u003cdiv style=\"text-align: center;\"\u003e\u003cspan style=\"font-weight: 400;\"\u003e\u003cspan data-mce-fragment=\"1\"\u003eSpeed up time and movement with a single tap by creating a striking hyperlapse. You can also capture larger, more detailed shots of your surroundings with panorama.\u003c\/span\u003e\u003c\/span\u003e\u003c\/div\u003e\n\u003cdiv style=\"text-align: center;\"\u003e\u003cimg style=\"float: none;\" src=\"https:\/\/cdn.shopify.com\/s\/files\/1\/2532\/7020\/files\/DJI_Mavic_Air_2S_Fly_More_Combo_12.jpg?v=1628575937\" alt=\"dji-mavic-air-2S-fly-more-combo-drone-content-feature-Hyperlapse-and-Panorama\"\u003e\u003c\/div\u003e\n\u003ch3 style=\"text-align: center;\"\u003e\u003cspan style=\"color: #ff8000;\"\u003e\u003cb\u003e\u003c\/b\u003e\u003c\/span\u003e\u003c\/h3\u003e\n\u003ch2 class=\"text style__eyebrow___2tBWn\" style=\"text-align: center;\"\u003e\u003cspan style=\"color: #ff8000;\"\u003eSmart features, perfect shots\u003c\/span\u003e\u003c\/h2\u003e\n\u003ch3 style=\"text-align: center;\"\u003e\u003cspan style=\"color: #ff8000;\"\u003e\u003cb\u003e\u003c\/b\u003e\u003c\/span\u003e\u003c\/h3\u003e\n\u003ch3 style=\"text-align: center;\"\u003e\u003cspan style=\"color: #ff8000;\"\u003e\u003cb\u003eIntroducing Mastershots\u003c\/b\u003e\u003c\/span\u003e\u003c\/h3\u003e\n\u003cdiv style=\"text-align: center;\"\u003e\u003cspan style=\"font-weight: 400;\"\u003e\u003cspan data-mce-fragment=\"1\"\u003eThe next evolution of QuickShots, MasterShots is an advanced intelligent feature that gives users the best shots in any location with just a tap. Simply select your subject, and the drone will film while executing ten different maneuvers in sequence, keeping your subject center-frame and generating a short cinematic video afterward.\u003c\/span\u003e\u003c\/span\u003e\u003c\/div\u003e\n\u003cdiv style=\"text-align: center;\"\u003e\u003cspan style=\"font-weight: 400;\"\u003e\u003cspan data-mce-fragment=\"1\"\u003e\u003cimg src=\"https:\/\/cdn.shopify.com\/s\/files\/1\/2532\/7020\/files\/DJI_Mavic_Air_2S_Fly_More_Combo_13.jpg?v=1628578139\" style=\"float: none;\" alt=\"dji-mavic-air-2S-fly-more-combo-drone-content-feature-Autonomous-Functions-Matershots\"\u003e\u003c\/span\u003e\u003c\/span\u003e\u003c\/div\u003e\n\u003cdiv style=\"text-align: center;\"\u003e\u003cb\u003e\u003cspan style=\"color: #ff8000;\"\u003e\u003c\/span\u003e\u003c\/b\u003e\u003c\/div\u003e\n\u003cdiv style=\"text-align: center;\"\u003e\u003cb\u003e\u003cspan style=\"color: #ff8000;\"\u003e\u003c\/span\u003e\u003c\/b\u003e\u003c\/div\u003e\n\u003cdiv style=\"text-align: center;\"\u003e\u003cb\u003e\u003cspan style=\"color: #ff8000;\"\u003e\u003c\/span\u003e\u003c\/b\u003e\u003c\/div\u003e\n\u003cdiv style=\"text-align: center;\"\u003e\u003cb\u003e\u003cspan style=\"color: #ff8000;\"\u003e\u003c\/span\u003e\u003c\/b\u003e\u003c\/div\u003e\n\u003cdiv style=\"text-align: center;\"\u003e\n\u003cdiv\u003e\u003cspan style=\"color: #ff8000;\"\u003e\u003cb\u003e\u003c\/b\u003e\u003c\/span\u003e\u003c\/div\u003e\n\u003cdiv\u003e\u003cspan style=\"color: #ff8000;\"\u003e\u003cb\u003e\u003c\/b\u003e\u003c\/span\u003e\u003c\/div\u003e\n\u003cdiv\u003e\u003cspan style=\"color: #ff8000;\"\u003e\u003cb\u003eThe Center of Attention \u003c\/b\u003e\u003c\/span\u003e\u003c\/div\u003e\n\u003cdiv\u003e\n\u003cb\u003e\u003cspan\u003e\u003c\/span\u003e\u003c\/b\u003e\u003cbr\u003e\n\u003c\/div\u003e\n\u003cdiv\u003e\u003cspan\u003eFocusTrack features Spotlight 2.0, ActiveTrack 4.0, and Point of Interest 3.0, making it a breeze for DJI Air 2S to follow or circle your subject.\u003c\/span\u003e\u003c\/div\u003e\n\u003cdiv style=\"text-align: center;\"\u003e\u003cbr\u003e\u003c\/div\u003e\n\u003cdiv style=\"text-align: center;\"\u003e\u003c\/div\u003e\n\u003c\/div\u003e\n\u003cdiv style=\"text-align: center;\"\u003e\n\u003ctable width=\"100%\"\u003e\n\u003ctbody\u003e\n\u003ctr\u003e\n\u003ctd style=\"width: 31%; text-align: center;\"\u003e \u003cstrong\u003e\u003cspan style=\"color: #ff8000;\" data-mce-fragment=\"1\"\u003eSpotlight 2.0 \u003c\/span\u003e\u003c\/strong\u003e\n\u003c\/td\u003e\n\u003ctd style=\"width: 31.7106%;\"\u003e\n\u003cdiv data-ga-label=\"all-1-tab-button\" class=\"style__tab-item___1yKLp\"\u003e\n\u003cdiv style=\"text-align: center;\"\u003e\u003cstrong\u003e\u003cspan style=\"color: #ff8000;\"\u003eActiveTrack 4.0\u003c\/span\u003e\u003c\/strong\u003e\u003c\/div\u003e\n\u003c\/div\u003e\n\u003c\/td\u003e\n\u003ctd style=\"width: 31.2894%; text-align: center;\"\u003e\u003cstrong\u003e\u003cspan style=\"color: #ff8000;\"\u003ePoint of Interest 3.0\u003c\/span\u003e\u003c\/strong\u003e\u003c\/td\u003e\n\u003c\/tr\u003e\n\u003ctr\u003e\n\u003ctd style=\"width: 31%;\"\u003e\n\u003cp\u003e\u003cspan data-mce-fragment=\"1\"\u003eFollow your subject smoothly while autonomously avoiding obstacles. Even if the subject is momentarily lost, you can quickly resume tracking during flight.\u003c\/span\u003e\u003c\/p\u003e\n\u003cp\u003e\u003cspan data-mce-fragment=\"1\"\u003e\u003cimg src=\"https:\/\/cdn.shopify.com\/s\/files\/1\/2532\/7020\/files\/DJI_Mavic_Air_2S_Fly_More_Combo_14_480x480.jpg?v=1628578319\" alt=\"dji-mavic-air-2S-fly-more-combo-drone-content-feature-The-Center-of-Aattention-Spotlight-2.0\" width=\"480x480\" height=\"480x480\" style=\"float: none;\" data-mce-fragment=\"1\" data-mce-src=\"https:\/\/cdn.shopify.com\/s\/files\/1\/2532\/7020\/files\/DJI_Mavic_Air_2S_Fly_More_Combo_14_480x480.jpg?v=1628578319\"\u003e\u003c\/span\u003e\u003c\/p\u003e\n\u003cdiv\u003e\u003cspan style=\"color: #ff8000;\"\u003e\u003cb\u003e\u003c\/b\u003e\u003c\/span\u003e\u003c\/div\u003e\n\u003c\/td\u003e\n\u003ctd style=\"width: 31.7106%;\"\u003e\n\u003cp\u003e\u003cspan\u003eFollow your subject smoothly while autonomously avoiding obstacles. Even if the subject is momentarily lost, you can quickly resume tracking during flight.\u003c\/span\u003e\u003c\/p\u003e\n\u003cp\u003e\u003cimg alt=\"dji-mavic-air-2S-fly-more-combo-drone-content-feature-The-Center-of-Aattention-ActiveTrack-4.0\" src=\"https:\/\/cdn.shopify.com\/s\/files\/1\/2532\/7020\/files\/DJI_Mavic_Air_2S_Fly_More_Combo_15_480x480.jpg?v=1628578617\" width=\"480x480\" height=\"480x480\" style=\"float: none;\"\u003e\u003c\/p\u003e\n\u003c\/td\u003e\n\u003ctd style=\"width: 31.2894%;\"\u003e\n\u003cp\u003e\u003cspan\u003eEasily take a perfect circle shot while keeping your subject centered. \u003c\/span\u003e\u003c\/p\u003e\n\u003cp\u003e \u003c\/p\u003e\n\u003cp\u003e \u003cimg alt=\"dji-mavic-air-2S-fly-more-combo-drone-content-feature-The-Center-of-Aattention-Point-of-Interest-3.0\" src=\"https:\/\/cdn.shopify.com\/s\/files\/1\/2532\/7020\/files\/DJI_Mavic_Air_2S_Fly_More_Combo_16_480x480.jpg?v=1628578705\" width=\"480x480\" height=\"480x480\" style=\"float: none;\" data-mce-fragment=\"1\" data-mce-src=\"https:\/\/cdn.shopify.com\/s\/files\/1\/2532\/7020\/files\/DJI_Mavic_Air_2S_Fly_More_Combo_16_480x480.jpg?v=1628578705\"\u003e\u003c\/p\u003e\n\u003c\/td\u003e\n\u003c\/tr\u003e\n\u003c\/tbody\u003e\n\u003c\/table\u003e\n\u003c\/div\u003e\n\u003cdiv style=\"text-align: center;\"\u003e\u003cb\u003e\u003cspan style=\"color: #ff8000;\"\u003e\u003c\/span\u003e\u003c\/b\u003e\u003c\/div\u003e\n\u003cdiv style=\"text-align: center;\"\u003e\u003cb\u003e\u003cspan style=\"color: #ff8000;\"\u003e\u003c\/span\u003e\u003c\/b\u003e\u003c\/div\u003e\n\u003cdiv style=\"text-align: center;\"\u003e \u003c\/div\u003e\n\u003ch3 style=\"text-align: center;\"\u003e\u003cspan style=\"color: #ff8000;\"\u003eFeel the Flight\u003c\/span\u003e\u003c\/h3\u003e\n\u003cdiv style=\"text-align: center;\"\u003e\u003cb\u003eWorry Less, Discover More \u003c\/b\u003e\u003c\/div\u003e\n\u003cdiv style=\"text-align: center;\"\u003e\u003cspan style=\"font-weight: 400;\"\u003e\u003cspan data-mce-fragment=\"1\"\u003eThe combination of portability, safety, and intelligent technology means you can spend more time enjoying flights and less time worrying about them. Take DJI Air 2S into the sky confidently, every flight.\u003c\/span\u003e\u003c\/span\u003e\u003c\/div\u003e\n\u003ch3 style=\"text-align: center;\"\u003e\u003cspan style=\"color: #ff8000;\"\u003e\u003cb\u003e\u003c\/b\u003e\u003c\/span\u003e\u003c\/h3\u003e\n\u003ch3 style=\"text-align: center;\"\u003e\u003cspan style=\"color: #ff8000;\"\u003eEnvironment Sensing\u003c\/span\u003e\u003c\/h3\u003e\n\u003cdiv style=\"text-align: center;\"\u003e\u003cspan style=\"font-weight: 400;\"\u003e\u003cspan data-mce-fragment=\"1\"\u003eDJI Air 2S has the ability to perceive its environment in four directions: up, down, forward, and backward. The algorithms for Advanced Pilot Assistance Systems (APAS 4.0) have been further improved, allowing DJI Air 2S to actively avoid obstacles in more complex scenarios and at high speeds.\u003c\/span\u003e\u003c\/span\u003e\u003c\/div\u003e\n\u003cdiv style=\"text-align: center;\"\u003e\u003cimg style=\"float: none;\" src=\"https:\/\/cdn.shopify.com\/s\/files\/1\/2532\/7020\/files\/DJI_Mavic_Air_2S_Fly_More_Combo_17.jpg?v=1628579395\" alt=\"dji-mavic-air-2S-fly-more-combo-drone-content-feature-Feel-the-Flight-Environment-Sensing\"\u003e\u003c\/div\u003e\n\u003cdiv style=\"text-align: center;\"\u003e \u003c\/div\u003e\n\u003ch3 style=\"text-align: center;\"\u003e\u003cspan style=\"color: #ff8000;\"\u003e\u003cb\u003eO3 Tranmission\u003c\/b\u003e\u003c\/span\u003e\u003c\/h3\u003e\n\u003cdiv style=\"text-align: center;\"\u003e\u003cspan style=\"font-weight: 400;\"\u003e\u003cspan data-mce-fragment=\"1\"\u003eDJI Air 2S features DJI's most advanced O3 (OcuSync 3.0) image transmission technology, delivering an ultra-smooth, clear, and reliable image feed.\u003c\/span\u003e\u003c\/span\u003e\u003c\/div\u003e\n\u003cdiv style=\"text-align: center;\"\u003e\n\u003ctable width=\"100%\"\u003e\n\u003ctbody\u003e\n\u003ctr\u003e\n\u003ctd style=\"text-align: center;\"\u003e \u003cspan style=\"color: #ff8000;\"\u003e\u003cstrong\u003e\u003cspan class=\"style__icon-number___2OOlV\" data-mce-fragment=\"1\"\u003e12\u003c\/span\u003e\u003cspan class=\"style__icon-unit___2hz_k\" data-mce-fragment=\"1\"\u003eKm\u003c\/span\u003e\u003c\/strong\u003e\u003c\/span\u003e\n\u003cp class=\"style__icon-desc___Otw9j\" data-mce-fragment=\"1\"\u003eMax Video Transmission\u003c\/p\u003e\n\u003c\/td\u003e\n\u003ctd\u003e\n\u003cdiv style=\"text-align: center;\" class=\"style__icon-number-container___2cK9V\"\u003e\u003cspan style=\"color: #ff8000;\"\u003e\u003cstrong\u003e\u003cspan class=\"style__icon-number___2OOlV\"\u003e1080\u003c\/span\u003e\u003cspan class=\"style__icon-unit___2hz_k\"\u003ep\u003c\/span\u003e\u003c\/strong\u003e\u003c\/span\u003e\u003c\/div\u003e\n\u003cp style=\"text-align: center;\" class=\"style__icon-desc___Otw9j\"\u003eTransmission\u003c\/p\u003e\n\u003c\/td\u003e\n\u003ctd\u003e\n\u003cdiv style=\"text-align: center;\" class=\"style__icon-number-container___2cK9V\"\u003e\u003cspan style=\"color: #ff8000;\"\u003e\u003cstrong\u003e\u003cspan class=\"style__icon-number___2OOlV\"\u003e4\u003c\/span\u003e\u003cspan class=\"style__icon-unit___2hz_k\"\u003eAntennas\u003c\/span\u003e\u003c\/strong\u003e\u003c\/span\u003e\u003c\/div\u003e\n\u003cp style=\"text-align: center;\" class=\"style__icon-desc___Otw9j\"\u003e2.4\/5.8GHz Dual Frequency\u003c\/p\u003e\n\u003c\/td\u003e\n\u003c\/tr\u003e\n\u003c\/tbody\u003e\n\u003c\/table\u003e\n\u003c\/div\u003e\n\u003cdiv style=\"text-align: center;\"\u003e\u003cspan style=\"font-weight: 400; color: #ffffff;\"\u003e\u003c\/span\u003e\u003c\/div\u003e\n\u003cdiv style=\"text-align: center;\"\u003e\u003cspan style=\"font-weight: 400; color: #ffffff;\"\u003e\u003cimg style=\"float: none;\" src=\"https:\/\/cdn.shopify.com\/s\/files\/1\/2532\/7020\/files\/DJI_Mavic_Air_2S_Fly_More_Combo_18_480x480.jpg?v=1628579621\" alt=\"dji-mavic-air-2S-fly-more-combo-drone-content-feature-O3-Tranmission\" data-mce-fragment=\"1\" data-mce-src=\"https:\/\/cdn.shopify.com\/s\/files\/1\/2532\/7020\/files\/DJI_Mavic_Air_2S_Fly_More_Combo_18_480x480.jpg?v=1628579621\"\u003e.\u003c\/span\u003e\u003c\/div\u003e\n\u003ch3 style=\"text-align: center;\"\u003e\u003cspan style=\"color: #ff8000;\"\u003e\u003cb\u003e\u003c\/b\u003e\u003c\/span\u003e\u003c\/h3\u003e\n\u003ch3 style=\"text-align: center;\"\u003e\u003cspan style=\"color: #ff8000;\"\u003e\u003cb\u003e\u003c\/b\u003e\u003c\/span\u003e\u003c\/h3\u003e\n\u003ch3 style=\"text-align: center;\"\u003e\u003cspan style=\"color: #ff8000;\"\u003e\u003cb\u003eSafer Skies with ADS-B\u003c\/b\u003e\u003c\/span\u003e\u003c\/h3\u003e\n\u003cdiv style=\"text-align: center;\"\u003e\u003cspan style=\"font-weight: 400;\"\u003e\u003cspan data-mce-fragment=\"1\"\u003eDJI Air 2S provides an added layer of airspace safety with the industry-leading AirSense safety system. This receives Automatic Dependent Surveillance-Broadcast (ADS-B) flight location information from airplanes and helicopters in your area that transmit ADS-B signals, displays those aircraft on a map, and provides audio and visual alerts through the DJI Fly app to help you keep the drone out of the way of those aircraft.\u003c\/span\u003e\u003c\/span\u003e\u003c\/div\u003e\n\u003cdiv style=\"text-align: center;\"\u003e\u003cspan style=\"font-weight: 400;\"\u003e\u003cspan data-mce-fragment=\"1\"\u003e\u003cimg src=\"https:\/\/cdn.shopify.com\/s\/files\/1\/2532\/7020\/files\/DJI_Mavic_Air_2S_Fly_More_Combo_19.jpg?v=1628579892\" style=\"float: none;\" alt=\"dji-mavic-air-2S-fly-more-combo-drone-content-feature-Safer-Skies-with-ADS-B\"\u003e\u003c\/span\u003e\u003c\/span\u003e\u003c\/div\u003e\n\u003cdiv style=\"text-align: center;\"\u003e \u003c\/div\u003e\n\u003cdiv style=\"text-align: center;\"\u003e\u003cbr\u003e\u003c\/div\u003e\n\u003ch3 style=\"text-align: center;\"\u003e\u003cspan style=\"color: #ff8000;\"\u003e\u003cb\u003eExpansive Accessories\u003c\/b\u003e\u003c\/span\u003e\u003c\/h3\u003e\n\u003ch3 style=\"text-align: center;\"\u003e\u003cb\u003eGet the Most Out Of Air 2S\u003c\/b\u003e\u003c\/h3\u003e\n\u003cdiv style=\"text-align: center;\"\u003e\u003cspan style=\"font-weight: 400;\"\u003e\u003cspan data-mce-fragment=\"1\"\u003eWith a diverse range of accessories, the sky is truly the limit.\u003c\/span\u003e\u003c\/span\u003e\u003c\/div\u003e\n\u003cdiv style=\"text-align: center;\"\u003e\u003cspan style=\"font-weight: 400;\"\u003e\u003cspan data-mce-fragment=\"1\"\u003e\u003c\/span\u003e\u003c\/span\u003e\u003c\/div\u003e\n\u003ch3 style=\"text-align: center;\"\u003e\u003cspan style=\"color: #ff8000;\"\u003e\u003cb\u003e\u003c\/b\u003e\u003c\/span\u003e\u003c\/h3\u003e\n\u003cp\u003e \u003c\/p\u003e\n\u003cp\u003e \u003c\/p\u003e\n\u003ch3 style=\"text-align: center;\"\u003e\u003cspan style=\"color: #ff8000;\"\u003e\u003cb\u003e\u003c\/b\u003e\u003c\/span\u003e\u003c\/h3\u003e\n\u003ch3\u003e\u003cspan\u003e\u003cb\u003e\u003c\/b\u003e\u003c\/span\u003e\u003c\/h3\u003e\n\u003ch3 style=\"text-align: center;\"\u003e\u003cspan style=\"color: #ff8000;\"\u003e\u003cb\u003eDJI Smart Controller\u003c\/b\u003e\u003c\/span\u003e\u003c\/h3\u003e\n\u003cdiv\u003e\u003cspan\u003eThis powerful remote controller features a 5.5-inch 1080p high-brightness display for pure performance. Compatible with the DJI GO 4 and DJI Fly apps, it also supports the installation of third-party apps.\u003c\/span\u003e\u003c\/div\u003e\n\u003cdiv\u003e\u003cimg alt=\"dji-mavic-air-2S-fly-more-combo-drone-content-feature-Expansive-Accessories-Fly-More-Combo-DJI Smart Controller\" src=\"https:\/\/cdn.shopify.com\/s\/files\/1\/2532\/7020\/files\/DJI_Mavic_Air_2S_Fly_More_Combo_22.jpg?v=1628580371\"\u003e\u003c\/div\u003e\n\u003ch3 style=\"text-align: center;\"\u003e\u003cspan style=\"color: #ff8000;\"\u003e\u003cb\u003e\u003c\/b\u003e\u003c\/span\u003e\u003c\/h3\u003e\n\u003ch3 style=\"text-align: center;\"\u003e\u003cspan style=\"color: #ff8000;\"\u003e\u003cb\u003e\u003c\/b\u003e\u003c\/span\u003e\u003c\/h3\u003e\n\u003cdiv style=\"text-align: center;\"\u003e \u003c\/div\u003e\n\u003ch2 style=\"text-align: left;\"\u003e\u003cstrong\u003e\u003c\/strong\u003e\u003c\/h2\u003e\n\u003ch2 style=\"text-align: left;\"\u003e\u003cstrong\u003eSpecification\u003c\/strong\u003e\u003c\/h2\u003e\n\u003cp\u003e \u003c\/p\u003e\n\u003cp\u003e \u003c\/p\u003e\n\u003cp\u003e \u003c\/p\u003e\n\u003ch3 class=\"group-list-title\"\u003eAircraft\u003c\/h3\u003e\n\u003ctable width=\"523\"\u003e\n\u003ctbody\u003e\n\u003ctr style=\"height: 19px;\"\u003e\n\u003ctd style=\"width: 245.562px; height: 19px;\"\u003e Takeoff Weight\u003c\/td\u003e\n\u003ctd style=\"width: 254.438px; height: 19px;\"\u003e595 g\u003c\/td\u003e\n\u003c\/tr\u003e\n\u003ctr style=\"height: 76px;\"\u003e\n\u003ctd style=\"width: 245.562px; height: 76px;\"\u003eDimensions\u003c\/td\u003e\n\u003ctd style=\"width: 254.438px; height: 76px;\"\u003eFolded:\u003cbr\u003e180×97×77 mm (length×width×height)\u003cbr\u003eUnfolded:\u003cbr\u003e183×253×77 mm (length×width×height)\u003c\/td\u003e\n\u003c\/tr\u003e\n\u003ctr style=\"height: 19px;\"\u003e\n\u003ctd style=\"width: 245.562px; height: 19px;\"\u003eDiagonal Length\u003c\/td\u003e\n\u003ctd style=\"width: 254.438px; height: 19px;\"\u003e302 mm\u003c\/td\u003e\n\u003c\/tr\u003e\n\u003ctr style=\"height: 38px;\"\u003e\n\u003ctd style=\"width: 245.562px; height: 38px;\"\u003eMax Ascent Speed\u003c\/td\u003e\n\u003ctd style=\"width: 254.438px; height: 38px;\"\u003e6 m\/s (S Mode)\u003cbr\u003e6 m\/s (N Mode)\u003c\/td\u003e\n\u003c\/tr\u003e\n\u003ctr style=\"height: 52px;\"\u003e\n\u003ctd style=\"width: 245.562px; height: 52px;\"\u003eMax Descent Speed\u003c\/td\u003e\n\u003ctd style=\"width: 254.438px; height: 52px;\"\u003e\n\u003cp\u003e6 m\/s (S Mode)\u003cbr\u003e6 m\/s (N Mode)\u003c\/p\u003e\n\u003c\/td\u003e\n\u003c\/tr\u003e\n\u003ctr style=\"height: 27px;\"\u003e\n\u003ctd style=\"width: 245.562px; height: 27px;\"\u003eMax Service Ceiling Above Sea Level\u003c\/td\u003e\n\u003ctd style=\"width: 254.438px; height: 27px;\"\u003e\n\u003cp\u003e5000 m\u003cbr\u003e\u003c\/p\u003e\n\u003c\/td\u003e\n\u003c\/tr\u003e\n\u003ctr style=\"height: 9px;\"\u003e\n\u003ctd style=\"width: 245.562px; height: 9px;\"\u003eMax Flight Time (no wind)\u003c\/td\u003e\n\u003ctd style=\"width: 254.438px; height: 9px;\"\u003e\n\u003cp\u003e31 minutes\u003c\/p\u003e\n\u003c\/td\u003e\n\u003c\/tr\u003e\n\u003ctr style=\"height: 9px;\"\u003e\n\u003ctd style=\"width: 245.562px; height: 9px;\"\u003eMax Hovering Time (no wind)\u003c\/td\u003e\n\u003ctd style=\"width: 254.438px; height: 9px;\"\u003e\n\u003cp\u003e30 minutes\u003c\/p\u003e\n\u003c\/td\u003e\n\u003c\/tr\u003e\n\u003ctr style=\"height: 9px;\"\u003e\n\u003ctd style=\"width: 245.562px; height: 9px;\"\u003eMax Flight Distance (no wind)\u003c\/td\u003e\n\u003ctd style=\"width: 254.438px; height: 9px;\"\u003e\n\u003cp\u003e18.5 km\u003c\/p\u003e\n\u003c\/td\u003e\n\u003c\/tr\u003e\n\u003ctr style=\"height: 9px;\"\u003e\n\u003ctd style=\"width: 245.562px; height: 9px;\"\u003eMax Flight Speed (near sea level, no wind)\u003c\/td\u003e\n\u003ctd style=\"width: 254.438px; height: 9px;\"\u003e19 m\/s (S Mode)\u003cbr\u003e15 m\/s (N Mode)\u003cbr\u003e5 m\/s (C Mode)\u003c\/td\u003e\n\u003c\/tr\u003e\n\u003ctr style=\"height: 9px;\"\u003e\n\u003ctd style=\"width: 245.562px; height: 9px;\"\u003eMax Wind Speed Resistance\u003c\/td\u003e\n\u003ctd style=\"width: 254.438px; height: 9px;\"\u003e10.7 m\/s\u003c\/td\u003e\n\u003c\/tr\u003e\n\u003ctr style=\"height: 9px;\"\u003e\n\u003ctd style=\"width: 245.562px; height: 9px;\"\u003eMax Tilt Angle\u003c\/td\u003e\n\u003ctd style=\"width: 254.438px; height: 9px;\"\u003e35° (S Mode)\u003cbr\u003eFront: 30°, Back: 20°, Left: 35°, Right: 35° (N Mode)\u003c\/td\u003e\n\u003c\/tr\u003e\n\u003ctr style=\"height: 9px;\"\u003e\n\u003ctd style=\"width: 245.562px; height: 9px;\"\u003eMax Angular Velocity\u003c\/td\u003e\n\u003ctd style=\"width: 254.438px; height: 9px;\"\u003e250°\/s (S Mode)\u003cbr\u003e90°\/s (N Mode)\u003cbr\u003e60°\/s (C Mode)\u003c\/td\u003e\n\u003c\/tr\u003e\n\u003ctr style=\"height: 9px;\"\u003e\n\u003ctd style=\"width: 245.562px; height: 9px;\"\u003eOperating Temperature Range\u003c\/td\u003e\n\u003ctd style=\"width: 254.438px; height: 9px;\"\u003e0° to 40°C (32° to 104°F)\u003c\/td\u003e\n\u003c\/tr\u003e\n\u003ctr style=\"height: 9px;\"\u003e\n\u003ctd style=\"width: 245.562px; height: 9px;\"\u003eOperating Frequency\u003c\/td\u003e\n\u003ctd style=\"width: 254.438px; height: 9px;\"\u003e2.4 GHz\u003cbr\u003e5.8 GHz\u003cbr\u003eTransmission Power (EIRP)\u003cbr\u003e2.4 GHz:\u003cbr\u003eFCC: ≤30 dBm\u003cbr\u003eCE: ≤20 dBm\u003cbr\u003eSRRC: ≤20 dBm\u003cbr\u003eMIC: ≤20 dBm\u003cbr\u003e5.8 GHz:\u003cbr\u003eFCC: ≤30 dBm\u003cbr\u003eCE: ≤14 dBm\u003cbr\u003eSRRC: ≤29 dBm\u003c\/td\u003e\n\u003c\/tr\u003e\n\u003ctr style=\"height: 9px;\"\u003e\n\u003ctd style=\"width: 245.562px; height: 9px;\"\u003eHovering Accuracy Range\u003c\/td\u003e\n\u003ctd style=\"width: 254.438px; height: 9px;\"\u003eVertical:\u003cbr\u003e± 0.1 m (with vision positioning)\u003cbr\u003e± 0.5 m (with GNSS positioning)\u003cbr\u003eHorizontal:\u003cbr\u003e± 0.1 m (with vision positioning)\u003cbr\u003e± 1.5 m (with GNSS positioning)\u003c\/td\u003e\n\u003c\/tr\u003e\n\u003ctr style=\"height: 9px;\"\u003e\n\u003ctd style=\"width: 245.562px; height: 9px;\"\u003ePropellers\u003c\/td\u003e\n\u003ctd style=\"width: 254.438px; height: 9px;\"\u003eQuick release, low noise, folding\u003c\/td\u003e\n\u003c\/tr\u003e\n\u003ctr style=\"height: 9px;\"\u003e\n\u003ctd style=\"width: 245.562px; height: 9px;\"\u003eAircraft Arms\u003c\/td\u003e\n\u003ctd style=\"width: 254.438px; height: 9px;\"\u003eFoldable\u003c\/td\u003e\n\u003c\/tr\u003e\n\u003ctr style=\"height: 9px;\"\u003e\n\u003ctd style=\"width: 245.562px; height: 9px;\"\u003eGNSS\u003c\/td\u003e\n\u003ctd style=\"width: 254.438px; height: 9px;\"\u003eGPS+GLONASS+GALILEO\u003c\/td\u003e\n\u003c\/tr\u003e\n\u003ctr style=\"height: 9px;\"\u003e\n\u003ctd style=\"width: 245.562px; height: 9px;\"\u003eCompass\u003c\/td\u003e\n\u003ctd style=\"width: 254.438px; height: 9px;\"\u003eSingle Compass\u003c\/td\u003e\n\u003c\/tr\u003e\n\u003ctr style=\"height: 9px;\"\u003e\n\u003ctd style=\"width: 245.562px; height: 9px;\"\u003eIMU\u003c\/td\u003e\n\u003ctd style=\"width: 254.438px; height: 9px;\"\u003eSingle IMU\u003c\/td\u003e\n\u003c\/tr\u003e\n\u003ctr style=\"height: 9px;\"\u003e\n\u003ctd style=\"width: 245.562px; height: 9px;\"\u003eInternal Storage\u003c\/td\u003e\n\u003ctd style=\"width: 254.438px; height: 9px;\"\u003e8 GB\u003c\/td\u003e\n\u003c\/tr\u003e\n\u003c\/tbody\u003e\n\u003c\/table\u003e\n\u003cp\u003e\u003cbr\u003e\u003cbr\u003e\u003c\/p\u003e\n\u003ch3 class=\"group-list-title\"\u003eIntelligent Flight Battery\u003c\/h3\u003e\n\u003ctable width=\"100%\"\u003e\n\u003ctbody\u003e\n\u003ctr\u003e\n\u003ctd style=\"width: 46.981%;\"\u003e Capacity\u003c\/td\u003e\n\u003ctd style=\"width: 49.7244%;\"\u003e3500 mAh\u003c\/td\u003e\n\u003c\/tr\u003e\n\u003ctr\u003e\n\u003ctd style=\"width: 46.981%;\"\u003eVoltage\u003c\/td\u003e\n\u003ctd style=\"width: 49.7244%;\"\u003e11.55 V\u003c\/td\u003e\n\u003c\/tr\u003e\n\u003ctr\u003e\n\u003ctd style=\"width: 46.981%;\"\u003eMax Charging Voltage\u003c\/td\u003e\n\u003ctd style=\"width: 49.7244%;\"\u003e13.2 V\u003c\/td\u003e\n\u003c\/tr\u003e\n\u003ctr\u003e\n\u003ctd style=\"width: 46.981%;\"\u003eBattery Type\u003c\/td\u003e\n\u003ctd style=\"width: 49.7244%;\"\u003eLiPo 3S\u003c\/td\u003e\n\u003c\/tr\u003e\n\u003ctr\u003e\n\u003ctd style=\"width: 46.981%;\"\u003eEnergy\u003c\/td\u003e\n\u003ctd style=\"width: 49.7244%;\"\u003e40.42 Wh\u003c\/td\u003e\n\u003c\/tr\u003e\n\u003ctr\u003e\n\u003ctd style=\"width: 46.981%;\"\u003eWeight\u003c\/td\u003e\n\u003ctd style=\"width: 49.7244%;\"\u003e198 g\u003c\/td\u003e\n\u003c\/tr\u003e\n\u003ctr\u003e\n\u003ctd style=\"width: 46.981%;\"\u003eCharging Temperature Range\u003c\/td\u003e\n\u003ctd style=\"width: 49.7244%;\"\u003e5° to 40°C (41° to 104°F)\u003c\/td\u003e\n\u003c\/tr\u003e\n\u003ctr\u003e\n\u003ctd style=\"width: 46.981%;\"\u003eMax Charging Power\u003c\/td\u003e\n\u003ctd style=\"width: 49.7244%;\"\u003e38 W\u003c\/td\u003e\n\u003c\/tr\u003e\n\u003ctr\u003e\n\u003ctd style=\"width: 46.981%;\"\u003eBuilt-in Battery\u003c\/td\u003e\n\u003ctd style=\"width: 49.7244%;\"\u003eN\/A\u003c\/td\u003e\n\u003c\/tr\u003e\n\u003c\/tbody\u003e\n\u003c\/table\u003e\n\u003cp\u003e\u003cbr\u003e\u003c\/p\u003e\n\u003ch3 class=\"group-list-title\"\u003eCamera\u003c\/h3\u003e\n\u003ctable width=\"100%\"\u003e\n\u003ctbody\u003e\n\u003ctr\u003e\n\u003ctd style=\"width: 47.0159%;\"\u003e Sensor\u003c\/td\u003e\n\u003ctd style=\"width: 48.9841%;\"\u003e\n\u003cp\u003e1\" CMOS\u003c\/p\u003e\n\u003cp\u003eEffective Pixels: 20 MP; 2.4μm Pixel Size\u003c\/p\u003e\n\u003c\/td\u003e\n\u003c\/tr\u003e\n\u003ctr\u003e\n\u003ctd style=\"width: 47.0159%;\"\u003eLens\u003c\/td\u003e\n\u003ctd style=\"width: 48.9841%;\"\u003eFOV: 88°\u003cbr\u003e35 mm Format Equivalent: 22 mm\u003cbr\u003eAperture: f\/2.8\u003cbr\u003eShooting Range: 0.6 m to ∞\u003c\/td\u003e\n\u003c\/tr\u003e\n\u003ctr\u003e\n\u003ctd style=\"width: 47.0159%;\"\u003eISO Range\u003c\/td\u003e\n\u003ctd style=\"width: 48.9841%;\"\u003eVideo:\u003cbr\u003e100-3200 (Auto)\u003cbr\u003e100-6400 (Manual)\u003cbr\u003e10-Bit Dlog-M Video:\u003cbr\u003e100-800 (Auto)\u003cbr\u003e100-1600 (Manual)\u003cbr\u003ePhoto:\u003cbr\u003e100-3200 (Auto)\u003cbr\u003e100-12800 (Manual)\u003c\/td\u003e\n\u003c\/tr\u003e\n\u003ctr\u003e\n\u003ctd style=\"width: 47.0159%;\"\u003eStill Image Size\u003c\/td\u003e\n\u003ctd style=\"width: 48.9841%;\"\u003e20 MP\u003cbr\u003e5472×3648 (3:2)\u003cbr\u003e5472×3078 (16:9)\u003c\/td\u003e\n\u003c\/tr\u003e\n\u003ctr\u003e\n\u003ctd style=\"width: 47.0159%;\"\u003eStill Photography Modes\u003c\/td\u003e\n\u003ctd style=\"width: 48.9841%;\"\u003eSingle shot: 20 MP\u003cbr\u003eBurst shooting: 20 MP (continuous burst)\u003cbr\u003eAuto Exposure Bracketing (AEB): 20 MP, 3\/5 bracketed frames at 0.7 EV bias\u003cbr\u003eTimed: 20 MP, 2\/3\/5\/7\/10\/15\/20\/30\/60s\u003cbr\u003eSmartPhoto (including HDR and HyperLight): 20 MP\u003cbr\u003eHDR Panorama:\u003cbr\u003eVertical (3×1): 3328×8000 (width×height)\u003cbr\u003eWide-angle (3×3): 8000×6144 (width×height)\u003cbr\u003e180° (3×7): 8192×3500 (width×height)\u003cbr\u003eSphere (3×8+1): 8192×4096 (width×height)\u003cbr\u003eJPEG\/DNG (RAW)\u003c\/td\u003e\n\u003c\/tr\u003e\n\u003ctr\u003e\n\u003ctd style=\"width: 47.0159%;\"\u003eVideo Resolution\u003c\/td\u003e\n\u003ctd style=\"width: 48.9841%;\"\u003e5.4K: 5472×3078 @ 24\/25\/30 fps\u003cbr\u003e4K Ultra HD: 3840×2160 @ 24\/25\/30\/48\/50\/60 fps\u003cbr\u003e2.7K: 2688x1512 @ 24\/25\/30\/48\/50\/60 fps\u003cbr\u003eFHD: 1920×1080 @ 24\/25\/30\/48\/50\/60\/120 fps\u003cbr\u003eMP4\/MOV (H.264\/MPEG-4 AVC, H.265\/HEVC)\u003c\/td\u003e\n\u003c\/tr\u003e\n\u003ctr\u003e\n\u003ctd style=\"width: 47.0159%;\"\u003eMax Video Bitrate\u003c\/td\u003e\n\u003ctd style=\"width: 48.9841%;\"\u003e150 Mbps\u003c\/td\u003e\n\u003c\/tr\u003e\n\u003ctr\u003e\n\u003ctd style=\"width: 47.0159%;\"\u003eSupported File System\u003c\/td\u003e\n\u003ctd style=\"width: 48.9841%;\"\u003e\n\u003cp\u003eFAT32\/exFAT\u003c\/p\u003e\n\u003cp\u003eSupports a microSD card with a capacity of up to 256 GB.\u003c\/p\u003e\n\u003c\/td\u003e\n\u003c\/tr\u003e\n\u003ctr\u003e\n\u003ctd style=\"width: 47.0159%;\"\u003eDigital Zoom\u003c\/td\u003e\n\u003ctd style=\"width: 48.9841%;\"\u003e\n\u003cp\u003eZoom recording is not available while recording 10-bit videos and 120fps videos.\u003c\/p\u003e\n\u003cp\u003e4K\/30fps:\u003cbr\u003e4x;\u003cbr\u003e2.7K\/60fps:\u003cbr\u003e4x;\u003cbr\u003e2.7K\/30fps:\u003cbr\u003e6x;\u003cbr\u003e1080p\/60fps:\u003cbr\u003e6x;\u003cbr\u003e1080p\/30fps:\u003cbr\u003e8x\u003c\/p\u003e\n\u003c\/td\u003e\n\u003c\/tr\u003e\n\u003c\/tbody\u003e\n\u003c\/table\u003e\n\u003cp\u003e \u003c\/p\u003e\n\u003ch3 class=\"group-list-title\"\u003eGimbal\u003c\/h3\u003e\n\u003ctable width=\"100%\"\u003e\n\u003ctbody\u003e\n\u003ctr\u003e\n\u003ctd style=\"width: 46.8312%;\"\u003e Stabilization\u003c\/td\u003e\n\u003ctd style=\"width: 48.1688%;\"\u003e3-axis (tilt, roll, pan)\u003c\/td\u003e\n\u003c\/tr\u003e\n\u003ctr\u003e\n\u003ctd style=\"width: 46.8312%;\"\u003eMechanical Range\u003c\/td\u003e\n\u003ctd style=\"width: 48.1688%;\"\u003eTilt: -135° to 45°\u003cbr\u003eRoll: -45° to 45°\u003cbr\u003ePan: -100° to 100°\u003c\/td\u003e\n\u003c\/tr\u003e\n\u003ctr\u003e\n\u003ctd style=\"width: 46.8312%;\"\u003ePan Axis\u003c\/td\u003e\n\u003ctd style=\"width: 48.1688%;\"\u003eNot Controllable\u003c\/td\u003e\n\u003c\/tr\u003e\n\u003ctr\u003e\n\u003ctd style=\"width: 46.8312%;\"\u003eControllable Range\u003c\/td\u003e\n\u003ctd style=\"width: 48.1688%;\"\u003eTilt: -90° to 0°(default); -90° to 24° (extended)\u003c\/td\u003e\n\u003c\/tr\u003e\n\u003ctr\u003e\n\u003ctd style=\"width: 46.8312%;\"\u003eMax Controllable Speed (tilt)\u003c\/td\u003e\n\u003ctd style=\"width: 48.1688%;\"\u003e100°\/s\u003c\/td\u003e\n\u003c\/tr\u003e\n\u003ctr\u003e\n\u003ctd style=\"width: 46.8312%;\"\u003eAngular Vibration Range\u003c\/td\u003e\n\u003ctd style=\"width: 48.1688%;\"\u003e±0.01°\u003c\/td\u003e\n\u003c\/tr\u003e\n\u003c\/tbody\u003e\n\u003c\/table\u003e\n\u003cp\u003e\u003cbr\u003e\u003c\/p\u003e\n\u003ch3 class=\"group-list-title\"\u003eSensing System\u003c\/h3\u003e\n\u003ctable width=\"100%\"\u003e\n\u003ctbody\u003e\n\u003ctr\u003e\n\u003ctd style=\"width: 48.1438%;\"\u003e Forward\u003c\/td\u003e\n\u003ctd style=\"width: 48.5617%;\"\u003e\n\u003cp\u003ePrecision Measurement Range: 0.38-23.8 m\u003c\/p\u003e\n\u003cp\u003eEffective Sensing Speed: ≤15 m\/s\u003cbr\u003eField of View (FOV): 72° (horizontal), 58° (vertical)\u003c\/p\u003e\n\u003c\/td\u003e\n\u003c\/tr\u003e\n\u003ctr\u003e\n\u003ctd style=\"width: 48.1438%;\"\u003eBackward\u003c\/td\u003e\n\u003ctd style=\"width: 48.5617%;\"\u003ePrecision Measurement Range: 0.37-23.4 m\u003cbr\u003eEffective Sensing Speed: ≤12 m\/s\u003cbr\u003eField of View (FOV): 57° (horizontal), 44° (vertical)\u003c\/td\u003e\n\u003c\/tr\u003e\n\u003ctr\u003e\n\u003ctd style=\"width: 48.1438%;\"\u003eDownward\u003c\/td\u003e\n\u003ctd style=\"width: 48.5617%;\"\u003eToF Measurement Range: 0.1-8 m\u003cbr\u003eHovering Range: 0.5-30 m\u003cbr\u003eVision Sensor Hovering Range: 0.5-60 m\u003c\/td\u003e\n\u003c\/tr\u003e\n\u003ctr\u003e\n\u003ctd style=\"width: 48.1438%;\"\u003eLeft\/Right\u003c\/td\u003e\n\u003ctd style=\"width: 48.5617%;\"\u003eN\/A\u003c\/td\u003e\n\u003c\/tr\u003e\n\u003ctr\u003e\n\u003ctd style=\"width: 48.1438%;\"\u003eUpward\u003c\/td\u003e\n\u003ctd style=\"width: 48.5617%;\"\u003ePrecision Measurement Range: 0.34-28.6 m\u003cbr\u003eField of View (FOV): 63° (horizontal), 78° (vertical)\u003c\/td\u003e\n\u003c\/tr\u003e\n\u003ctr\u003e\n\u003ctd style=\"width: 48.1438%;\"\u003eDownward Auxiliary Light\u003c\/td\u003e\n\u003ctd style=\"width: 48.5617%;\"\u003eSingle LED\u003c\/td\u003e\n\u003c\/tr\u003e\n\u003c\/tbody\u003e\n\u003c\/table\u003e\n\u003cp\u003e\u003cbr\u003e\u003c\/p\u003e\n\u003ch3 class=\"group-list-title\"\u003eVideo Transmission\u003c\/h3\u003e\n\u003ctable width=\"100%\"\u003e\n\u003ctbody\u003e\n\u003ctr\u003e\n\u003ctd style=\"width: 47.6063%;\"\u003e Transmission System\u003c\/td\u003e\n\u003ctd style=\"width: 47.3937%;\"\u003e\n\u003cp\u003eO3\u003c\/p\u003e\n\u003cp\u003e2.4 GHz\/5.8 GHz Auto-Switching (compatible with OcuSync 2.0)\u003cbr data-mce-fragment=\"1\"\u003e4-antenna 2T4R\u003c\/p\u003e\n\u003c\/td\u003e\n\u003c\/tr\u003e\n\u003ctr\u003e\n\u003ctd style=\"width: 47.6063%;\"\u003eMax Transmission Distance\u003c\/td\u003e\n\u003ctd style=\"width: 47.3937%;\"\u003e12 km (FCC), 8 km (CE)\u003cbr\u003e8 km (SRRC), 8 km (MIC)\u003c\/td\u003e\n\u003c\/tr\u003e\n\u003ctr\u003e\n\u003ctd style=\"width: 47.6063%;\"\u003eLive View Quality\/Latency\u003c\/td\u003e\n\u003ctd style=\"width: 47.3937%;\"\u003eDrone + Remote Controller: 1080p\/30fps 12 Mbps 120 ms\u003cbr\u003eDrone + DJI Smart Controller: 1080p\/30fps 12Mbps 130 ms\u003c\/td\u003e\n\u003c\/tr\u003e\n\u003ctr\u003e\n\u003ctd style=\"width: 47.6063%;\"\u003eMax Transmission Bitrate\u003c\/td\u003e\n\u003ctd style=\"width: 47.3937%;\"\u003e44 Mbps (download bitrate)\u003cbr\u003e16 Mbps (live video bitrate)\u003c\/td\u003e\n\u003c\/tr\u003e\n\u003ctr\u003e\n\u003ctd style=\"width: 47.6063%;\"\u003eOperating Frequency\u003c\/td\u003e\n\u003ctd style=\"width: 47.3937%;\"\u003e2.4 GHz\u003cbr\u003e5.8 GHz\u003c\/td\u003e\n\u003c\/tr\u003e\n\u003c\/tbody\u003e\n\u003c\/table\u003e\n\u003cp\u003e\u003cbr\u003e\u003c\/p\u003e\n\u003ch3 class=\"group-list-title\"\u003eRemote Controller\u003c\/h3\u003e\n\u003ctable width=\"100%\"\u003e\n\u003ctbody\u003e\n\u003ctr\u003e\n\u003ctd style=\"width: 47.7766%;\"\u003e Multiple Controllers\u003c\/td\u003e\n\u003ctd style=\"width: 47.2234%;\"\u003eN\/A\u003c\/td\u003e\n\u003c\/tr\u003e\n\u003ctr\u003e\n\u003ctd style=\"width: 47.7766%;\"\u003eDJI Smart Controller\u003c\/td\u003e\n\u003ctd style=\"width: 47.2234%;\"\u003eSupported\u003c\/td\u003e\n\u003c\/tr\u003e\n\u003ctr\u003e\n\u003ctd style=\"width: 47.7766%;\"\u003eRemote Controller Transmission System\u003c\/td\u003e\n\u003ctd style=\"width: 47.2234%;\"\u003eOcuSync 2.0\u003c\/td\u003e\n\u003c\/tr\u003e\n\u003ctr\u003e\n\u003ctd style=\"width: 47.7766%;\"\u003eBattery Life\u003c\/td\u003e\n\u003ctd style=\"width: 47.2234%;\"\u003e6 hours (4 hours when charging a mobile device)\u003c\/td\u003e\n\u003c\/tr\u003e\n\u003ctr\u003e\n\u003ctd style=\"width: 47.7766%;\"\u003eSupported Mobile Device Connectors\u003c\/td\u003e\n\u003ctd style=\"width: 47.2234%;\"\u003eLightning, Micro USB, USB-C\u003c\/td\u003e\n\u003c\/tr\u003e\n\u003ctr\u003e\n\u003ctd style=\"width: 47.7766%;\"\u003eMax Supported Mobile Device Size\u003c\/td\u003e\n\u003ctd style=\"width: 47.2234%;\"\u003e180×86×10 mm (length×width×height)\u003c\/td\u003e\n\u003c\/tr\u003e\n\u003ctr\u003e\n\u003ctd style=\"width: 47.7766%;\"\u003eOperating Temperature\u003c\/td\u003e\n\u003ctd style=\"width: 47.2234%;\"\u003e0° to 40°C (14° to 104°F)\u003c\/td\u003e\n\u003c\/tr\u003e\n\u003ctr\u003e\n\u003ctd style=\"width: 47.7766%;\"\u003eTransmitter Power (EIRP)\u003c\/td\u003e\n\u003ctd style=\"width: 47.2234%;\"\u003e2.4 GHz:\u003cbr\u003eFCC: ≤26 dBm\u003cbr\u003eCE: ≤20 dBm\u003cbr\u003eSRRC: ≤20 dBm\u003cbr\u003eMIC: ≤20 dBm\u003cbr\u003e5.8 GHz:\u003cbr\u003eFCC: ≤26 dBm\u003cbr\u003eCE: ≤14 dBm\u003cbr\u003eSRRC: ≤26 dBm\u003c\/td\u003e\n\u003c\/tr\u003e\n\u003c\/tbody\u003e\n\u003c\/table\u003e\n\u003cp\u003e\u003cbr\u003e\u003c\/p\u003e\n\u003ch3 class=\"group-list-title\"\u003eCharger\u003c\/h3\u003e\n\u003ctable width=\"100%\"\u003e\n\u003ctbody\u003e\n\u003ctr\u003e\n\u003ctd style=\"width: 49.888%;\"\u003e Charging Input\u003c\/td\u003e\n\u003ctd style=\"width: 46.8175%;\"\u003e100-240V, 50\/60 Hz, 1.3 A\u003c\/td\u003e\n\u003c\/tr\u003e\n\u003ctr\u003e\n\u003ctd style=\"width: 49.888%;\"\u003eCharging Output\u003c\/td\u003e\n\u003ctd style=\"width: 46.8175%;\"\u003eCharging Port: 13.2 V⎓2.82 A\u003cbr\u003eUSB Port: 5 V⎓2 A\u003c\/td\u003e\n\u003c\/tr\u003e\n\u003ctr\u003e\n\u003ctd style=\"width: 49.888%;\"\u003eVoltage\u003c\/td\u003e\n\u003ctd style=\"width: 46.8175%;\"\u003e13.2 V\u003c\/td\u003e\n\u003c\/tr\u003e\n\u003ctr\u003e\n\u003ctd style=\"width: 49.888%;\"\u003eRated Power\u003c\/td\u003e\n\u003ctd style=\"width: 46.8175%;\"\u003e38 W\u003c\/td\u003e\n\u003c\/tr\u003e\n\u003c\/tbody\u003e\n\u003c\/table\u003e\n\u003cp\u003e\u003cbr\u003e\u003c\/p\u003e\n\u003cdiv\u003e\n\u003cul style=\"text-align: center;\"\u003e\u003c\/ul\u003e\n\u003c\/div\u003e\n\u003cstyle\u003e\u003c!--\n.embed-container { position: relative; padding-bottom: 56.25%; height: 0; overflow: hidden; max-width: 100%; } .embed-container iframe, .embed-container object, .embed-container embed { position: absolute; top: 0; left: 0; width: 100%; height: 100%; }\n--\u003e\u003c\/style\u003e\n\u003c\/div\u003e","published_at":"2022-10-20T06:13:57-04:00","created_at":"2022-10-02T06:34:30-04:00","vendor":"DJI","type":"Drone","tags":["best drone","DJI Drones","DJI Mavic Air 2","drone","drone camera","drone dji","drone with camera","FocusTrack","HDR","mini drone","無人機","無人機套裝","航拍機","遙控航拍機","飛行無人機","高清航拍機"],"price":97800,"price_min":97800,"price_max":97800,"available":true,"price_varies":false,"compare_at_price":null,"compare_at_price_min":0,"compare_at_price_max":0,"compare_at_price_varies":false,"variants":[{"id":39869991747659,"title":"Default Title","option1":"Default Title","option2":null,"option3":null,"sku":"DJI-AIR-2S","requires_shipping":true,"taxable":true,"featured_image":null,"available":true,"name":"DJI Mavic Air 2S - 4 Directions of Obstacle Sensing Drone with 3-Axis Gimbal Camera | 5.4K Video | 1-Inch Sensor | MasterShots","public_title":null,"options":["Default Title"],"price":97800,"weight":4000,"compare_at_price":null,"inventory_management":"shopify","barcode":"","requires_selling_plan":false,"selling_plan_allocations":[]}],"images":["\/\/www.stream-sourcing.com\/cdn\/shop\/products\/DJI-Mavic-Air-2S-Fly-More-Combo_StreamSource_7454d458-c258-4035-9678-bd6f657f6772.jpg?v=1664706876","\/\/www.stream-sourcing.com\/cdn\/shop\/products\/DJI-Mavic-Air-2S-Fly-More-Combo_3_1_StreamSource2_a9eecce2-74f6-4bc1-8da2-a5945c19a54b.jpg?v=1664706877","\/\/www.stream-sourcing.com\/cdn\/shop\/products\/DJI-Mavic-Air-2S-Fly-More-Combo_4_1_StreamSource4_8e3f9619-9040-4888-b00c-fad2e25f5577.jpg?v=1664706877","\/\/www.stream-sourcing.com\/cdn\/shop\/products\/DJI-Mavic-Air-2S-Fly-More-Combo_StreamSource5_0e8ad2cc-6117-42a2-b8bf-64e3376bb619.jpg?v=1664706877","\/\/www.stream-sourcing.com\/cdn\/shop\/products\/DJI-Mavic-Air-2S-Fly-More-Combo_StreamSource6_d4456b92-6f7a-41bf-b1d0-e1adbb3e8cdd.jpg?v=1664706877"],"featured_image":"\/\/www.stream-sourcing.com\/cdn\/shop\/products\/DJI-Mavic-Air-2S-Fly-More-Combo_StreamSource_7454d458-c258-4035-9678-bd6f657f6772.jpg?v=1664706876","options":["Title"],"media":[{"alt":"DJI-Mavic-Air-2S-Fly-More-Combo_StreamSource","id":21590625648715,"position":1,"preview_image":{"aspect_ratio":1.762,"height":681,"width":1200,"src":"\/\/www.stream-sourcing.com\/cdn\/shop\/products\/DJI-Mavic-Air-2S-Fly-More-Combo_StreamSource_7454d458-c258-4035-9678-bd6f657f6772.jpg?v=1664706876"},"aspect_ratio":1.762,"height":681,"media_type":"image","src":"\/\/www.stream-sourcing.com\/cdn\/shop\/products\/DJI-Mavic-Air-2S-Fly-More-Combo_StreamSource_7454d458-c258-4035-9678-bd6f657f6772.jpg?v=1664706876","width":1200},{"alt":"DJI-Mavic-Air-2S-Fly-More-Combo_StreamSource","id":21590625714251,"position":2,"preview_image":{"aspect_ratio":1.762,"height":681,"width":1200,"src":"\/\/www.stream-sourcing.com\/cdn\/shop\/products\/DJI-Mavic-Air-2S-Fly-More-Combo_3_1_StreamSource2_a9eecce2-74f6-4bc1-8da2-a5945c19a54b.jpg?v=1664706877"},"aspect_ratio":1.762,"height":681,"media_type":"image","src":"\/\/www.stream-sourcing.com\/cdn\/shop\/products\/DJI-Mavic-Air-2S-Fly-More-Combo_3_1_StreamSource2_a9eecce2-74f6-4bc1-8da2-a5945c19a54b.jpg?v=1664706877","width":1200},{"alt":"DJI-Mavic-Air-2S-Fly-More-Combo_StreamSource","id":21590625747019,"position":3,"preview_image":{"aspect_ratio":1.762,"height":681,"width":1200,"src":"\/\/www.stream-sourcing.com\/cdn\/shop\/products\/DJI-Mavic-Air-2S-Fly-More-Combo_4_1_StreamSource4_8e3f9619-9040-4888-b00c-fad2e25f5577.jpg?v=1664706877"},"aspect_ratio":1.762,"height":681,"media_type":"image","src":"\/\/www.stream-sourcing.com\/cdn\/shop\/products\/DJI-Mavic-Air-2S-Fly-More-Combo_4_1_StreamSource4_8e3f9619-9040-4888-b00c-fad2e25f5577.jpg?v=1664706877","width":1200},{"alt":"DJI-Mavic-Air-2S-Fly-More-Combo_StreamSource","id":21590625779787,"position":4,"preview_image":{"aspect_ratio":1.762,"height":681,"width":1200,"src":"\/\/www.stream-sourcing.com\/cdn\/shop\/products\/DJI-Mavic-Air-2S-Fly-More-Combo_StreamSource5_0e8ad2cc-6117-42a2-b8bf-64e3376bb619.jpg?v=1664706877"},"aspect_ratio":1.762,"height":681,"media_type":"image","src":"\/\/www.stream-sourcing.com\/cdn\/shop\/products\/DJI-Mavic-Air-2S-Fly-More-Combo_StreamSource5_0e8ad2cc-6117-42a2-b8bf-64e3376bb619.jpg?v=1664706877","width":1200},{"alt":"DJI-Mavic-Air-2S-Fly-More-Combo_StreamSource","id":21590625812555,"position":5,"preview_image":{"aspect_ratio":1.762,"height":681,"width":1200,"src":"\/\/www.stream-sourcing.com\/cdn\/shop\/products\/DJI-Mavic-Air-2S-Fly-More-Combo_StreamSource6_d4456b92-6f7a-41bf-b1d0-e1adbb3e8cdd.jpg?v=1664706877"},"aspect_ratio":1.762,"height":681,"media_type":"image","src":"\/\/www.stream-sourcing.com\/cdn\/shop\/products\/DJI-Mavic-Air-2S-Fly-More-Combo_StreamSource6_d4456b92-6f7a-41bf-b1d0-e1adbb3e8cdd.jpg?v=1664706877","width":1200}],"requires_selling_plan":false,"selling_plan_groups":[],"content":"\u003ch1 style=\"text-align: center;\"\u003e\u003cstrong\u003eDJI Mavic Air 2S\u003c\/strong\u003e\u003c\/h1\u003e\u003cdiv class=\"desc\"\u003e\n\u003ch2 style=\"text-align: center;\"\u003eDJI Air 2S is the ultimate drone for creators on the move, with a 1-inch CMOS sensor, powerful autonomous functions, and a compact body weighing less than 600 g. \u003c\/h2\u003e\n\u003cstyle\u003e\u003c!--\n.embed-container { position: relative; padding-bottom: 56.25%; height: 0; overflow: hidden; max-width: 100%; } .embed-container iframe, .embed-container object, .embed-container embed { position: absolute; top: 0; left: 0; width: 100%; height: 100%; }\n--\u003e\u003c\/style\u003e\n\u003cdiv class=\"embed-container\" style=\"text-align: center;\"\u003e\u003ciframe src=\"https:\/\/www.youtube.com\/embed\/NJ3Z1hSOoMc\" frameborder=\"0\" allowfullscreen=\"\"\u003e\u003c\/iframe\u003e\u003c\/div\u003e\n\u003cdiv style=\"text-align: center;\"\u003e \u003c\/div\u003e\n\u003ch3 style=\"text-align: center;\"\u003e\u003cspan style=\"font-weight: 400;\"\u003eTake this all-in-one aerial powerhouse along anywhere to experience and record your world in stunning detail.\u003c\/span\u003e\u003c\/h3\u003e\n\u003cp\u003e \u003c\/p\u003e\n\u003ch2 style=\"text-align: left;\"\u003e\n\u003cstrong\u003eDifference Between DJI Mavic Air 2S Fly More Combo and DJI Mavic Air 2 Fly More Combo:\u003c\/strong\u003e \u003c\/h2\u003e\n\u003cp\u003e \u003c\/p\u003e\n\u003ch3 style=\"text-align: center;\"\u003e\u003cspan style=\"color: #ff8000;\"\u003e\u003cb\u003eUpgrades\u003c\/b\u003e\u003c\/span\u003e\u003c\/h3\u003e\n\u003cdiv\u003eUpgrades include a 1-inch CMOS sensor, four-antenna low-latency transmission, APAS 4.0, added upward-facing dual-vision sensors, and MasterShots. The camera performance, intelligent features, obstacle sensing system, and transmission system have all improved significantly. \u003c\/div\u003e\n\u003ch2 style=\"text-align: center;\"\u003e\u003cstrong\u003e\u003c\/strong\u003e\u003c\/h2\u003e\n\u003cp\u003e \u003c\/p\u003e\n\u003ch2 style=\"text-align: center;\"\u003e\u003cstrong\u003eHighlights and Features\u003c\/strong\u003e\u003c\/h2\u003e\n\u003ctable data-mce-fragment=\"1\"\u003e\n\u003ctbody data-mce-fragment=\"1\"\u003e\n\u003ctr data-mce-fragment=\"1\"\u003e\n\u003ctd width=\"184\" data-mce-fragment=\"1\"\u003e1-inch CMOS Sensor\u003c\/td\u003e\n\u003ctd width=\"184\" data-mce-fragment=\"1\"\u003eMasterShots\u003c\/td\u003e\n\u003ctd width=\"184\" data-mce-fragment=\"1\"\u003e5.4K Video\u003c\/td\u003e\n\u003c\/tr\u003e\n\u003ctr data-mce-fragment=\"1\"\u003e\n\u003ctd width=\"184\" data-mce-fragment=\"1\"\u003e12km FHD Transmission\u003cspan data-mce-fragment=\"1\"\u003e \u003c\/span\u003e\u003csup data-mce-fragment=\"1\"\u003e[1]\u003c\/sup\u003e\n\u003c\/td\u003e\n\u003ctd width=\"184\" data-mce-fragment=\"1\"\u003eObstacle Sensing in 4 Directions\u003c\/td\u003e\n\u003ctd width=\"184\" data-mce-fragment=\"1\"\u003eADS-B\u003c\/td\u003e\n\u003c\/tr\u003e\n\u003c\/tbody\u003e\n\u003c\/table\u003e\n\u003cbr\u003e\n\u003cdiv style=\"text-align: start;\"\u003e\u003cimg style=\"margin-right: auto; float: none; display: block; margin-left: auto;\" src=\"https:\/\/cdn.shopify.com\/s\/files\/1\/2532\/7020\/files\/Screenshot_2021-08-06_183943.png?v=1628246675\" alt=\"dji-mavic-air-2S-fly-more-combo-drone-content-feature-all\"\u003e\u003c\/div\u003e\n\u003cp\u003e \u003c\/p\u003e\n\u003ch3 style=\"text-align: center;\"\u003e\u003cspan style=\"color: #ff8000;\"\u003e\u003cb\u003e\u003c\/b\u003e\u003c\/span\u003e\u003c\/h3\u003e\n\u003cdiv style=\"text-align: center;\"\u003e\u003c\/div\u003e\n\u003cdiv style=\"text-align: center;\"\u003e\u003c\/div\u003e\n\u003cdiv style=\"text-align: center;\"\u003e\u003c\/div\u003e\n\u003cdiv style=\"text-align: center;\"\u003e\n\u003cp\u003e \u003c\/p\u003e\n\u003ch3\u003e\u003cspan style=\"color: #ff8000;\"\u003e\u003cb\u003eIncredible Image System\u003c\/b\u003e\u003c\/span\u003e\u003c\/h3\u003e\n\u003cdiv style=\"text-align: center;\"\u003e\u003cb\u003eBig World, Big Sensor\u003c\/b\u003e\u003c\/div\u003e\n\u003cdiv style=\"text-align: center;\"\u003e\u003cb\u003e\u003c\/b\u003e\u003c\/div\u003e\n\u003c\/div\u003e\n\u003cdiv style=\"text-align: center;\"\u003e\u003cspan\u003eEquipped with a 1-inch CMOS image sensor and large 2.4μm pixels, DJI Air 2S is capable of 5.4K\/30fps and 4K\/60fps video. Capture any moment with the rich clarity and authentic color tones it deserves.\u003c\/span\u003e\u003c\/div\u003e\n\u003cdiv style=\"text-align: center;\"\u003e\u003cspan\u003e\u003cimg src=\"https:\/\/cdn.shopify.com\/s\/files\/1\/2532\/7020\/files\/DJI_Mavic_Air_2S_Fly_More_Combo_8.jpg?v=1628248569\" style=\"float: none;\" alt=\"dji-mavic-air-2S-fly-more-combo-drone-content-feature-Good-Image-System\"\u003e\u003c\/span\u003e\u003c\/div\u003e\n\u003cdiv style=\"text-align: center;\"\u003e\u003cspan\u003e\u003c\/span\u003e\u003c\/div\u003e\n\u003cdiv style=\"text-align: center;\"\u003e\u003cspan\u003e\u003c\/span\u003e\u003c\/div\u003e\n\u003cdiv style=\"text-align: center;\"\u003e\u003cspan\u003e\u003c\/span\u003e\u003c\/div\u003e\n\u003ch3 style=\"text-align: center;\"\u003e\u003cspan style=\"color: #ff8000;\"\u003e\u003cb\u003e\u003c\/b\u003e\u003c\/span\u003e\u003c\/h3\u003e\n\u003ch3 style=\"text-align: center;\"\u003e\u003cspan style=\"color: #ff8000;\"\u003e\u003cb\u003e\u003c\/b\u003e\u003c\/span\u003e\u003c\/h3\u003e\n\u003ch3 style=\"text-align: center;\"\u003e\u003cspan style=\"color: #ff8000;\"\u003eTurn On the Night\u003c\/span\u003e\u003c\/h3\u003e\n\u003cdiv style=\"text-align: center;\"\u003e\u003cspan style=\"font-weight: 400;\"\u003e\u003cspan data-mce-fragment=\"1\"\u003eCapture the allure of the world, even as it darkens. Thanks to a high dynamic range, high resolution, and accurate color reproduction, even low-light scenes are sharp and vibrant.\u003c\/span\u003e\u003c\/span\u003e\u003c\/div\u003e\n\u003cdiv style=\"text-align: center;\"\u003e\u003cimg style=\"float: none;\" src=\"https:\/\/cdn.shopify.com\/s\/files\/1\/2532\/7020\/files\/DJI_Mavic_Air_2S_Fly_More_Combo_9.jpg?v=1628573124\" alt=\"dji-mavic-air-2S-fly-more-combo-drone-content-feature-Turn-On-the-Night\"\u003e\u003c\/div\u003e\n\u003ch3 style=\"text-align: center;\"\u003e\u003cspan style=\"color: #ff8000;\"\u003e\u003cb\u003e\u003c\/b\u003e\u003c\/span\u003e\u003c\/h3\u003e\n\u003ch3 style=\"text-align: center;\"\u003e\u003cspan style=\"color: #ff8000;\"\u003e\u003cb\u003e\u003cspan data-mce-fragment=\"1\"\u003eOne billion colors\u003c\/span\u003e\u003c\/b\u003e\u003c\/span\u003e\u003c\/h3\u003e\n\u003cdiv style=\"text-align: center;\"\u003e\u003cspan style=\"font-weight: 400;\"\u003e\u003cspan data-mce-fragment=\"1\"\u003eCaptured by the 10-bit Dlog-M color profile of DJI Air 2S let you fully immerse yourself in all the hues of your environment.\u003c\/span\u003e\u003c\/span\u003e\u003c\/div\u003e\n\u003cdiv style=\"text-align: center;\"\u003e\u003cimg style=\"float: none;\" src=\"https:\/\/cdn.shopify.com\/s\/files\/1\/2532\/7020\/files\/DJI_Mavic_Air_2S_Fly_More_Combo_10.jpg?v=1628573285\" alt=\"dji-mavic-air-2S-fly-more-combo-drone-content-feature-One-billion-colors\"\u003e\u003c\/div\u003e\n\u003ch3 style=\"text-align: center;\"\u003e\u003cspan style=\"color: #ff8000;\"\u003e\u003cb\u003e\u003c\/b\u003e\u003c\/span\u003e\u003c\/h3\u003e\n\u003ctable width=\"100%\"\u003e\n\u003ctbody\u003e\n\u003ctr\u003e\n\u003ctd style=\"width: 47.3093%;\"\u003e\n\u003ch3 data-mce-fragment=\"1\"\u003e\u003cspan style=\"color: #ff8000;\" data-mce-fragment=\"1\"\u003e\u003cb data-mce-fragment=\"1\"\u003eShoot RAW\u003c\/b\u003e\u003c\/span\u003e\u003c\/h3\u003e\n\u003cp style=\"text-align: left;\"\u003e\u003cspan\u003eFormat photos with a dynamic \u003c\/span\u003e\u003cspan style=\"font-weight: 400;\" data-mce-fragment=\"1\" data-mce-style=\"font-weight: 400;\"\u003erange of up to 12.6 stops to\u003c\/span\u003e\u003cspan style=\"font-weight: 400;\" data-mce-fragment=\"1\" data-mce-style=\"font-weight: 400;\"\u003e capture more visual information in every scene, even when lighting conditions are bad or complex. This provides more flexibility in post-processing, giving creators more possibilities to get the look they want. \u003c\/span\u003e\u003c\/p\u003e\n\u003c\/td\u003e\n\u003ctd style=\"width: 47.6907%;\"\u003e\n\u003cdiv style=\"text-align: center;\"\u003e\u003cimg src=\"https:\/\/cdn.shopify.com\/s\/files\/1\/2532\/7020\/files\/DJI-Mavic-Air-2S-Fly-More-Combo_600x600.jpg?v=1628577003\" alt=\"dji-mavic-air-2S-fly-more-combo-drone-content-feature-all\" style=\"float: none;\" width=\"600x600\" height=\"600x600\"\u003e\u003c\/div\u003e\n\u003c\/td\u003e\n\u003c\/tr\u003e\n\u003ctr\u003e\n\u003ctd style=\"width: 47.3093%;\"\u003e\n\u003cdiv style=\"text-align: center;\" data-mce-fragment=\"1\" data-mce-style=\"text-align: center;\"\u003e\u003cimg style=\"float: none;\" alt=\"dji-mavic-air-2S-fly-more-combo-drone-content-feature-Shoot-RAW\" src=\"https:\/\/cdn.shopify.com\/s\/files\/1\/2532\/7020\/files\/3b0718d6123b5e2827b85292dc6322fa_600x600.jpg?v=1628577485\" width=\"600x600\" height=\"600x600\" data-mce-fragment=\"1\" data-mce-src=\"https:\/\/cdn.shopify.com\/s\/files\/1\/2532\/7020\/files\/3b0718d6123b5e2827b85292dc6322fa_600x600.jpg?v=1628577485\" data-mce-style=\"float: none;\"\u003e\u003c\/div\u003e\n\u003ch3 style=\"text-align: center;\"\u003e\n\u003cspan style=\"color: #ff8000;\"\u003e\u003cb\u003e\u003c\/b\u003e\u003c\/span\u003e\u003cbr\u003e\n\u003c\/h3\u003e\n\u003c\/td\u003e\n\u003ctd style=\"width: 47.6907%;\"\u003e\n\u003ch3 style=\"text-align: right;\"\u003e\u003cspan style=\"color: #ff8000;\"\u003e\u003cb\u003eIntelligent HDR technology\u003c\/b\u003e\u003c\/span\u003e\u003c\/h3\u003e\n\u003cp style=\"text-align: right;\"\u003e\u003cspan\u003eMerges multiple shots automatically, increasing the dynamic range of images without the need for post-processing. That means more nuanced details in both the highlights and shadows for richer images with greater depth.\u003c\/span\u003e\u003c\/p\u003e\n\u003c\/td\u003e\n\u003c\/tr\u003e\n\u003c\/tbody\u003e\n\u003c\/table\u003e\n\u003ch3 style=\"text-align: center;\"\u003e\u003cspan style=\"color: #ff8000;\"\u003e\u003cb\u003e\u003cspan data-mce-fragment=\"1\"\u003e\u003c\/span\u003e\u003c\/b\u003e\u003c\/span\u003e\u003c\/h3\u003e\n\u003ch3 style=\"text-align: center;\"\u003e\u003cspan style=\"color: #ff8000;\"\u003e\u003cb\u003e\u003cspan data-mce-fragment=\"1\"\u003e\u003c\/span\u003e\u003c\/b\u003e\u003c\/span\u003e\u003c\/h3\u003e\n\u003ch3 style=\"text-align: center;\"\u003e\u003cspan style=\"color: #ff8000;\"\u003e\u003cb\u003e\u003cspan data-mce-fragment=\"1\"\u003e\u003c\/span\u003e\u003c\/b\u003e\u003c\/span\u003e\u003c\/h3\u003e\n\u003ch3 style=\"text-align: center;\"\u003e\u003cspan style=\"font-weight: 400;\"\u003e\u003cspan data-mce-fragment=\"1\"\u003e\u003cbr\u003e\u003c\/span\u003e\u003c\/span\u003e\u003c\/h3\u003e\n\u003cdiv style=\"text-align: center;\"\u003e\n\u003ch3 style=\"text-align: center;\"\u003e\u003cspan style=\"color: #ff8000;\"\u003eHyperlapse and Panorama\u003c\/span\u003e\u003c\/h3\u003e\n\u003c\/div\u003e\n\u003cdiv style=\"text-align: center;\"\u003e\u003cspan style=\"font-weight: 400;\"\u003e\u003cspan data-mce-fragment=\"1\"\u003eSpeed up time and movement with a single tap by creating a striking hyperlapse. You can also capture larger, more detailed shots of your surroundings with panorama.\u003c\/span\u003e\u003c\/span\u003e\u003c\/div\u003e\n\u003cdiv style=\"text-align: center;\"\u003e\u003cimg style=\"float: none;\" src=\"https:\/\/cdn.shopify.com\/s\/files\/1\/2532\/7020\/files\/DJI_Mavic_Air_2S_Fly_More_Combo_12.jpg?v=1628575937\" alt=\"dji-mavic-air-2S-fly-more-combo-drone-content-feature-Hyperlapse-and-Panorama\"\u003e\u003c\/div\u003e\n\u003ch3 style=\"text-align: center;\"\u003e\u003cspan style=\"color: #ff8000;\"\u003e\u003cb\u003e\u003c\/b\u003e\u003c\/span\u003e\u003c\/h3\u003e\n\u003ch2 class=\"text style__eyebrow___2tBWn\" style=\"text-align: center;\"\u003e\u003cspan style=\"color: #ff8000;\"\u003eSmart features, perfect shots\u003c\/span\u003e\u003c\/h2\u003e\n\u003ch3 style=\"text-align: center;\"\u003e\u003cspan style=\"color: #ff8000;\"\u003e\u003cb\u003e\u003c\/b\u003e\u003c\/span\u003e\u003c\/h3\u003e\n\u003ch3 style=\"text-align: center;\"\u003e\u003cspan style=\"color: #ff8000;\"\u003e\u003cb\u003eIntroducing Mastershots\u003c\/b\u003e\u003c\/span\u003e\u003c\/h3\u003e\n\u003cdiv style=\"text-align: center;\"\u003e\u003cspan style=\"font-weight: 400;\"\u003e\u003cspan data-mce-fragment=\"1\"\u003eThe next evolution of QuickShots, MasterShots is an advanced intelligent feature that gives users the best shots in any location with just a tap. Simply select your subject, and the drone will film while executing ten different maneuvers in sequence, keeping your subject center-frame and generating a short cinematic video afterward.\u003c\/span\u003e\u003c\/span\u003e\u003c\/div\u003e\n\u003cdiv style=\"text-align: center;\"\u003e\u003cspan style=\"font-weight: 400;\"\u003e\u003cspan data-mce-fragment=\"1\"\u003e\u003cimg src=\"https:\/\/cdn.shopify.com\/s\/files\/1\/2532\/7020\/files\/DJI_Mavic_Air_2S_Fly_More_Combo_13.jpg?v=1628578139\" style=\"float: none;\" alt=\"dji-mavic-air-2S-fly-more-combo-drone-content-feature-Autonomous-Functions-Matershots\"\u003e\u003c\/span\u003e\u003c\/span\u003e\u003c\/div\u003e\n\u003cdiv style=\"text-align: center;\"\u003e\u003cb\u003e\u003cspan style=\"color: #ff8000;\"\u003e\u003c\/span\u003e\u003c\/b\u003e\u003c\/div\u003e\n\u003cdiv style=\"text-align: center;\"\u003e\u003cb\u003e\u003cspan style=\"color: #ff8000;\"\u003e\u003c\/span\u003e\u003c\/b\u003e\u003c\/div\u003e\n\u003cdiv style=\"text-align: center;\"\u003e\u003cb\u003e\u003cspan style=\"color: #ff8000;\"\u003e\u003c\/span\u003e\u003c\/b\u003e\u003c\/div\u003e\n\u003cdiv style=\"text-align: center;\"\u003e\u003cb\u003e\u003cspan style=\"color: #ff8000;\"\u003e\u003c\/span\u003e\u003c\/b\u003e\u003c\/div\u003e\n\u003cdiv style=\"text-align: center;\"\u003e\n\u003cdiv\u003e\u003cspan style=\"color: #ff8000;\"\u003e\u003cb\u003e\u003c\/b\u003e\u003c\/span\u003e\u003c\/div\u003e\n\u003cdiv\u003e\u003cspan style=\"color: #ff8000;\"\u003e\u003cb\u003e\u003c\/b\u003e\u003c\/span\u003e\u003c\/div\u003e\n\u003cdiv\u003e\u003cspan style=\"color: #ff8000;\"\u003e\u003cb\u003eThe Center of Attention \u003c\/b\u003e\u003c\/span\u003e\u003c\/div\u003e\n\u003cdiv\u003e\n\u003cb\u003e\u003cspan\u003e\u003c\/span\u003e\u003c\/b\u003e\u003cbr\u003e\n\u003c\/div\u003e\n\u003cdiv\u003e\u003cspan\u003eFocusTrack features Spotlight 2.0, ActiveTrack 4.0, and Point of Interest 3.0, making it a breeze for DJI Air 2S to follow or circle your subject.\u003c\/span\u003e\u003c\/div\u003e\n\u003cdiv style=\"text-align: center;\"\u003e\u003cbr\u003e\u003c\/div\u003e\n\u003cdiv style=\"text-align: center;\"\u003e\u003c\/div\u003e\n\u003c\/div\u003e\n\u003cdiv style=\"text-align: center;\"\u003e\n\u003ctable width=\"100%\"\u003e\n\u003ctbody\u003e\n\u003ctr\u003e\n\u003ctd style=\"width: 31%; text-align: center;\"\u003e \u003cstrong\u003e\u003cspan style=\"color: #ff8000;\" data-mce-fragment=\"1\"\u003eSpotlight 2.0 \u003c\/span\u003e\u003c\/strong\u003e\n\u003c\/td\u003e\n\u003ctd style=\"width: 31.7106%;\"\u003e\n\u003cdiv data-ga-label=\"all-1-tab-button\" class=\"style__tab-item___1yKLp\"\u003e\n\u003cdiv style=\"text-align: center;\"\u003e\u003cstrong\u003e\u003cspan style=\"color: #ff8000;\"\u003eActiveTrack 4.0\u003c\/span\u003e\u003c\/strong\u003e\u003c\/div\u003e\n\u003c\/div\u003e\n\u003c\/td\u003e\n\u003ctd style=\"width: 31.2894%; text-align: center;\"\u003e\u003cstrong\u003e\u003cspan style=\"color: #ff8000;\"\u003ePoint of Interest 3.0\u003c\/span\u003e\u003c\/strong\u003e\u003c\/td\u003e\n\u003c\/tr\u003e\n\u003ctr\u003e\n\u003ctd style=\"width: 31%;\"\u003e\n\u003cp\u003e\u003cspan data-mce-fragment=\"1\"\u003eFollow your subject smoothly while autonomously avoiding obstacles. Even if the subject is momentarily lost, you can quickly resume tracking during flight.\u003c\/span\u003e\u003c\/p\u003e\n\u003cp\u003e\u003cspan data-mce-fragment=\"1\"\u003e\u003cimg src=\"https:\/\/cdn.shopify.com\/s\/files\/1\/2532\/7020\/files\/DJI_Mavic_Air_2S_Fly_More_Combo_14_480x480.jpg?v=1628578319\" alt=\"dji-mavic-air-2S-fly-more-combo-drone-content-feature-The-Center-of-Aattention-Spotlight-2.0\" width=\"480x480\" height=\"480x480\" style=\"float: none;\" data-mce-fragment=\"1\" data-mce-src=\"https:\/\/cdn.shopify.com\/s\/files\/1\/2532\/7020\/files\/DJI_Mavic_Air_2S_Fly_More_Combo_14_480x480.jpg?v=1628578319\"\u003e\u003c\/span\u003e\u003c\/p\u003e\n\u003cdiv\u003e\u003cspan style=\"color: #ff8000;\"\u003e\u003cb\u003e\u003c\/b\u003e\u003c\/span\u003e\u003c\/div\u003e\n\u003c\/td\u003e\n\u003ctd style=\"width: 31.7106%;\"\u003e\n\u003cp\u003e\u003cspan\u003eFollow your subject smoothly while autonomously avoiding obstacles. Even if the subject is momentarily lost, you can quickly resume tracking during flight.\u003c\/span\u003e\u003c\/p\u003e\n\u003cp\u003e\u003cimg alt=\"dji-mavic-air-2S-fly-more-combo-drone-content-feature-The-Center-of-Aattention-ActiveTrack-4.0\" src=\"https:\/\/cdn.shopify.com\/s\/files\/1\/2532\/7020\/files\/DJI_Mavic_Air_2S_Fly_More_Combo_15_480x480.jpg?v=1628578617\" width=\"480x480\" height=\"480x480\" style=\"float: none;\"\u003e\u003c\/p\u003e\n\u003c\/td\u003e\n\u003ctd style=\"width: 31.2894%;\"\u003e\n\u003cp\u003e\u003cspan\u003eEasily take a perfect circle shot while keeping your subject centered. \u003c\/span\u003e\u003c\/p\u003e\n\u003cp\u003e \u003c\/p\u003e\n\u003cp\u003e \u003cimg alt=\"dji-mavic-air-2S-fly-more-combo-drone-content-feature-The-Center-of-Aattention-Point-of-Interest-3.0\" src=\"https:\/\/cdn.shopify.com\/s\/files\/1\/2532\/7020\/files\/DJI_Mavic_Air_2S_Fly_More_Combo_16_480x480.jpg?v=1628578705\" width=\"480x480\" height=\"480x480\" style=\"float: none;\" data-mce-fragment=\"1\" data-mce-src=\"https:\/\/cdn.shopify.com\/s\/files\/1\/2532\/7020\/files\/DJI_Mavic_Air_2S_Fly_More_Combo_16_480x480.jpg?v=1628578705\"\u003e\u003c\/p\u003e\n\u003c\/td\u003e\n\u003c\/tr\u003e\n\u003c\/tbody\u003e\n\u003c\/table\u003e\n\u003c\/div\u003e\n\u003cdiv style=\"text-align: center;\"\u003e\u003cb\u003e\u003cspan style=\"color: #ff8000;\"\u003e\u003c\/span\u003e\u003c\/b\u003e\u003c\/div\u003e\n\u003cdiv style=\"text-align: center;\"\u003e\u003cb\u003e\u003cspan style=\"color: #ff8000;\"\u003e\u003c\/span\u003e\u003c\/b\u003e\u003c\/div\u003e\n\u003cdiv style=\"text-align: center;\"\u003e \u003c\/div\u003e\n\u003ch3 style=\"text-align: center;\"\u003e\u003cspan style=\"color: #ff8000;\"\u003eFeel the Flight\u003c\/span\u003e\u003c\/h3\u003e\n\u003cdiv style=\"text-align: center;\"\u003e\u003cb\u003eWorry Less, Discover More \u003c\/b\u003e\u003c\/div\u003e\n\u003cdiv style=\"text-align: center;\"\u003e\u003cspan style=\"font-weight: 400;\"\u003e\u003cspan data-mce-fragment=\"1\"\u003eThe combination of portability, safety, and intelligent technology means you can spend more time enjoying flights and less time worrying about them. Take DJI Air 2S into the sky confidently, every flight.\u003c\/span\u003e\u003c\/span\u003e\u003c\/div\u003e\n\u003ch3 style=\"text-align: center;\"\u003e\u003cspan style=\"color: #ff8000;\"\u003e\u003cb\u003e\u003c\/b\u003e\u003c\/span\u003e\u003c\/h3\u003e\n\u003ch3 style=\"text-align: center;\"\u003e\u003cspan style=\"color: #ff8000;\"\u003eEnvironment Sensing\u003c\/span\u003e\u003c\/h3\u003e\n\u003cdiv style=\"text-align: center;\"\u003e\u003cspan style=\"font-weight: 400;\"\u003e\u003cspan data-mce-fragment=\"1\"\u003eDJI Air 2S has the ability to perceive its environment in four directions: up, down, forward, and backward. The algorithms for Advanced Pilot Assistance Systems (APAS 4.0) have been further improved, allowing DJI Air 2S to actively avoid obstacles in more complex scenarios and at high speeds.\u003c\/span\u003e\u003c\/span\u003e\u003c\/div\u003e\n\u003cdiv style=\"text-align: center;\"\u003e\u003cimg style=\"float: none;\" src=\"https:\/\/cdn.shopify.com\/s\/files\/1\/2532\/7020\/files\/DJI_Mavic_Air_2S_Fly_More_Combo_17.jpg?v=1628579395\" alt=\"dji-mavic-air-2S-fly-more-combo-drone-content-feature-Feel-the-Flight-Environment-Sensing\"\u003e\u003c\/div\u003e\n\u003cdiv style=\"text-align: center;\"\u003e \u003c\/div\u003e\n\u003ch3 style=\"text-align: center;\"\u003e\u003cspan style=\"color: #ff8000;\"\u003e\u003cb\u003eO3 Tranmission\u003c\/b\u003e\u003c\/span\u003e\u003c\/h3\u003e\n\u003cdiv style=\"text-align: center;\"\u003e\u003cspan style=\"font-weight: 400;\"\u003e\u003cspan data-mce-fragment=\"1\"\u003eDJI Air 2S features DJI's most advanced O3 (OcuSync 3.0) image transmission technology, delivering an ultra-smooth, clear, and reliable image feed.\u003c\/span\u003e\u003c\/span\u003e\u003c\/div\u003e\n\u003cdiv style=\"text-align: center;\"\u003e\n\u003ctable width=\"100%\"\u003e\n\u003ctbody\u003e\n\u003ctr\u003e\n\u003ctd style=\"text-align: center;\"\u003e \u003cspan style=\"color: #ff8000;\"\u003e\u003cstrong\u003e\u003cspan class=\"style__icon-number___2OOlV\" data-mce-fragment=\"1\"\u003e12\u003c\/span\u003e\u003cspan class=\"style__icon-unit___2hz_k\" data-mce-fragment=\"1\"\u003eKm\u003c\/span\u003e\u003c\/strong\u003e\u003c\/span\u003e\n\u003cp class=\"style__icon-desc___Otw9j\" data-mce-fragment=\"1\"\u003eMax Video Transmission\u003c\/p\u003e\n\u003c\/td\u003e\n\u003ctd\u003e\n\u003cdiv style=\"text-align: center;\" class=\"style__icon-number-container___2cK9V\"\u003e\u003cspan style=\"color: #ff8000;\"\u003e\u003cstrong\u003e\u003cspan class=\"style__icon-number___2OOlV\"\u003e1080\u003c\/span\u003e\u003cspan class=\"style__icon-unit___2hz_k\"\u003ep\u003c\/span\u003e\u003c\/strong\u003e\u003c\/span\u003e\u003c\/div\u003e\n\u003cp style=\"text-align: center;\" class=\"style__icon-desc___Otw9j\"\u003eTransmission\u003c\/p\u003e\n\u003c\/td\u003e\n\u003ctd\u003e\n\u003cdiv style=\"text-align: center;\" class=\"style__icon-number-container___2cK9V\"\u003e\u003cspan style=\"color: #ff8000;\"\u003e\u003cstrong\u003e\u003cspan class=\"style__icon-number___2OOlV\"\u003e4\u003c\/span\u003e\u003cspan class=\"style__icon-unit___2hz_k\"\u003eAntennas\u003c\/span\u003e\u003c\/strong\u003e\u003c\/span\u003e\u003c\/div\u003e\n\u003cp style=\"text-align: center;\" class=\"style__icon-desc___Otw9j\"\u003e2.4\/5.8GHz Dual Frequency\u003c\/p\u003e\n\u003c\/td\u003e\n\u003c\/tr\u003e\n\u003c\/tbody\u003e\n\u003c\/table\u003e\n\u003c\/div\u003e\n\u003cdiv style=\"text-align: center;\"\u003e\u003cspan style=\"font-weight: 400; color: #ffffff;\"\u003e\u003c\/span\u003e\u003c\/div\u003e\n\u003cdiv style=\"text-align: center;\"\u003e\u003cspan style=\"font-weight: 400; color: #ffffff;\"\u003e\u003cimg style=\"float: none;\" src=\"https:\/\/cdn.shopify.com\/s\/files\/1\/2532\/7020\/files\/DJI_Mavic_Air_2S_Fly_More_Combo_18_480x480.jpg?v=1628579621\" alt=\"dji-mavic-air-2S-fly-more-combo-drone-content-feature-O3-Tranmission\" data-mce-fragment=\"1\" data-mce-src=\"https:\/\/cdn.shopify.com\/s\/files\/1\/2532\/7020\/files\/DJI_Mavic_Air_2S_Fly_More_Combo_18_480x480.jpg?v=1628579621\"\u003e.\u003c\/span\u003e\u003c\/div\u003e\n\u003ch3 style=\"text-align: center;\"\u003e\u003cspan style=\"color: #ff8000;\"\u003e\u003cb\u003e\u003c\/b\u003e\u003c\/span\u003e\u003c\/h3\u003e\n\u003ch3 style=\"text-align: center;\"\u003e\u003cspan style=\"color: #ff8000;\"\u003e\u003cb\u003e\u003c\/b\u003e\u003c\/span\u003e\u003c\/h3\u003e\n\u003ch3 style=\"text-align: center;\"\u003e\u003cspan style=\"color: #ff8000;\"\u003e\u003cb\u003eSafer Skies with ADS-B\u003c\/b\u003e\u003c\/span\u003e\u003c\/h3\u003e\n\u003cdiv style=\"text-align: center;\"\u003e\u003cspan style=\"font-weight: 400;\"\u003e\u003cspan data-mce-fragment=\"1\"\u003eDJI Air 2S provides an added layer of airspace safety with the industry-leading AirSense safety system. This receives Automatic Dependent Surveillance-Broadcast (ADS-B) flight location information from airplanes and helicopters in your area that transmit ADS-B signals, displays those aircraft on a map, and provides audio and visual alerts through the DJI Fly app to help you keep the drone out of the way of those aircraft.\u003c\/span\u003e\u003c\/span\u003e\u003c\/div\u003e\n\u003cdiv style=\"text-align: center;\"\u003e\u003cspan style=\"font-weight: 400;\"\u003e\u003cspan data-mce-fragment=\"1\"\u003e\u003cimg src=\"https:\/\/cdn.shopify.com\/s\/files\/1\/2532\/7020\/files\/DJI_Mavic_Air_2S_Fly_More_Combo_19.jpg?v=1628579892\" style=\"float: none;\" alt=\"dji-mavic-air-2S-fly-more-combo-drone-content-feature-Safer-Skies-with-ADS-B\"\u003e\u003c\/span\u003e\u003c\/span\u003e\u003c\/div\u003e\n\u003cdiv style=\"text-align: center;\"\u003e \u003c\/div\u003e\n\u003cdiv style=\"text-align: center;\"\u003e\u003cbr\u003e\u003c\/div\u003e\n\u003ch3 style=\"text-align: center;\"\u003e\u003cspan style=\"color: #ff8000;\"\u003e\u003cb\u003eExpansive Accessories\u003c\/b\u003e\u003c\/span\u003e\u003c\/h3\u003e\n\u003ch3 style=\"text-align: center;\"\u003e\u003cb\u003eGet the Most Out Of Air 2S\u003c\/b\u003e\u003c\/h3\u003e\n\u003cdiv style=\"text-align: center;\"\u003e\u003cspan style=\"font-weight: 400;\"\u003e\u003cspan data-mce-fragment=\"1\"\u003eWith a diverse range of accessories, the sky is truly the limit.\u003c\/span\u003e\u003c\/span\u003e\u003c\/div\u003e\n\u003cdiv style=\"text-align: center;\"\u003e\u003cspan style=\"font-weight: 400;\"\u003e\u003cspan data-mce-fragment=\"1\"\u003e\u003c\/span\u003e\u003c\/span\u003e\u003c\/div\u003e\n\u003ch3 style=\"text-align: center;\"\u003e\u003cspan style=\"color: #ff8000;\"\u003e\u003cb\u003e\u003c\/b\u003e\u003c\/span\u003e\u003c\/h3\u003e\n\u003cp\u003e \u003c\/p\u003e\n\u003cp\u003e \u003c\/p\u003e\n\u003ch3 style=\"text-align: center;\"\u003e\u003cspan style=\"color: #ff8000;\"\u003e\u003cb\u003e\u003c\/b\u003e\u003c\/span\u003e\u003c\/h3\u003e\n\u003ch3\u003e\u003cspan\u003e\u003cb\u003e\u003c\/b\u003e\u003c\/span\u003e\u003c\/h3\u003e\n\u003ch3 style=\"text-align: center;\"\u003e\u003cspan style=\"color: #ff8000;\"\u003e\u003cb\u003eDJI Smart Controller\u003c\/b\u003e\u003c\/span\u003e\u003c\/h3\u003e\n\u003cdiv\u003e\u003cspan\u003eThis powerful remote controller features a 5.5-inch 1080p high-brightness display for pure performance. Compatible with the DJI GO 4 and DJI Fly apps, it also supports the installation of third-party apps.\u003c\/span\u003e\u003c\/div\u003e\n\u003cdiv\u003e\u003cimg alt=\"dji-mavic-air-2S-fly-more-combo-drone-content-feature-Expansive-Accessories-Fly-More-Combo-DJI Smart Controller\" src=\"https:\/\/cdn.shopify.com\/s\/files\/1\/2532\/7020\/files\/DJI_Mavic_Air_2S_Fly_More_Combo_22.jpg?v=1628580371\"\u003e\u003c\/div\u003e\n\u003ch3 style=\"text-align: center;\"\u003e\u003cspan style=\"color: #ff8000;\"\u003e\u003cb\u003e\u003c\/b\u003e\u003c\/span\u003e\u003c\/h3\u003e\n\u003ch3 style=\"text-align: center;\"\u003e\u003cspan style=\"color: #ff8000;\"\u003e\u003cb\u003e\u003c\/b\u003e\u003c\/span\u003e\u003c\/h3\u003e\n\u003cdiv style=\"text-align: center;\"\u003e \u003c\/div\u003e\n\u003ch2 style=\"text-align: left;\"\u003e\u003cstrong\u003e\u003c\/strong\u003e\u003c\/h2\u003e\n\u003ch2 style=\"text-align: left;\"\u003e\u003cstrong\u003eSpecification\u003c\/strong\u003e\u003c\/h2\u003e\n\u003cp\u003e \u003c\/p\u003e\n\u003cp\u003e \u003c\/p\u003e\n\u003cp\u003e \u003c\/p\u003e\n\u003ch3 class=\"group-list-title\"\u003eAircraft\u003c\/h3\u003e\n\u003ctable width=\"523\"\u003e\n\u003ctbody\u003e\n\u003ctr style=\"height: 19px;\"\u003e\n\u003ctd style=\"width: 245.562px; height: 19px;\"\u003e Takeoff Weight\u003c\/td\u003e\n\u003ctd style=\"width: 254.438px; height: 19px;\"\u003e595 g\u003c\/td\u003e\n\u003c\/tr\u003e\n\u003ctr style=\"height: 76px;\"\u003e\n\u003ctd style=\"width: 245.562px; height: 76px;\"\u003eDimensions\u003c\/td\u003e\n\u003ctd style=\"width: 254.438px; height: 76px;\"\u003eFolded:\u003cbr\u003e180×97×77 mm (length×width×height)\u003cbr\u003eUnfolded:\u003cbr\u003e183×253×77 mm (length×width×height)\u003c\/td\u003e\n\u003c\/tr\u003e\n\u003ctr style=\"height: 19px;\"\u003e\n\u003ctd style=\"width: 245.562px; height: 19px;\"\u003eDiagonal Length\u003c\/td\u003e\n\u003ctd style=\"width: 254.438px; height: 19px;\"\u003e302 mm\u003c\/td\u003e\n\u003c\/tr\u003e\n\u003ctr style=\"height: 38px;\"\u003e\n\u003ctd style=\"width: 245.562px; height: 38px;\"\u003eMax Ascent Speed\u003c\/td\u003e\n\u003ctd style=\"width: 254.438px; height: 38px;\"\u003e6 m\/s (S Mode)\u003cbr\u003e6 m\/s (N Mode)\u003c\/td\u003e\n\u003c\/tr\u003e\n\u003ctr style=\"height: 52px;\"\u003e\n\u003ctd style=\"width: 245.562px; height: 52px;\"\u003eMax Descent Speed\u003c\/td\u003e\n\u003ctd style=\"width: 254.438px; height: 52px;\"\u003e\n\u003cp\u003e6 m\/s (S Mode)\u003cbr\u003e6 m\/s (N Mode)\u003c\/p\u003e\n\u003c\/td\u003e\n\u003c\/tr\u003e\n\u003ctr style=\"height: 27px;\"\u003e\n\u003ctd style=\"width: 245.562px; height: 27px;\"\u003eMax Service Ceiling Above Sea Level\u003c\/td\u003e\n\u003ctd style=\"width: 254.438px; height: 27px;\"\u003e\n\u003cp\u003e5000 m\u003cbr\u003e\u003c\/p\u003e\n\u003c\/td\u003e\n\u003c\/tr\u003e\n\u003ctr style=\"height: 9px;\"\u003e\n\u003ctd style=\"width: 245.562px; height: 9px;\"\u003eMax Flight Time (no wind)\u003c\/td\u003e\n\u003ctd style=\"width: 254.438px; height: 9px;\"\u003e\n\u003cp\u003e31 minutes\u003c\/p\u003e\n\u003c\/td\u003e\n\u003c\/tr\u003e\n\u003ctr style=\"height: 9px;\"\u003e\n\u003ctd style=\"width: 245.562px; height: 9px;\"\u003eMax Hovering Time (no wind)\u003c\/td\u003e\n\u003ctd style=\"width: 254.438px; height: 9px;\"\u003e\n\u003cp\u003e30 minutes\u003c\/p\u003e\n\u003c\/td\u003e\n\u003c\/tr\u003e\n\u003ctr style=\"height: 9px;\"\u003e\n\u003ctd style=\"width: 245.562px; height: 9px;\"\u003eMax Flight Distance (no wind)\u003c\/td\u003e\n\u003ctd style=\"width: 254.438px; height: 9px;\"\u003e\n\u003cp\u003e18.5 km\u003c\/p\u003e\n\u003c\/td\u003e\n\u003c\/tr\u003e\n\u003ctr style=\"height: 9px;\"\u003e\n\u003ctd style=\"width: 245.562px; height: 9px;\"\u003eMax Flight Speed (near sea level, no wind)\u003c\/td\u003e\n\u003ctd style=\"width: 254.438px; height: 9px;\"\u003e19 m\/s (S Mode)\u003cbr\u003e15 m\/s (N Mode)\u003cbr\u003e5 m\/s (C Mode)\u003c\/td\u003e\n\u003c\/tr\u003e\n\u003ctr style=\"height: 9px;\"\u003e\n\u003ctd style=\"width: 245.562px; height: 9px;\"\u003eMax Wind Speed Resistance\u003c\/td\u003e\n\u003ctd style=\"width: 254.438px; height: 9px;\"\u003e10.7 m\/s\u003c\/td\u003e\n\u003c\/tr\u003e\n\u003ctr style=\"height: 9px;\"\u003e\n\u003ctd style=\"width: 245.562px; height: 9px;\"\u003eMax Tilt Angle\u003c\/td\u003e\n\u003ctd style=\"width: 254.438px; height: 9px;\"\u003e35° (S Mode)\u003cbr\u003eFront: 30°, Back: 20°, Left: 35°, Right: 35° (N Mode)\u003c\/td\u003e\n\u003c\/tr\u003e\n\u003ctr style=\"height: 9px;\"\u003e\n\u003ctd style=\"width: 245.562px; height: 9px;\"\u003eMax Angular Velocity\u003c\/td\u003e\n\u003ctd style=\"width: 254.438px; height: 9px;\"\u003e250°\/s (S Mode)\u003cbr\u003e90°\/s (N Mode)\u003cbr\u003e60°\/s (C Mode)\u003c\/td\u003e\n\u003c\/tr\u003e\n\u003ctr style=\"height: 9px;\"\u003e\n\u003ctd style=\"width: 245.562px; height: 9px;\"\u003eOperating Temperature Range\u003c\/td\u003e\n\u003ctd style=\"width: 254.438px; height: 9px;\"\u003e0° to 40°C (32° to 104°F)\u003c\/td\u003e\n\u003c\/tr\u003e\n\u003ctr style=\"height: 9px;\"\u003e\n\u003ctd style=\"width: 245.562px; height: 9px;\"\u003eOperating Frequency\u003c\/td\u003e\n\u003ctd style=\"width: 254.438px; height: 9px;\"\u003e2.4 GHz\u003cbr\u003e5.8 GHz\u003cbr\u003eTransmission Power (EIRP)\u003cbr\u003e2.4 GHz:\u003cbr\u003eFCC: ≤30 dBm\u003cbr\u003eCE: ≤20 dBm\u003cbr\u003eSRRC: ≤20 dBm\u003cbr\u003eMIC: ≤20 dBm\u003cbr\u003e5.8 GHz:\u003cbr\u003eFCC: ≤30 dBm\u003cbr\u003eCE: ≤14 dBm\u003cbr\u003eSRRC: ≤29 dBm\u003c\/td\u003e\n\u003c\/tr\u003e\n\u003ctr style=\"height: 9px;\"\u003e\n\u003ctd style=\"width: 245.562px; height: 9px;\"\u003eHovering Accuracy Range\u003c\/td\u003e\n\u003ctd style=\"width: 254.438px; height: 9px;\"\u003eVertical:\u003cbr\u003e± 0.1 m (with vision positioning)\u003cbr\u003e± 0.5 m (with GNSS positioning)\u003cbr\u003eHorizontal:\u003cbr\u003e± 0.1 m (with vision positioning)\u003cbr\u003e± 1.5 m (with GNSS positioning)\u003c\/td\u003e\n\u003c\/tr\u003e\n\u003ctr style=\"height: 9px;\"\u003e\n\u003ctd style=\"width: 245.562px; height: 9px;\"\u003ePropellers\u003c\/td\u003e\n\u003ctd style=\"width: 254.438px; height: 9px;\"\u003eQuick release, low noise, folding\u003c\/td\u003e\n\u003c\/tr\u003e\n\u003ctr style=\"height: 9px;\"\u003e\n\u003ctd style=\"width: 245.562px; height: 9px;\"\u003eAircraft Arms\u003c\/td\u003e\n\u003ctd style=\"width: 254.438px; height: 9px;\"\u003eFoldable\u003c\/td\u003e\n\u003c\/tr\u003e\n\u003ctr style=\"height: 9px;\"\u003e\n\u003ctd style=\"width: 245.562px; height: 9px;\"\u003eGNSS\u003c\/td\u003e\n\u003ctd style=\"width: 254.438px; height: 9px;\"\u003eGPS+GLONASS+GALILEO\u003c\/td\u003e\n\u003c\/tr\u003e\n\u003ctr style=\"height: 9px;\"\u003e\n\u003ctd style=\"width: 245.562px; height: 9px;\"\u003eCompass\u003c\/td\u003e\n\u003ctd style=\"width: 254.438px; height: 9px;\"\u003eSingle Compass\u003c\/td\u003e\n\u003c\/tr\u003e\n\u003ctr style=\"height: 9px;\"\u003e\n\u003ctd style=\"width: 245.562px; height: 9px;\"\u003eIMU\u003c\/td\u003e\n\u003ctd style=\"width: 254.438px; height: 9px;\"\u003eSingle IMU\u003c\/td\u003e\n\u003c\/tr\u003e\n\u003ctr style=\"height: 9px;\"\u003e\n\u003ctd style=\"width: 245.562px; height: 9px;\"\u003eInternal Storage\u003c\/td\u003e\n\u003ctd style=\"width: 254.438px; height: 9px;\"\u003e8 GB\u003c\/td\u003e\n\u003c\/tr\u003e\n\u003c\/tbody\u003e\n\u003c\/table\u003e\n\u003cp\u003e\u003cbr\u003e\u003cbr\u003e\u003c\/p\u003e\n\u003ch3 class=\"group-list-title\"\u003eIntelligent Flight Battery\u003c\/h3\u003e\n\u003ctable width=\"100%\"\u003e\n\u003ctbody\u003e\n\u003ctr\u003e\n\u003ctd style=\"width: 46.981%;\"\u003e Capacity\u003c\/td\u003e\n\u003ctd style=\"width: 49.7244%;\"\u003e3500 mAh\u003c\/td\u003e\n\u003c\/tr\u003e\n\u003ctr\u003e\n\u003ctd style=\"width: 46.981%;\"\u003eVoltage\u003c\/td\u003e\n\u003ctd style=\"width: 49.7244%;\"\u003e11.55 V\u003c\/td\u003e\n\u003c\/tr\u003e\n\u003ctr\u003e\n\u003ctd style=\"width: 46.981%;\"\u003eMax Charging Voltage\u003c\/td\u003e\n\u003ctd style=\"width: 49.7244%;\"\u003e13.2 V\u003c\/td\u003e\n\u003c\/tr\u003e\n\u003ctr\u003e\n\u003ctd style=\"width: 46.981%;\"\u003eBattery Type\u003c\/td\u003e\n\u003ctd style=\"width: 49.7244%;\"\u003eLiPo 3S\u003c\/td\u003e\n\u003c\/tr\u003e\n\u003ctr\u003e\n\u003ctd style=\"width: 46.981%;\"\u003eEnergy\u003c\/td\u003e\n\u003ctd style=\"width: 49.7244%;\"\u003e40.42 Wh\u003c\/td\u003e\n\u003c\/tr\u003e\n\u003ctr\u003e\n\u003ctd style=\"width: 46.981%;\"\u003eWeight\u003c\/td\u003e\n\u003ctd style=\"width: 49.7244%;\"\u003e198 g\u003c\/td\u003e\n\u003c\/tr\u003e\n\u003ctr\u003e\n\u003ctd style=\"width: 46.981%;\"\u003eCharging Temperature Range\u003c\/td\u003e\n\u003ctd style=\"width: 49.7244%;\"\u003e5° to 40°C (41° to 104°F)\u003c\/td\u003e\n\u003c\/tr\u003e\n\u003ctr\u003e\n\u003ctd style=\"width: 46.981%;\"\u003eMax Charging Power\u003c\/td\u003e\n\u003ctd style=\"width: 49.7244%;\"\u003e38 W\u003c\/td\u003e\n\u003c\/tr\u003e\n\u003ctr\u003e\n\u003ctd style=\"width: 46.981%;\"\u003eBuilt-in Battery\u003c\/td\u003e\n\u003ctd style=\"width: 49.7244%;\"\u003eN\/A\u003c\/td\u003e\n\u003c\/tr\u003e\n\u003c\/tbody\u003e\n\u003c\/table\u003e\n\u003cp\u003e\u003cbr\u003e\u003c\/p\u003e\n\u003ch3 class=\"group-list-title\"\u003eCamera\u003c\/h3\u003e\n\u003ctable width=\"100%\"\u003e\n\u003ctbody\u003e\n\u003ctr\u003e\n\u003ctd style=\"width: 47.0159%;\"\u003e Sensor\u003c\/td\u003e\n\u003ctd style=\"width: 48.9841%;\"\u003e\n\u003cp\u003e1\" CMOS\u003c\/p\u003e\n\u003cp\u003eEffective Pixels: 20 MP; 2.4μm Pixel Size\u003c\/p\u003e\n\u003c\/td\u003e\n\u003c\/tr\u003e\n\u003ctr\u003e\n\u003ctd style=\"width: 47.0159%;\"\u003eLens\u003c\/td\u003e\n\u003ctd style=\"width: 48.9841%;\"\u003eFOV: 88°\u003cbr\u003e35 mm Format Equivalent: 22 mm\u003cbr\u003eAperture: f\/2.8\u003cbr\u003eShooting Range: 0.6 m to ∞\u003c\/td\u003e\n\u003c\/tr\u003e\n\u003ctr\u003e\n\u003ctd style=\"width: 47.0159%;\"\u003eISO Range\u003c\/td\u003e\n\u003ctd style=\"width: 48.9841%;\"\u003eVideo:\u003cbr\u003e100-3200 (Auto)\u003cbr\u003e100-6400 (Manual)\u003cbr\u003e10-Bit Dlog-M Video:\u003cbr\u003e100-800 (Auto)\u003cbr\u003e100-1600 (Manual)\u003cbr\u003ePhoto:\u003cbr\u003e100-3200 (Auto)\u003cbr\u003e100-12800 (Manual)\u003c\/td\u003e\n\u003c\/tr\u003e\n\u003ctr\u003e\n\u003ctd style=\"width: 47.0159%;\"\u003eStill Image Size\u003c\/td\u003e\n\u003ctd style=\"width: 48.9841%;\"\u003e20 MP\u003cbr\u003e5472×3648 (3:2)\u003cbr\u003e5472×3078 (16:9)\u003c\/td\u003e\n\u003c\/tr\u003e\n\u003ctr\u003e\n\u003ctd style=\"width: 47.0159%;\"\u003eStill Photography Modes\u003c\/td\u003e\n\u003ctd style=\"width: 48.9841%;\"\u003eSingle shot: 20 MP\u003cbr\u003eBurst shooting: 20 MP (continuous burst)\u003cbr\u003eAuto Exposure Bracketing (AEB): 20 MP, 3\/5 bracketed frames at 0.7 EV bias\u003cbr\u003eTimed: 20 MP, 2\/3\/5\/7\/10\/15\/20\/30\/60s\u003cbr\u003eSmartPhoto (including HDR and HyperLight): 20 MP\u003cbr\u003eHDR Panorama:\u003cbr\u003eVertical (3×1): 3328×8000 (width×height)\u003cbr\u003eWide-angle (3×3): 8000×6144 (width×height)\u003cbr\u003e180° (3×7): 8192×3500 (width×height)\u003cbr\u003eSphere (3×8+1): 8192×4096 (width×height)\u003cbr\u003eJPEG\/DNG (RAW)\u003c\/td\u003e\n\u003c\/tr\u003e\n\u003ctr\u003e\n\u003ctd style=\"width: 47.0159%;\"\u003eVideo Resolution\u003c\/td\u003e\n\u003ctd style=\"width: 48.9841%;\"\u003e5.4K: 5472×3078 @ 24\/25\/30 fps\u003cbr\u003e4K Ultra HD: 3840×2160 @ 24\/25\/30\/48\/50\/60 fps\u003cbr\u003e2.7K: 2688x1512 @ 24\/25\/30\/48\/50\/60 fps\u003cbr\u003eFHD: 1920×1080 @ 24\/25\/30\/48\/50\/60\/120 fps\u003cbr\u003eMP4\/MOV (H.264\/MPEG-4 AVC, H.265\/HEVC)\u003c\/td\u003e\n\u003c\/tr\u003e\n\u003ctr\u003e\n\u003ctd style=\"width: 47.0159%;\"\u003eMax Video Bitrate\u003c\/td\u003e\n\u003ctd style=\"width: 48.9841%;\"\u003e150 Mbps\u003c\/td\u003e\n\u003c\/tr\u003e\n\u003ctr\u003e\n\u003ctd style=\"width: 47.0159%;\"\u003eSupported File System\u003c\/td\u003e\n\u003ctd style=\"width: 48.9841%;\"\u003e\n\u003cp\u003eFAT32\/exFAT\u003c\/p\u003e\n\u003cp\u003eSupports a microSD card with a capacity of up to 256 GB.\u003c\/p\u003e\n\u003c\/td\u003e\n\u003c\/tr\u003e\n\u003ctr\u003e\n\u003ctd style=\"width: 47.0159%;\"\u003eDigital Zoom\u003c\/td\u003e\n\u003ctd style=\"width: 48.9841%;\"\u003e\n\u003cp\u003eZoom recording is not available while recording 10-bit videos and 120fps videos.\u003c\/p\u003e\n\u003cp\u003e4K\/30fps:\u003cbr\u003e4x;\u003cbr\u003e2.7K\/60fps:\u003cbr\u003e4x;\u003cbr\u003e2.7K\/30fps:\u003cbr\u003e6x;\u003cbr\u003e1080p\/60fps:\u003cbr\u003e6x;\u003cbr\u003e1080p\/30fps:\u003cbr\u003e8x\u003c\/p\u003e\n\u003c\/td\u003e\n\u003c\/tr\u003e\n\u003c\/tbody\u003e\n\u003c\/table\u003e\n\u003cp\u003e \u003c\/p\u003e\n\u003ch3 class=\"group-list-title\"\u003eGimbal\u003c\/h3\u003e\n\u003ctable width=\"100%\"\u003e\n\u003ctbody\u003e\n\u003ctr\u003e\n\u003ctd style=\"width: 46.8312%;\"\u003e Stabilization\u003c\/td\u003e\n\u003ctd style=\"width: 48.1688%;\"\u003e3-axis (tilt, roll, pan)\u003c\/td\u003e\n\u003c\/tr\u003e\n\u003ctr\u003e\n\u003ctd style=\"width: 46.8312%;\"\u003eMechanical Range\u003c\/td\u003e\n\u003ctd style=\"width: 48.1688%;\"\u003eTilt: -135° to 45°\u003cbr\u003eRoll: -45° to 45°\u003cbr\u003ePan: -100° to 100°\u003c\/td\u003e\n\u003c\/tr\u003e\n\u003ctr\u003e\n\u003ctd style=\"width: 46.8312%;\"\u003ePan Axis\u003c\/td\u003e\n\u003ctd style=\"width: 48.1688%;\"\u003eNot Controllable\u003c\/td\u003e\n\u003c\/tr\u003e\n\u003ctr\u003e\n\u003ctd style=\"width: 46.8312%;\"\u003eControllable Range\u003c\/td\u003e\n\u003ctd style=\"width: 48.1688%;\"\u003eTilt: -90° to 0°(default); -90° to 24° (extended)\u003c\/td\u003e\n\u003c\/tr\u003e\n\u003ctr\u003e\n\u003ctd style=\"width: 46.8312%;\"\u003eMax Controllable Speed (tilt)\u003c\/td\u003e\n\u003ctd style=\"width: 48.1688%;\"\u003e100°\/s\u003c\/td\u003e\n\u003c\/tr\u003e\n\u003ctr\u003e\n\u003ctd style=\"width: 46.8312%;\"\u003eAngular Vibration Range\u003c\/td\u003e\n\u003ctd style=\"width: 48.1688%;\"\u003e±0.01°\u003c\/td\u003e\n\u003c\/tr\u003e\n\u003c\/tbody\u003e\n\u003c\/table\u003e\n\u003cp\u003e\u003cbr\u003e\u003c\/p\u003e\n\u003ch3 class=\"group-list-title\"\u003eSensing System\u003c\/h3\u003e\n\u003ctable width=\"100%\"\u003e\n\u003ctbody\u003e\n\u003ctr\u003e\n\u003ctd style=\"width: 48.1438%;\"\u003e Forward\u003c\/td\u003e\n\u003ctd style=\"width: 48.5617%;\"\u003e\n\u003cp\u003ePrecision Measurement Range: 0.38-23.8 m\u003c\/p\u003e\n\u003cp\u003eEffective Sensing Speed: ≤15 m\/s\u003cbr\u003eField of View (FOV): 72° (horizontal), 58° (vertical)\u003c\/p\u003e\n\u003c\/td\u003e\n\u003c\/tr\u003e\n\u003ctr\u003e\n\u003ctd style=\"width: 48.1438%;\"\u003eBackward\u003c\/td\u003e\n\u003ctd style=\"width: 48.5617%;\"\u003ePrecision Measurement Range: 0.37-23.4 m\u003cbr\u003eEffective Sensing Speed: ≤12 m\/s\u003cbr\u003eField of View (FOV): 57° (horizontal), 44° (vertical)\u003c\/td\u003e\n\u003c\/tr\u003e\n\u003ctr\u003e\n\u003ctd style=\"width: 48.1438%;\"\u003eDownward\u003c\/td\u003e\n\u003ctd style=\"width: 48.5617%;\"\u003eToF Measurement Range: 0.1-8 m\u003cbr\u003eHovering Range: 0.5-30 m\u003cbr\u003eVision Sensor Hovering Range: 0.5-60 m\u003c\/td\u003e\n\u003c\/tr\u003e\n\u003ctr\u003e\n\u003ctd style=\"width: 48.1438%;\"\u003eLeft\/Right\u003c\/td\u003e\n\u003ctd style=\"width: 48.5617%;\"\u003eN\/A\u003c\/td\u003e\n\u003c\/tr\u003e\n\u003ctr\u003e\n\u003ctd style=\"width: 48.1438%;\"\u003eUpward\u003c\/td\u003e\n\u003ctd style=\"width: 48.5617%;\"\u003ePrecision Measurement Range: 0.34-28.6 m\u003cbr\u003eField of View (FOV): 63° (horizontal), 78° (vertical)\u003c\/td\u003e\n\u003c\/tr\u003e\n\u003ctr\u003e\n\u003ctd style=\"width: 48.1438%;\"\u003eDownward Auxiliary Light\u003c\/td\u003e\n\u003ctd style=\"width: 48.5617%;\"\u003eSingle LED\u003c\/td\u003e\n\u003c\/tr\u003e\n\u003c\/tbody\u003e\n\u003c\/table\u003e\n\u003cp\u003e\u003cbr\u003e\u003c\/p\u003e\n\u003ch3 class=\"group-list-title\"\u003eVideo Transmission\u003c\/h3\u003e\n\u003ctable width=\"100%\"\u003e\n\u003ctbody\u003e\n\u003ctr\u003e\n\u003ctd style=\"width: 47.6063%;\"\u003e Transmission System\u003c\/td\u003e\n\u003ctd style=\"width: 47.3937%;\"\u003e\n\u003cp\u003eO3\u003c\/p\u003e\n\u003cp\u003e2.4 GHz\/5.8 GHz Auto-Switching (compatible with OcuSync 2.0)\u003cbr data-mce-fragment=\"1\"\u003e4-antenna 2T4R\u003c\/p\u003e\n\u003c\/td\u003e\n\u003c\/tr\u003e\n\u003ctr\u003e\n\u003ctd style=\"width: 47.6063%;\"\u003eMax Transmission Distance\u003c\/td\u003e\n\u003ctd style=\"width: 47.3937%;\"\u003e12 km (FCC), 8 km (CE)\u003cbr\u003e8 km (SRRC), 8 km (MIC)\u003c\/td\u003e\n\u003c\/tr\u003e\n\u003ctr\u003e\n\u003ctd style=\"width: 47.6063%;\"\u003eLive View Quality\/Latency\u003c\/td\u003e\n\u003ctd style=\"width: 47.3937%;\"\u003eDrone + Remote Controller: 1080p\/30fps 12 Mbps 120 ms\u003cbr\u003eDrone + DJI Smart Controller: 1080p\/30fps 12Mbps 130 ms\u003c\/td\u003e\n\u003c\/tr\u003e\n\u003ctr\u003e\n\u003ctd style=\"width: 47.6063%;\"\u003eMax Transmission Bitrate\u003c\/td\u003e\n\u003ctd style=\"width: 47.3937%;\"\u003e44 Mbps (download bitrate)\u003cbr\u003e16 Mbps (live video bitrate)\u003c\/td\u003e\n\u003c\/tr\u003e\n\u003ctr\u003e\n\u003ctd style=\"width: 47.6063%;\"\u003eOperating Frequency\u003c\/td\u003e\n\u003ctd style=\"width: 47.3937%;\"\u003e2.4 GHz\u003cbr\u003e5.8 GHz\u003c\/td\u003e\n\u003c\/tr\u003e\n\u003c\/tbody\u003e\n\u003c\/table\u003e\n\u003cp\u003e\u003cbr\u003e\u003c\/p\u003e\n\u003ch3 class=\"group-list-title\"\u003eRemote Controller\u003c\/h3\u003e\n\u003ctable width=\"100%\"\u003e\n\u003ctbody\u003e\n\u003ctr\u003e\n\u003ctd style=\"width: 47.7766%;\"\u003e Multiple Controllers\u003c\/td\u003e\n\u003ctd style=\"width: 47.2234%;\"\u003eN\/A\u003c\/td\u003e\n\u003c\/tr\u003e\n\u003ctr\u003e\n\u003ctd style=\"width: 47.7766%;\"\u003eDJI Smart Controller\u003c\/td\u003e\n\u003ctd style=\"width: 47.2234%;\"\u003eSupported\u003c\/td\u003e\n\u003c\/tr\u003e\n\u003ctr\u003e\n\u003ctd style=\"width: 47.7766%;\"\u003eRemote Controller Transmission System\u003c\/td\u003e\n\u003ctd style=\"width: 47.2234%;\"\u003eOcuSync 2.0\u003c\/td\u003e\n\u003c\/tr\u003e\n\u003ctr\u003e\n\u003ctd style=\"width: 47.7766%;\"\u003eBattery Life\u003c\/td\u003e\n\u003ctd style=\"width: 47.2234%;\"\u003e6 hours (4 hours when charging a mobile device)\u003c\/td\u003e\n\u003c\/tr\u003e\n\u003ctr\u003e\n\u003ctd style=\"width: 47.7766%;\"\u003eSupported Mobile Device Connectors\u003c\/td\u003e\n\u003ctd style=\"width: 47.2234%;\"\u003eLightning, Micro USB, USB-C\u003c\/td\u003e\n\u003c\/tr\u003e\n\u003ctr\u003e\n\u003ctd style=\"width: 47.7766%;\"\u003eMax Supported Mobile Device Size\u003c\/td\u003e\n\u003ctd style=\"width: 47.2234%;\"\u003e180×86×10 mm (length×width×height)\u003c\/td\u003e\n\u003c\/tr\u003e\n\u003ctr\u003e\n\u003ctd style=\"width: 47.7766%;\"\u003eOperating Temperature\u003c\/td\u003e\n\u003ctd style=\"width: 47.2234%;\"\u003e0° to 40°C (14° to 104°F)\u003c\/td\u003e\n\u003c\/tr\u003e\n\u003ctr\u003e\n\u003ctd style=\"width: 47.7766%;\"\u003eTransmitter Power (EIRP)\u003c\/td\u003e\n\u003ctd style=\"width: 47.2234%;\"\u003e2.4 GHz:\u003cbr\u003eFCC: ≤26 dBm\u003cbr\u003eCE: ≤20 dBm\u003cbr\u003eSRRC: ≤20 dBm\u003cbr\u003eMIC: ≤20 dBm\u003cbr\u003e5.8 GHz:\u003cbr\u003eFCC: ≤26 dBm\u003cbr\u003eCE: ≤14 dBm\u003cbr\u003eSRRC: ≤26 dBm\u003c\/td\u003e\n\u003c\/tr\u003e\n\u003c\/tbody\u003e\n\u003c\/table\u003e\n\u003cp\u003e\u003cbr\u003e\u003c\/p\u003e\n\u003ch3 class=\"group-list-title\"\u003eCharger\u003c\/h3\u003e\n\u003ctable width=\"100%\"\u003e\n\u003ctbody\u003e\n\u003ctr\u003e\n\u003ctd style=\"width: 49.888%;\"\u003e Charging Input\u003c\/td\u003e\n\u003ctd style=\"width: 46.8175%;\"\u003e100-240V, 50\/60 Hz, 1.3 A\u003c\/td\u003e\n\u003c\/tr\u003e\n\u003ctr\u003e\n\u003ctd style=\"width: 49.888%;\"\u003eCharging Output\u003c\/td\u003e\n\u003ctd style=\"width: 46.8175%;\"\u003eCharging Port: 13.2 V⎓2.82 A\u003cbr\u003eUSB Port: 5 V⎓2 A\u003c\/td\u003e\n\u003c\/tr\u003e\n\u003ctr\u003e\n\u003ctd style=\"width: 49.888%;\"\u003eVoltage\u003c\/td\u003e\n\u003ctd style=\"width: 46.8175%;\"\u003e13.2 V\u003c\/td\u003e\n\u003c\/tr\u003e\n\u003ctr\u003e\n\u003ctd style=\"width: 49.888%;\"\u003eRated Power\u003c\/td\u003e\n\u003ctd style=\"width: 46.8175%;\"\u003e38 W\u003c\/td\u003e\n\u003c\/tr\u003e\n\u003c\/tbody\u003e\n\u003c\/table\u003e\n\u003cp\u003e\u003cbr\u003e\u003c\/p\u003e\n\u003cdiv\u003e\n\u003cul style=\"text-align: center;\"\u003e\u003c\/ul\u003e\n\u003c\/div\u003e\n\u003cstyle\u003e\u003c!--\n.embed-container { position: relative; padding-bottom: 56.25%; height: 0; overflow: hidden; max-width: 100%; } .embed-container iframe, .embed-container object, .embed-container embed { position: absolute; top: 0; left: 0; width: 100%; height: 100%; }\n--\u003e\u003c\/style\u003e\n\u003c\/div\u003e"}
-
Translation missing: en.products.product.regular_price
$10.00$9.00 On Sale Sold OutTranslation missing: en.products.product.regular_price $978.00Insta360 GO 2 Easy Clip
Insta360 GO 2 accessories| Easy Clip
The adjustable simple clip design allows you to find a suitable shooting angle, and you can quickly disassemble and assemble in a few seconds.

Adjustable design so you can get the right angle.
Clip-on and off in seconds.
Insert your Insta360 GO 2 camera directly into this simple clip, and then you can clip it on the front or back of your hat or headband, or clip it to various other objects or locations that you find useful. The camera can be tilted in a simple clip so that you can switch the angle anytime and anywhere.
The simple clip is provided with the GO 2 camera package. This simple clip can be purchased separately and used as a spare or replacement.
Brand: Insta360
Product size: length x width x height 3.5 x 3.4 x 1.5 inches
Commodity weight: 0.05 Pounds -
Translation missing: en.products.product.regular_price
$39.00$35.00 On Sale Sold OutTranslation missing: en.products.product.regular_price $978.00Insta360 GO 2 Dive Case
Start your water-based adventures by using
Insta360 GO 2
Dive Case

IPX 8 waterproof to depths of 45 m
Protect your GO 2 action camera on all your water-based adventures

How to use it
1. Open the Case
Push the lock block (1) in the direction shown in the figure. After locking, remove the hook (2).

2. Attach the Anti-Fog Inserts
Attach the anti-fog inserts into the buckle on the backside of the Dive Case door, as shown.
 Note:1) Attach the anti-fog inserts into the buckle on the backside of the Dive Case door.
2) When using third-party anti-fog inserts, ensure that the size is within 20 X 20 X 0.5 mm. If the inserts are too large, they may cause water leakage and potentially damage the camera.3. Insert the Camera
 Note:When inserting the camera, take care not to scratch the lens.
4. Close the Case
To close the Dive Case, latch the buckle onto the case's hook and firmly push it down until it clicks. Note:1) Always ensure the Dive Case is firmly closed before use. Check that the parts of the Dive Case in contact with its rubber seal are free of dirt or dust.2) For best results, keep the Dive Case clean, particularly the area protecting GO 2's lens.
Specs:
Maximum depth:45 mIncluded items:Insta360 GO 2 Dive Case, Anti-Fog Inserts, Protective Pouch, Instructions & WarrantyWeight: 131 g -
Translation missing: en.products.product.regular_price
$899.00$728.00 On Sale Sold OutTranslation missing: en.products.product.regular_price $978.00YoloLiv YoloBox Portable Live Stream Studio
Professional Live Streaming Made Simple & Affordable Event
Exclusive Hong Kong International Version with built-in YouTube & Facebook Live integration
Tap to Start Your Full HD Live Stream
Professional streaming made simple. Whether streaming to social or producing an event streamed around the world, our YoloBox Plus (international version) is designed to make you look like a pro. Reach your audience everywhere. Distribute high-quality video to your you'rewebsite, apps, Cloud and social channels. Your videos will be ready for viewing within seconds and are captured with high resolution and great contrast.
3 Simple Steps
STEP 1 CONNECT
Connect to the internet via Ethernet/WiFi/4G, sign up your YoloLiv account, then plug your camera into YoloBox, you are way to go.

STEP 2 CAPTURE
YoloBox can input video from different sources including multiple cameras, GoPro, drone, local library, SD card, Computer, etc.

STEP 3 STREAM
Boost your viewership in cross-channels like Facebook, YouTube, Twitch, or any other RTMP(s) supported websites.
 YoloBox helps you start live broadcasting events with unprecedented scale and effectiveness
Support various kinds of captures
Not only can YoloBox Plus (international version) stream from DSLR, DV, action cams, drones, Youtube and Facebook, YoloBox are now available to stream your screen from mainstream smartphones, tablets and computers.
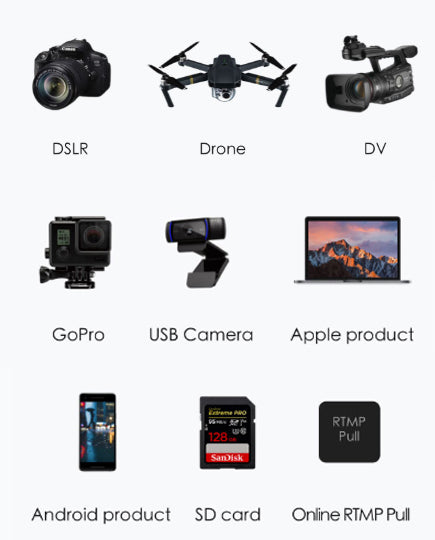

Do you know live streaming is the new trend on social media platforms? Check out "3 reasons why live streaming is the new trend" blog now!
Touch Screen Live Production
With encoder, switcher, monitor and record built-in one, YoloBox is a studio and play device which allows you to do Full HD Live Stream, Multi-camera production, Picture in picture, Watermarks and many more.

Multi-Camera Capture
Switch up to 5 video sources simultaneously
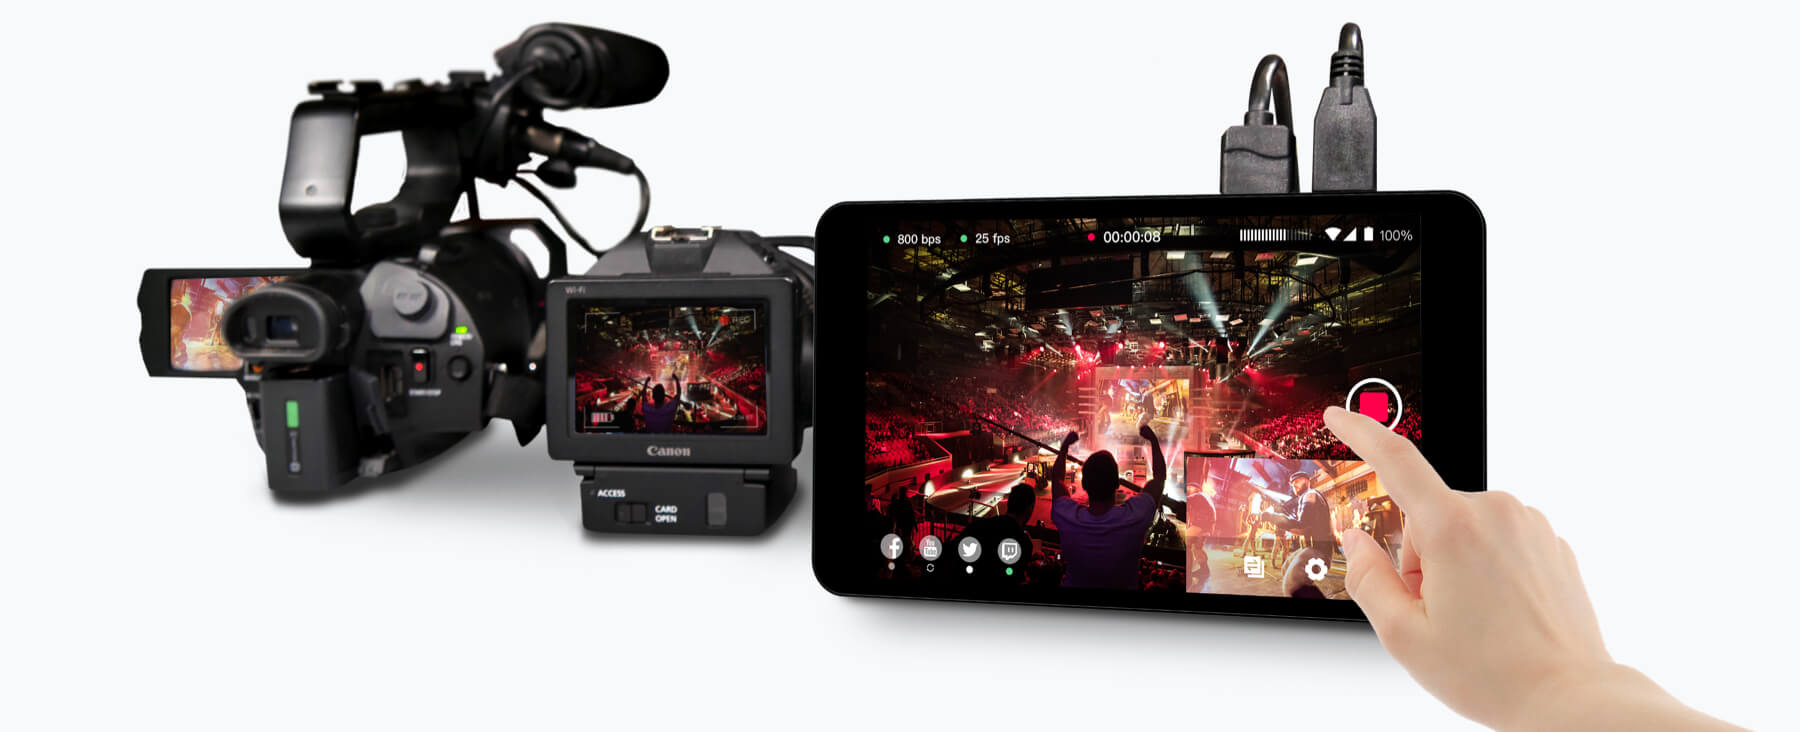
Independent Audio Input/ Output
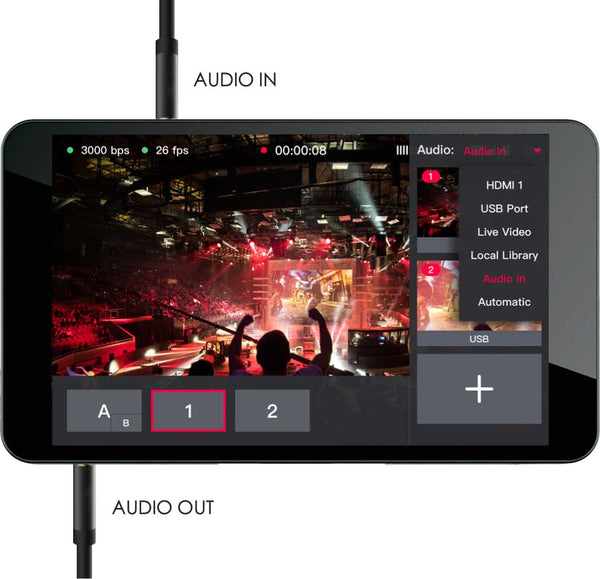
Add Video Sources From Local SD Card
Roll in pre-recorded video for intro, countdown, B-rolls or special segments.

Load PDF as an Extra Source Locally
Enhance the storytelling by one extra source. You can simple control the PDF by clicking the buttons on the screen with your finger.

Picture in Picture
YoloBox Plus (international version) supports "Picture in Picture" feature that will allow producers to show two camera shots in one graphic layer at the same time. You can now decide which video source you would like to appear on the screen with one simple click.
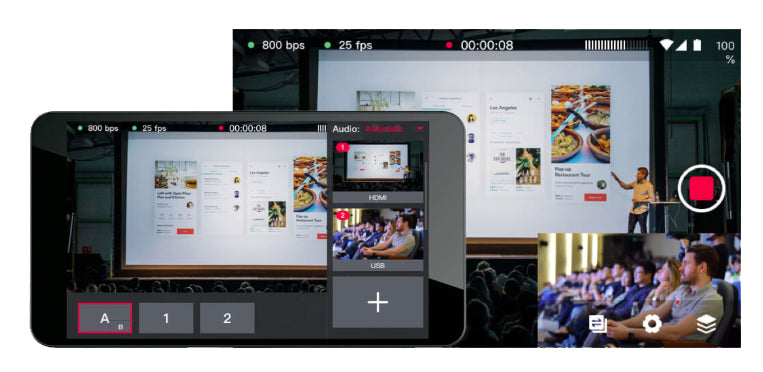
Add Custom Graphic Layers
A more professional settings with customized picture in picture options including Interview Mode. You can also add logos, banner in the screen to show the information of the live.
Interview Mode
Show two video source at the same time and make instant communication.

Add and Edit on the Built-in Lower-Thirds Templates
Display the intro of the speaker or Call-to-Action messages to drive viewers' instant actions.
Feature Comment Overlays to the Stream
Engage with your audience in real-time and enrich the content of your live.

Add Customizable Scoreboard
Display real-time controlled scoreboard to make your game look professional.
Make everything professional!

Cross Platforms Streaming
Stream your live event to three destinations simultaneously, seamless integration with major platforms.

No Monthly Subscription Fee
Unlimited streaming data, unlimited streaming time.
Reach your audience across multiple social media platforms at the same time.
Product Spec
We are trying to do better on every tiny little detail as we can.


Specifications
Dimensions and Weight
Length:185mm
Width:107mm
Height:19.5mm
Weight:480g
Encoded Format
Video Encoded Format:H.264
Audio Encoded Format:AAC (48k)
Video Recorded format:MP4
Audio Input Format:32kHz, 44.1kHz, 48kHz, 16-bit
Video Input Format (HDMI 1):1080i/ 720p/ 1080p
Video Input Format (HDMI 2):1080i/ 720p/
Video Recorded Resolution:Up to 1080p:60fps
Live Broadcast Resolution:540P/720P/1080P
Video Storage
Storage Card Type:SD Card
Storage Card Capacity:Expanded to 128G
Network Connection
WiFi:2.4G/5G, Support 802.11a/b/g/n/ac
4G Network:LTE-FDD B2/4/5/7/12/13/17/25/26,LTE-TDD B41
SIM Card Size:Standard SIM Card
Power
Power Interface:Type C, Quick Charge 3.0
Battery Capacity:3.7V/5700mAh
Working Environment
Operating Temperature:-10℃-40℃
Storage Temperature:5℃-40℃
Package
YoloBox, USB Charging Cable
HotShoe Mount, Storage Bag
User ManualFrequently Asked Questions for Yolobox
-
Translation missing: en.products.product.regular_price
$299.99$254.00 On Sale Sold OutTranslation missing: en.products.product.regular_price $978.00Insta360 GO 2 1440P Remote Control Sports Camera (32GB / 64GB)
Package


The smallest action camera in the world
Main function

First-person perspective
Share the world in your eyes
Tap the camera body lightly to shoot at will. The first perspective records every moment of life, allowing the audience to empathize and immerse themselves in it.

FlowState shockproof technology
Small and exquisite without fear of bumps
Insta360 GO 2 is equipped with FlowState anti-shock technology, the picture is smooth and smooth, and the shooting moves as you like.

Level correction
Correct the horizon, the picture is more stable
Super video mode can automatically start a horizontal correction, the camera rotates continuously, and the picture is stable.
Movement delay
Stride Meteor Shuttle Time
Insta360 GO 2 provides 6 times acceleration function. There is no need for a stabilizer, and time is under control between steps.

Time-lapse photography
Containing the footprints of time
Insta360 GO 2 supports continuous shooting for 3 hours of time-lapse photography to generate time-lapse movies. Adjust the angle, set the shooting interval, and feel the excitement of time condensed.
Slow-motion
Frozen your time, focus on the wonderful
Insta360 GO 2 supports 120fps shooting, which can be slowed down to 4 times. Reminisce about the wonderful moments, every frame of fun is not to be missed.

HDR video
Highlights and shadows are preserved
HDR mode shooting, optimize the light and dark details. In strong light and shadow, it can be clearly restored.

One charging box, multiple uses
The Insta360 GO 2 charging box is ushered in a new upgrade. It integrates a charging box, Bluetooth remote control, and a tripod. The powerful functions are beyond imagination.
IPX8 waterproof
Up the mountain and down the sea omnipotent
The bare metal is waterproof to 4 meters, the lens does not fog, and it can focus underwater
Underwater color reproduction
Really feel the colorful sea under the sea
Import the underwater shots into APP/Studio, you can adjust the white balance with one click, and restore the colorful underwater world.

Wi-Fi preview
Insta360 GO 2 can connect to a mobile phone via Wi-Fi for real-time preview and content transmission, and you can view the shooting screen anytime, anywhere.
AI editing
Post-production soundtrack in one go
AI editing is upgraded again, diversified theme templates, intelligent selection of wonderful moments, saving you worry and effort.

Export multiple ratios
A variety of movie export ratios are available for selection, one creative movie, and multiple platforms for publishing.

Package
Package includes 1x GO 2 (32GB), 1x Charge Case, 1x Lens Guard (pre-installed on the lens by default), 1x Magnet Pendant, 1x Pivot Stand, 1x Easy Clip and 1x Type-C Charge Cable.

Parameter
Video resolution
FlowState shockproof shooting
2560x1440@50fps, 30fps, 25fps, 24fps / 1920x1080@50fps, 30fps, 25fps, 24fps
Ordinary shockproof shooting
2560x1440@50fps, 30fps, 25fps, 24fps / 1920x1080@50fps, 30fps, 25fps, 24fps
HDR shooting
2560x1440@25fps, 24fps / 1920x1080@25fps, 24fps
Positioning delay
2560x1440@30fps / 1920x1080@30fps
Movement delay
2560x1440@30fps / 1920x1080@30fps
Slow motion
1920x1080@120fps
Photo resolution
16:9, 2560x1440
1:1, 2560x2560
9:16, 1440x2560
Film Panorama, 2938x1088
Video format
MP4
Photo format
INSP (can be exported via APP or Studio)
DNG (this mode only supports editing on smartphone/PC/Mac)
Photo mode
Normal mode, interval shooting, starry sky mode shooting, night scene mode
Movie mode
Ordinary shockproof recording mode, FlowState shockproof recording, HDR recording, positioning delay, moving delay, slow motion mode
Video exposure mode
automatic,
Manual (Shutter 1/8000-1/30, ISO 100-3200)
Photo exposure mode
automatic,
Manual (Shutter 1/8000s-120s, ISO 100-3200)
Video encoding format
H.264
Maximum video bitrate
80Mbps
Video length
FlowState shockproof shooting: 10 minutes
Ordinary shockproof shooting: 15 minutes
FPV mode shooting: 30 minutes
Time-lapse shooting: with a charging box, it can record 110 minutes of time-lapse movies with a playback time of 7 minutesAdapted models
iOS device:
Compatible chip A11 or above and iOS version 10.0 or above iOS devices, including iPhone SE2, iPhone 8, iPhone 8P, iPhone XR, iPhone XS, iPhone XS Max, iPhone X, iPhone 11, iPhone 11 Pro, iPhone 11 Pro Max , IPhone 12, iPhone 12 Pro, iPhone 12 Pro Max, iPhone 12 mini, iPad Air (2020), iPad Pro and above models.
Android Android device:
Compatible with Android mobile devices that meet the following capabilities, including:
Android devices with Kirin 980 and above chips, including Huawei Mate20, P30 and above models;
Android devices with Snapdragon 845 and above chips, including Samsung S9, Xiaomi 8 and above models;
Android devices with Exynos 9810 and above chips, including Samsung S9, S9+, Note9 and above models.
Notice:
1. As long as the mobile phone whose performance does not meet the above requirements can be installed with the app, it may also support the use of the app to control camera shooting and basic editing, but some AI analysis or video playback that requires high processing performance may be slow and lagging. Condition.
2. After testing, mobile phones equipped with Qualcomm SDM765 5G chip have poor hardware decoding capabilities and do not support use, such as OPPO Reno 3 5G mobile phones.
3. The mobile phone's 64-bit system is required to install the app, and the 32-bit mobile phone does not support the installation of the app.White balance
Automatic, 2700K, 4000K, 5000K, 6500K, 7500K
Bluetooth
BLE 5.0
aperture
F/2.2
ISO
Automatic, 100-3200
USB interface
Type-C
Storage capacity
32GB
Charging method
Type-C
Charging time
GO 2: 23 minutes-80%, 35 minutes-100%
Charging box: 47 minutes-80%, 65 minutes-100%
Battery life
Independent use:
30 minutes (normal shockproof video shooting)
20 minutes (FlowState shockproof video shooting)
Use with charging case:
150 minutes (normal shockproof video shooting)
110 minutes (FlowState shockproof video shooting)
Use environment
-10℃ to 40℃
weight
GO 2-26.5g
Charging case-63.5g
size
GO 2
52.9mm x 23.6mm x 20.7mm
Charging case
Unfolded state: 132.5mm x 26.0mm x 26.6mm
Closed state: 68.1mm x 48.54mm x 26.5mm
colour
White
Exposure compensation (EV)
±4 EV
35mm equivalent focal length
11.24mm- HDR recording mode is suitable for static recording; FlowState anti-shock recording mode is recommended for sports scenes.
- The single time to fully charge the GO 2 with the charging case is 35 minutes. When used with a fully charged charging box, GO 2 uses 1080P@30fps to shoot in the video recording (in-camera shockproof) mode, and the accumulated battery life can reach up to 150 minutes.
- GO 2 can only achieve 4 meters water resistance when a lens protector is installed.
- The steering bracket can only be used on a dry and clean surface.


